


Ziroli SBD-3 Dauntless build
 07-13-2022, 12:03 AM
#126

Thread Starter
Join Date: Sep 2014
Location: Scottsdale, AZ
Posts: 169
Likes: 0
Received 0 Likes
on
0 Posts
I decided to attach the covers for the seam to the center section, rather than the outer panels. I've seen it done both ways. I'm not sure which is better in terms of joining the parts. But I was concerned about access to the top brake (on the outer wing panel) hinge wire. I believe that it will be hard to pull the wire if I have this attached and running over where the wire inserts.
I can say, from limited experience, that sliding the wing into this newly created "seam cover" is extremely tight. I did not originally shim up the cover on the outer panel side, but then changed my mind. I found it impossible - without a huge shoe horn - to slide the wings together. Adding a shim that was basically the thickness of the layup worked well.
This is how I did it

I used scrap pieces to shim up the overlap on the outer panel side

Now the bottom layer (layup from earlier) can be placed over the seam. I used epoxy and made sure to remove the primer underneath. In the picture above, I will be applying epoxy on the center section or right side of the black line.

Here's the bottom side. The layup was done in 2 pieces.

Lots of tape to hold everything down - getting ready to add the top side pieces that wraps around and meets on the bottom.

A view of the finished piece. I will assess the amount of trimming after I get the top pieces in place.

Speaking of which, these 2 pieces have been shaped. I'm planning to add some filler and more final shaping before gluing them down. It's easier to shape now.

Not yet glued down, but just to show the basic construction.
I can say, from limited experience, that sliding the wing into this newly created "seam cover" is extremely tight. I did not originally shim up the cover on the outer panel side, but then changed my mind. I found it impossible - without a huge shoe horn - to slide the wings together. Adding a shim that was basically the thickness of the layup worked well.
This is how I did it
I used scrap pieces to shim up the overlap on the outer panel side
Now the bottom layer (layup from earlier) can be placed over the seam. I used epoxy and made sure to remove the primer underneath. In the picture above, I will be applying epoxy on the center section or right side of the black line.
Here's the bottom side. The layup was done in 2 pieces.
Lots of tape to hold everything down - getting ready to add the top side pieces that wraps around and meets on the bottom.
A view of the finished piece. I will assess the amount of trimming after I get the top pieces in place.
Speaking of which, these 2 pieces have been shaped. I'm planning to add some filler and more final shaping before gluing them down. It's easier to shape now.
Not yet glued down, but just to show the basic construction.
 08-14-2022, 08:32 PM
#127
Thread Starter
Join Date: Sep 2014
Location: Scottsdale, AZ
Posts: 169
Likes: 0
Received 0 Likes
on
0 Posts
I ended up needing to peel off the base strip from the center section. The epoxy became brittle and my only thought was that it had gone bad. I had to strip all the old epoxy off and refinish the surfaces to get back to where I was before I started the process.

This is where I am now. The strip is firmly attached with the polystyrene on top. I've used yellow glaze to fill in some areas followed by the red 3M glaze for some minor filling.

I started working on the light bases, making these out of polystyrene exactly how boB did his.

I bought some preformed lenses and will use 1 full lens for the base light and a half lens for the cover.

I needed to sand off some of the area to account for the base thickness.

Using the acrylic paint, I coated the inside of the lenses to create the red/green colors
This is where I am now. The strip is firmly attached with the polystyrene on top. I've used yellow glaze to fill in some areas followed by the red 3M glaze for some minor filling.
I started working on the light bases, making these out of polystyrene exactly how boB did his.
I bought some preformed lenses and will use 1 full lens for the base light and a half lens for the cover.
I needed to sand off some of the area to account for the base thickness.
Using the acrylic paint, I coated the inside of the lenses to create the red/green colors
08-15-2022, 10:10 PM
#128
Thread Starter
Join Date: Sep 2014
Location: Scottsdale, AZ
Posts: 169
Likes: 0
Received 0 Likes
on
0 Posts

This is about as much as I can do. The shape and size looks right.

I'll start with the bottom side of the center section to start adding hatches.

The light base is glued on and after some preliminary shaping, I'll blend this in with yellow glaze.

After the first application
08-18-2022, 11:02 AM
#129
Thread Starter
Join Date: Sep 2014
Location: Scottsdale, AZ
Posts: 169
Likes: 0
Received 0 Likes
on
0 Posts
A few misc pics

How the wing tip lights are coming along.

Working on the hatch layout. Decided to add a little more primer on the exposed yellow glaze. Now marking out the rivet lines.

Haven't yet worked out the gunner tunnel, but added these two hatches. My pictures showed the back hatch being off center, so that's what I did.
How the wing tip lights are coming along.
Working on the hatch layout. Decided to add a little more primer on the exposed yellow glaze. Now marking out the rivet lines.
Haven't yet worked out the gunner tunnel, but added these two hatches. My pictures showed the back hatch being off center, so that's what I did.
08-22-2022, 11:51 PM
#130
Thread Starter
Join Date: Sep 2014
Location: Scottsdale, AZ
Posts: 169
Likes: 0
Received 0 Likes
on
0 Posts

Panel lines have been drawn. Using the Lukasik book and Jaworski thread as the final reference.

Needed to add a panel line around the center bomb section.

Lots and lots of rivets to apply. Slowly getting the hang of these. Rivets are from Chad Veich.
Looking forward to seeing Chad and his brother Greg out at a flying event when I return to the Phoenix area.

Now it's time to top these off with a little drop of canopy glue mixed with silver paint.

Need more practice on the glue drop. These 3 at the end of the casing chute shows how a little too much will leave a bubble top.
09-06-2022, 01:05 PM
#131
Thread Starter
Join Date: Sep 2014
Location: Scottsdale, AZ
Posts: 169
Likes: 0
Received 0 Likes
on
0 Posts
Finished up some the center section

Eventually rivets were added around the wheel well.

First a small pass to see how the paint would cover

Here's after 1 coat. Always looks better after this step. Generally happy with this level of detail.
Eventually rivets were added around the wheel well.
First a small pass to see how the paint would cover
Here's after 1 coat. Always looks better after this step. Generally happy with this level of detail.
09-06-2022, 01:11 PM
#132
Thread Starter
Join Date: Sep 2014
Location: Scottsdale, AZ
Posts: 169
Likes: 0
Received 0 Likes
on
0 Posts
Working on the outer panels. Needed more rivet glue but couldn't find the bottle of Rustoleum Sterling Silver - expect that to arrive in a few days. Also needed more 2mm half round for the hinges.

Got the hatches laid out. Checked for fitment in between rivets. You might want to reverse the order. Decided to move one of the lines running from the root to tip based on my scales references.

With glue drops added but still need the hatch rivets.

Moved over to the other panel to add the hatch rivets. I've found that I may need to take the panel inside (lower temp/humidity) to prevent the existing rivets from sticky to my arm and pulling off.
Got the hatches laid out. Checked for fitment in between rivets. You might want to reverse the order. Decided to move one of the lines running from the root to tip based on my scales references.
With glue drops added but still need the hatch rivets.
Moved over to the other panel to add the hatch rivets. I've found that I may need to take the panel inside (lower temp/humidity) to prevent the existing rivets from sticky to my arm and pulling off.
09-06-2022, 01:14 PM
#133
Thread Starter
Join Date: Sep 2014
Location: Scottsdale, AZ
Posts: 169
Likes: 0
Received 0 Likes
on
0 Posts
While parts are on the way, the fuselage rivet lines were scribed.

I'll have more to share on a discovery when I added the elevators. Still scratching my head.

First past looks good. I need to move on and install the forward hatches and magnets. But this gets the ball rolling.
I'll have more to share on a discovery when I added the elevators. Still scratching my head.
First past looks good. I need to move on and install the forward hatches and magnets. But this gets the ball rolling.
09-12-2022, 11:27 AM
#134
Thread Starter
Join Date: Sep 2014
Location: Scottsdale, AZ
Posts: 169
Likes: 0
Received 0 Likes
on
0 Posts
This next one still has me scratching my head.

Not sure why this issue wasn't noticed before.

My only idea was to use the 2 part filler I've used before as I know it sticks to anything is tough. Used light cardboard and saran wrap as a form.

I goop'd this in and as it started to firm up, cut some lines to make shaping easier.

It's best/easiest to shave this down before fully cured.
Not sure why this issue wasn't noticed before.
My only idea was to use the 2 part filler I've used before as I know it sticks to anything is tough. Used light cardboard and saran wrap as a form.
I goop'd this in and as it started to firm up, cut some lines to make shaping easier.
It's best/easiest to shave this down before fully cured.
09-12-2022, 11:46 AM
#135
Thread Starter
Join Date: Sep 2014
Location: Scottsdale, AZ
Posts: 169
Likes: 0
Received 0 Likes
on
0 Posts
I'm really hoping to get everything completed to the point of the aluminum primer on all major parts before this build goes back on hiatus.

Continue to make progress on the wings.

Still practicing on getting consistent rivets. I'm adding a small drop (usually) to the tops of the rivets stickers (which control the spread unless I apply too much). I added the half rounds for the hinges and cut the sections with an Xacto saw.
Continue to make progress on the wings.
Still practicing on getting consistent rivets. I'm adding a small drop (usually) to the tops of the rivets stickers (which control the spread unless I apply too much). I added the half rounds for the hinges and cut the sections with an Xacto saw.
09-17-2022, 09:05 PM
#136
Thread Starter
Join Date: Sep 2014
Location: Scottsdale, AZ
Posts: 169
Likes: 0
Received 0 Likes
on
0 Posts
The bottoom of the 3 sections is roughed in

When I flipped the wing over, the mailbox slots caught me eye. I know bpotter reduced his. I'm not sure if this is part of the plans or something I missed, but I also had to reduced the slots.

I used G10 sections, Hysol and some yellow glaze to complete the fit.

Sorry, but it looks like a 5 years drew the rivet lines. After several attempts, I think I have an idea of what needs to be done.
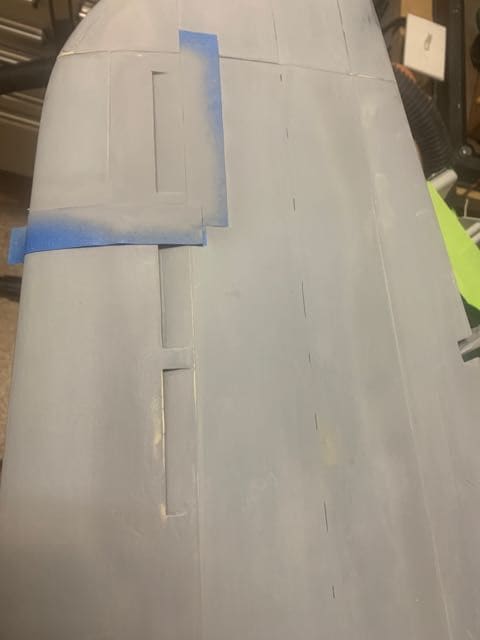
I also went back to retouched some of the panel sections. These mailboxes, as shown above, are about 1/2 the size of the original.
While this was going on, I completed the application of rivets decals on the center top. Also more work going on the fuselage. Pictures to come.
When I flipped the wing over, the mailbox slots caught me eye. I know bpotter reduced his. I'm not sure if this is part of the plans or something I missed, but I also had to reduced the slots.
I used G10 sections, Hysol and some yellow glaze to complete the fit.
Sorry, but it looks like a 5 years drew the rivet lines. After several attempts, I think I have an idea of what needs to be done.
I also went back to retouched some of the panel sections. These mailboxes, as shown above, are about 1/2 the size of the original.
While this was going on, I completed the application of rivets decals on the center top. Also more work going on the fuselage. Pictures to come.
