


Ziroli SBD-3 Dauntless build
 09-26-2020, 08:55 AM
#51

Join Date: Nov 2016
Posts: 13
Likes: 0
Received 0 Likes
on
0 Posts
Hey Bob, how goes the Dauntless? I just started this project myself and have probably read this post a dozen times now. I have around 6 or 7 different ones bookmarked, but this is the one I look at the most.
Got a question, did you have to cut your own fuel cell floor out and the cockpit floor? I've tried finding it in my parts but its not to be found, so I'm assuming that its something that has to be cut out of some ply material.
Got a question, did you have to cut your own fuel cell floor out and the cockpit floor? I've tried finding it in my parts but its not to be found, so I'm assuming that its something that has to be cut out of some ply material.
 09-26-2020, 10:43 AM
#52
Thread Starter
Join Date: Sep 2014
Location: Scottsdale, AZ
Posts: 169
Likes: 0
Received 0 Likes
on
0 Posts
Hi RRF,
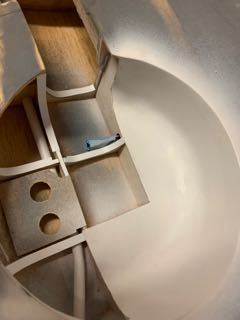
The short answer is I cut both parts out of ply. My kit (Precision Cut Kits) supplied both parts, but.... I used the fuel tank floor as shown in the plans, however, if you are making the firewall removable with the fuel tank tray on the back side, you will need a second fuel tank floor - that's the one I cut. I believe the removable firewall is a great idea. I've never done this before, but Sam P is a master of practicality. This removable fuel tank floor slides right above the fixed floor in the fuse that I'm assuming is also structural. The cockpit floor came in my kit but was not quite long enough. In the end, I think I measured mine just a little too long based on the info from my dbalsa kit. I believe 21.5" is the number.
I'm waiting for boB on RCSB to start the cockpit to see some of the stuff he does. I'm thinking I will use some of these parts, but maybe enhance some of the panels (either construct my own parts or modify).
Since you are in the beginning stages, I'll share some other things I would have done differently. (1) I would have probably made my flaps like boB or Kalima did out of solid or G10 sandwich material. It's obviously more stable plus easier to detail. (2) I also opted to remove my life raft hatch and also the stuff for the opposite side hatch. My rationale was - I'll never finish this plane with all this secondary detail plus I imagined that these hatches would be problematic later - like popping open in flight etc. Same goes for the rear gun tunnel. I will detail it on the outside using polystyrene. (3) I think I would have tried to figure out a way to move the servos out of the back stab. It's an extremely practical and solid way to control the elevator halves but will undoubtedly cause the need for more lead weight in the nose. (4) And I would have scaled down my aileron control attachments. They are robust for sure, just too big.
Ah, hindsight. All else is Ok. My fiberglass issue was resolved. I just needed to walk away for a week or things would have gotten ugly. I think I had a couple things going wrong. My Zpoxy might have been old. I'm building this along the coast north of San Diego where it's really humid. And I needed to let the epoxy cure for longer than 24 hours before pulling up the peel ply. I switched to West Systems and things seem better. Most of what I had done was good, just needed more cure time.
I still need to finish the cowl attachment - more of something like boB did and also follow his lead on the cowl flaps. I also need to figure out the layout of the brains for this on the servo tray and how I plan to access it via a hatch. These are things that paralyze my build.
I also need to post more pictures, but in truth it's nothing you wouldn't see elsewhere. I finished detailing the control surfaces, working on the flap detail and almost done with the landing gear covers and wheel well detail. But I'm spending more time watching boB's build.
Last edited by BatteryBob; 09-26-2020 at 10:46 AM.
09-28-2020, 08:26 PM
#53
Thread Starter
Join Date: Sep 2014
Location: Scottsdale, AZ
Posts: 169
Likes: 0
Received 0 Likes
on
0 Posts
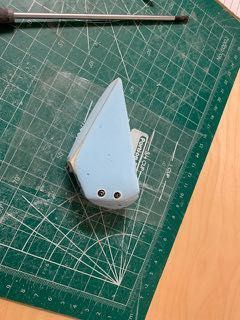
This is what I did for the carrier version of the tailwheel body. I made a simple frame, with the rear removable so I could take it on and off without having to remove the wheel. I used hardwood and G10. The top rails slide next to the hardwood block that the tailwheel is routed through - I plan to screw the shroud into that block.
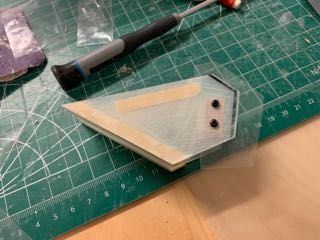
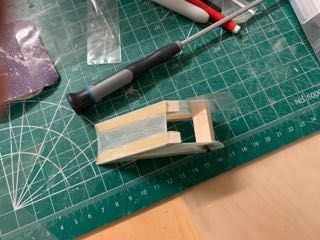
I added some polystyrene sleeves around the screw heads to serve as a way to recess these heads.
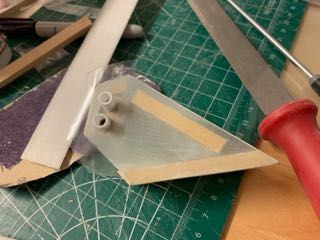
From there, I added on the poly fil. I like this stuff because you can cut it easily with an exacto while it's hardening up. It's fairly light and tough.
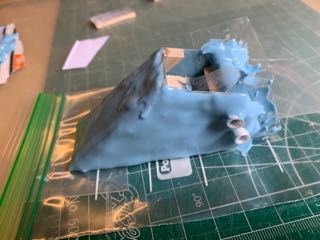
First pass at shaping

I added some polystyrene sleeves around the screw heads to serve as a way to recess these heads.
From there, I added on the poly fil. I like this stuff because you can cut it easily with an exacto while it's hardening up. It's fairly light and tough.
First pass at shaping
09-29-2020, 06:55 AM
#54
Join Date: Nov 2016
Posts: 13
Likes: 0
Received 0 Likes
on
0 Posts
Hey Bob, tail wheel assembly looks good. Have a couple of questions for you. I got my fuel tank floor and cockpit floor cut out, and like you said, the removable fire wall is a good idea. I like the idea of being able to remove the engine and fuel tank for easy maintenance and had already decided to add this to mine. And since its in front of the cg itll add a bit of extra weight.
So, question 1: Ive been dry fitting stringers in the tail section and noticed my top center stringer is curved between F9 and F10. It was really bad so i took F10 off and repositioned it. Its straighter now but still curved slightly. When I eyeball it by lining up F7 to F9 its slightly, like 1/8", of center from the other 3. All the other stringers seem to be straight. Is this an issue? If so, how do I correct it?
I should also mention, there is a very small warp in the crutch, something like the width of a thin piece of card board, near the back. I assumed this could be corrected when the sheeting is added.
Question 2: Ive noticed some of the other builders replacing wing ribs with 5 ply. Is that necessary? If the wing ribs need extra strength could I not just add a layer of fiberglass? I had considered the G10 material, but figured just adding a layer of fiberglass would produce the same effect and be easier to deal with than trying to cut out new ribs.
Thanks for your time.
Rodney
09-29-2020, 08:12 AM
#55
Thread Starter
Join Date: Sep 2014
Location: Scottsdale, AZ
Posts: 169
Likes: 0
Received 0 Likes
on
0 Posts
Hi Rodney,
Hopefully others will chime in here as well. This was my first build off of plans. I started a Bates F4U about a year after starting this plane. What I've learned is that many of these designs are not checked for actual fit via software like 3D Catia. There are guys out there that have taken plans and generated their own 3D models and found errors. In the case of the F4U, there were several - like ribs not have the notches in the right place. Same goes for the formers. Most of us, those without those skills, run into these problems and make the necessary adjustments. For example, I cut new ribs with the notches in the right place. That's a little background, now to your specific questions:
I recall a couple of issues with the fuse. I noticed, over time, that the tail was curving up just slightly. I know my series of supports were flat and so the crutch started out flat (upside down). But one thing I hadn't learned is that if a part does not go where it should and stay there (at rest), it will fight back after you glue it in place. That's where I believe warping starts. If you place your straightedge in the slots at the 12 o'clock position in your formers rear of the cockpit, it should touch all the formers. If not, I would adjust the slots and either add to the low formers or reduce the high ones, all the while using the straightedge along the outsides of the formers. Of course, you have to take into that there is some curvature on the sides. I believe I had a similar issue and corrected it by adjusting the opposing side stringer to "pull" things back into alignment. You might be able to straighten it during sheeting, but I think that may be hard. You're trying to put the sheeting on in opposing ways if possible so you don't get any shrinkage from the gluing (although I'm not sure that's a thing). I just know I did top sheeting while using the crutch for top/bottom alignment and tried to apply the side sheeting on both sides at the same time. Again, I hope someone else shares a more intelligent approach.
I contacted Sam about the 5 ply question back when I was building the wings. He cuts all his own parts and the 1/8" ply he bought (from National or Balsa) comes in 5 ply. He also mentioned that he replaced the ribs around the lander gear mounts with 1/8" ply. I used the ribs in my PCK as is - all ply, but not 5 ply. I think your idea of adding a layer of G10 in the range of 0.010" - 0.020", with the epoxy or CA would be plenty. I didn't do this.
Last edited by BatteryBob; 09-29-2020 at 08:15 AM.
09-29-2020, 08:27 AM
#56
Thread Starter
Join Date: Sep 2014
Location: Scottsdale, AZ
Posts: 169
Likes: 0
Received 0 Likes
on
0 Posts
One more thing on the center section and the LG mounts: There are at least two schools of thought on reinforcing for the LG. Some will say you beef up the rails. I was advised to add some G10 so they don't split from the stress of the bolts on a hard landing.
Others will say, screw the LG into the rails and let the threading be the "fuse" that let's go on a hard landing. The thought being that you'd rather add CA, enlarge the thread etc (and patch the hole where the wheel went through the bottom of the wing) when the whole LG assembly rips out than have to repair a major split within the wing because the mount didn't fail, but everything around it took the hit and caused some major cracks.
Or maybe work on the give in the Oleos, but just shy of making it bounce easy.
Or don't land so hard.
In the end, it might be a good idea to add some doublers or G10 skin to the ribs that have the LG rails passing through and also add some fiberglass to the underside of the sheeting.
09-29-2020, 08:58 AM
#57
Thread Starter
Join Date: Sep 2014
Location: Scottsdale, AZ
Posts: 169
Likes: 0
Received 0 Likes
on
0 Posts
One last thought on glassing. The real culprit may have been not waiting long enough for the cure of the epoxy and getting a off gas reaction when the primer hit the glass. Anyway, I ended up doing the entire fuse with peel ply starting with the stabs, then going from the bottom, to the sides and then the top. The overlapping was no problem and I just extended the peel ply beyond the epoxy with ran probably and inch beyond the glass. I'm always in 60% or greater humidity so I was concerned with the cure time with polyacrylic.
A few other things that were completed over the last few weeks:
I made my mast out of 0.020" G10 with hardwood on each side. My thought was that the G10 will hold up and provide a stronger antenna line attachment. On the other hand, if this thing takes a hit, it will probably rip the nose of the plane off.
Rough piece
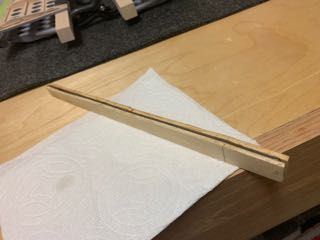
After shaping and creating a G10 sleeve for the mast to slide into.
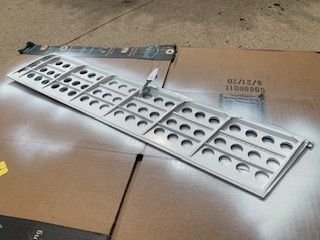
Wheel wells were trimmed out. I can't emphasize enough that it's so much easier if you make a decent, smooth plug that produces a good interior surface. Or plan to add filler and sand and add filler and sand etc.
and I finished the prep for the control surfaces. boB did a great job and I followed his advice for the boost tab linkages. I ended up using 0.010" on the surfaces of the tabs. I did not add the polystyrene plate where the trim tab rod exits the aileron/elevator as the "old" scale pictures didn't have this. There are so many pictures of full scale, and some are old and some are restored. So in the end, I'm not totally sure. I'm sure either way will look good.
A few other things that were completed over the last few weeks:
I made my mast out of 0.020" G10 with hardwood on each side. My thought was that the G10 will hold up and provide a stronger antenna line attachment. On the other hand, if this thing takes a hit, it will probably rip the nose of the plane off.
Rough piece
After shaping and creating a G10 sleeve for the mast to slide into.
Wheel wells were trimmed out. I can't emphasize enough that it's so much easier if you make a decent, smooth plug that produces a good interior surface. Or plan to add filler and sand and add filler and sand etc.
and I finished the prep for the control surfaces. boB did a great job and I followed his advice for the boost tab linkages. I ended up using 0.010" on the surfaces of the tabs. I did not add the polystyrene plate where the trim tab rod exits the aileron/elevator as the "old" scale pictures didn't have this. There are so many pictures of full scale, and some are old and some are restored. So in the end, I'm not totally sure. I'm sure either way will look good.
Last edited by BatteryBob; 09-29-2020 at 01:40 PM.
09-29-2020, 01:50 PM
#58
Thread Starter
Join Date: Sep 2014
Location: Scottsdale, AZ
Posts: 169
Likes: 0
Received 0 Likes
on
0 Posts
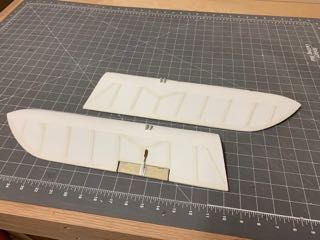
Saw some good flap detailing on boB's thread that I wanted to try. My first attempt looked like this
I was pretty happy with this, but I realized I needed to shave down the ribs so there wasn't interference in the closed position. I also added a strip of G10 at the TE and more polystyrene per the full size version. I also attempted to create the slope on backside of the LE spar. I only did one flap, which I'm glad, because I decided to modify this before doing the rest.
This seems better. The G10 is recessed. Ribs are shaved down. I need to add the caps on the ribs (the reason why I needed to shave the ribs down) and the junction plates and then replicate on the other flaps.

As a side note, I keep the flaps clamped to hardwood that I've checked with a straightedge just to prevent any more warping. I have a feeling that the G10 strip that I routed in at this thickness won't help keep things as stable as I'd like. Again, a reason to go with full or sandwiched G10 material for the flaps.
I was pretty happy with this, but I realized I needed to shave down the ribs so there wasn't interference in the closed position. I also added a strip of G10 at the TE and more polystyrene per the full size version. I also attempted to create the slope on backside of the LE spar. I only did one flap, which I'm glad, because I decided to modify this before doing the rest.
This seems better. The G10 is recessed. Ribs are shaved down. I need to add the caps on the ribs (the reason why I needed to shave the ribs down) and the junction plates and then replicate on the other flaps.
As a side note, I keep the flaps clamped to hardwood that I've checked with a straightedge just to prevent any more warping. I have a feeling that the G10 strip that I routed in at this thickness won't help keep things as stable as I'd like. Again, a reason to go with full or sandwiched G10 material for the flaps.
Last edited by BatteryBob; 09-29-2020 at 01:52 PM.
09-29-2020, 02:21 PM
#59
Join Date: Nov 2016
Posts: 13
Likes: 0
Received 0 Likes
on
0 Posts
Bob, were your flaps flat before you added everything? Im just wondering if they warped after, because all of mine are very flat. After reading about this issue, i made sure all of mine were in a flat position under weight.
This is my first giant scale build. I am also working on a great planes F4U, I managed to get one of the last ones before the discontinued them.
This is my first giant scale build. I am also working on a great planes F4U, I managed to get one of the last ones before the discontinued them.
09-29-2020, 04:54 PM
#60
Thread Starter
Join Date: Sep 2014
Location: Scottsdale, AZ
Posts: 169
Likes: 0
Received 0 Likes
on
0 Posts
That's a great question.
I had my kit for about 2 years before I started on it. That's going back to 2016 or so. I'm not sure but I'm guessing these were flat on the bottom of the box (it was a full kit). I always tried to keep them flat but I seem to recall that a couple had a bit of curve in them before adding any ribs or spars. You can load them up with weights but I'm not sure if that will do much once the weight is removed.
Once this plane is full assembled, I will likely find a way to pinch the flaps tightly shut when in storage.
Way to score on the TF kit. I hear great things about those and have read all the threads on that kit to help me with my Bates build. I was warned about the F4U, but I'm still glad I'm building it. I already have a second kit from Bob Holman - he is awesome! I'd like to find a way to build a F4U-1 from the -5 plans. I clearly don't know what I'm talking about yet.
09-29-2020, 05:26 PM
#61
Join Date: Nov 2016
Posts: 13
Likes: 0
Received 0 Likes
on
0 Posts
Thats ok, I dont know what -5 is myself. Its funny too cause I bought my kit back in 2018, so I had mine in storage for about 2 years as well before starting. I was waiting to get a decent place and a good bench to work on.
My flaps have been flat since I got my kit, I checked all my parts when I got them and my flaps were good and flat. Ive just been keeping them under a bit of weight to keep them from getting any ideas.
My flaps have been flat since I got my kit, I checked all my parts when I got them and my flaps were good and flat. Ive just been keeping them under a bit of weight to keep them from getting any ideas.
10-01-2020, 09:39 AM
#63
Thread Starter
Join Date: Sep 2014
Location: Scottsdale, AZ
Posts: 169
Likes: 0
Received 0 Likes
on
0 Posts
10-01-2020, 10:06 AM
#64
Join Date: Nov 2016
Posts: 13
Likes: 0
Received 0 Likes
on
0 Posts
Yea, the GT80 is probably what Ill get as well. Especially since they are on sale till next friday. Cant hardly pass up saving a couple of hundred, nor really justify spending $2000 on a radial. Although UMS makes a couple that would probably work good.
10-10-2020, 08:17 AM
#65
Thread Starter
Join Date: Sep 2014
Location: Scottsdale, AZ
Posts: 169
Likes: 0
Received 0 Likes
on
0 Posts
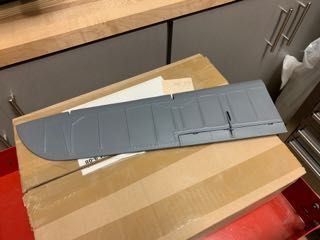
I have the flaps finished and primed on the inside. I realized, after I was all done, that I should have done this in aluminum metallic for future weathering, but then I'm not sure how much wear I've seen on the inside of the flaps. Lots of dirt, oil & other grime.
with rivets and paint. I've seen some examples of the center flap painted white on the inside. And some red. Not sure if one of these versions are restorations???
One other tidbit of advice is on keeping the hinges clean so the wires are easy to insert. I don't enjoy that part much. Also, as I mentioned before, pay attention to the rib height as it impacts how the flaps close. I tried to taper to the TE to the best of my ability. The double thickness of the flaps itself is rather thick compared to the aileron right next to it.
This is where I will pause for a few months as I transition to another location where I have a F4U going on. I have my checklist for my return.
11-02-2020, 04:50 PM
#66
Join Date: Nov 2016
Posts: 13
Likes: 0
Received 0 Likes
on
0 Posts
Hey Bob,
Well I took a second look at my flaps and of course they decided to start warping on me. I've tried adding weight, but as you guessed, it didn't do anything at all. A couple of them are actually warped and twisted. I'm thinking of just using a fiberglass laminate for the whole thing. I've been doing a little research and 6 layers of 9 oz fiberglass should get me close to the 3/32" thickness I need for the flaps.
I have a question about sheeting. All the pics Ive looked at from all the builders doing this plane have nice flat sheets on the plane. My first attempt looks like hell. It has smashed areas from the clamps I used and one spot was so badly caved in that I had to cut it out and replace it. What am I doing wrong? How do you guys get your sheeting to stay so nice and flat to the stringers without smashing it keeping it clamped down? Do you even use clamps?
Thanks
Rodney
11-02-2020, 10:58 PM
#67
Thread Starter
Join Date: Sep 2014
Location: Scottsdale, AZ
Posts: 169
Likes: 0
Received 0 Likes
on
0 Posts
Hey Rodney,
Regarding the flaps, did this happen after you added the spars and ribs? If yes, I'm not sure what to say. I also don't know if you are thinking of adding the 3/32" FG to the existing flap or using the 3/32" as the flap by itself (sounds like the latter). But the idea of making an equivalent to G10 on your own sounds a little challenging but maybe if you lay it down on a thick piece of plate glass with saran wrap over it???
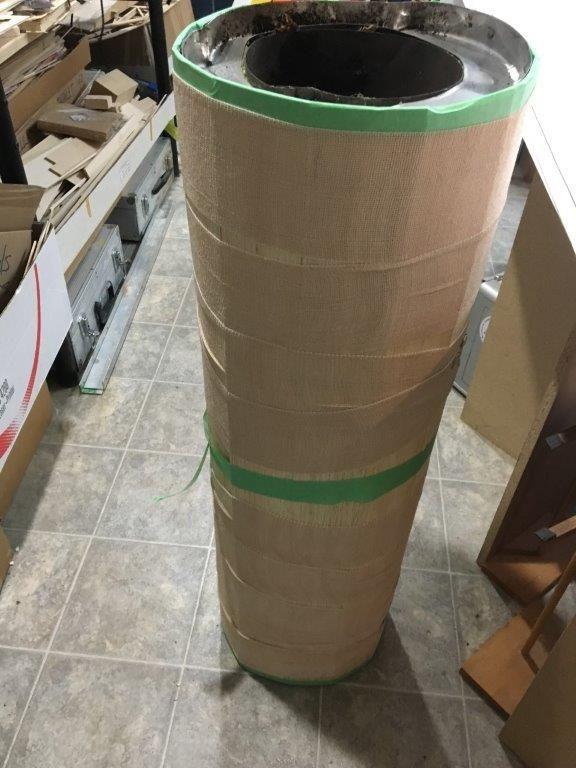
Sam Parfitt did a great job of showing how he makes sheets and applies them to his plane. I followed the same approach. I use Windex and pre-soak/pre-bend the sheeting before I glue. I'll use green 3M tape (I think this is the kind for masonry work) and start by placing the sheet on the part that needs requires the sheeting to bend. I'll wrap with the tape and with each wrap (like wrapping an ankle), bend it a little more (like around the fuselage). You need to make sure the balsa has some natural bend to it. If its really stiff, don't use it. You might also soak the balsa planks (in 3" or 4" width) and use something like a airduct or whatever you can find that is similar in diameter.
Check out an example by Wayne on RCSB with his F4U. Here, he is making the entire sheeting. I usually do the fuse using 1 or 2 piece max wide sheets. So either 4" or 8" wide. Occasionally the balsa will split. If it does, I'll fill the crack and sand smooth.
You are right, you can't use too much force or you will snap stringers. Last bit of advice is - either sand or add balsa so that there are no dips between ribs or stingers. Use a straightedge to check. If you don't, you will have all these high and low spots to take care of before or after glassing. It only gets more difficult later on in the process.
Hope this was helpful.
Regarding the flaps, did this happen after you added the spars and ribs? If yes, I'm not sure what to say. I also don't know if you are thinking of adding the 3/32" FG to the existing flap or using the 3/32" as the flap by itself (sounds like the latter). But the idea of making an equivalent to G10 on your own sounds a little challenging but maybe if you lay it down on a thick piece of plate glass with saran wrap over it???
Sam Parfitt did a great job of showing how he makes sheets and applies them to his plane. I followed the same approach. I use Windex and pre-soak/pre-bend the sheeting before I glue. I'll use green 3M tape (I think this is the kind for masonry work) and start by placing the sheet on the part that needs requires the sheeting to bend. I'll wrap with the tape and with each wrap (like wrapping an ankle), bend it a little more (like around the fuselage). You need to make sure the balsa has some natural bend to it. If its really stiff, don't use it. You might also soak the balsa planks (in 3" or 4" width) and use something like a airduct or whatever you can find that is similar in diameter.
Check out an example by Wayne on RCSB with his F4U. Here, he is making the entire sheeting. I usually do the fuse using 1 or 2 piece max wide sheets. So either 4" or 8" wide. Occasionally the balsa will split. If it does, I'll fill the crack and sand smooth.
You are right, you can't use too much force or you will snap stringers. Last bit of advice is - either sand or add balsa so that there are no dips between ribs or stingers. Use a straightedge to check. If you don't, you will have all these high and low spots to take care of before or after glassing. It only gets more difficult later on in the process.
Hope this was helpful.
11-03-2020, 04:13 AM
#68
Join Date: Nov 2016
Posts: 13
Likes: 0
Received 0 Likes
on
0 Posts
Hey Bob,
The flaps warped on me before I added anything to them. Am I overthinking this? Should I just build them and hope they stay flat? Yes the idea was to build my own G10 type material from scratch. But if its not necessary that would be awesome, as drilling over 300 holes in new material isn't something I was looking forward too. I'm just afraid that the flaps won't lie flat after they are built.
I know too that any dips or high spots are going to have to be addressed before any attempt at glassing, as its much easier to fill and sand before hand. Does it matter what kind of filler material I use? Will it affect the glassing process at all? I did use Windex and saturated my balsa and clamped it in place, left it overnight to dry then glued it down. I'm just trying to figure out how to do it without adding so much more work to the project. I should have realized that tape would be the best way to go.
Thanks for your help
Rodney
11-03-2020, 10:23 AM
#69
Thread Starter
Join Date: Sep 2014
Location: Scottsdale, AZ
Posts: 169
Likes: 0
Received 0 Likes
on
0 Posts
Hi Rodney,
Hope I'm not beating a dead horse. Stop me at any point.
Flaps: I forgot to add that, depending on the hinge you will be using, you will get some rigidity (and straightness - if that's a word) along the LE edge. I like to do lots of things myself, but I would probably find someone to make the G10 complete with laser cut holes. My fear would be wrecking the flap as I'm almost on the last hole.
Sheeting: Just to make sure, my comment about checking the ribs/stringers for over/under in height is before the sheeting goes on. Small dings - balsa filler. Larger dips - I use the same filler Sam used - Evercoat Easy Sand. I like that it sets up a little harder than the balsa filler. Holes or where I want durability - Superfil. I use the red 3M filler for really minor/thin application stuff in between primer coats.
I also forgot to mention that I use a variety of hardwood strips that I accumulated from cutting maple landing gear mounts. Thinner strips are great for bending around the top of a wing if you are running from LE to TE. Thicker for the root out to the tip. I'll space these out and put super heavy paint cans on top. You can add a scrap of soft balsa to prevent the maple strip from denting.
On my SBD, I glued together all of the sheets to make one entire section for the top and bottom of each section. When it comes to the wing tips, I will glue in the flat section of the wing, leaving the tip area unglued. Once that main section is ready, I'll use a welding brush or a paint brush to work glue in under the sheeting in the tip section. This way, when I wrap and tape the sheeting at the tip, it won't raise up back at the main section. Some guys use bags filled with shot or, in my case, ankle weights. There are also plank pins that are used by guys sheeting boat models.
I'm sheeting the bottom of the center section of my Corsair right now. It's a real pain with compound curves. The top was even harder. Like you, I wonder how the pros do this. I'm going one piece of sheeting at a time.
I'm sure there are lots of opinions on this.
11-03-2020, 10:38 AM
#70
Join Date: Nov 2016
Posts: 13
Likes: 0
Received 0 Likes
on
0 Posts
Yea, I didnt really think about checking the stringers and ribs like that. I do know that nearly every stringer is flush with the top of the ribs, and those that were high I sanded flush. The only location i know for sure had a low spot was rib 2a/b where the vent goes. I assumed that was part of the design tho and didnt worry about it.
 01-06-2021, 07:38 AM
#72
Thread Starter
Join Date: Sep 2014
Location: Scottsdale, AZ
Posts: 169
Likes: 0
Received 0 Likes
on
0 Posts
Great question. My plane is at a different location, so no way to get my hands on it.
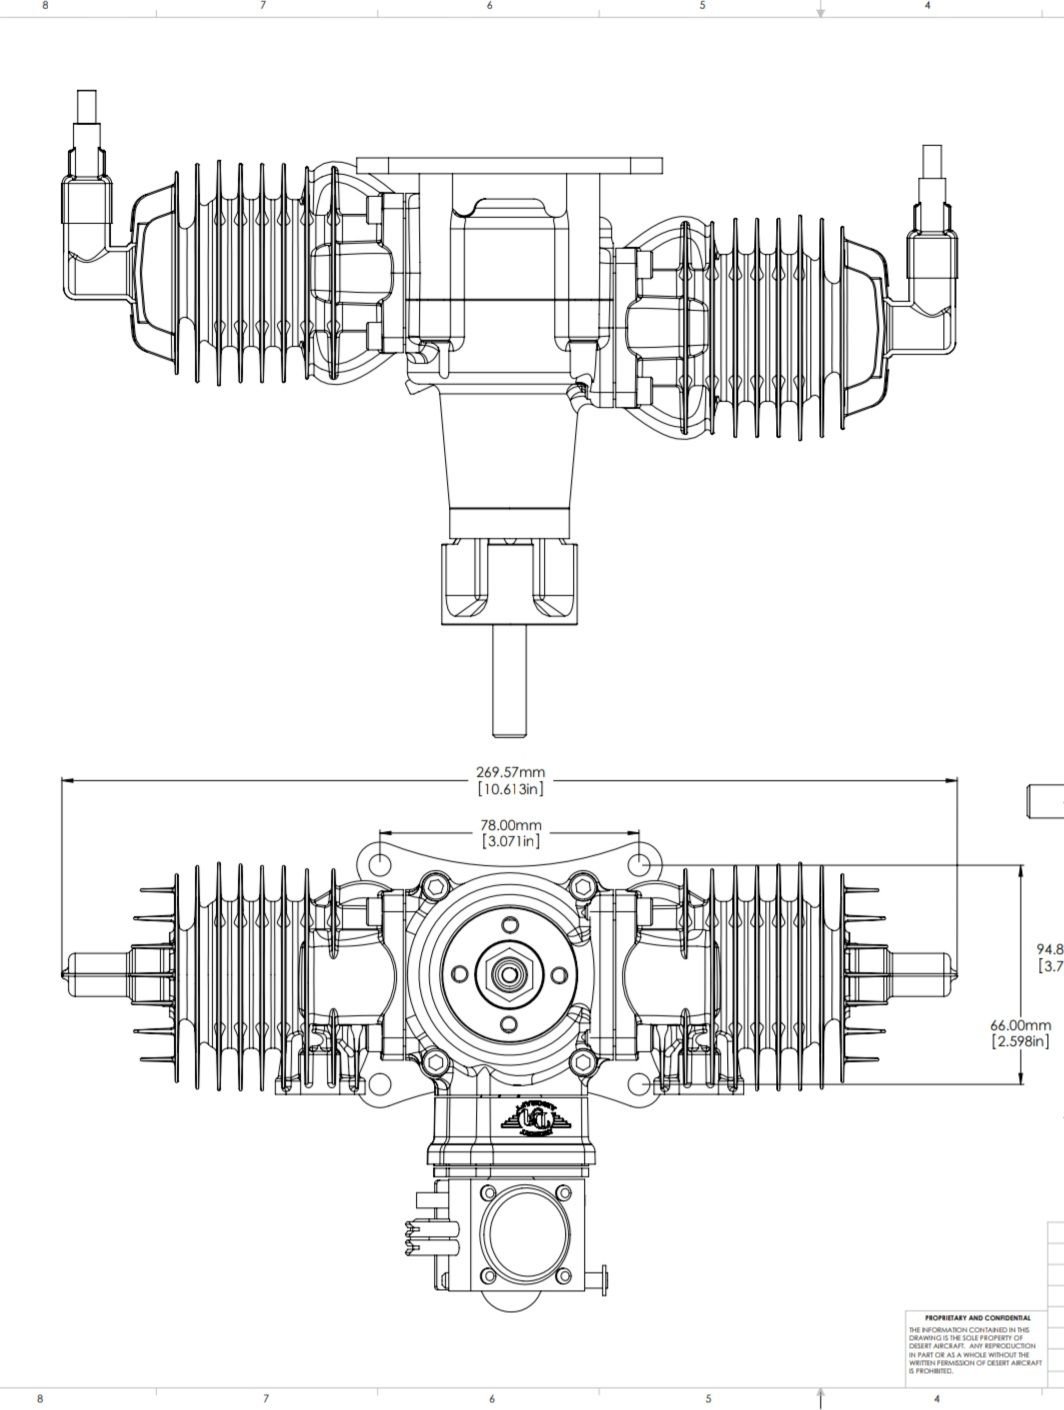
The GT80 shows a width of 257mm. I saw on Sam Parfitt's thread his comment that there was about 1/4" clearance on each side of the plug with his GT80. Appears your DA70 twin is about 1/2" wider so it looks to be tight. You probably already knew all this.
Wish I could give you a definitive answer.
The GT80 shows a width of 257mm. I saw on Sam Parfitt's thread his comment that there was about 1/4" clearance on each side of the plug with his GT80. Appears your DA70 twin is about 1/2" wider so it looks to be tight. You probably already knew all this.
Wish I could give you a definitive answer.
01-06-2021, 10:18 AM
#73

My Feedback: (1)
Join Date: Feb 2008
Location: New York, NY
Posts: 37
Likes: 0
Received 0 Likes
on
0 Posts
Appreciate the feedback. Yeah..tight fit..might have about or less the 1/4 inch from cap to cap. Arrrr
..will keep hunting for a engine that will fit (without chewing the cowl) . To bad Zanoah GT80 availablilty is in Europe somewhere ..would hate to start looking for replacement parts and waiting weeks to arrive.
..will keep hunting for a engine that will fit (without chewing the cowl) . To bad Zanoah GT80 availablilty is in Europe somewhere ..would hate to start looking for replacement parts and waiting weeks to arrive.
01-10-2021, 11:20 AM
#74
Join Date: Nov 2016
Posts: 13
Likes: 0
Received 0 Likes
on
0 Posts
I looked into this same issue a lot. The twin 70 has plugs that come straight out, whereas the Zenoah gt80 the plugs come out at an angle. You could get the heads inside the cowl I figure, but you would have to cut holes and put plugs in each time you remove the cowl.
I decided to get a DLE 85, going to mount upside down. I think ill still have to cut a hole, but with only one plug I think I will be able to roll it on.
I decided to get a DLE 85, going to mount upside down. I think ill still have to cut a hole, but with only one plug I think I will be able to roll it on.