


Ziroli SBD-3 Dauntless build
 08-03-2018, 03:33 PM
#26

Thread Starter
Join Date: Sep 2014
Location: Scottsdale, AZ
Posts: 169
Likes: 0
Received 0 Likes
on
0 Posts
Hi Folks, I'm still here and have been making some progress. I need to get caught up on posts. By the way, I did some closer looking at my SBD books and see the hinges. I was focused on the actuating arms and totally missed the hinges. Thanks for not embarrassing me.
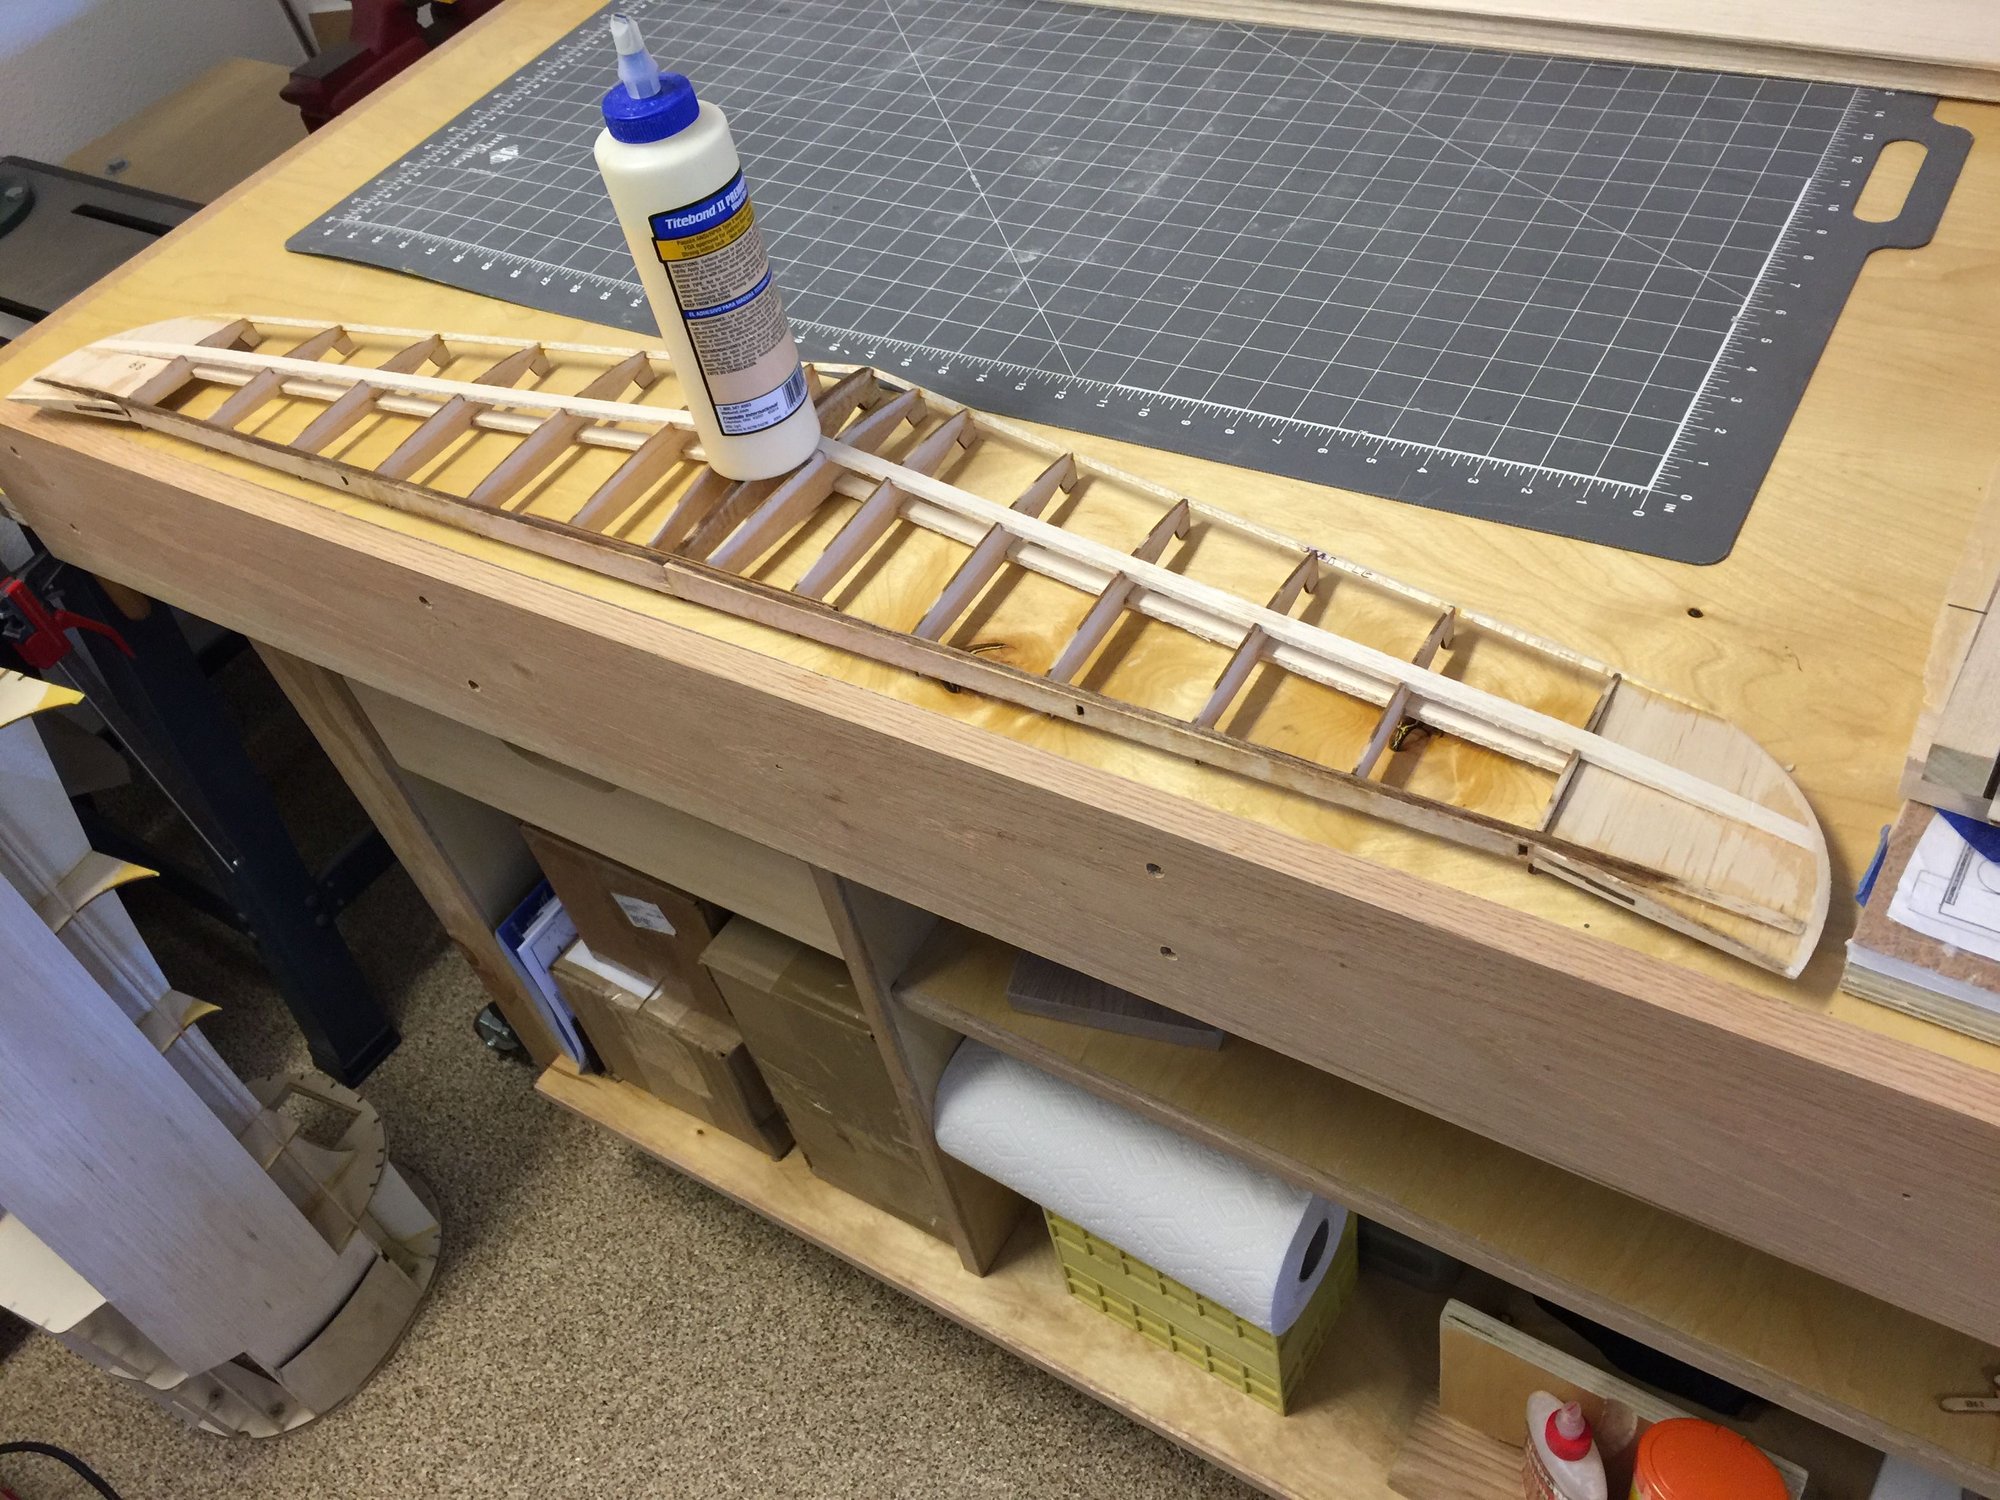
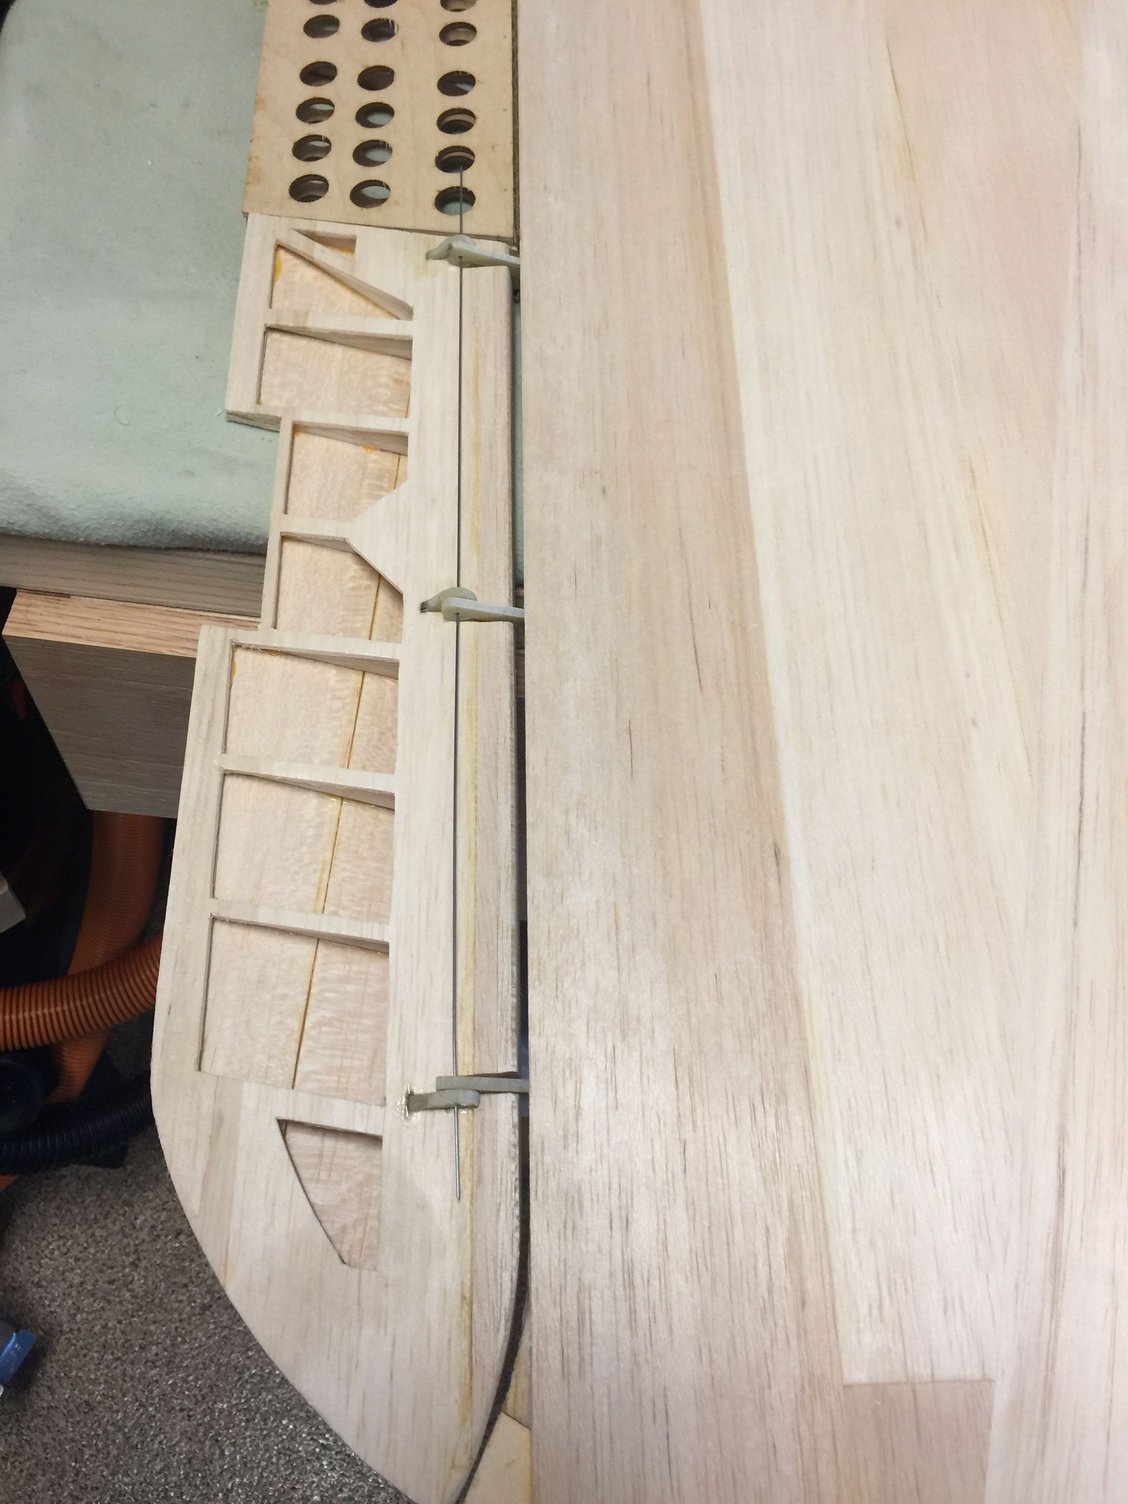
I decided to move on an build the stab. I used the same servo approach that Sam used and I figured if I changed my mind, I could just close up the two servo pockets.
I decided to move on an build the stab. I used the same servo approach that Sam used and I figured if I changed my mind, I could just close up the two servo pockets.

 08-03-2018, 03:44 PM
#28
Thread Starter
Join Date: Sep 2014
Location: Scottsdale, AZ
Posts: 169
Likes: 0
Received 0 Likes
on
0 Posts
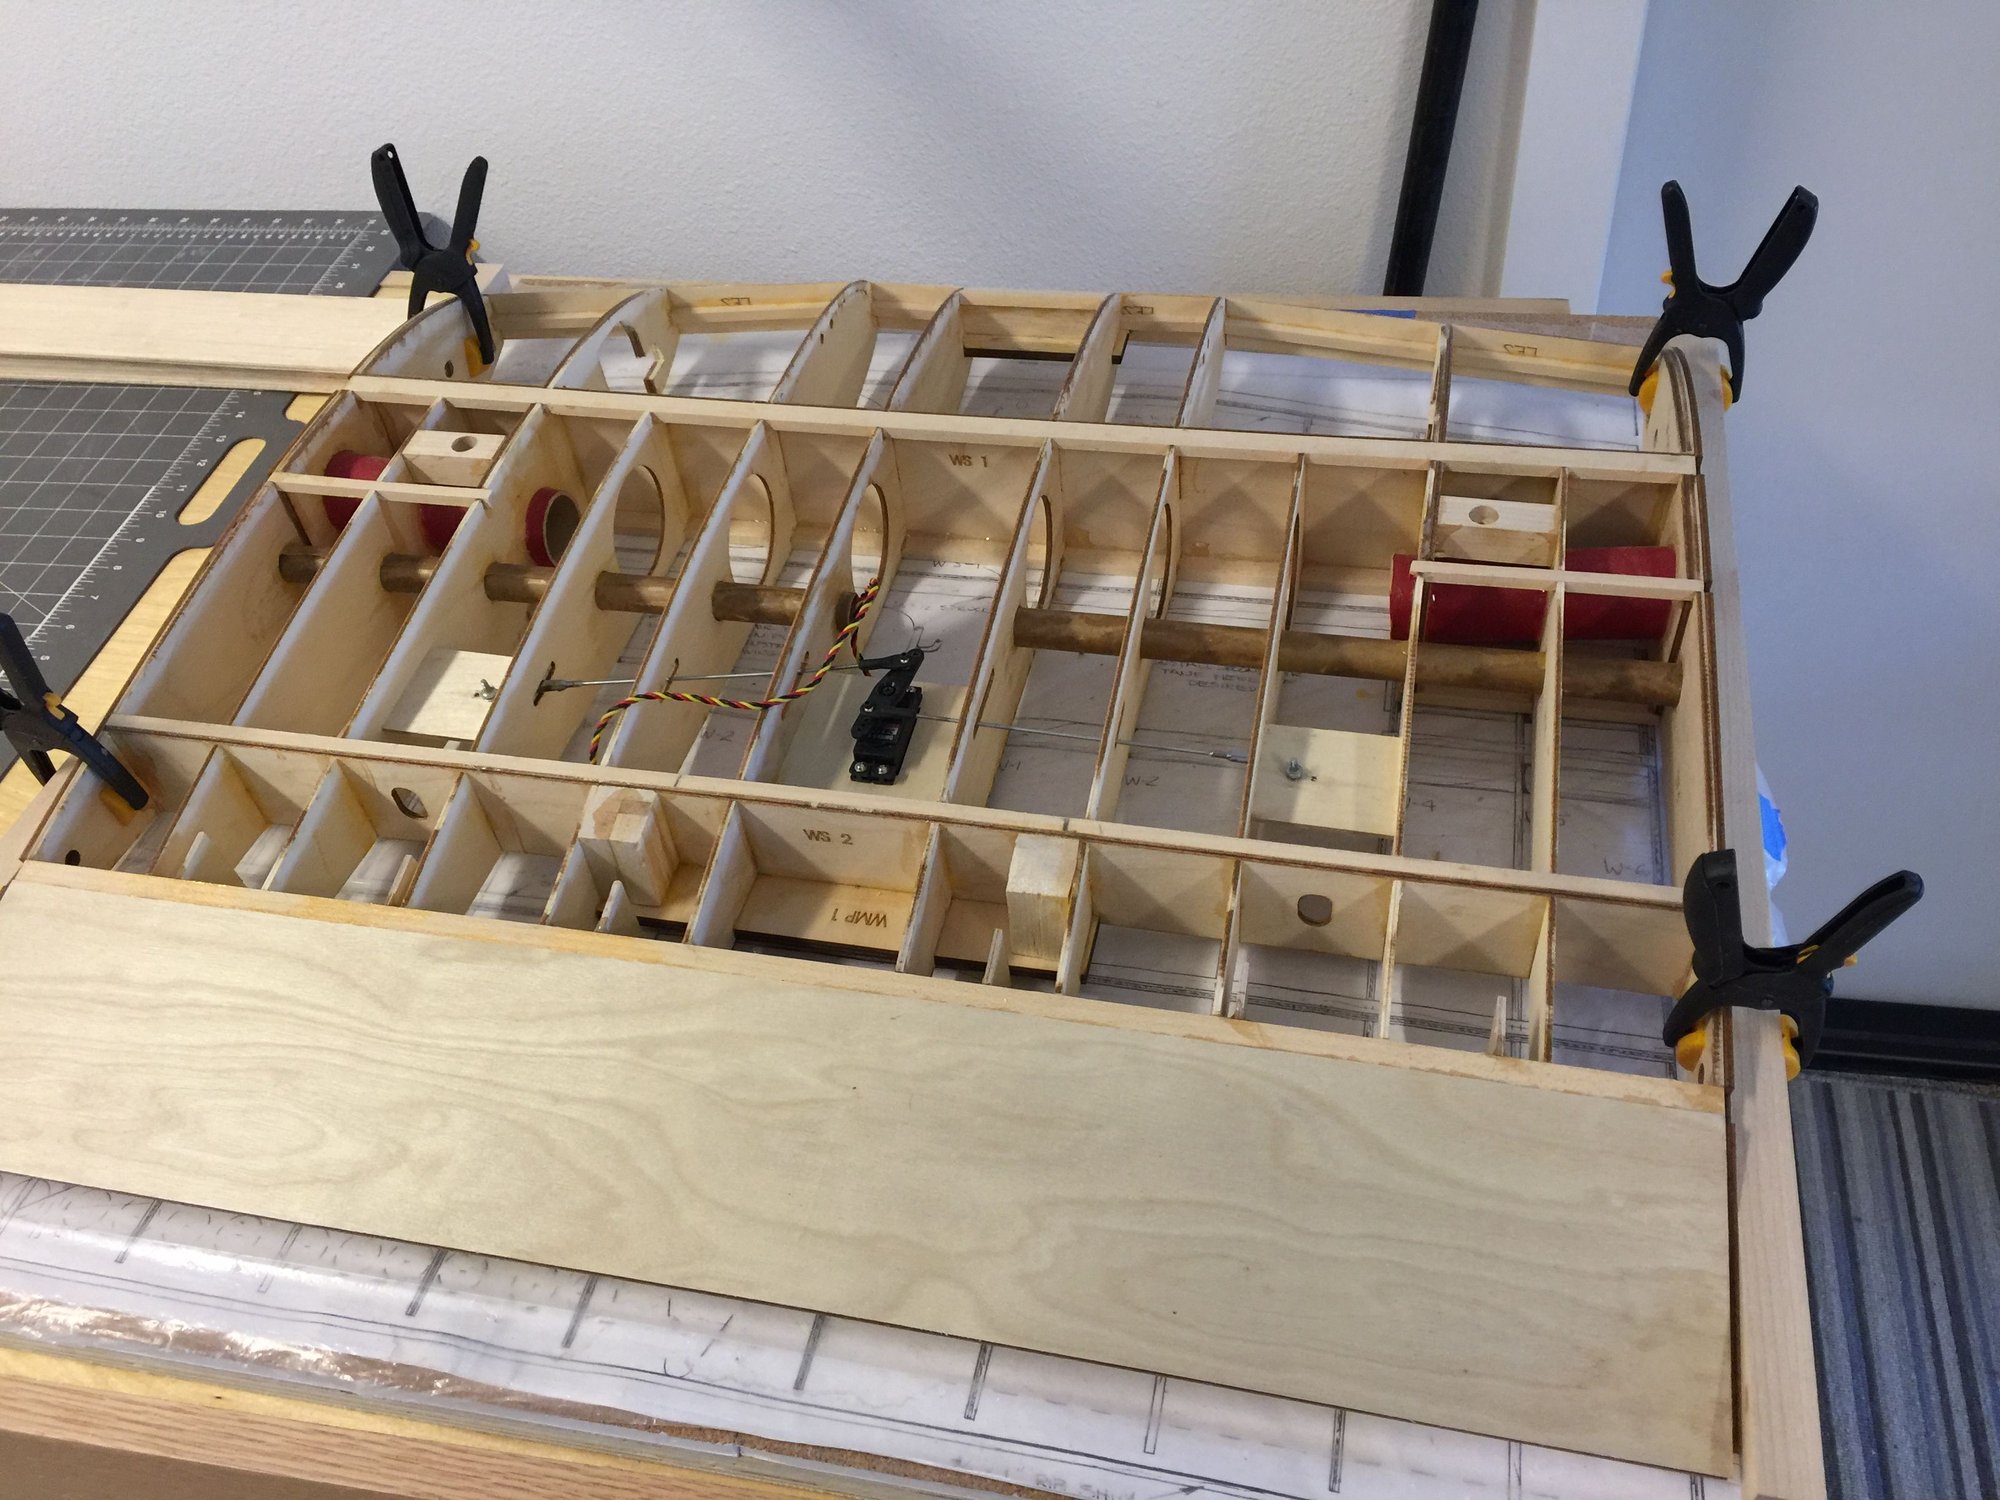
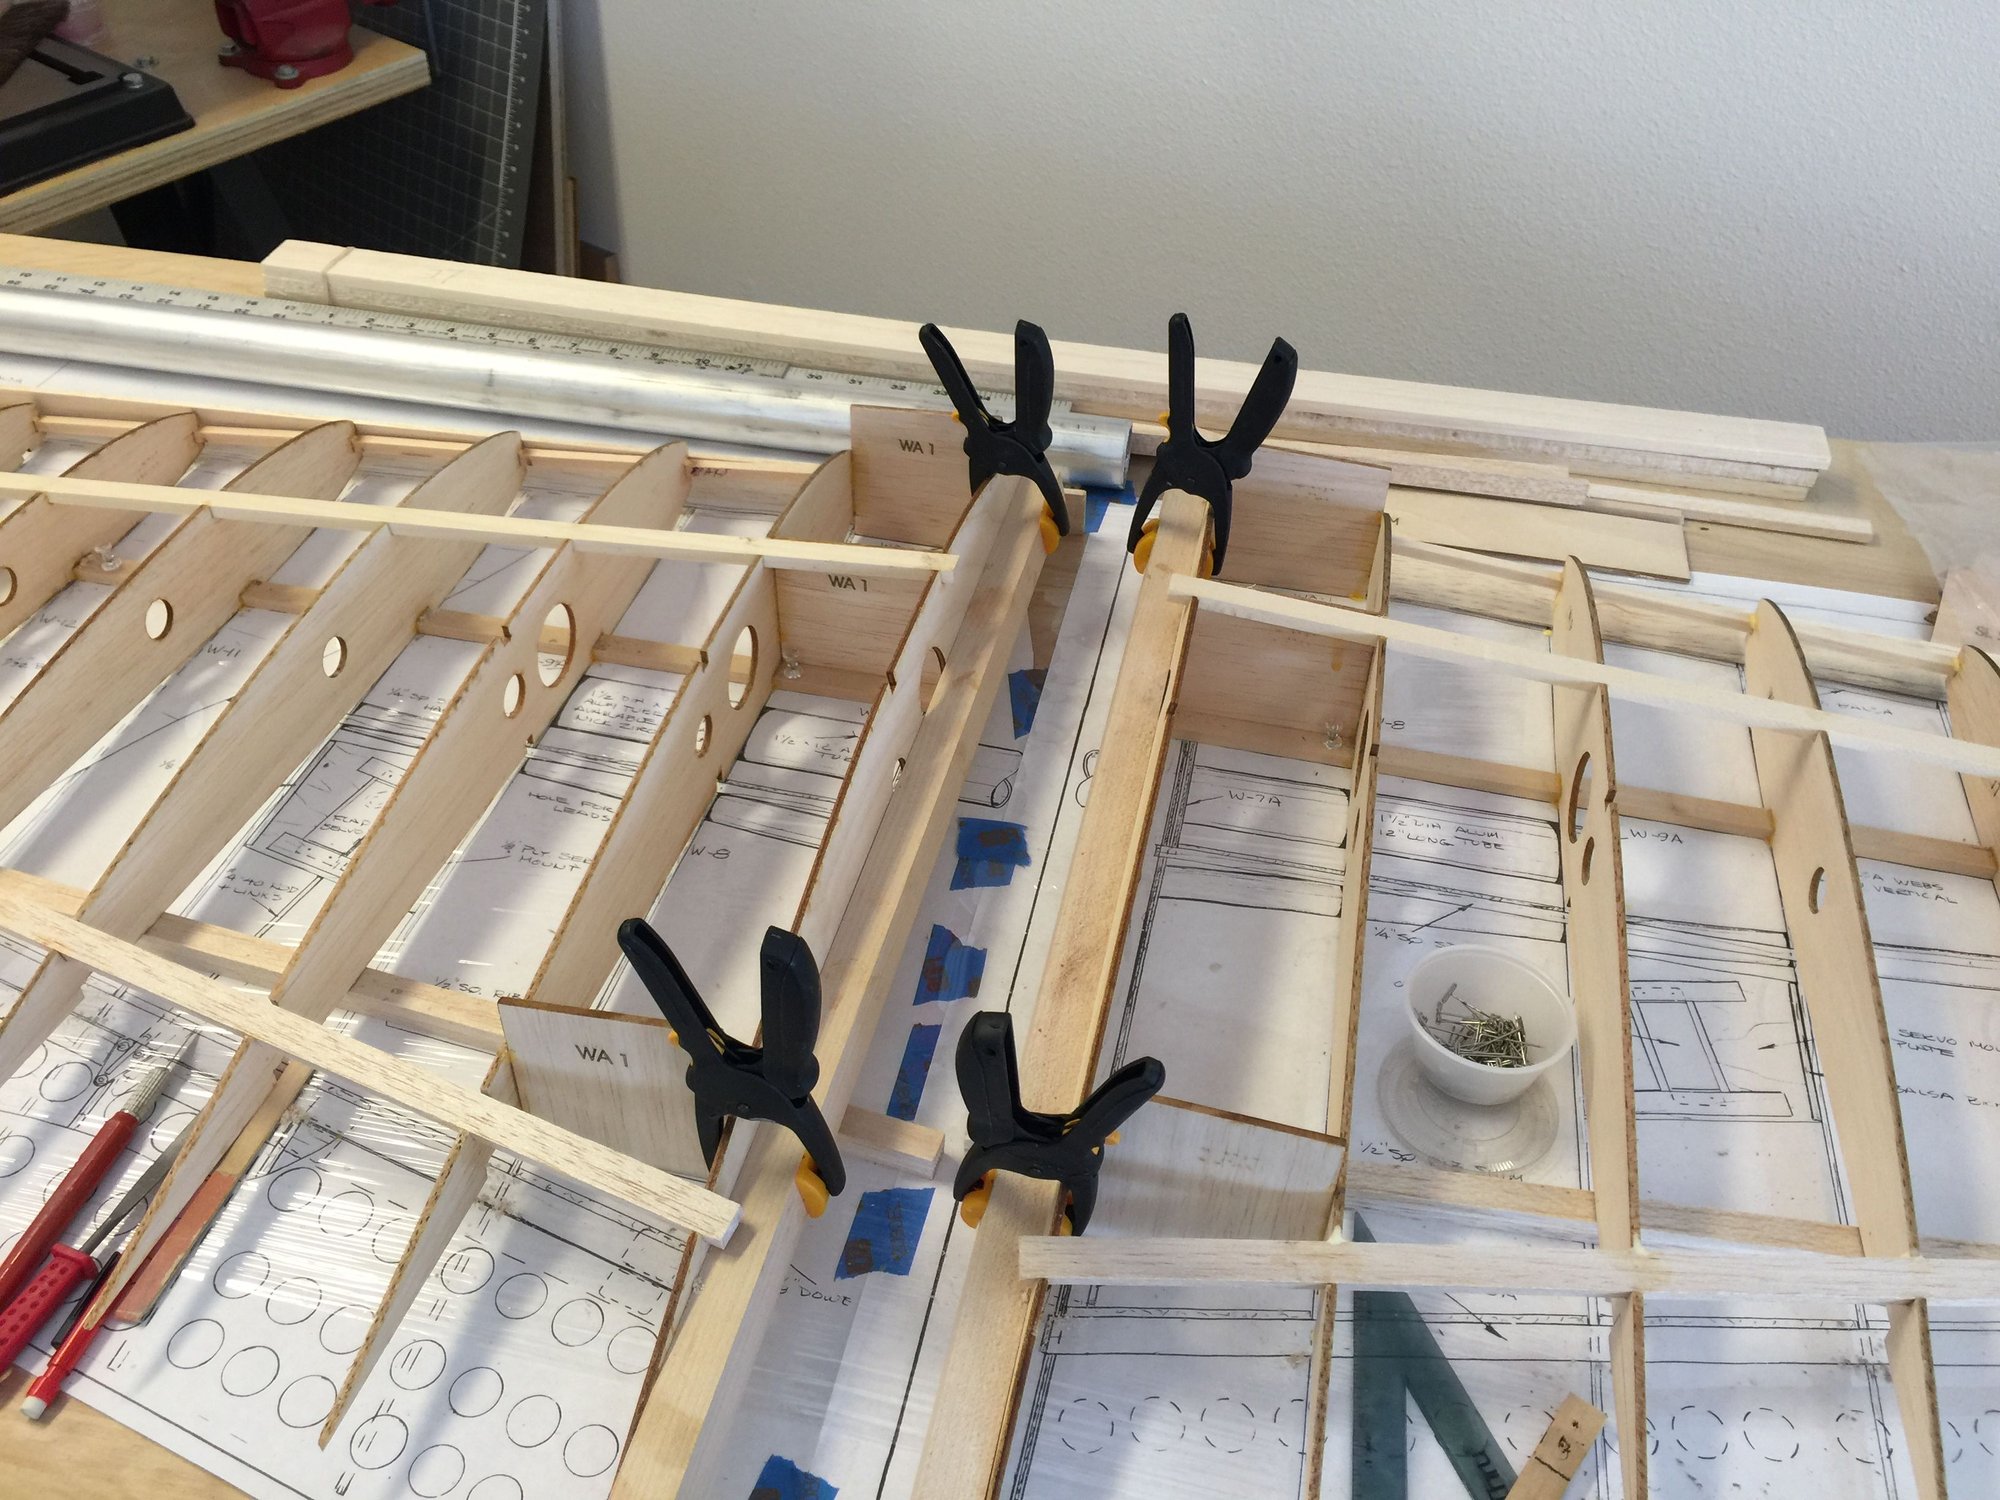
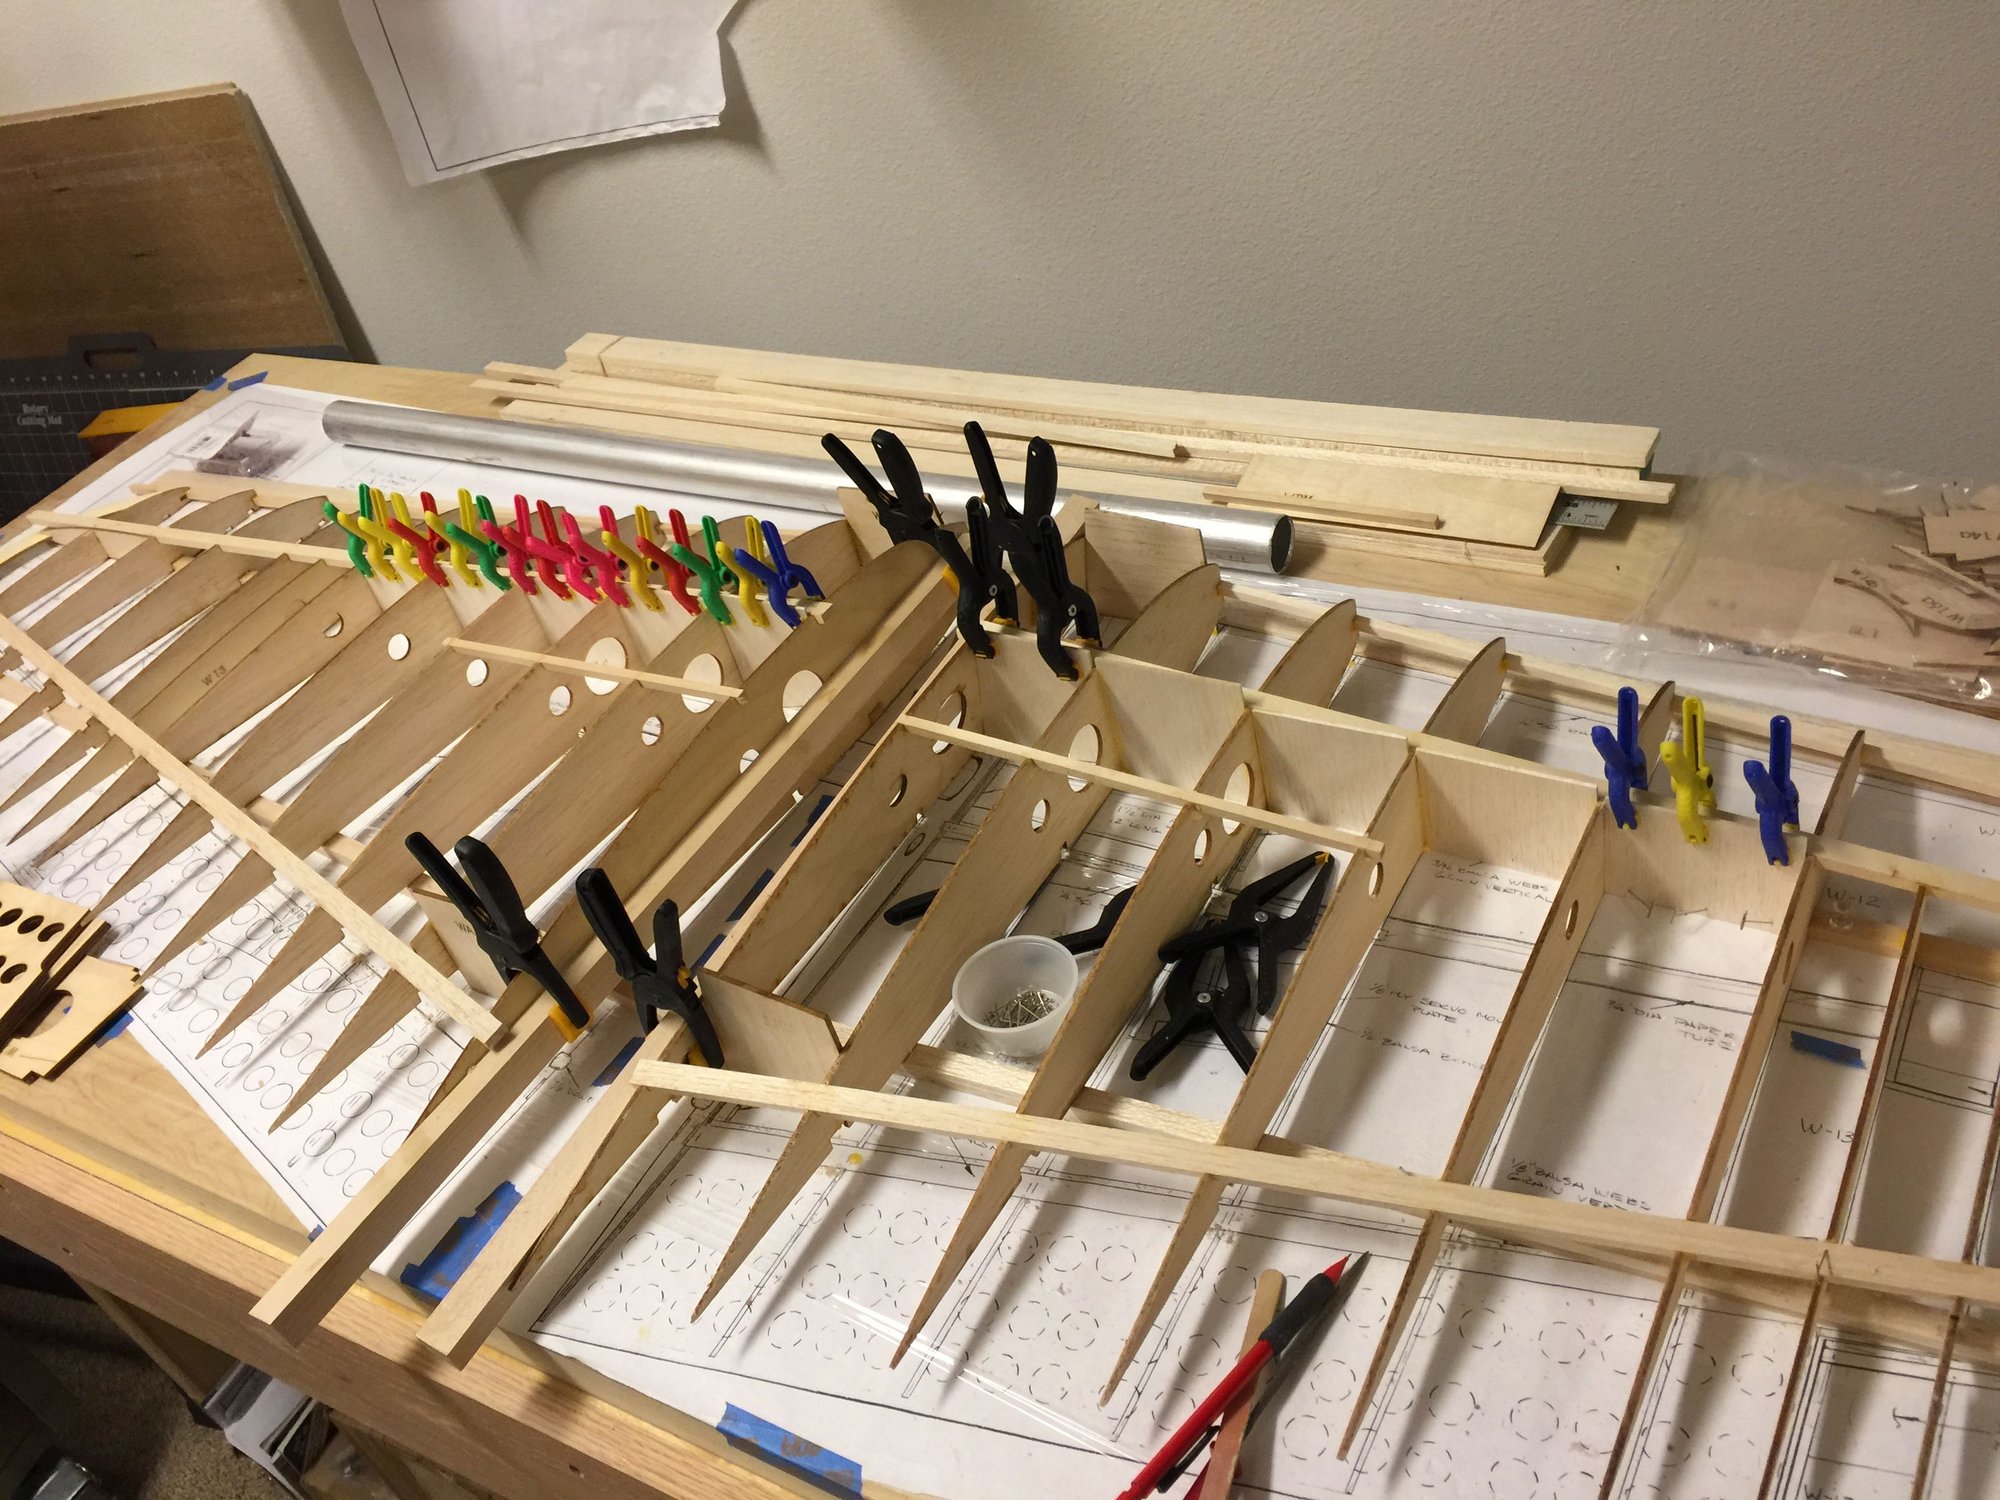
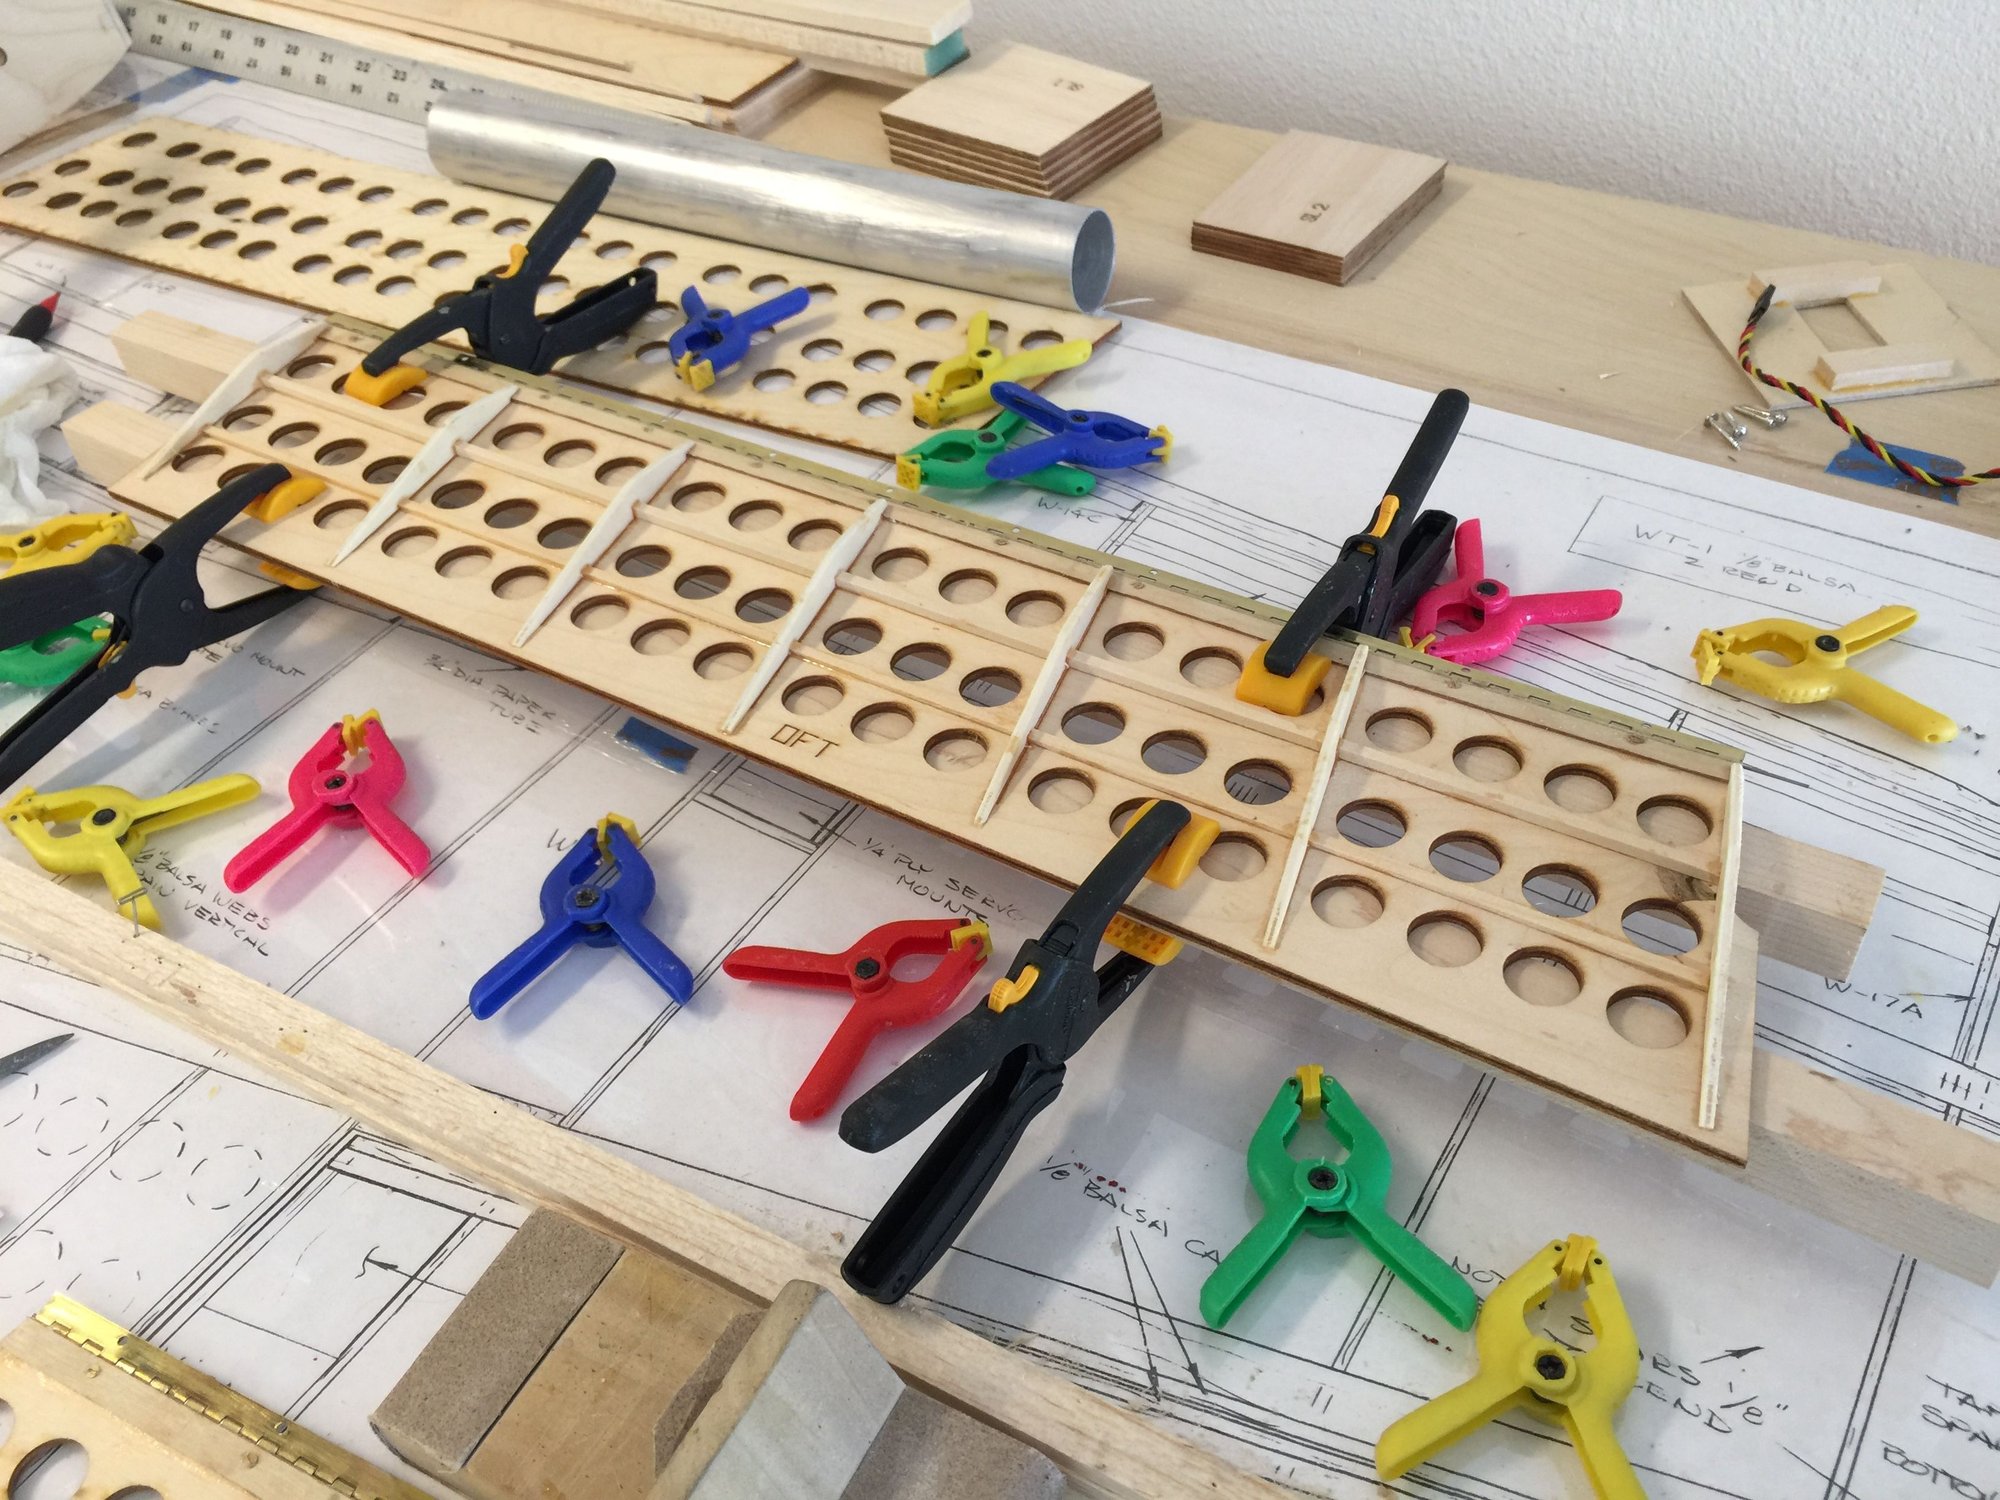
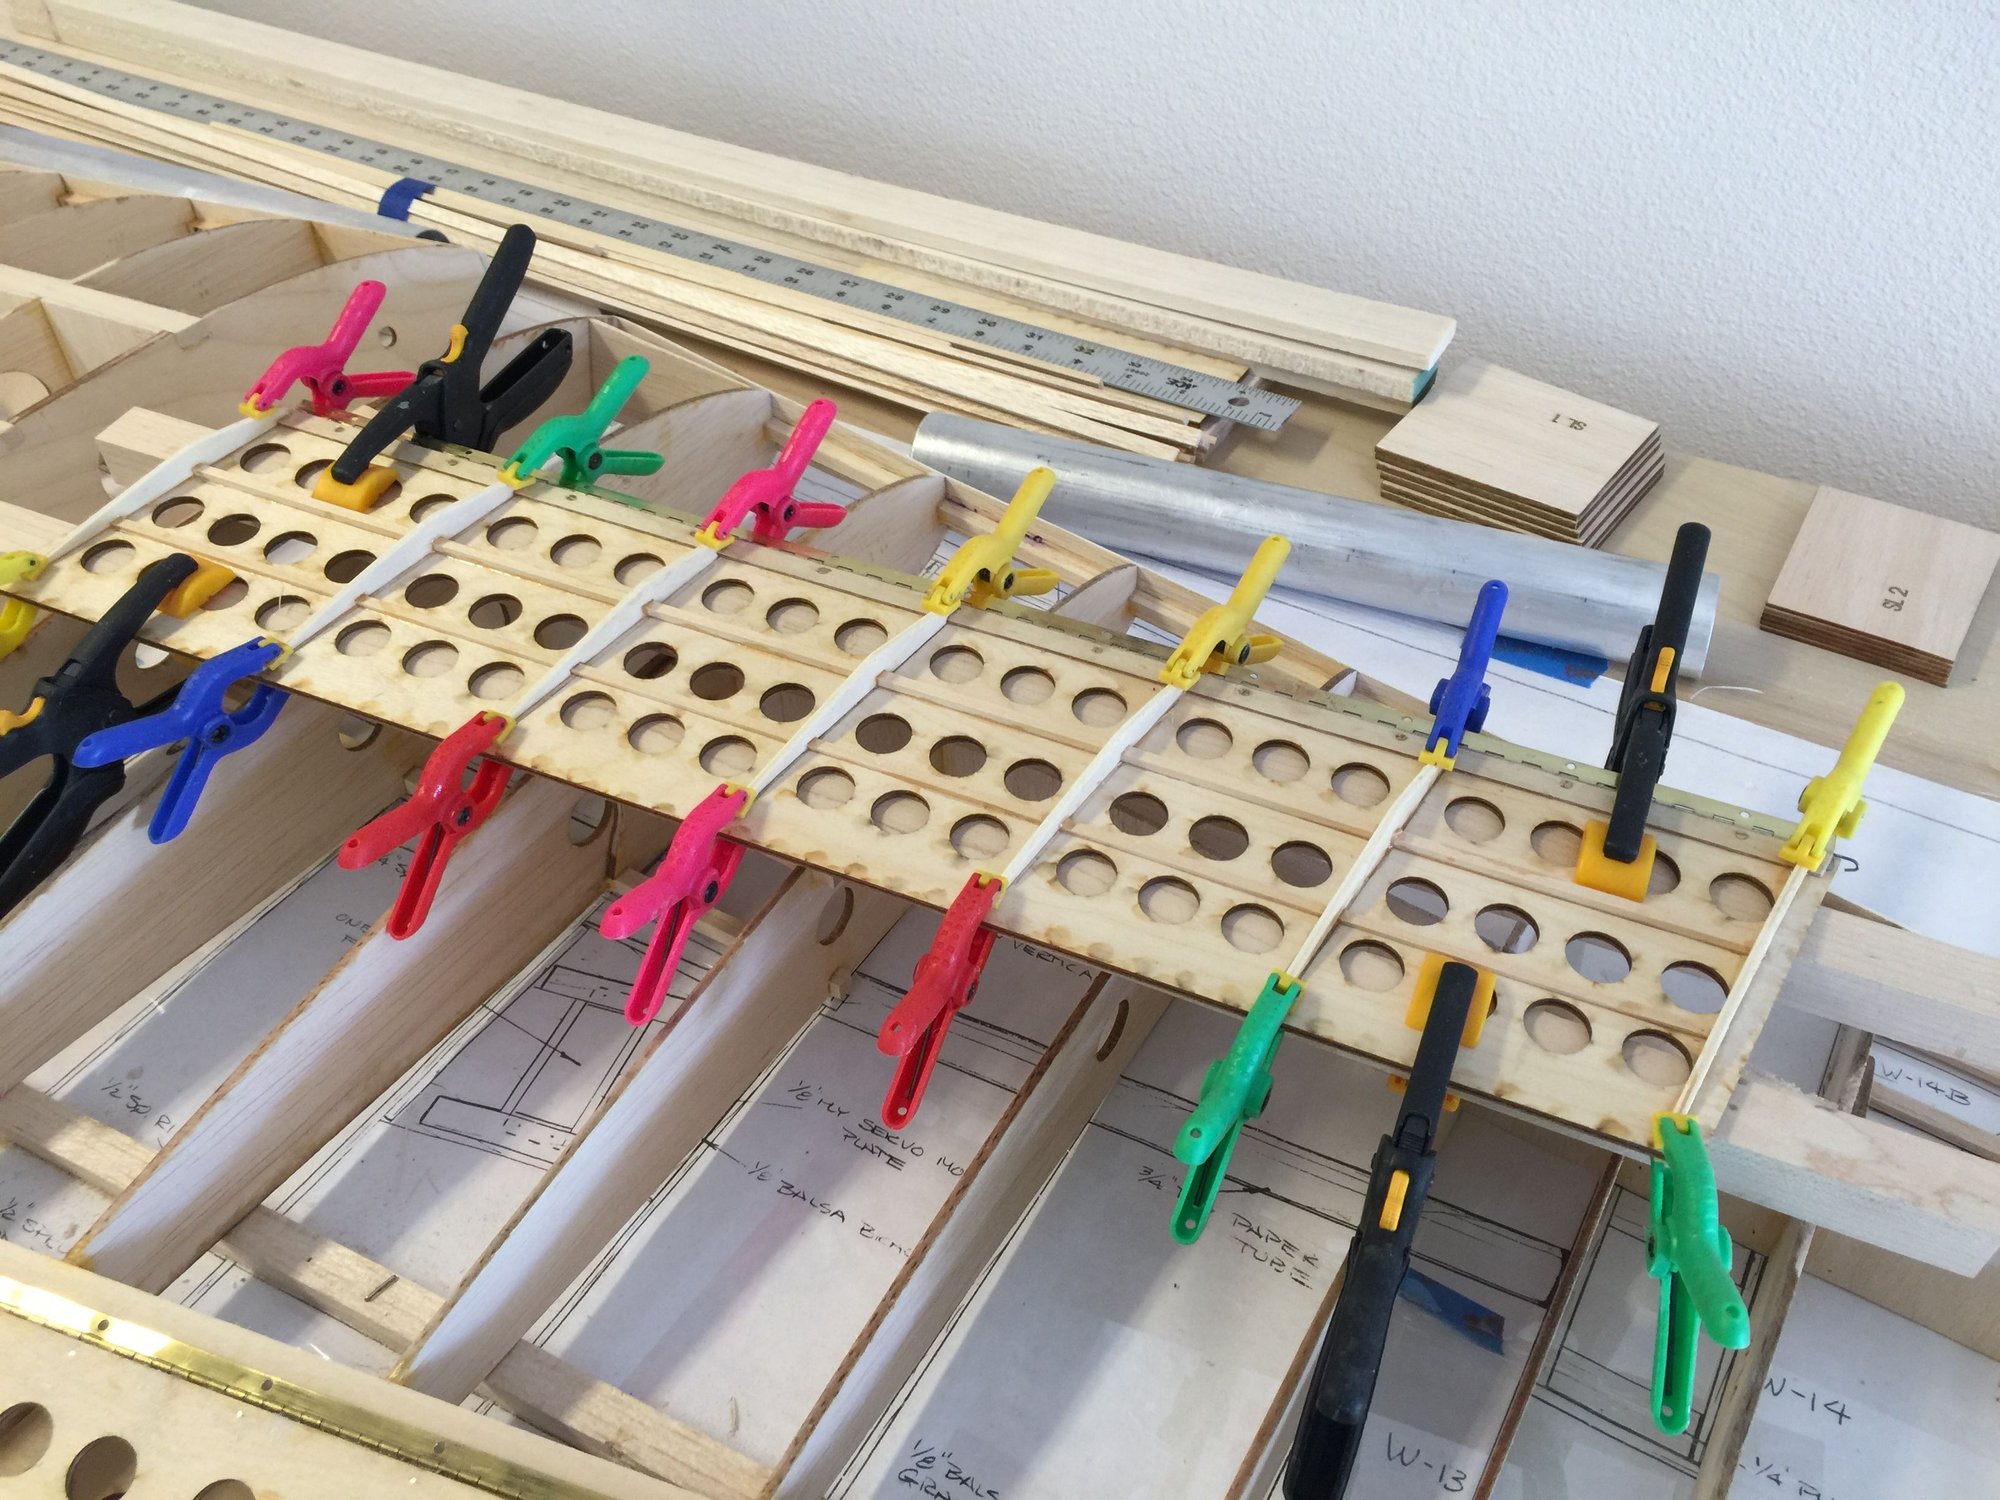
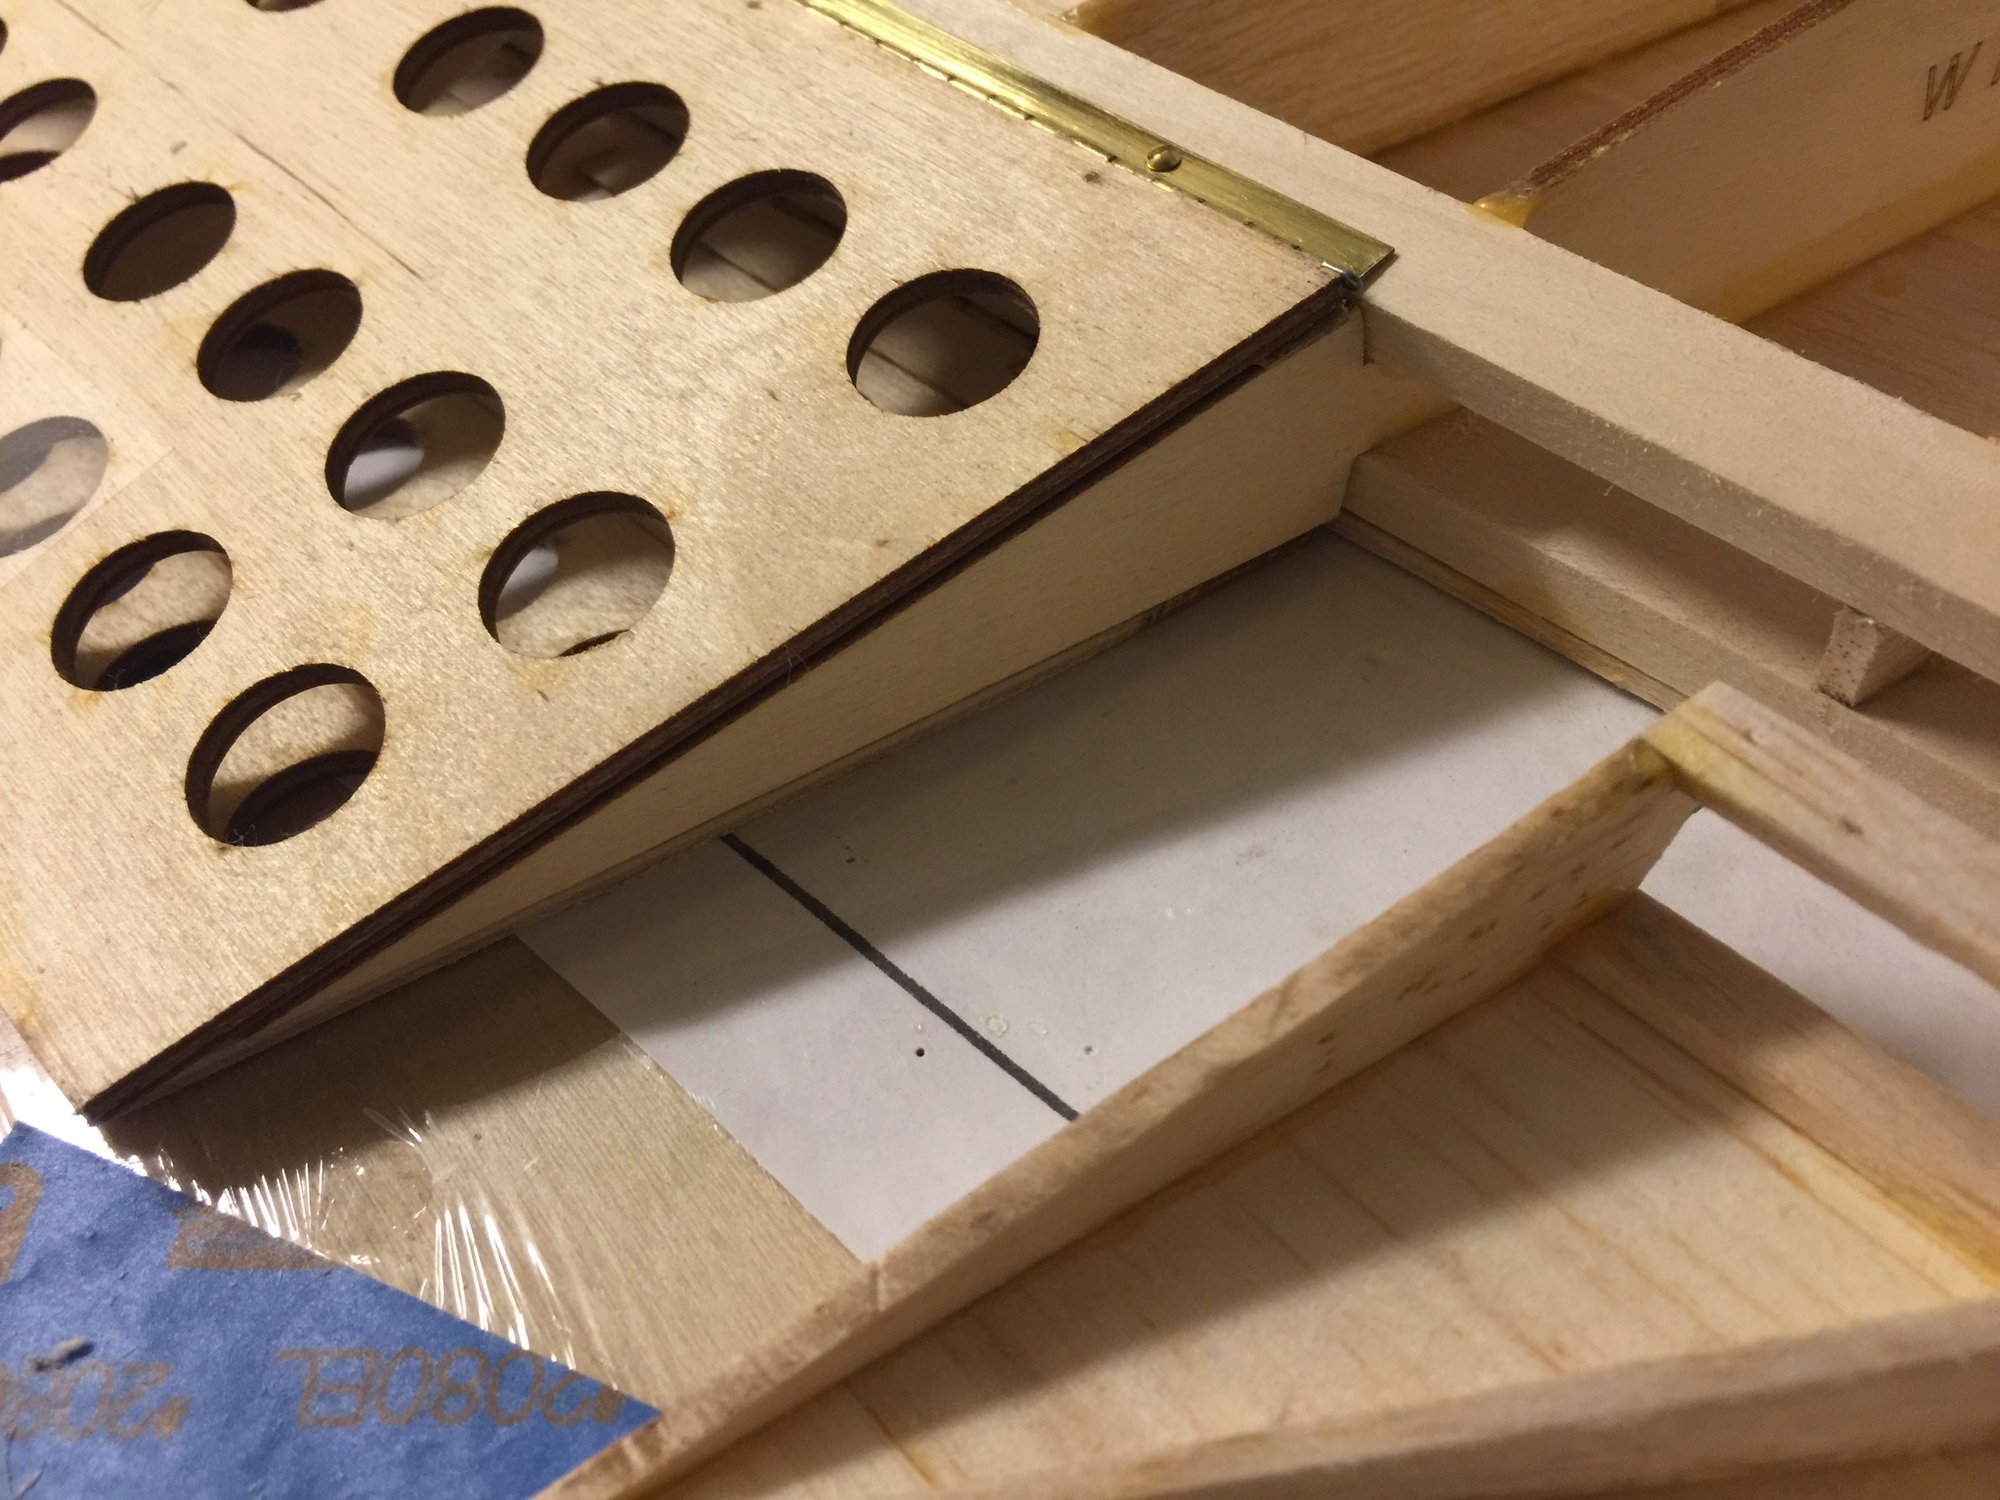
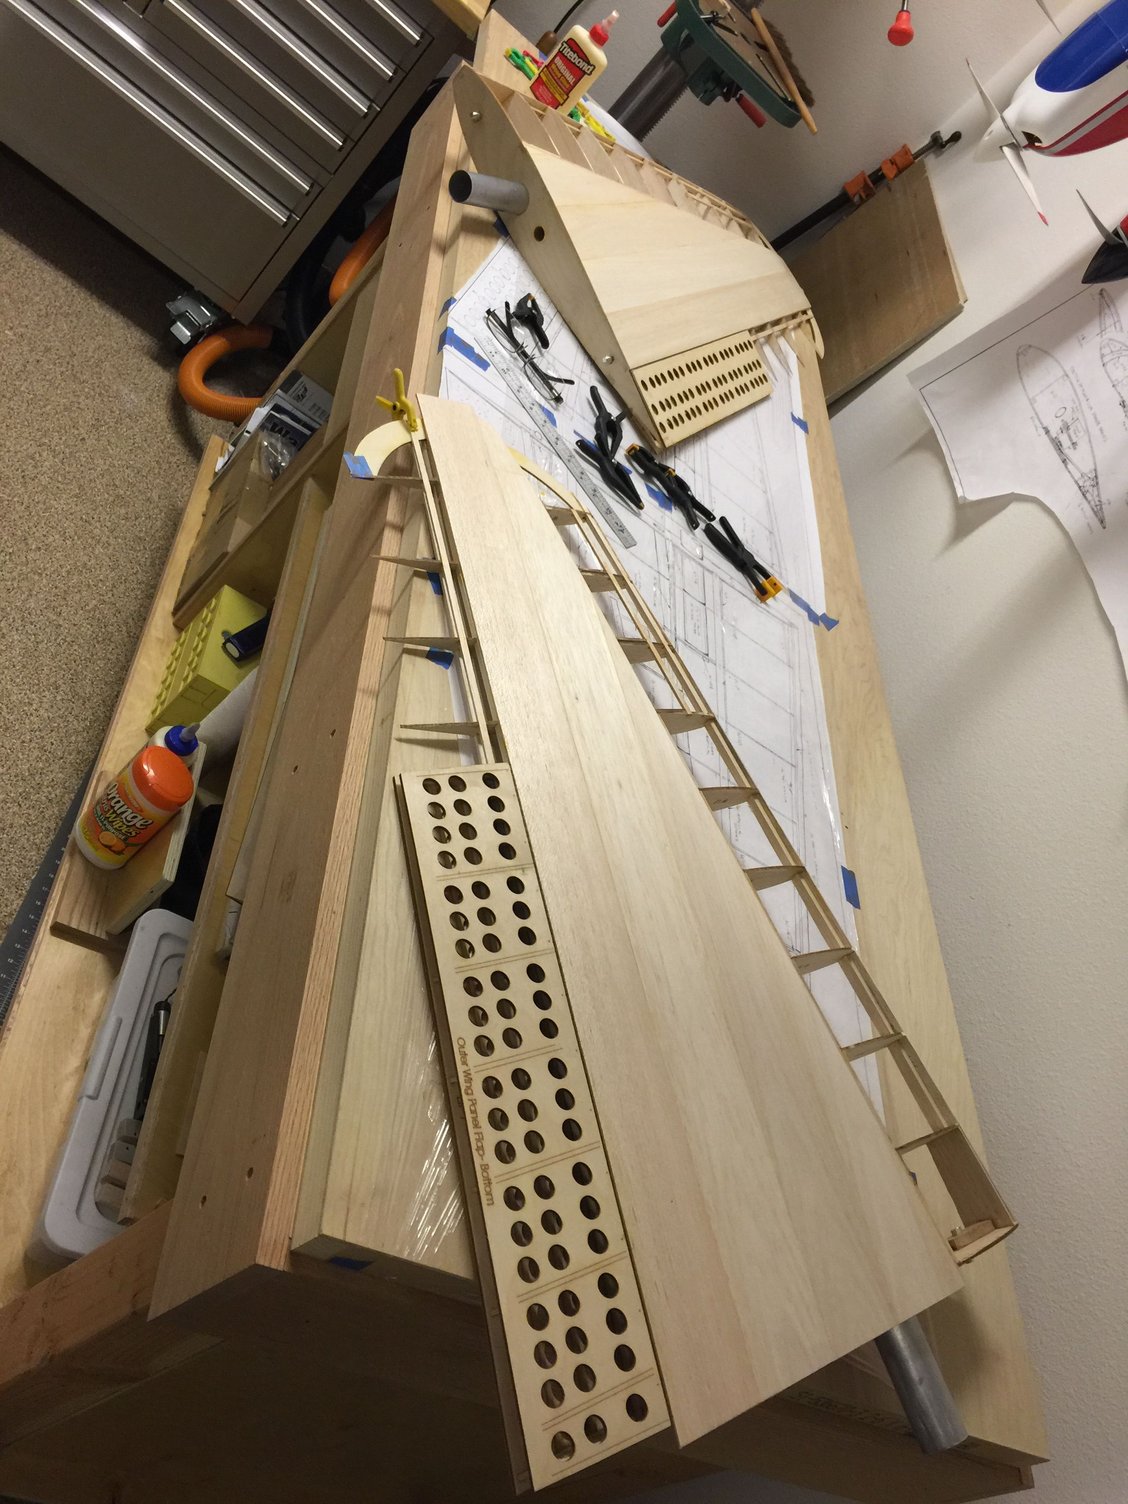
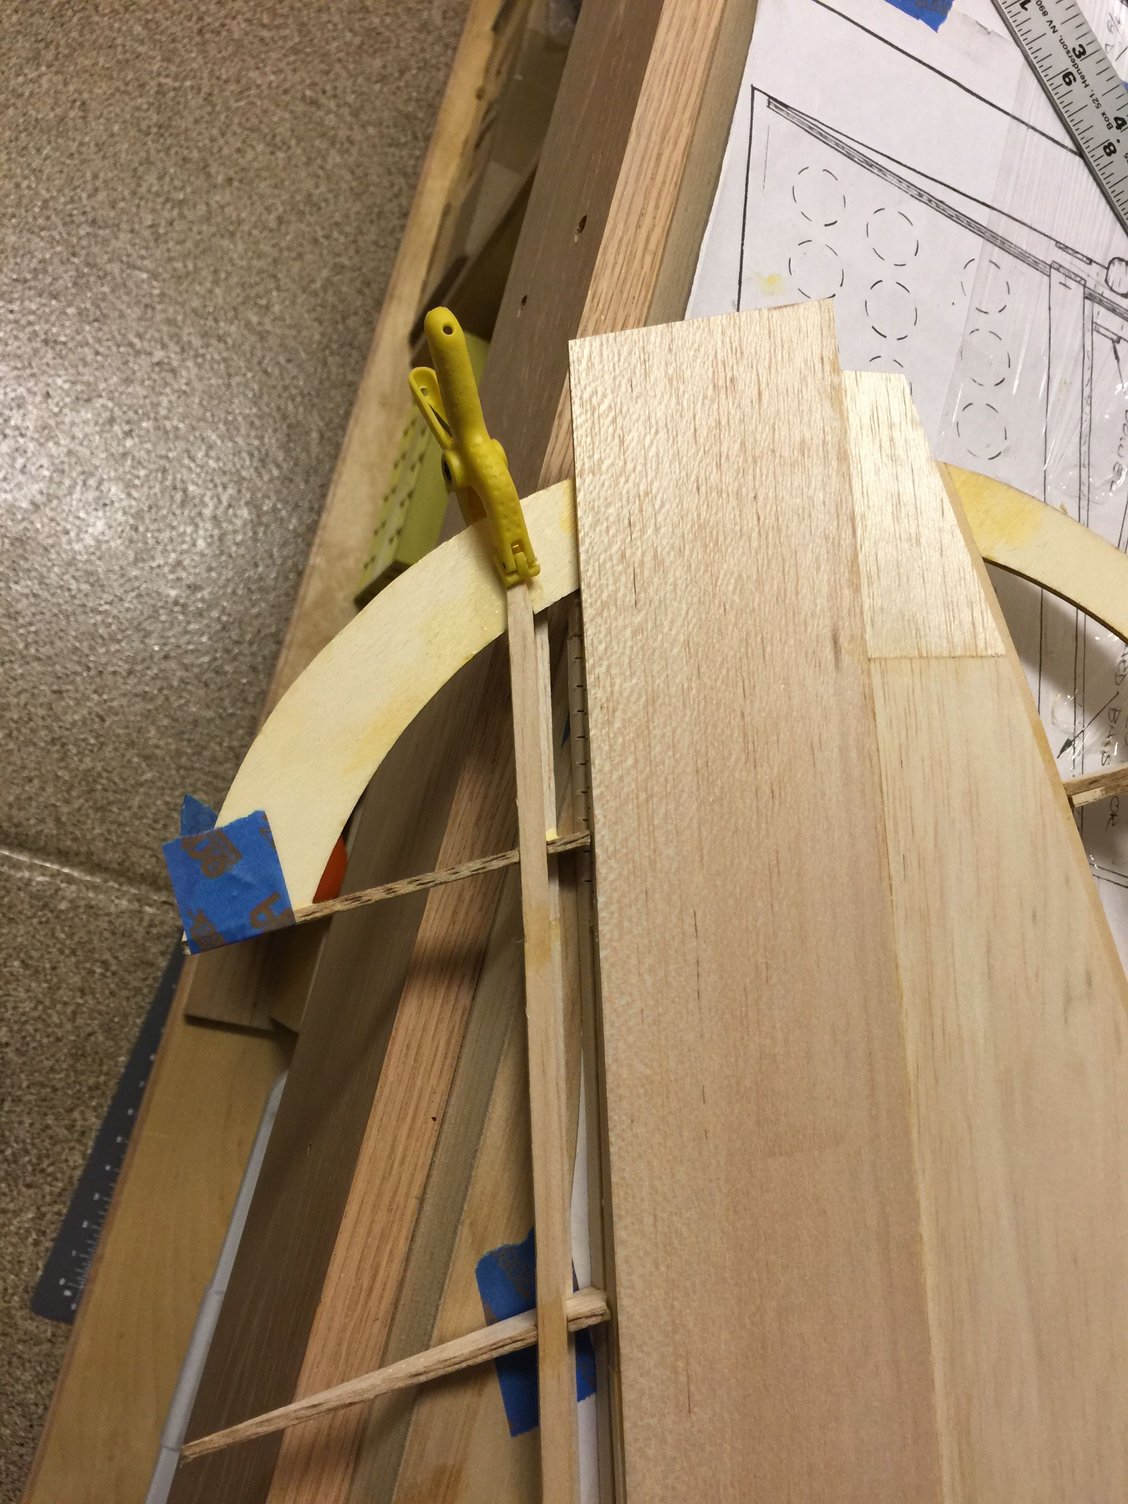
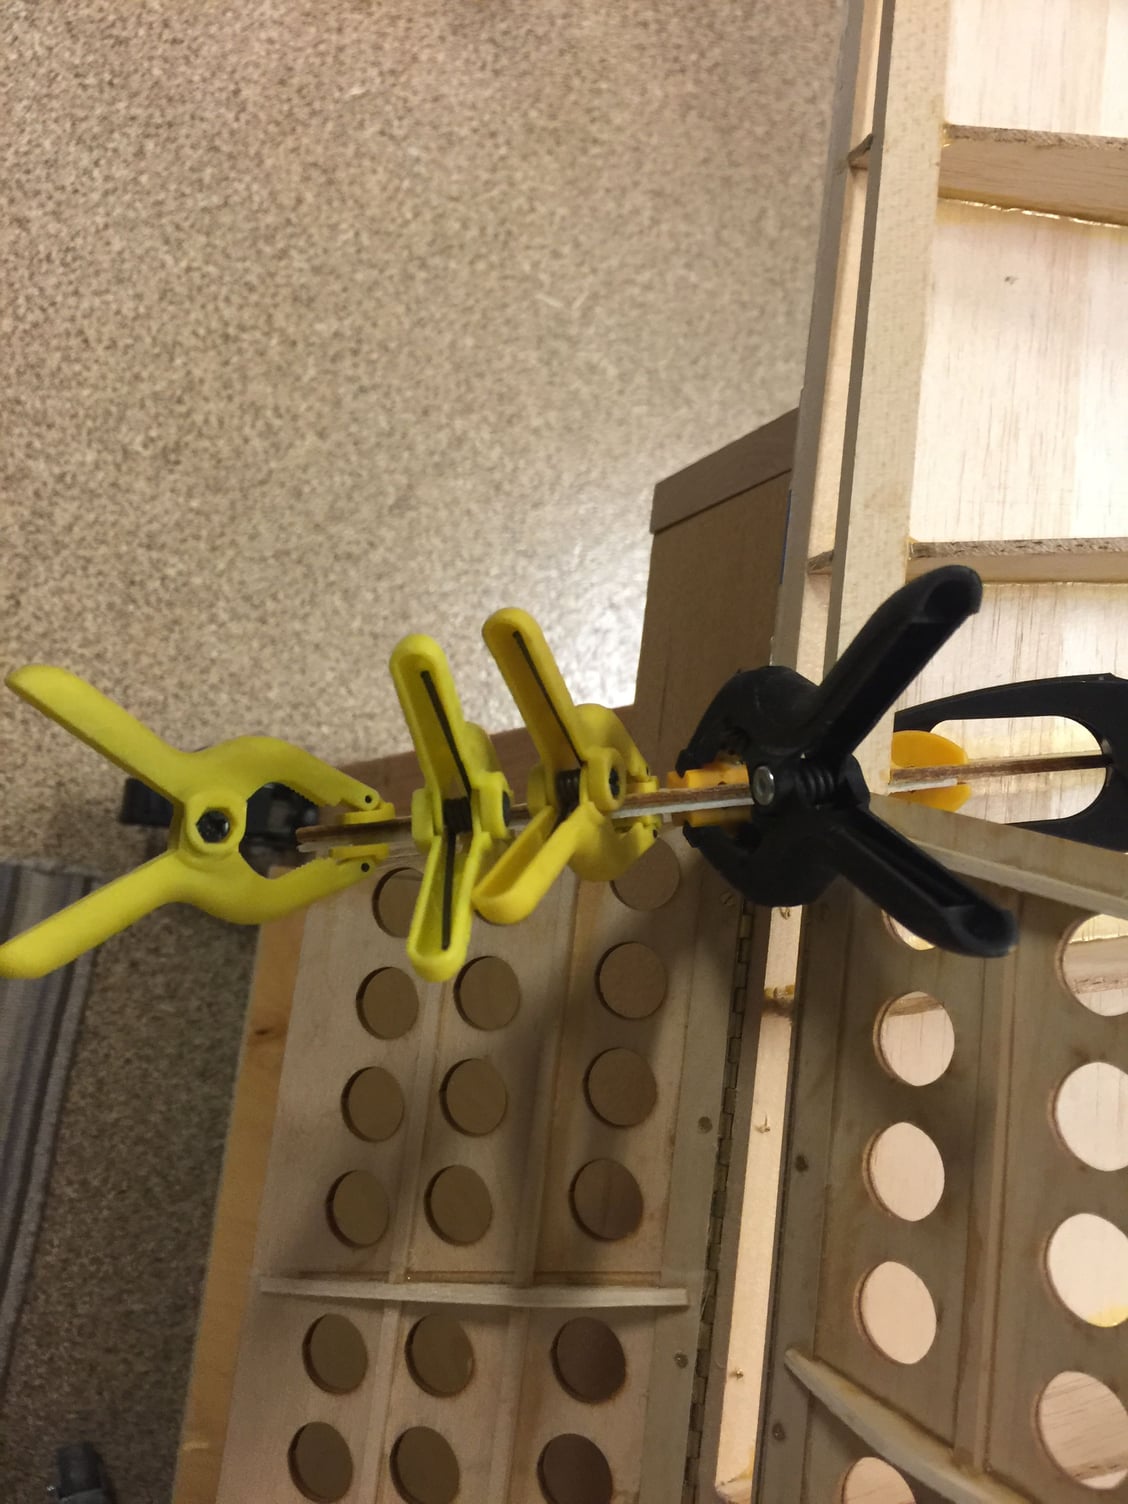
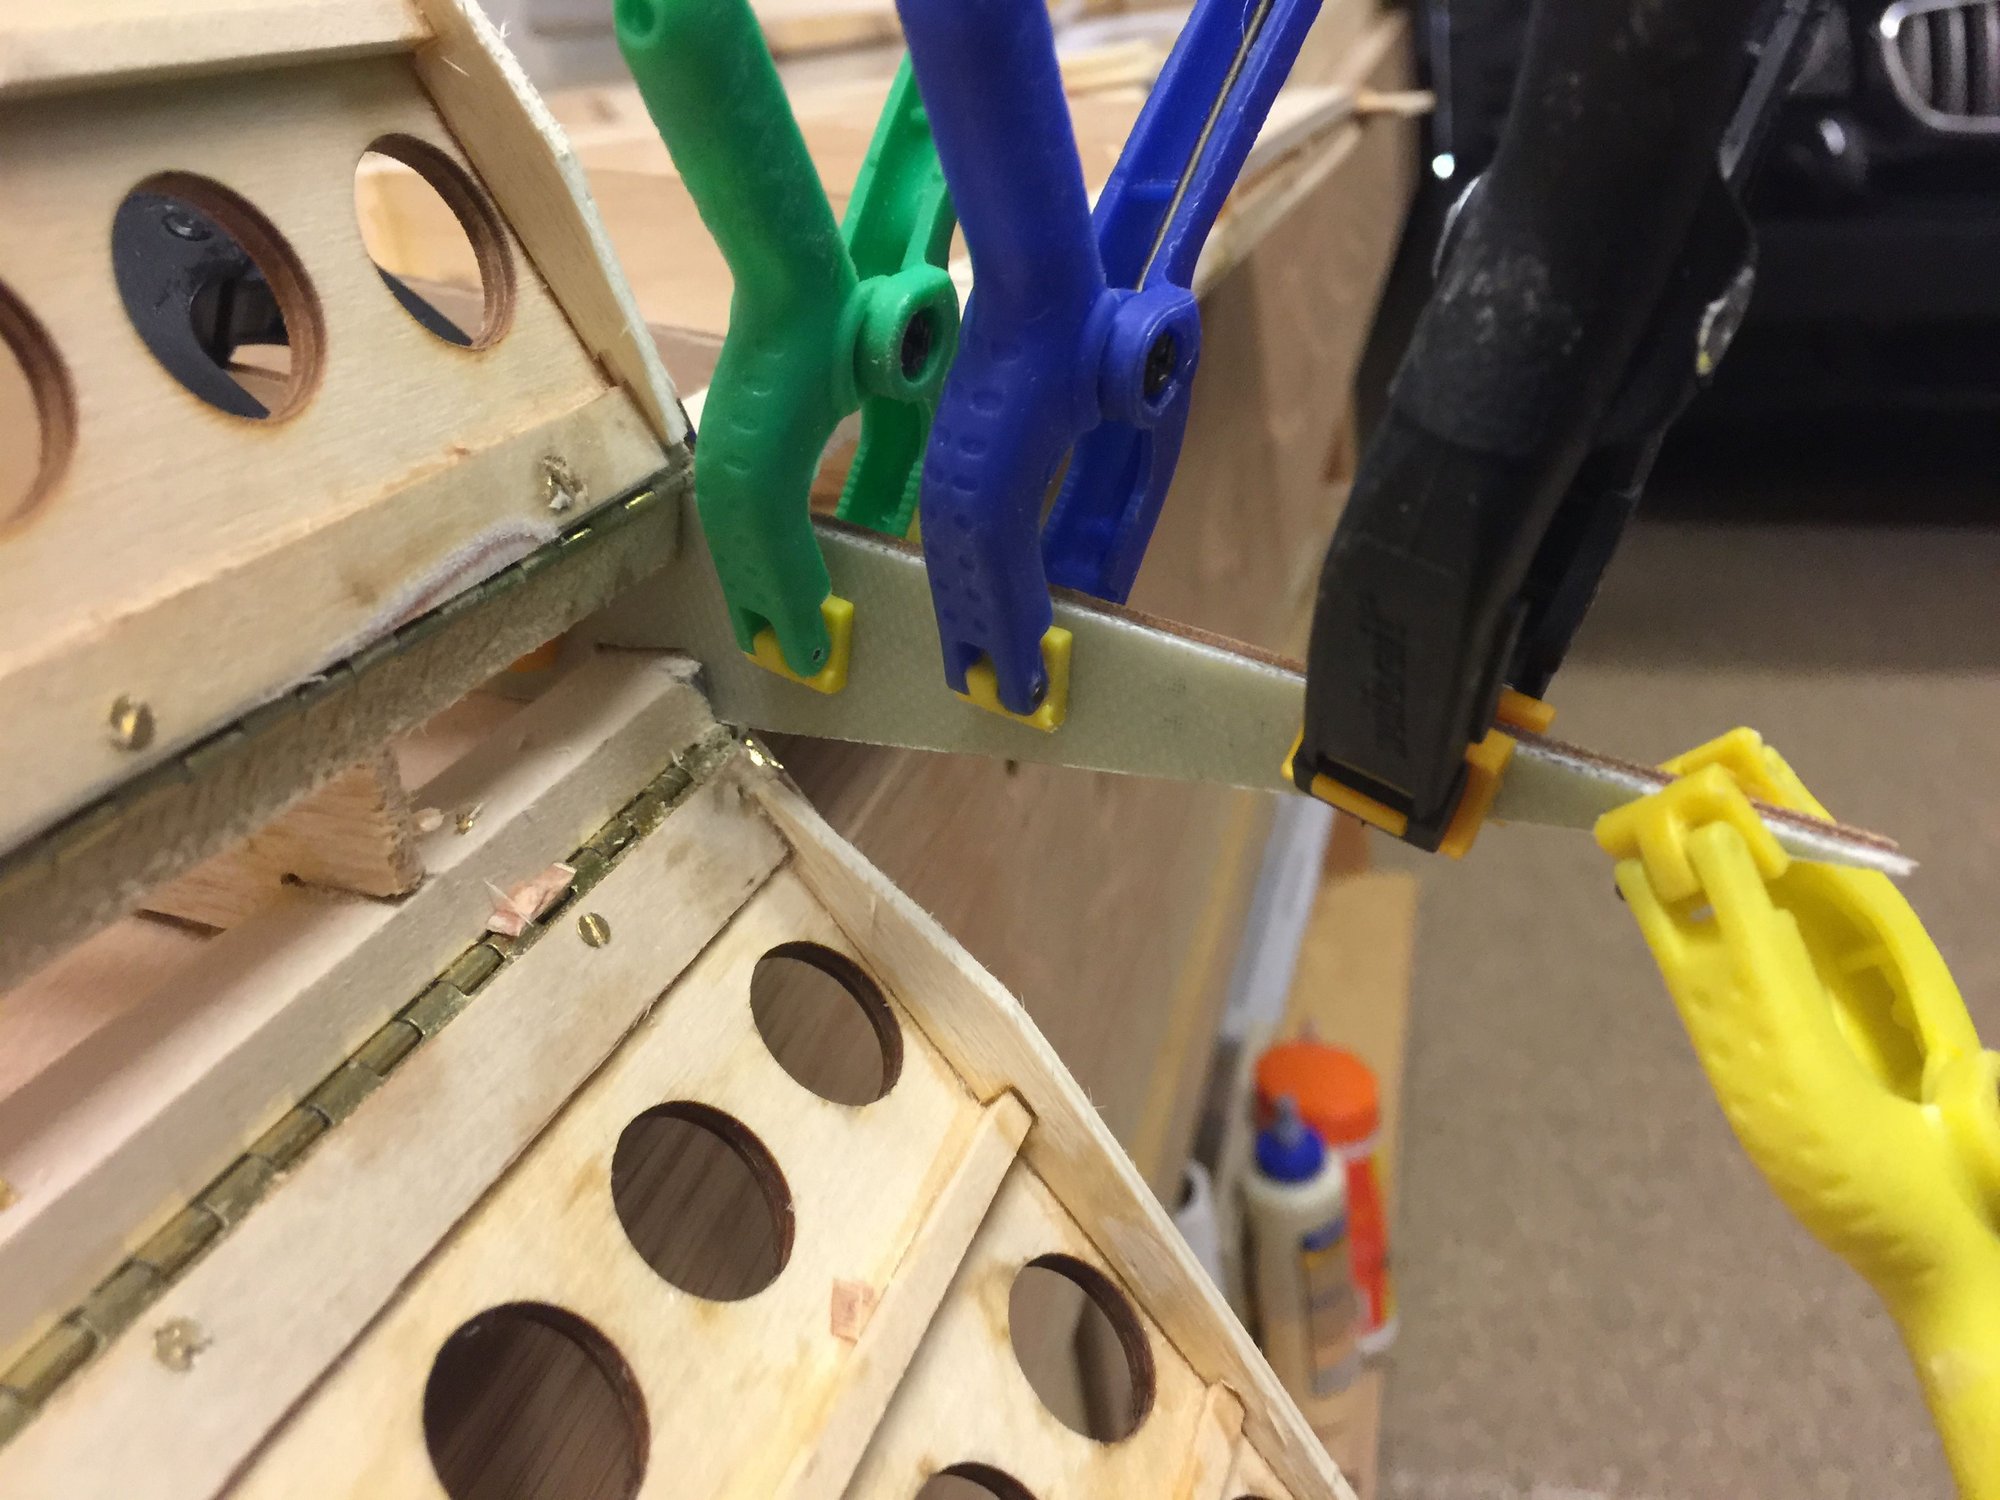
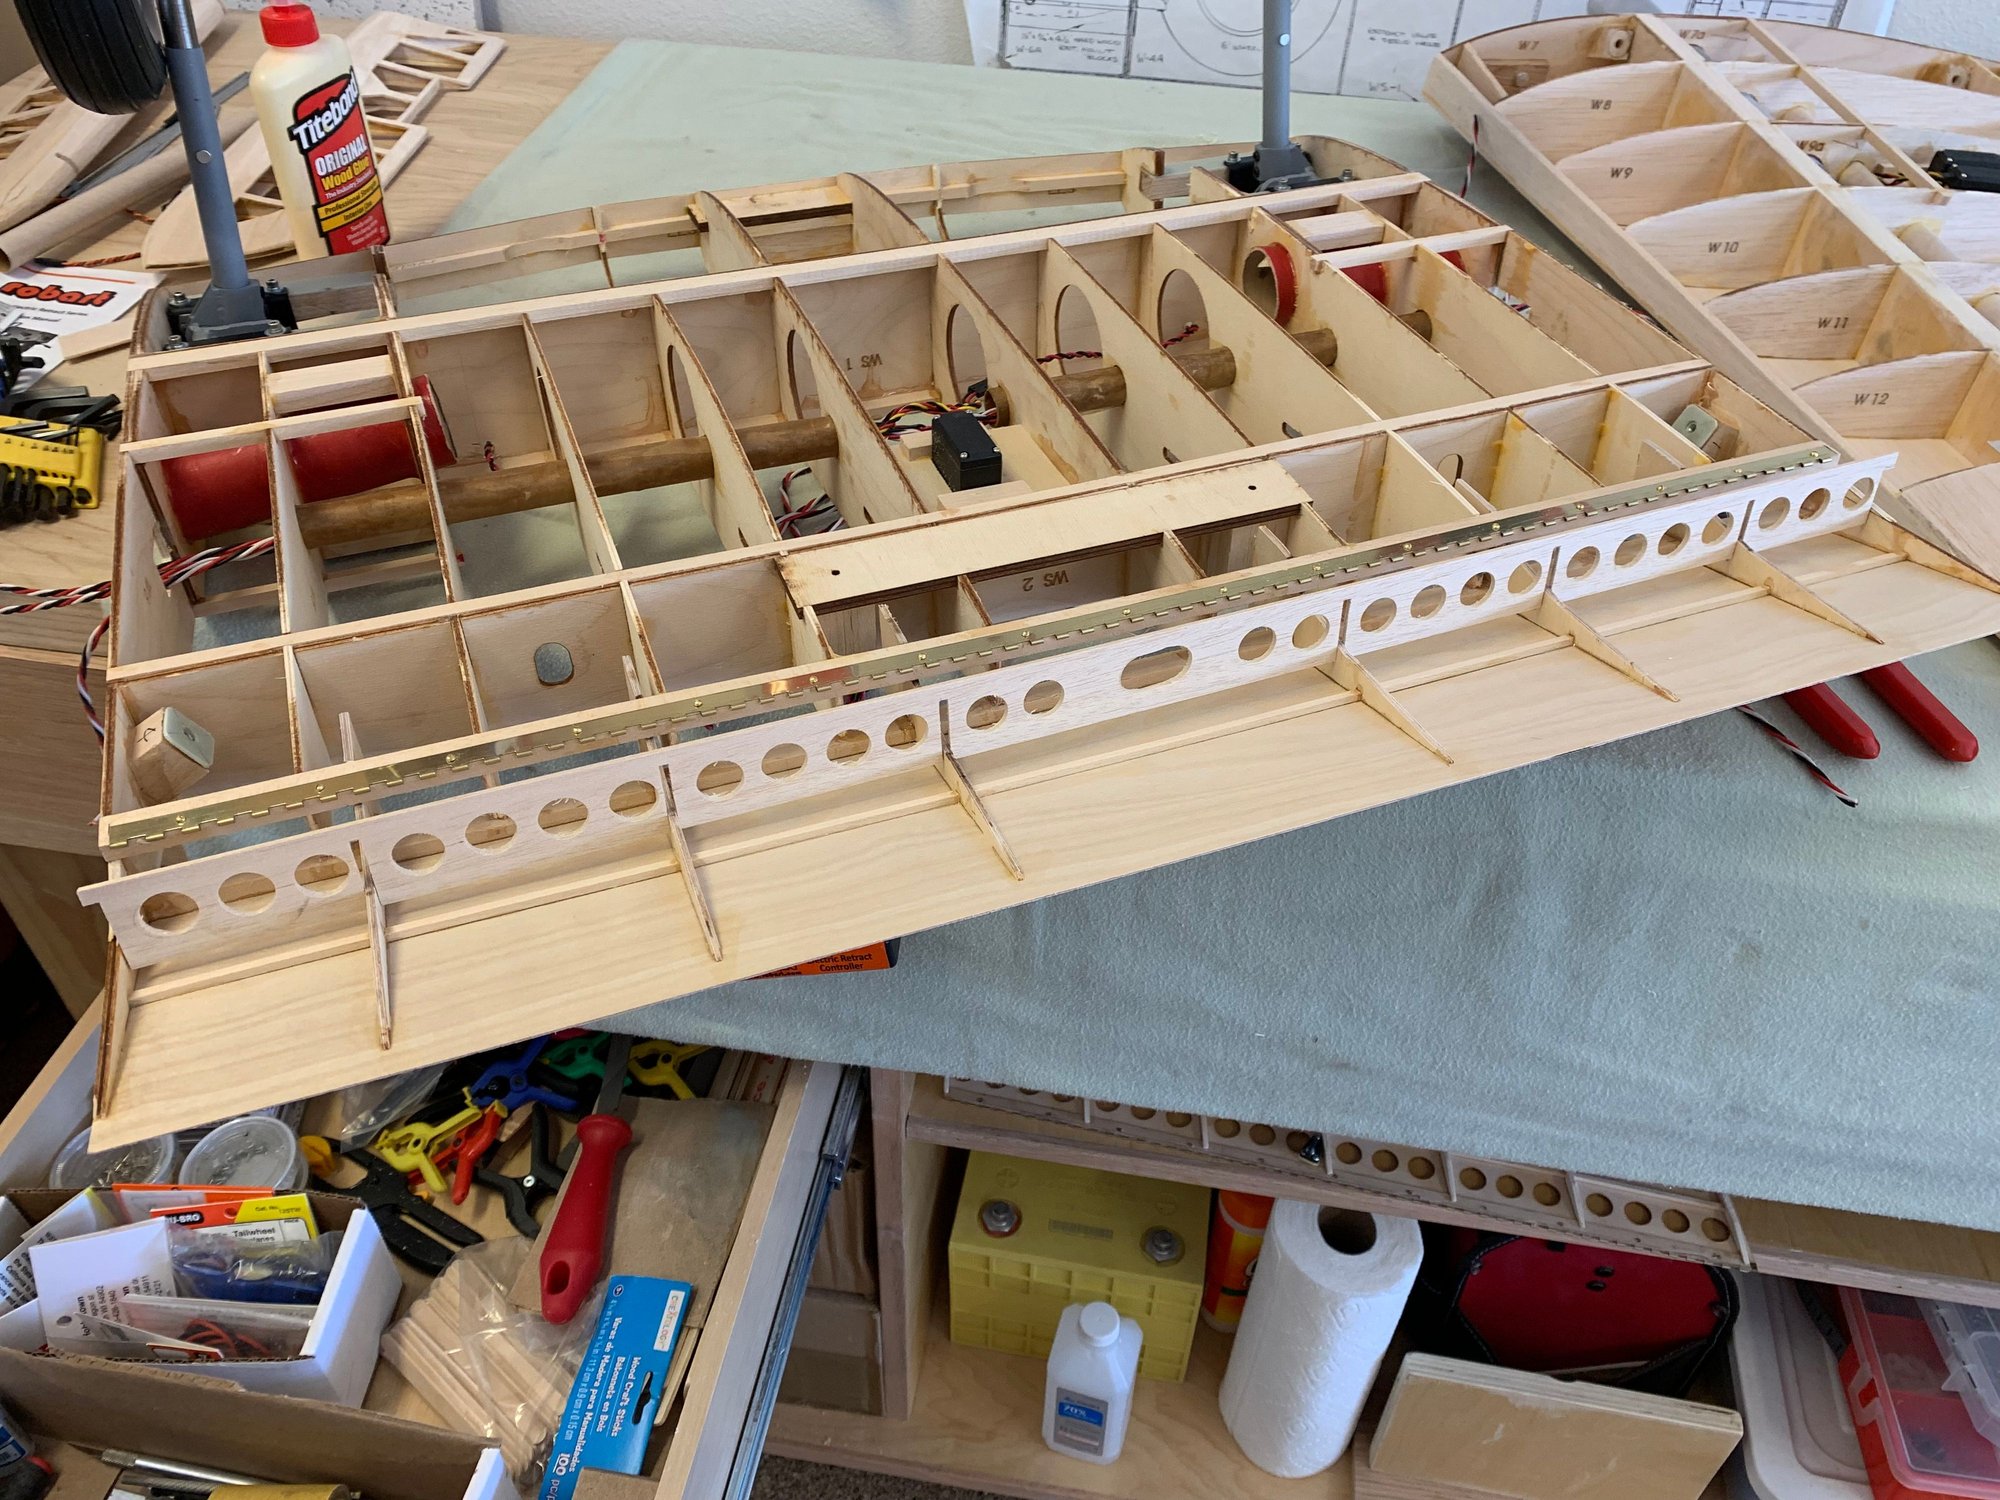
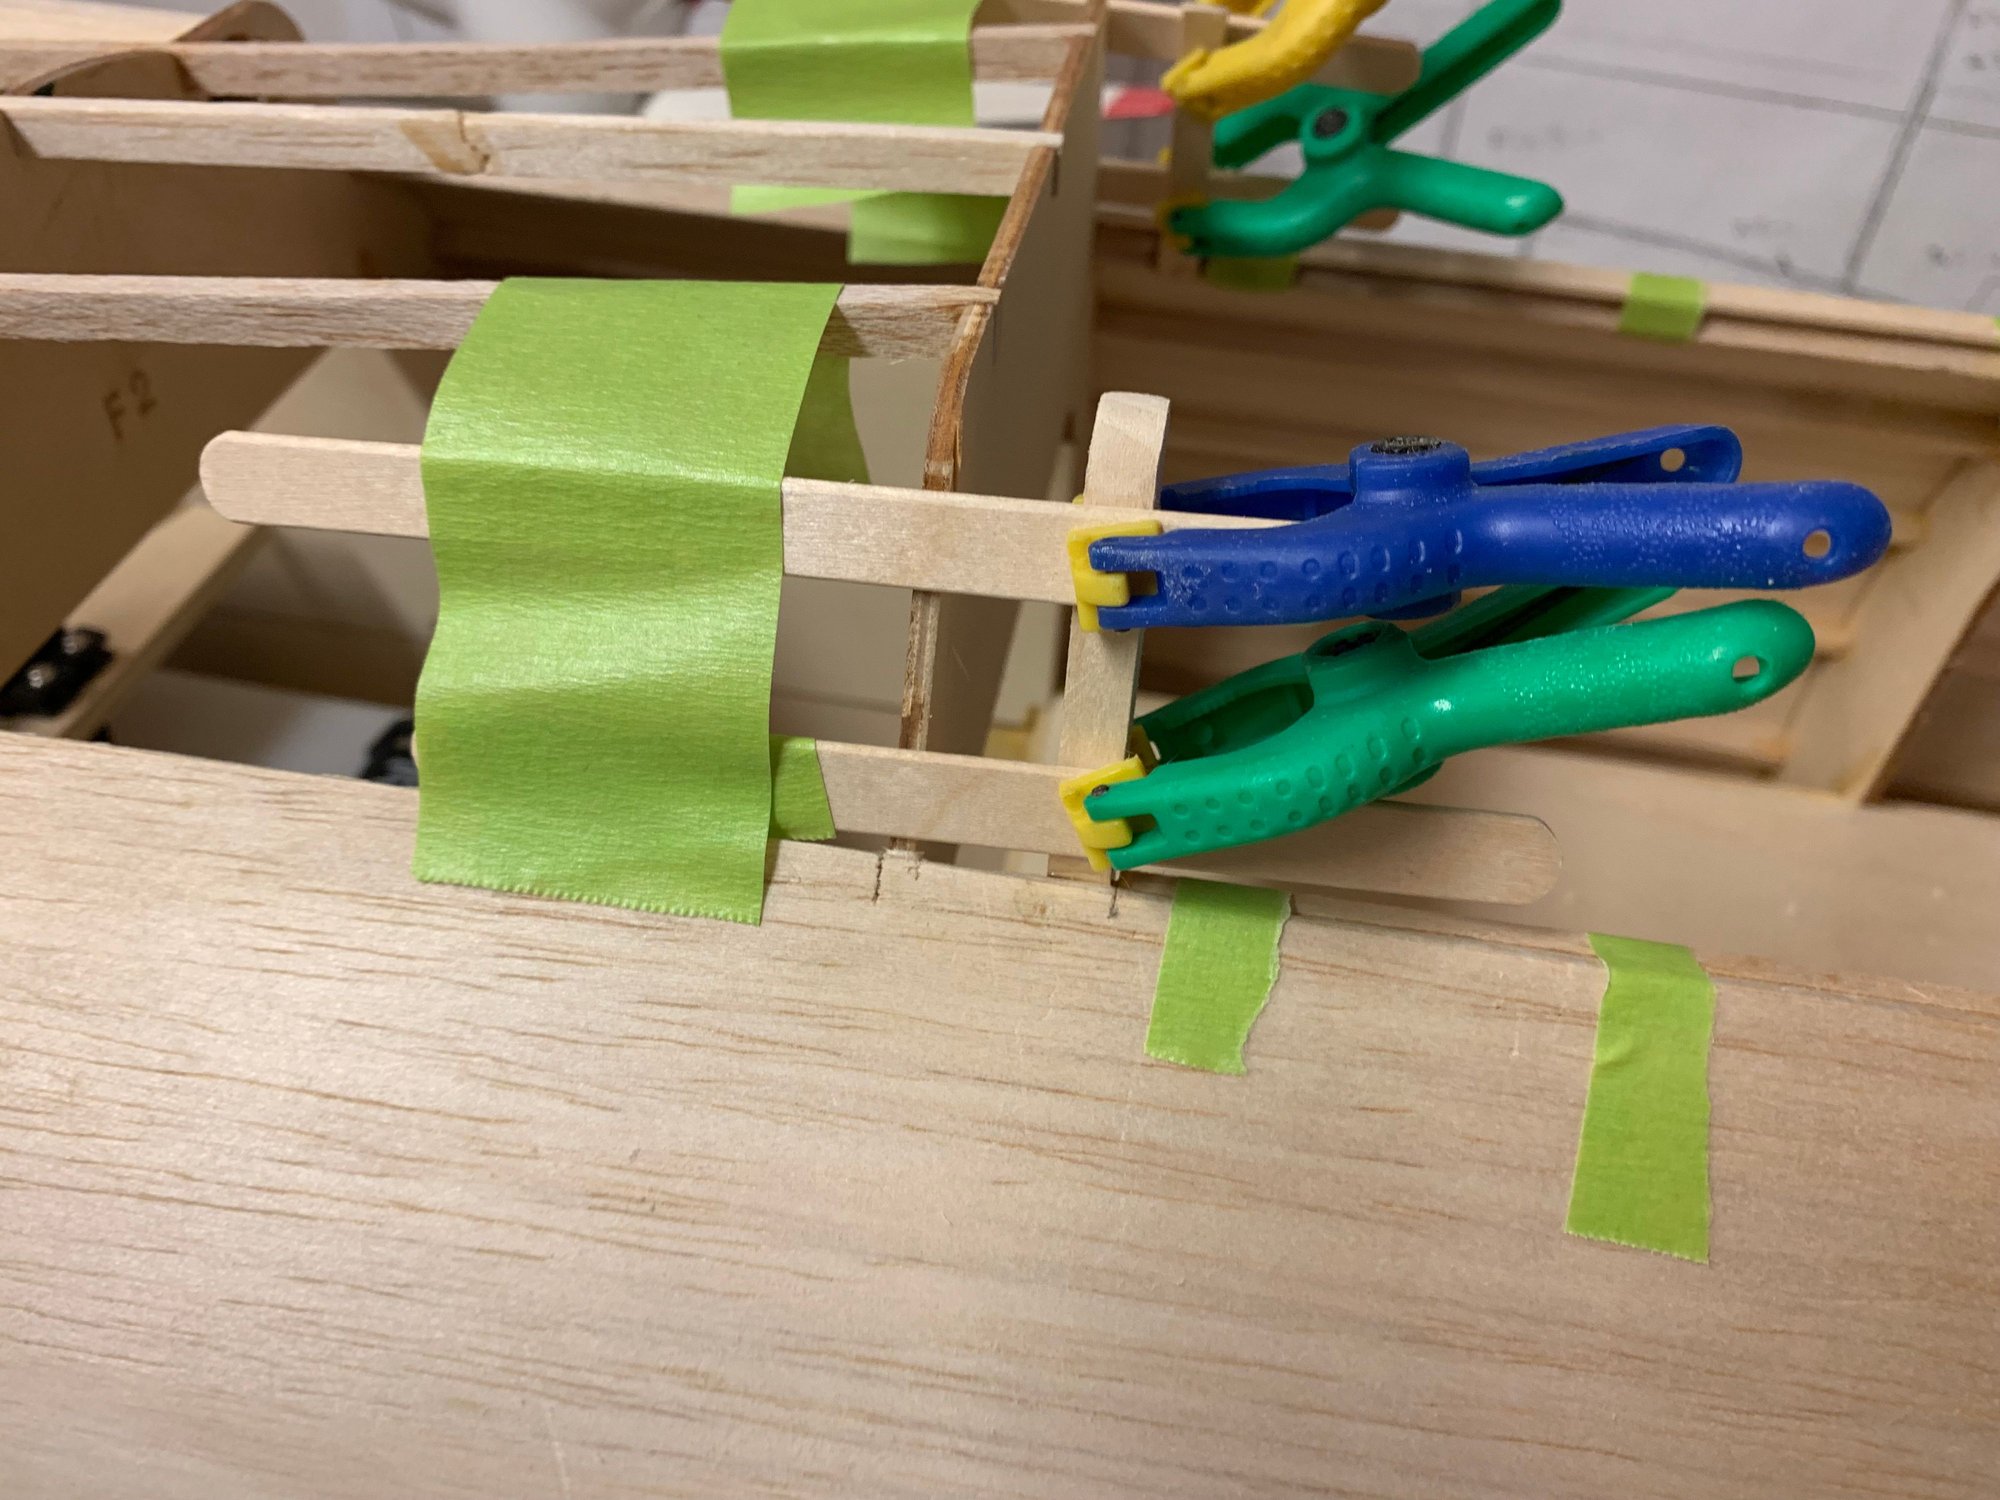
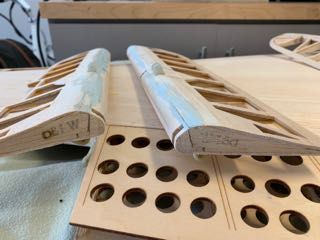
I also finished the fuse and the center section up to the point where I needed to deal with other issues. One was the tail linkages - still a TBD. The other was to get the outer wing panels assembled to the point of tube alignment. I wanted to have access to the mating ribs so I could clamp, if necessary. I kept the end ribs straight be clamping hardwood to each.
Last edited by BatteryBob; 08-03-2018 at 03:48 PM.
08-03-2018, 04:01 PM
#29
Thread Starter
Join Date: Sep 2014
Location: Scottsdale, AZ
Posts: 169
Likes: 0
Received 0 Likes
on
0 Posts
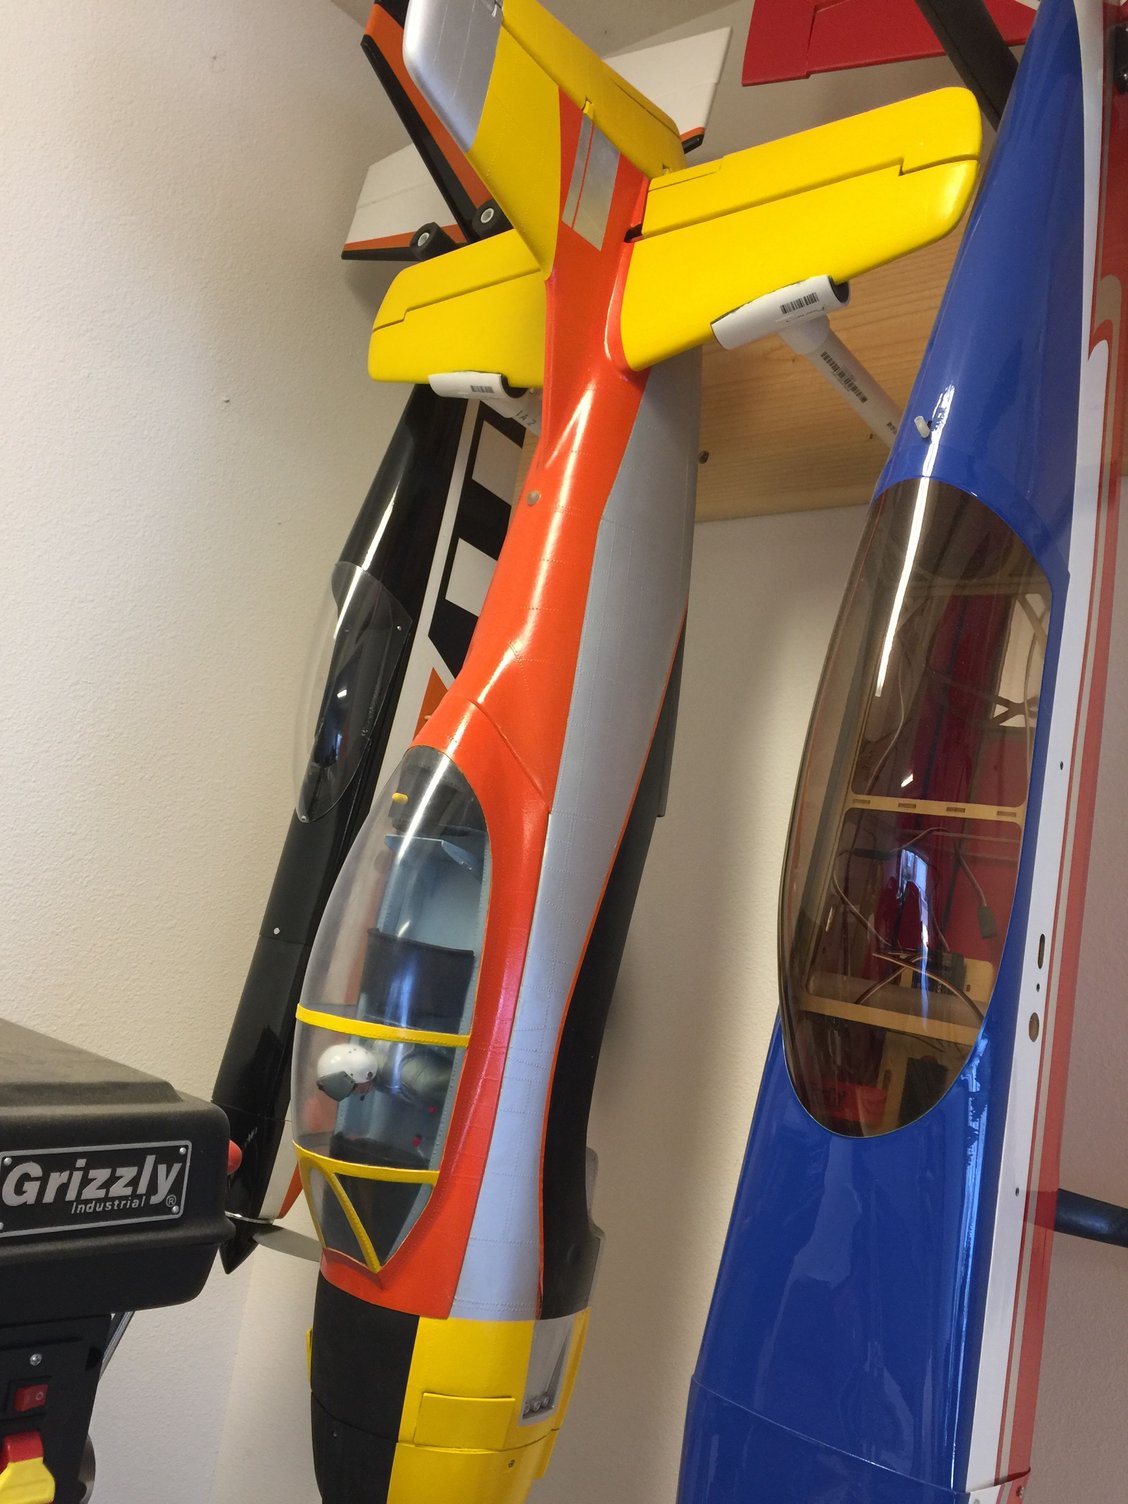

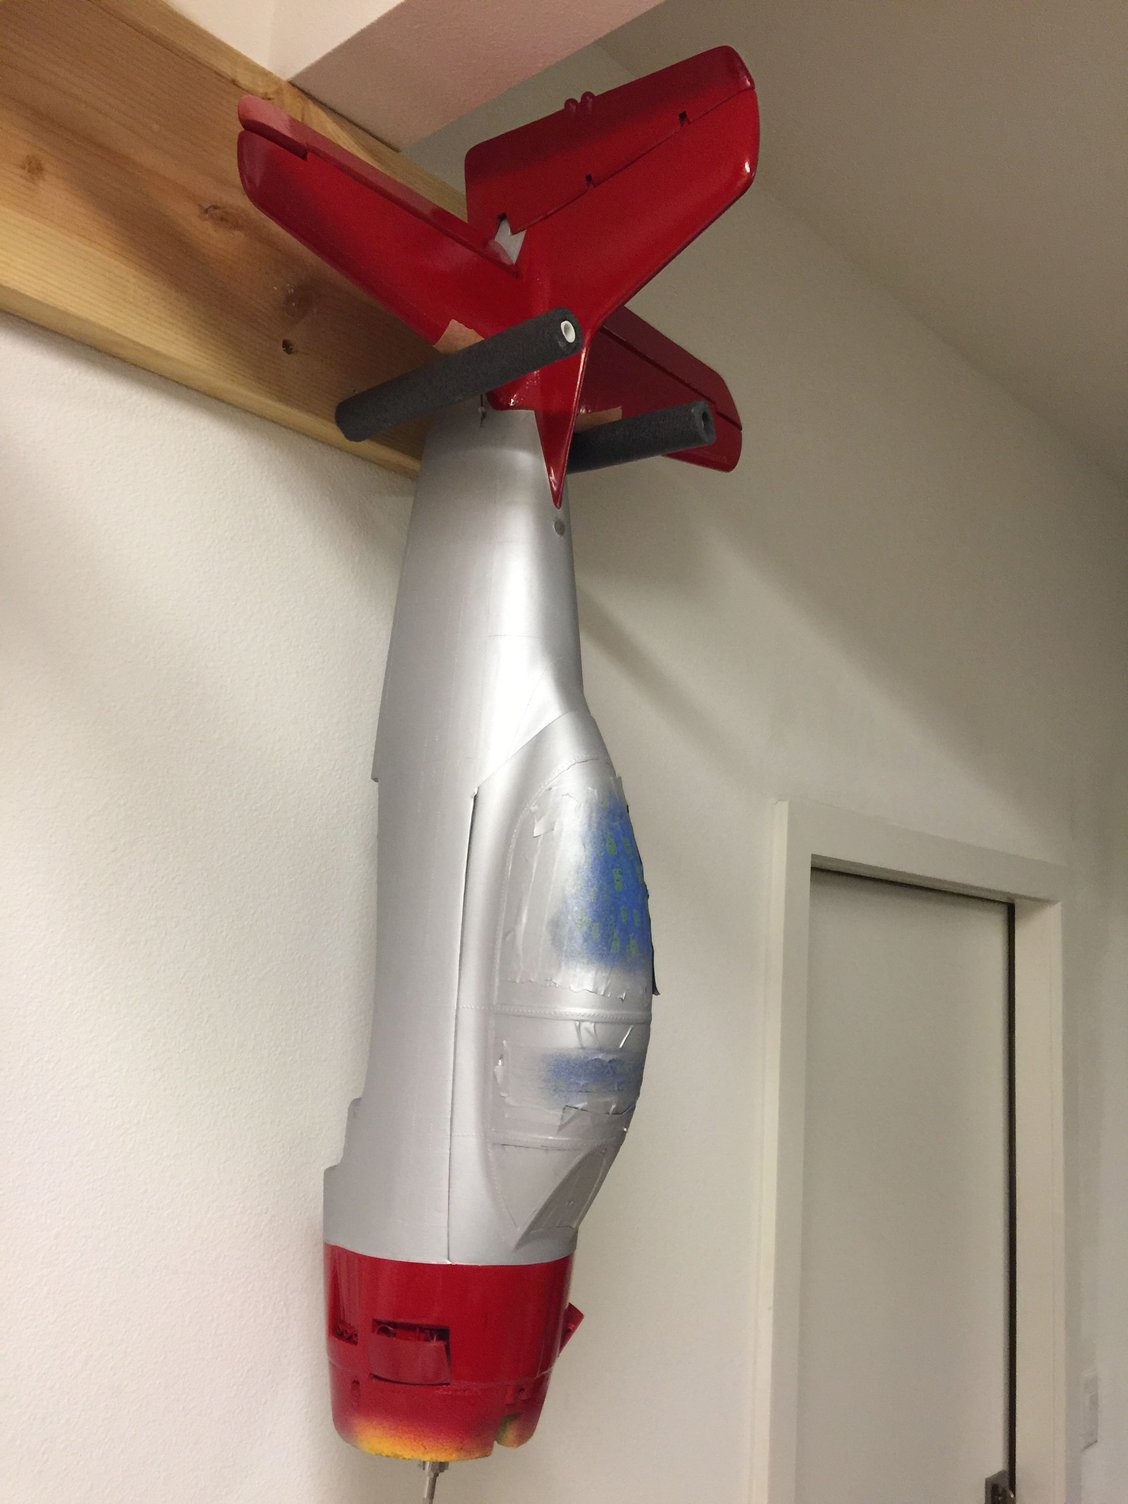
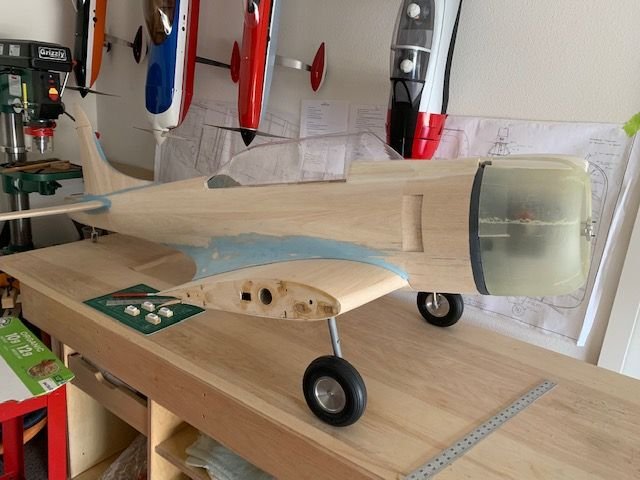
I got a little diverted on another project. I bought a second FMS T28 and decided to finish and glass the plane in a similar color scheme that I did in Oracol. Photos show how that turned out. I still need to do the markings, but this was some good practice for the SBD. I chose to put in panel lines and rivets just for fun. I really didn't like the film version and stripped this down and repeated the covering process using a different color scheme. All this being said, I learned a bit more about spraying and other finish techniques that will come in handy. I still need to learn more about the spray gun, particularly if I need to work with latex paints.
08-03-2018, 04:16 PM
#30
Thread Starter
Join Date: Sep 2014
Location: Scottsdale, AZ
Posts: 169
Likes: 0
Received 0 Likes
on
0 Posts
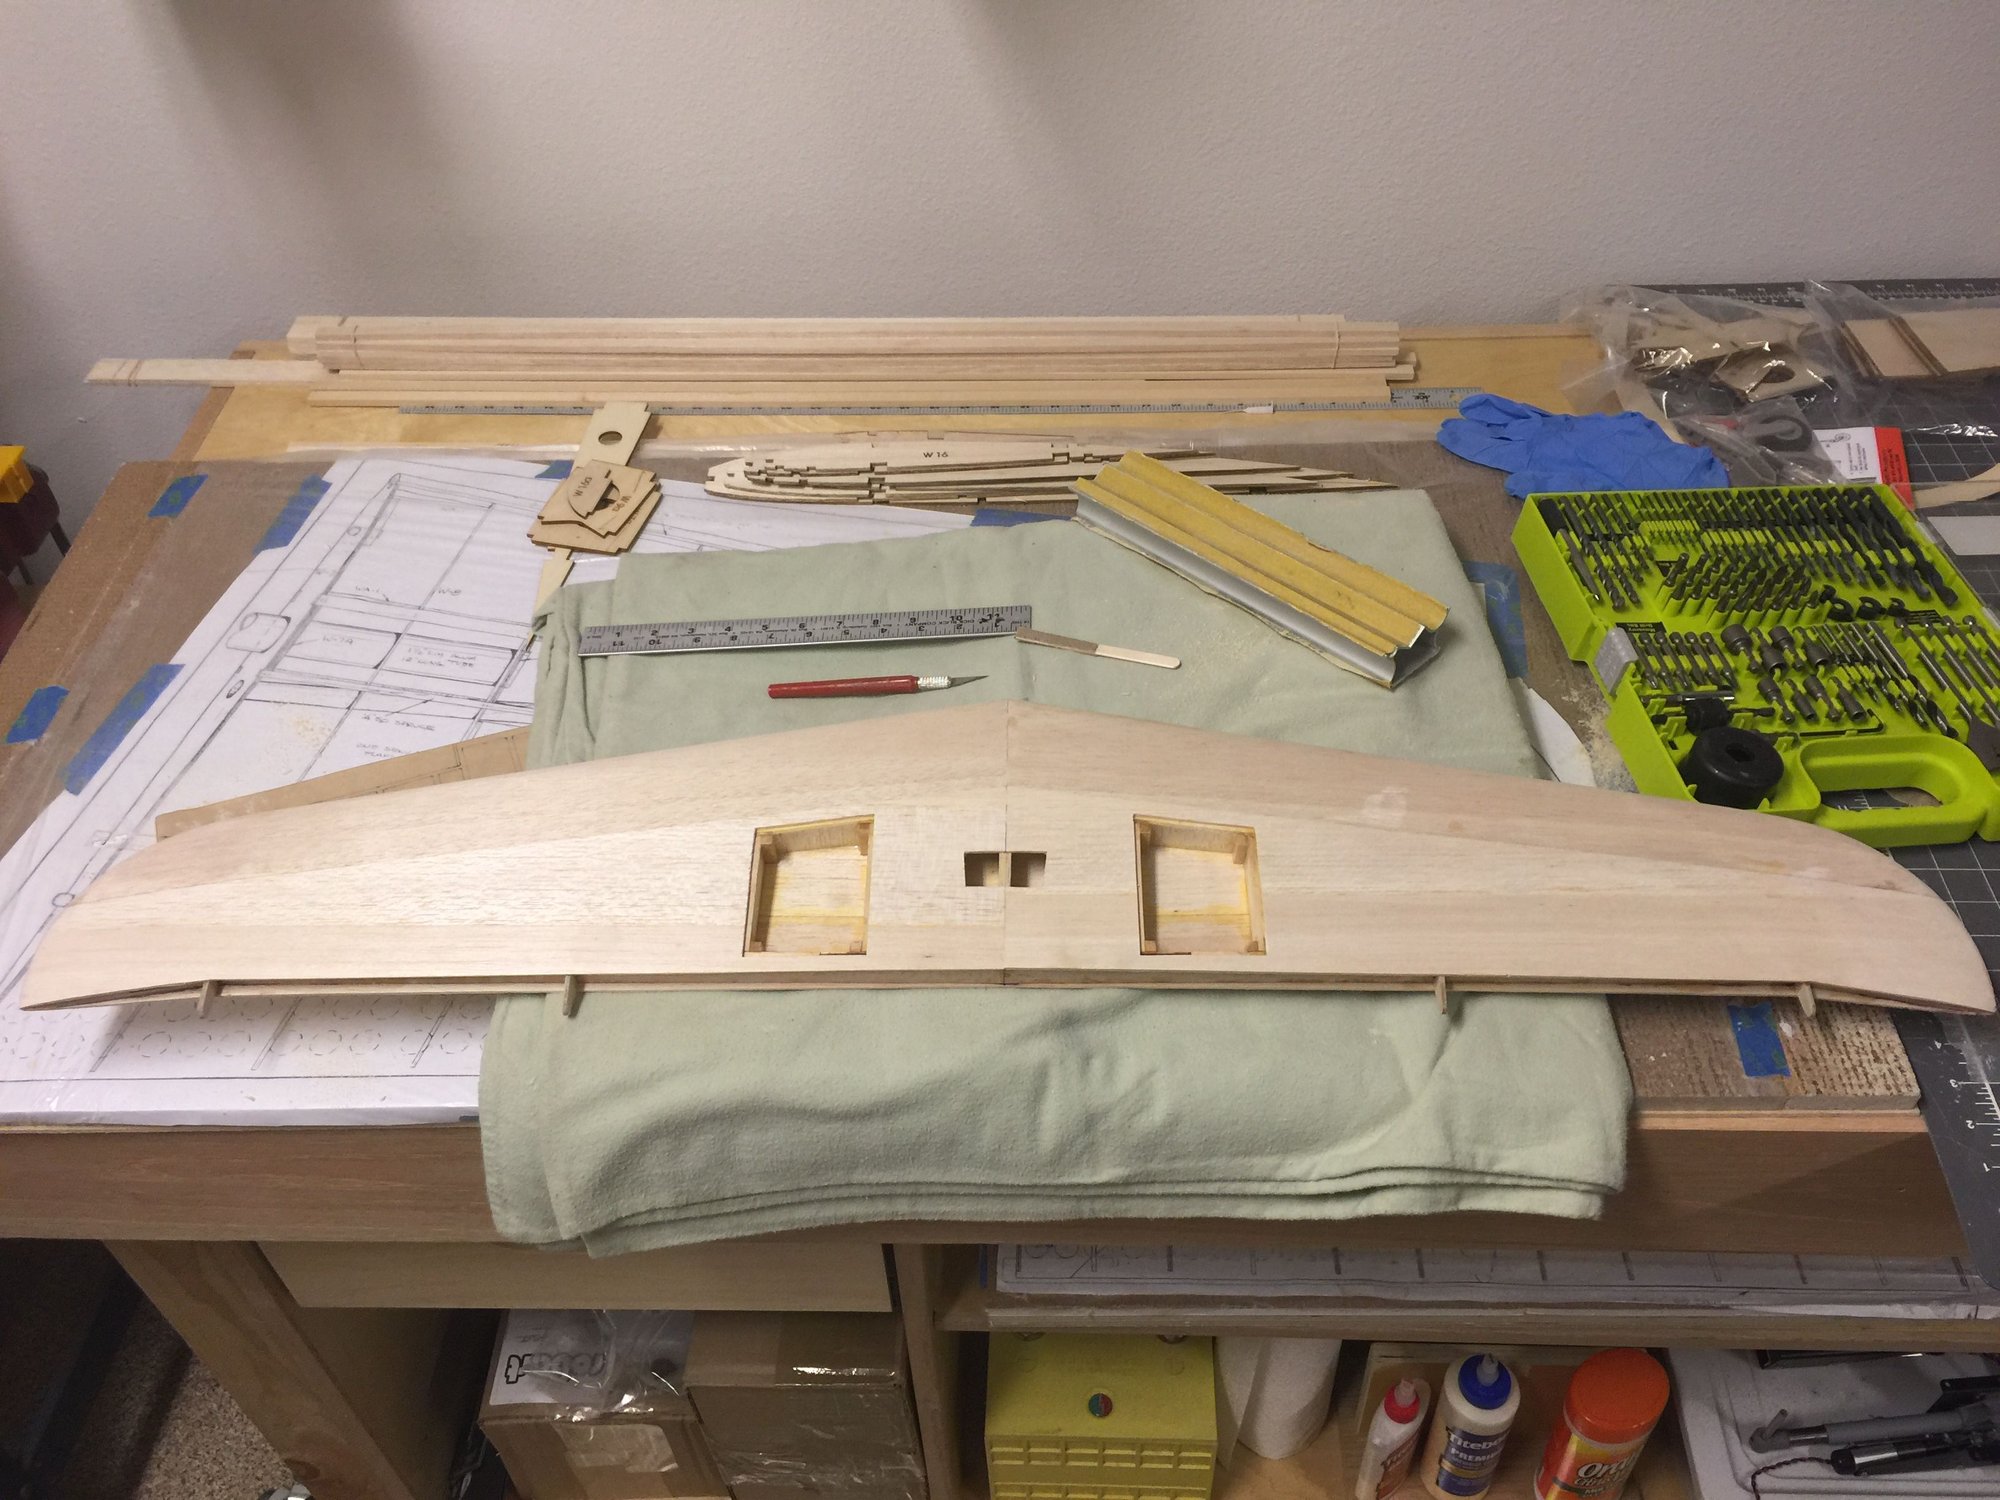
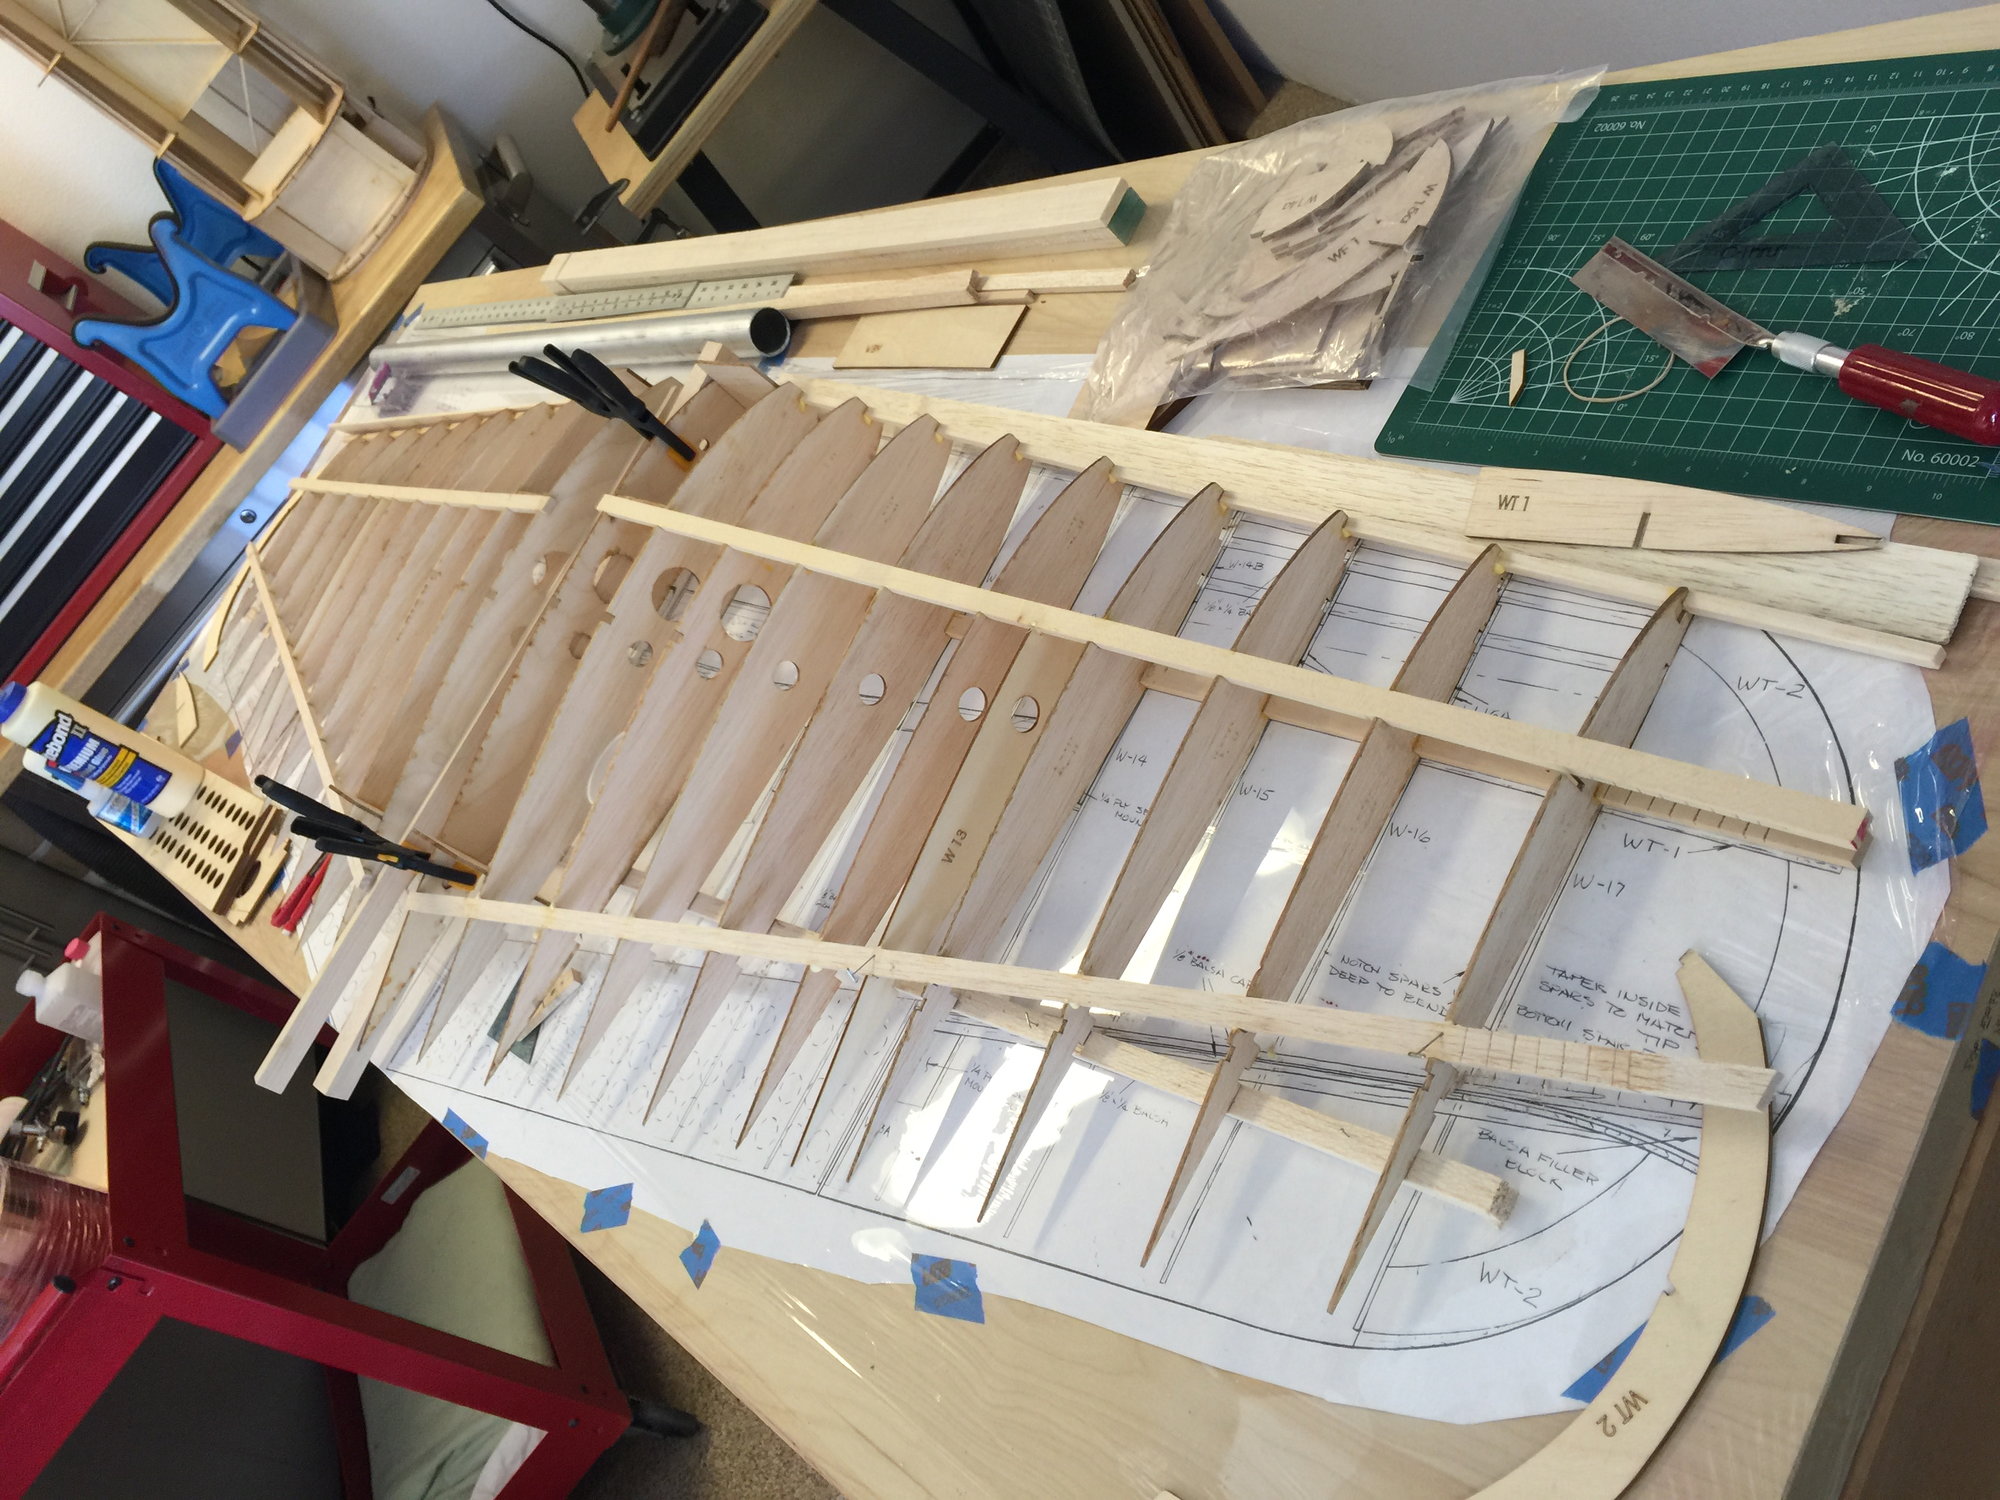
The wing assembly was straight forward. I put in the same shear webbing out to the tip as Sam did. I found some of the ribs to fight back on alignment. In the past, I would have probably pinned the rib ends down in place, but after thinking more about this, it's only like constraining a spring, and it's only bound to relieve itself in a twist later on. So I prefer looser joint with parts that lie naturally aligned. I think I'm the last one to figure this out. (Hey, I'm not sure why these pictures are posting so huge. Let me know how to resize these - thanks)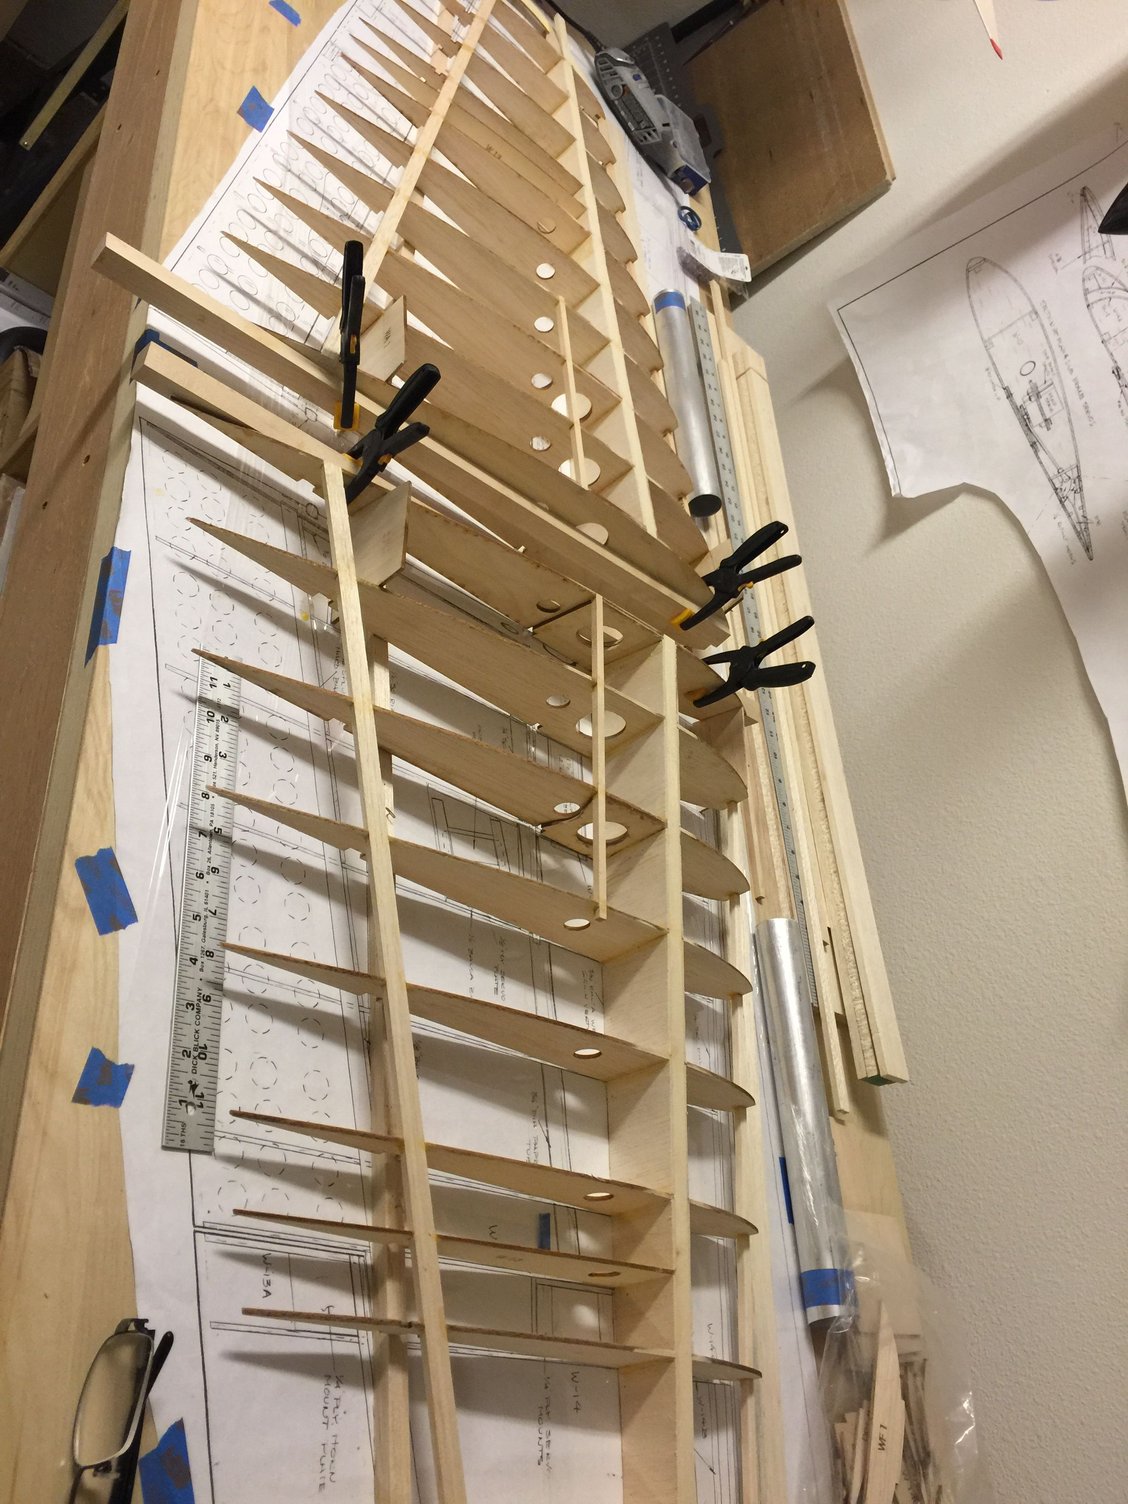


09-30-2018, 10:30 PM
#31
Thread Starter
Join Date: Sep 2014
Location: Scottsdale, AZ
Posts: 169
Likes: 0
Received 0 Likes
on
0 Posts
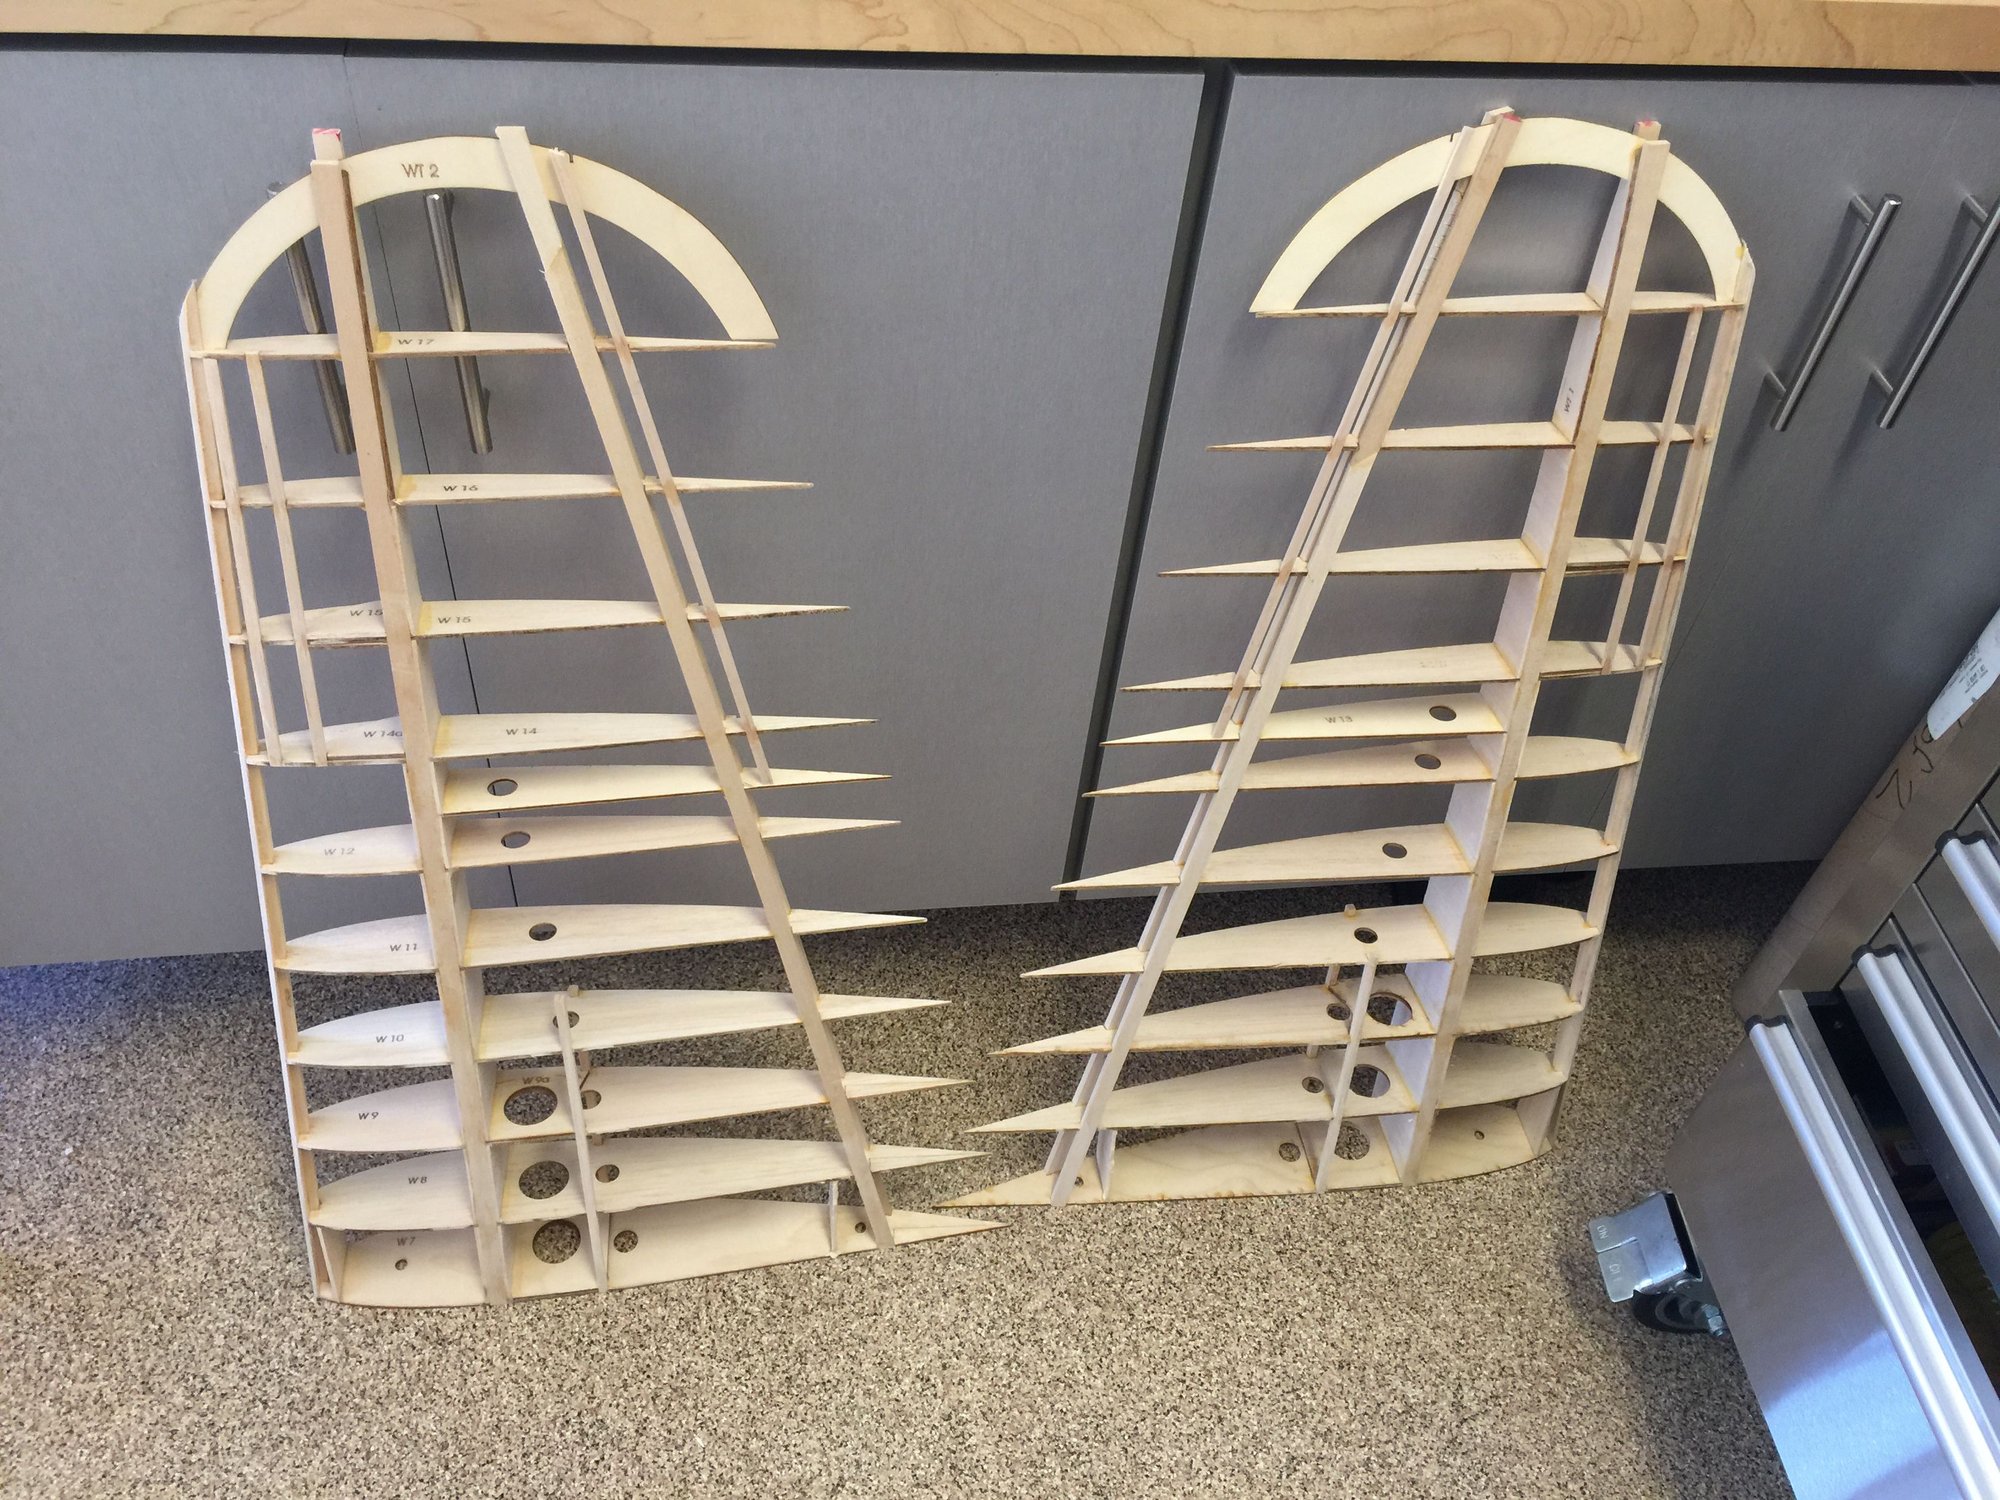
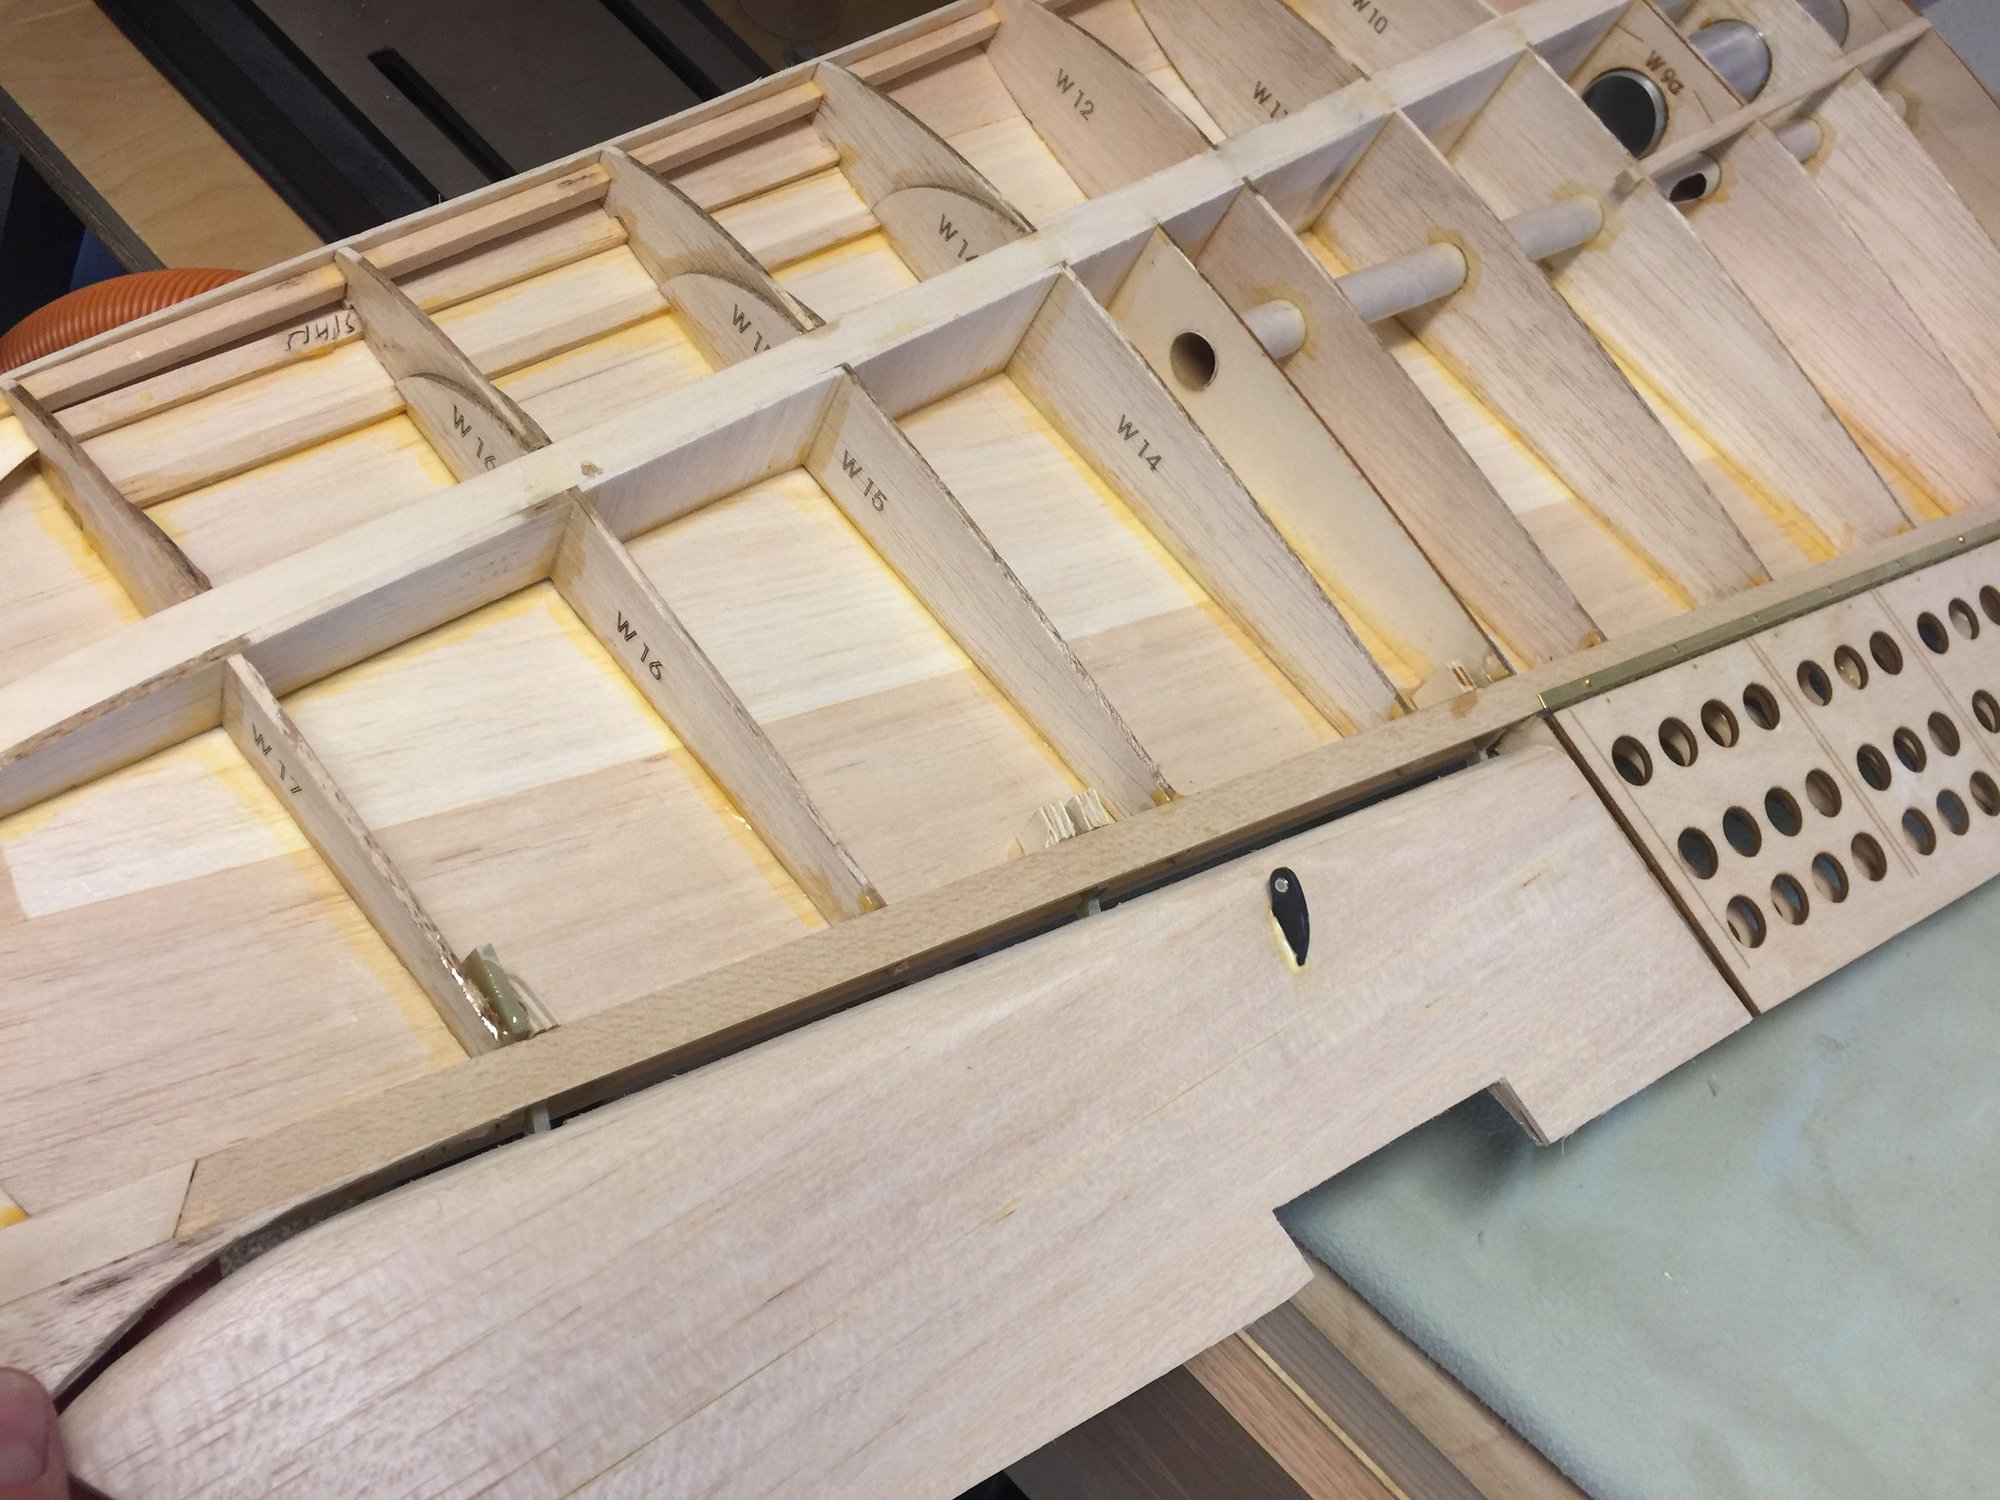
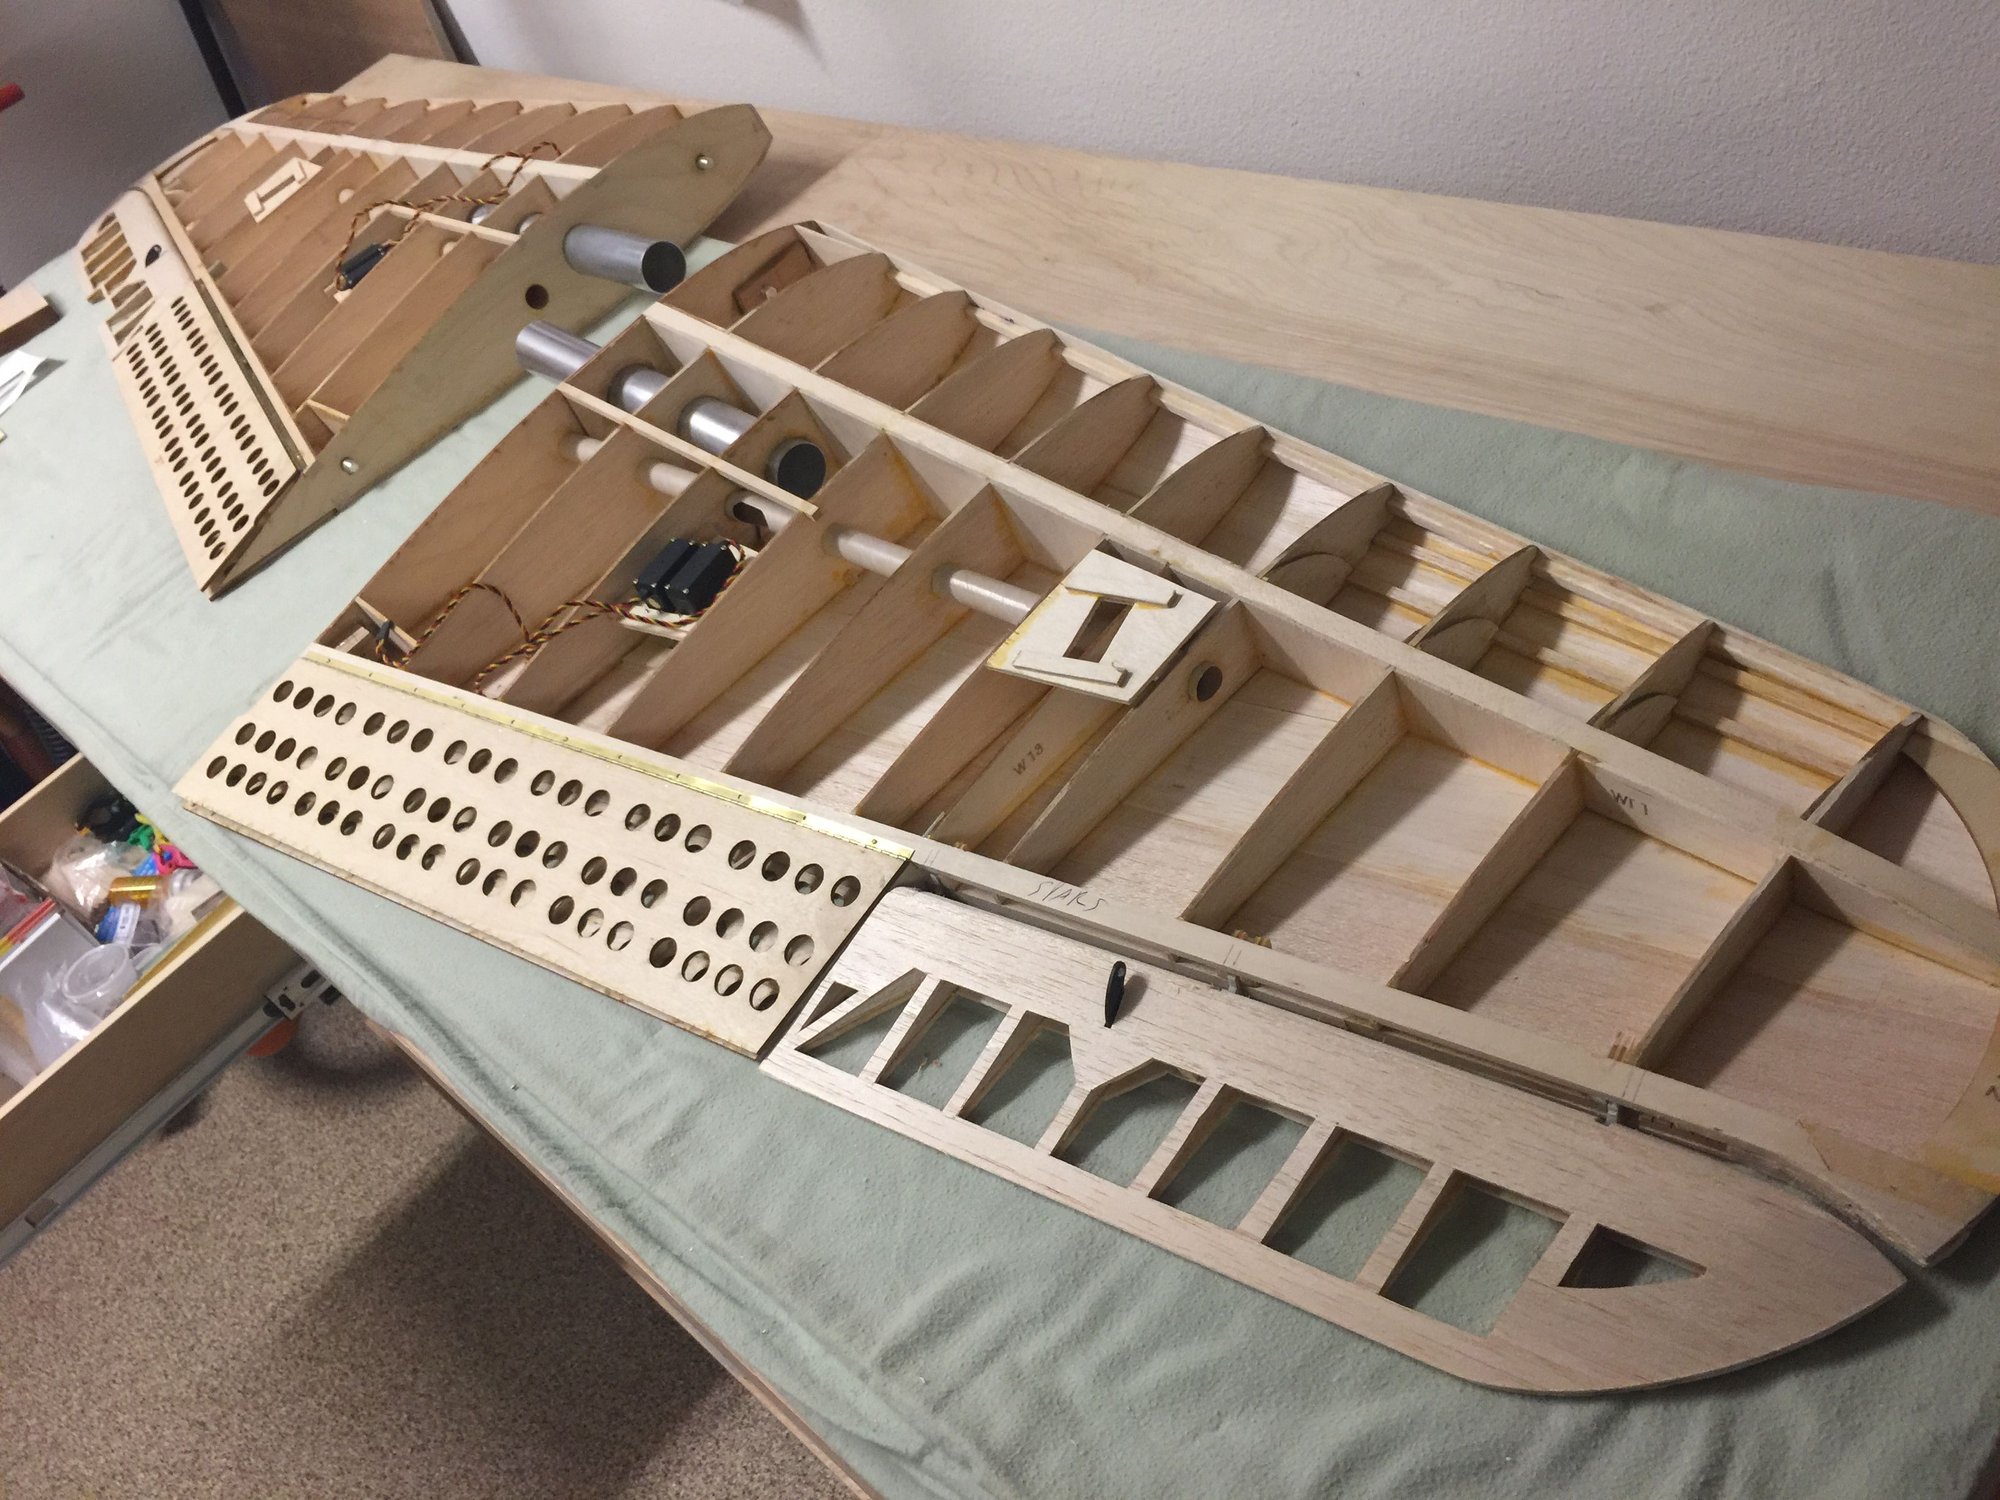
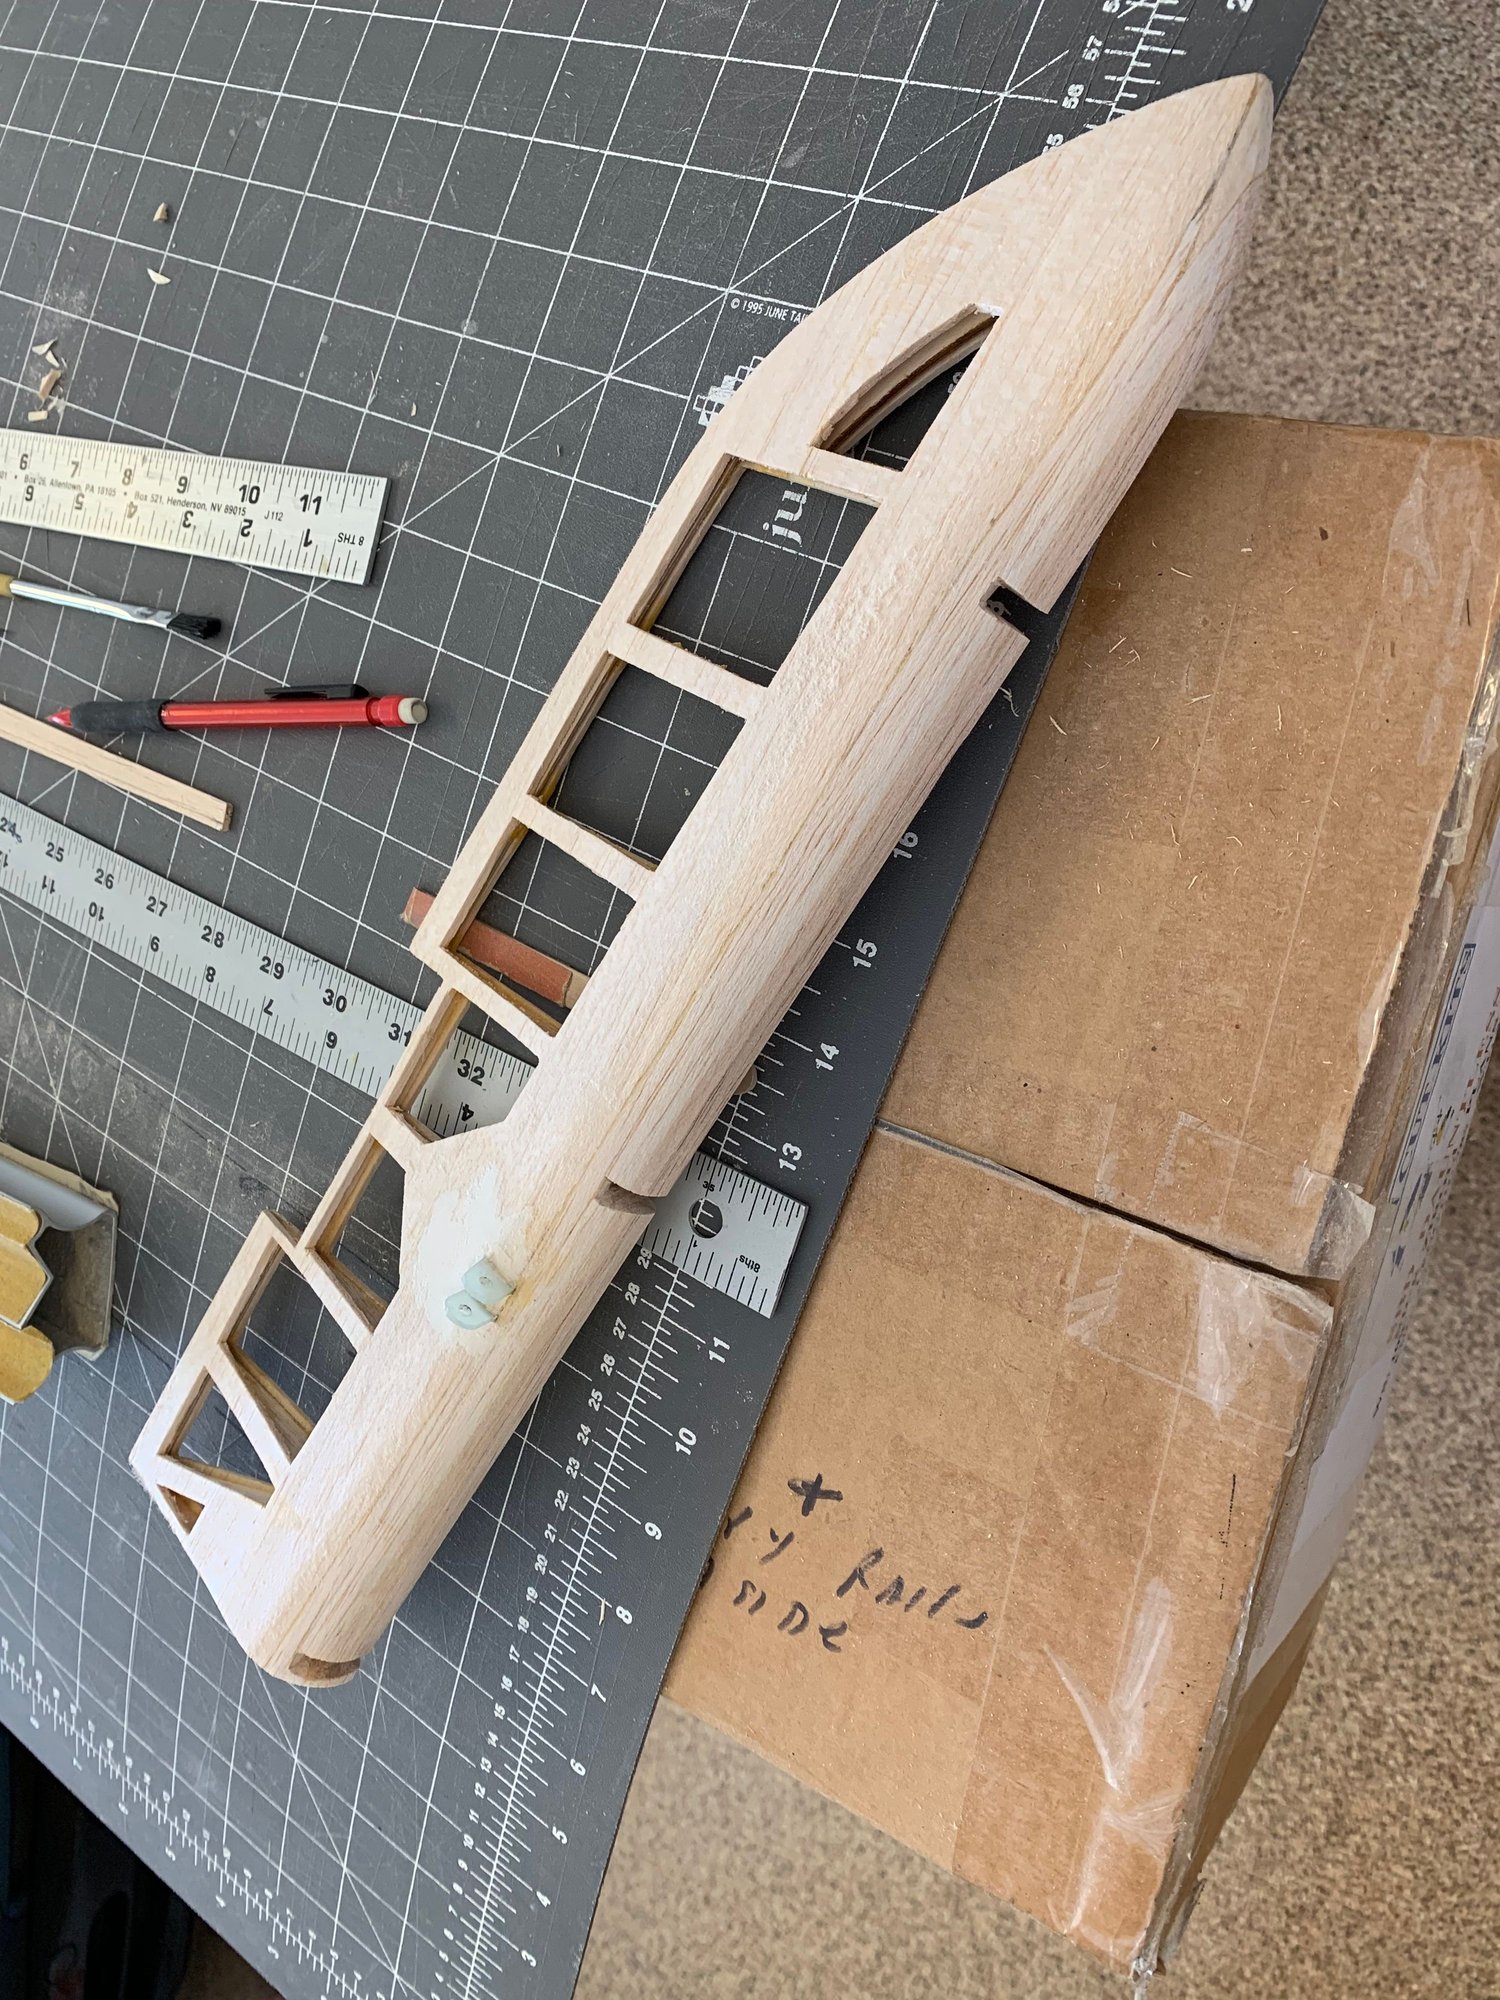
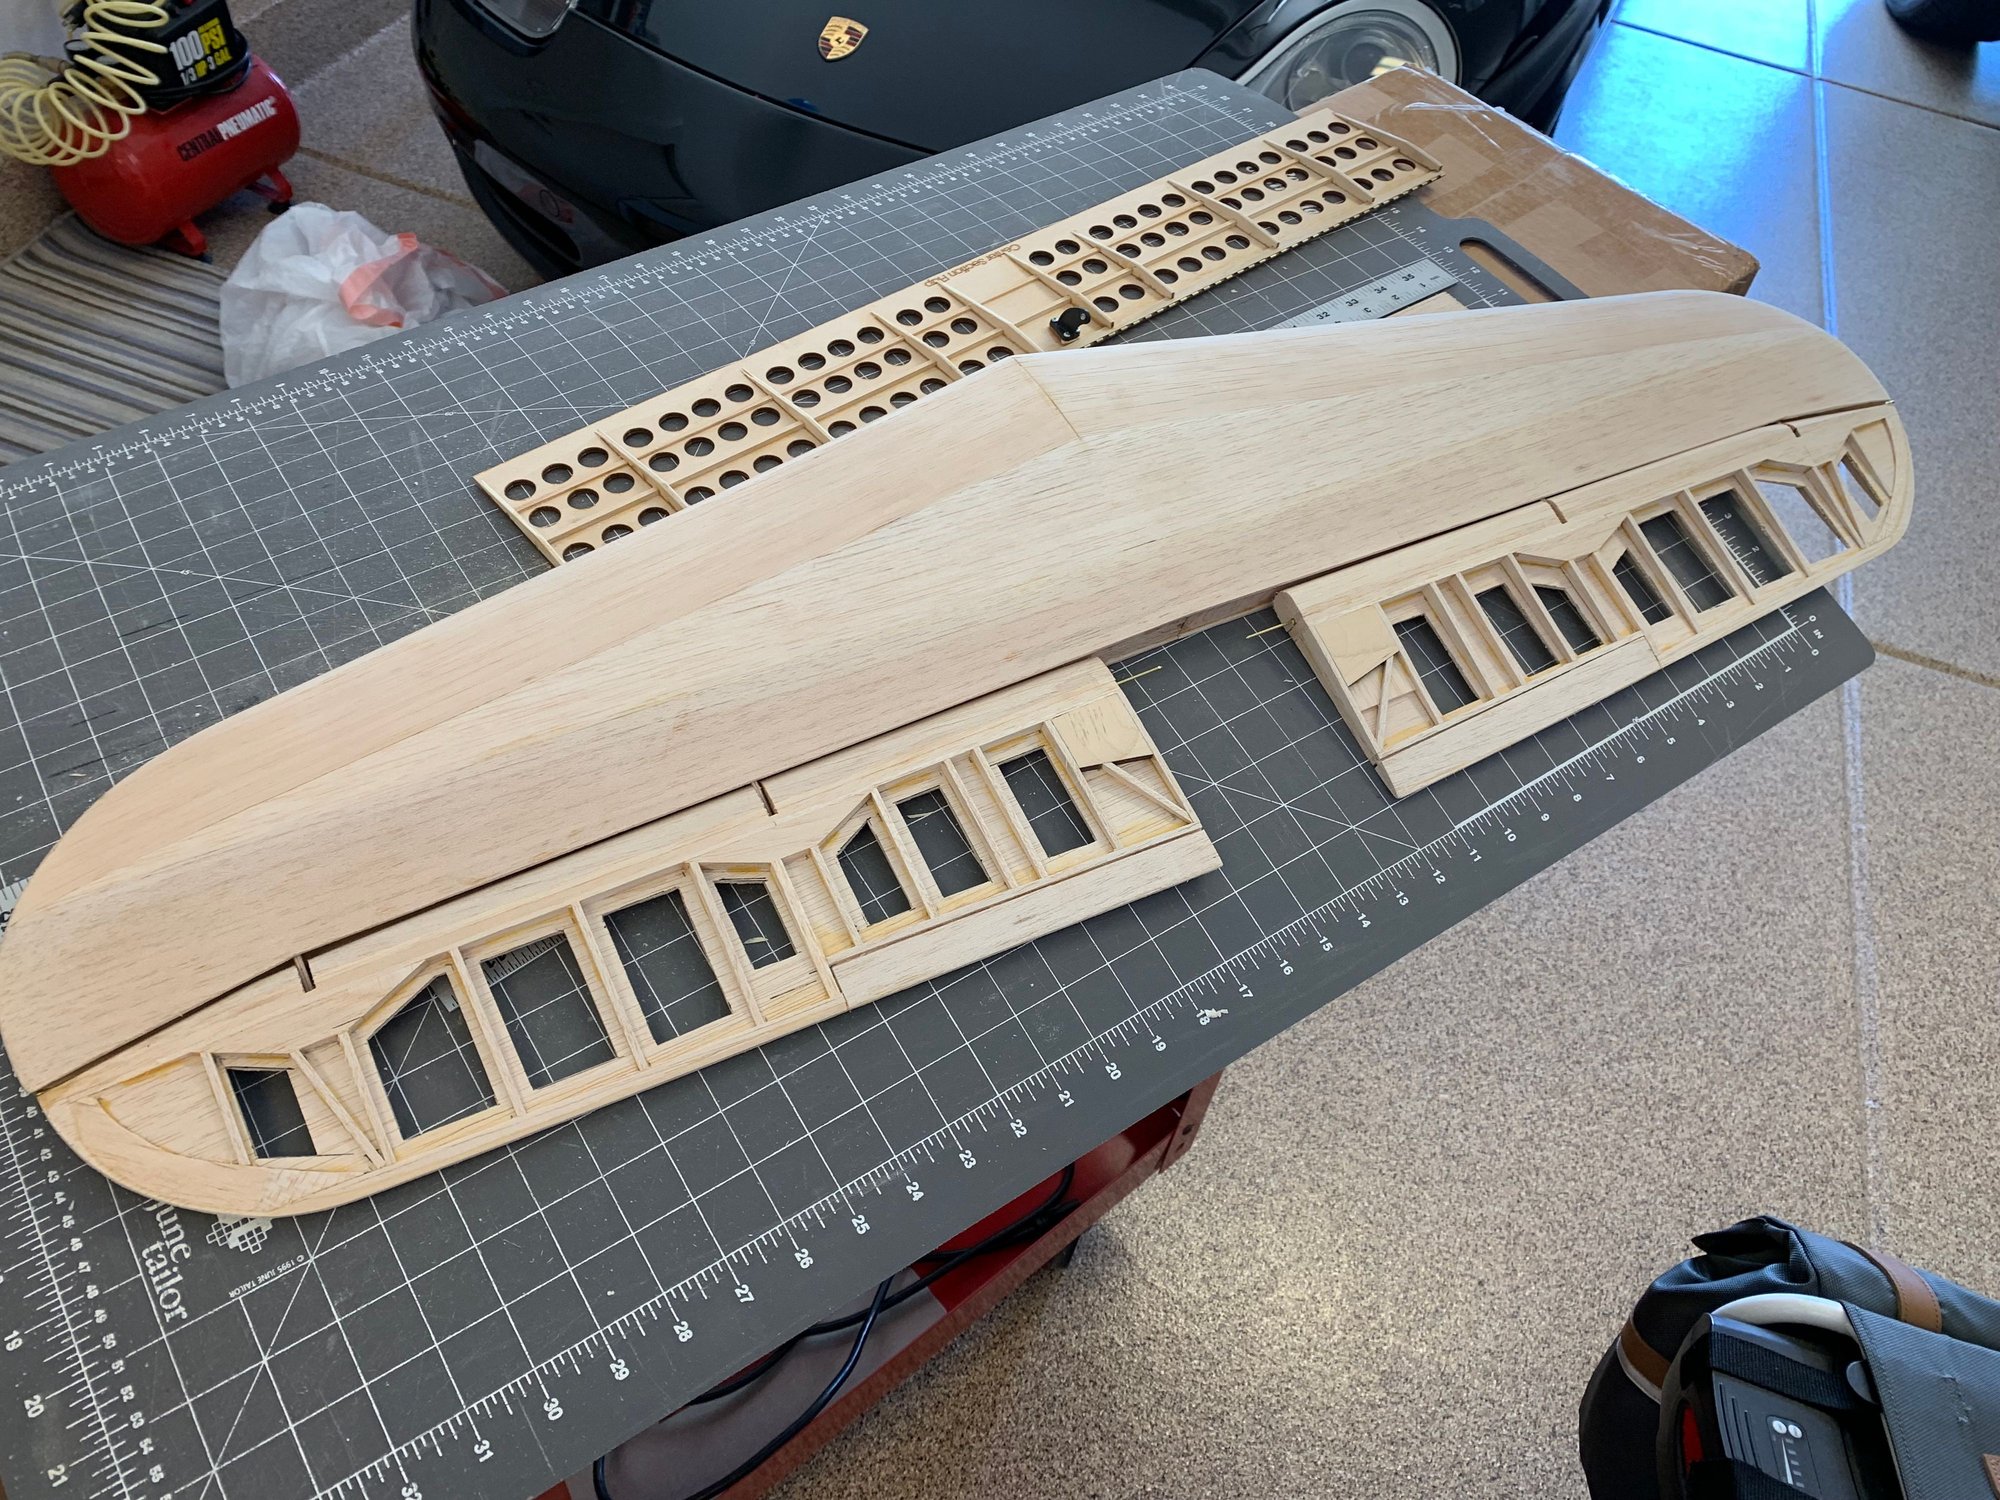
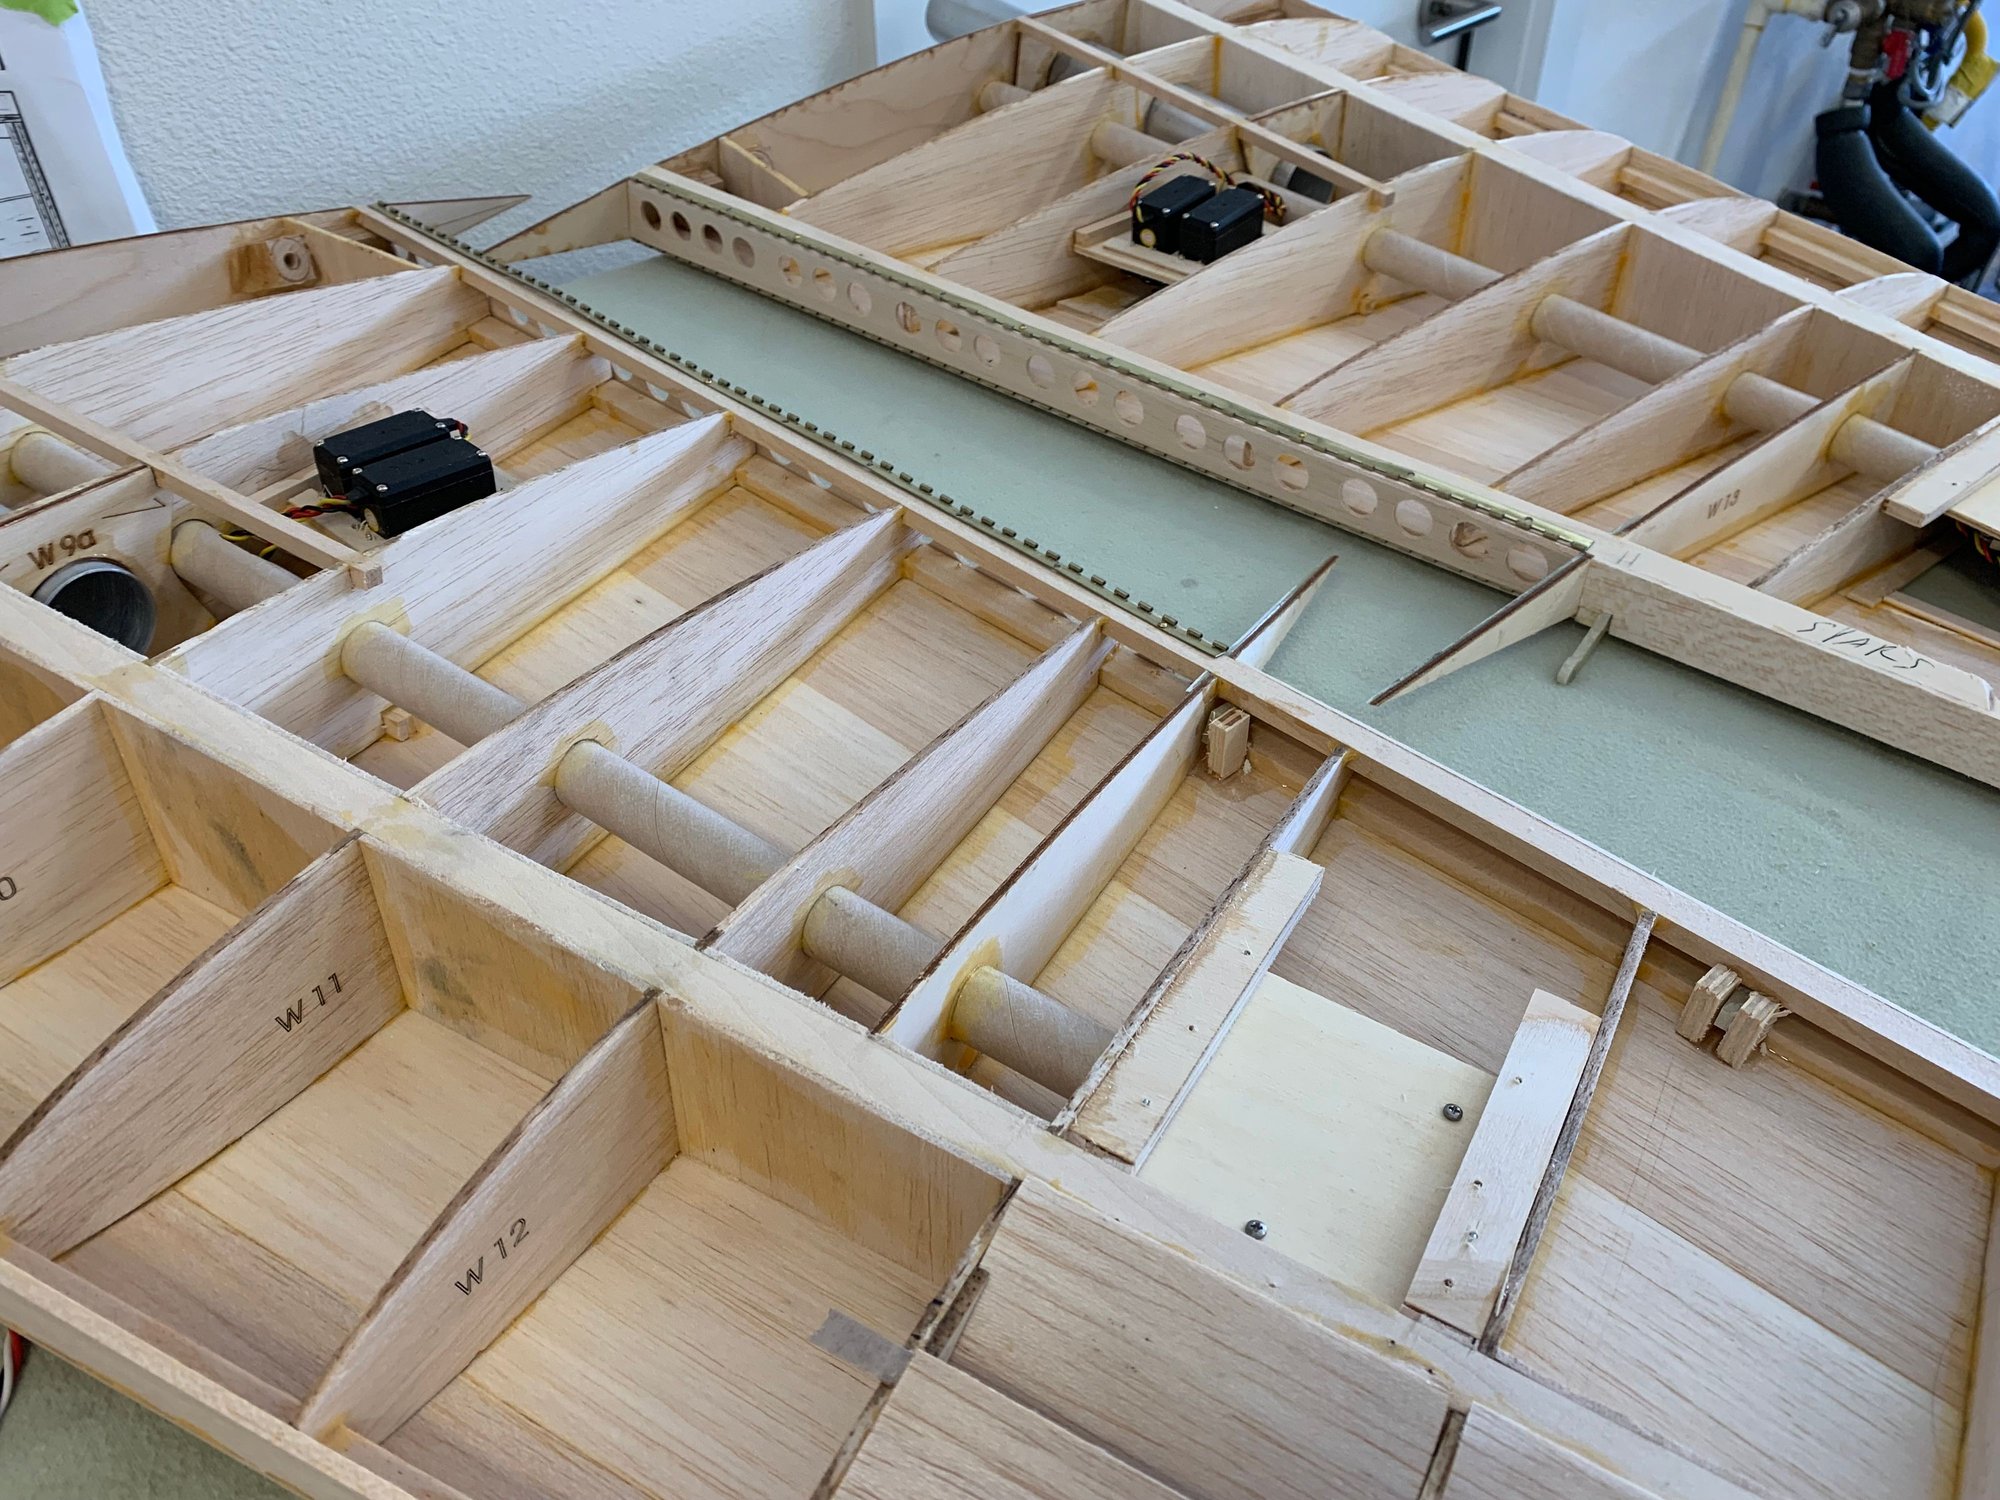
Basic framing completed and sheers added on both sides of the main spar.
Getting the flaps and brakes prep'd for the wings. Used the same approach that was used for the center flap. The Nelson hinge was scuffed and epoxied with a layer of 1/32" ply on top.
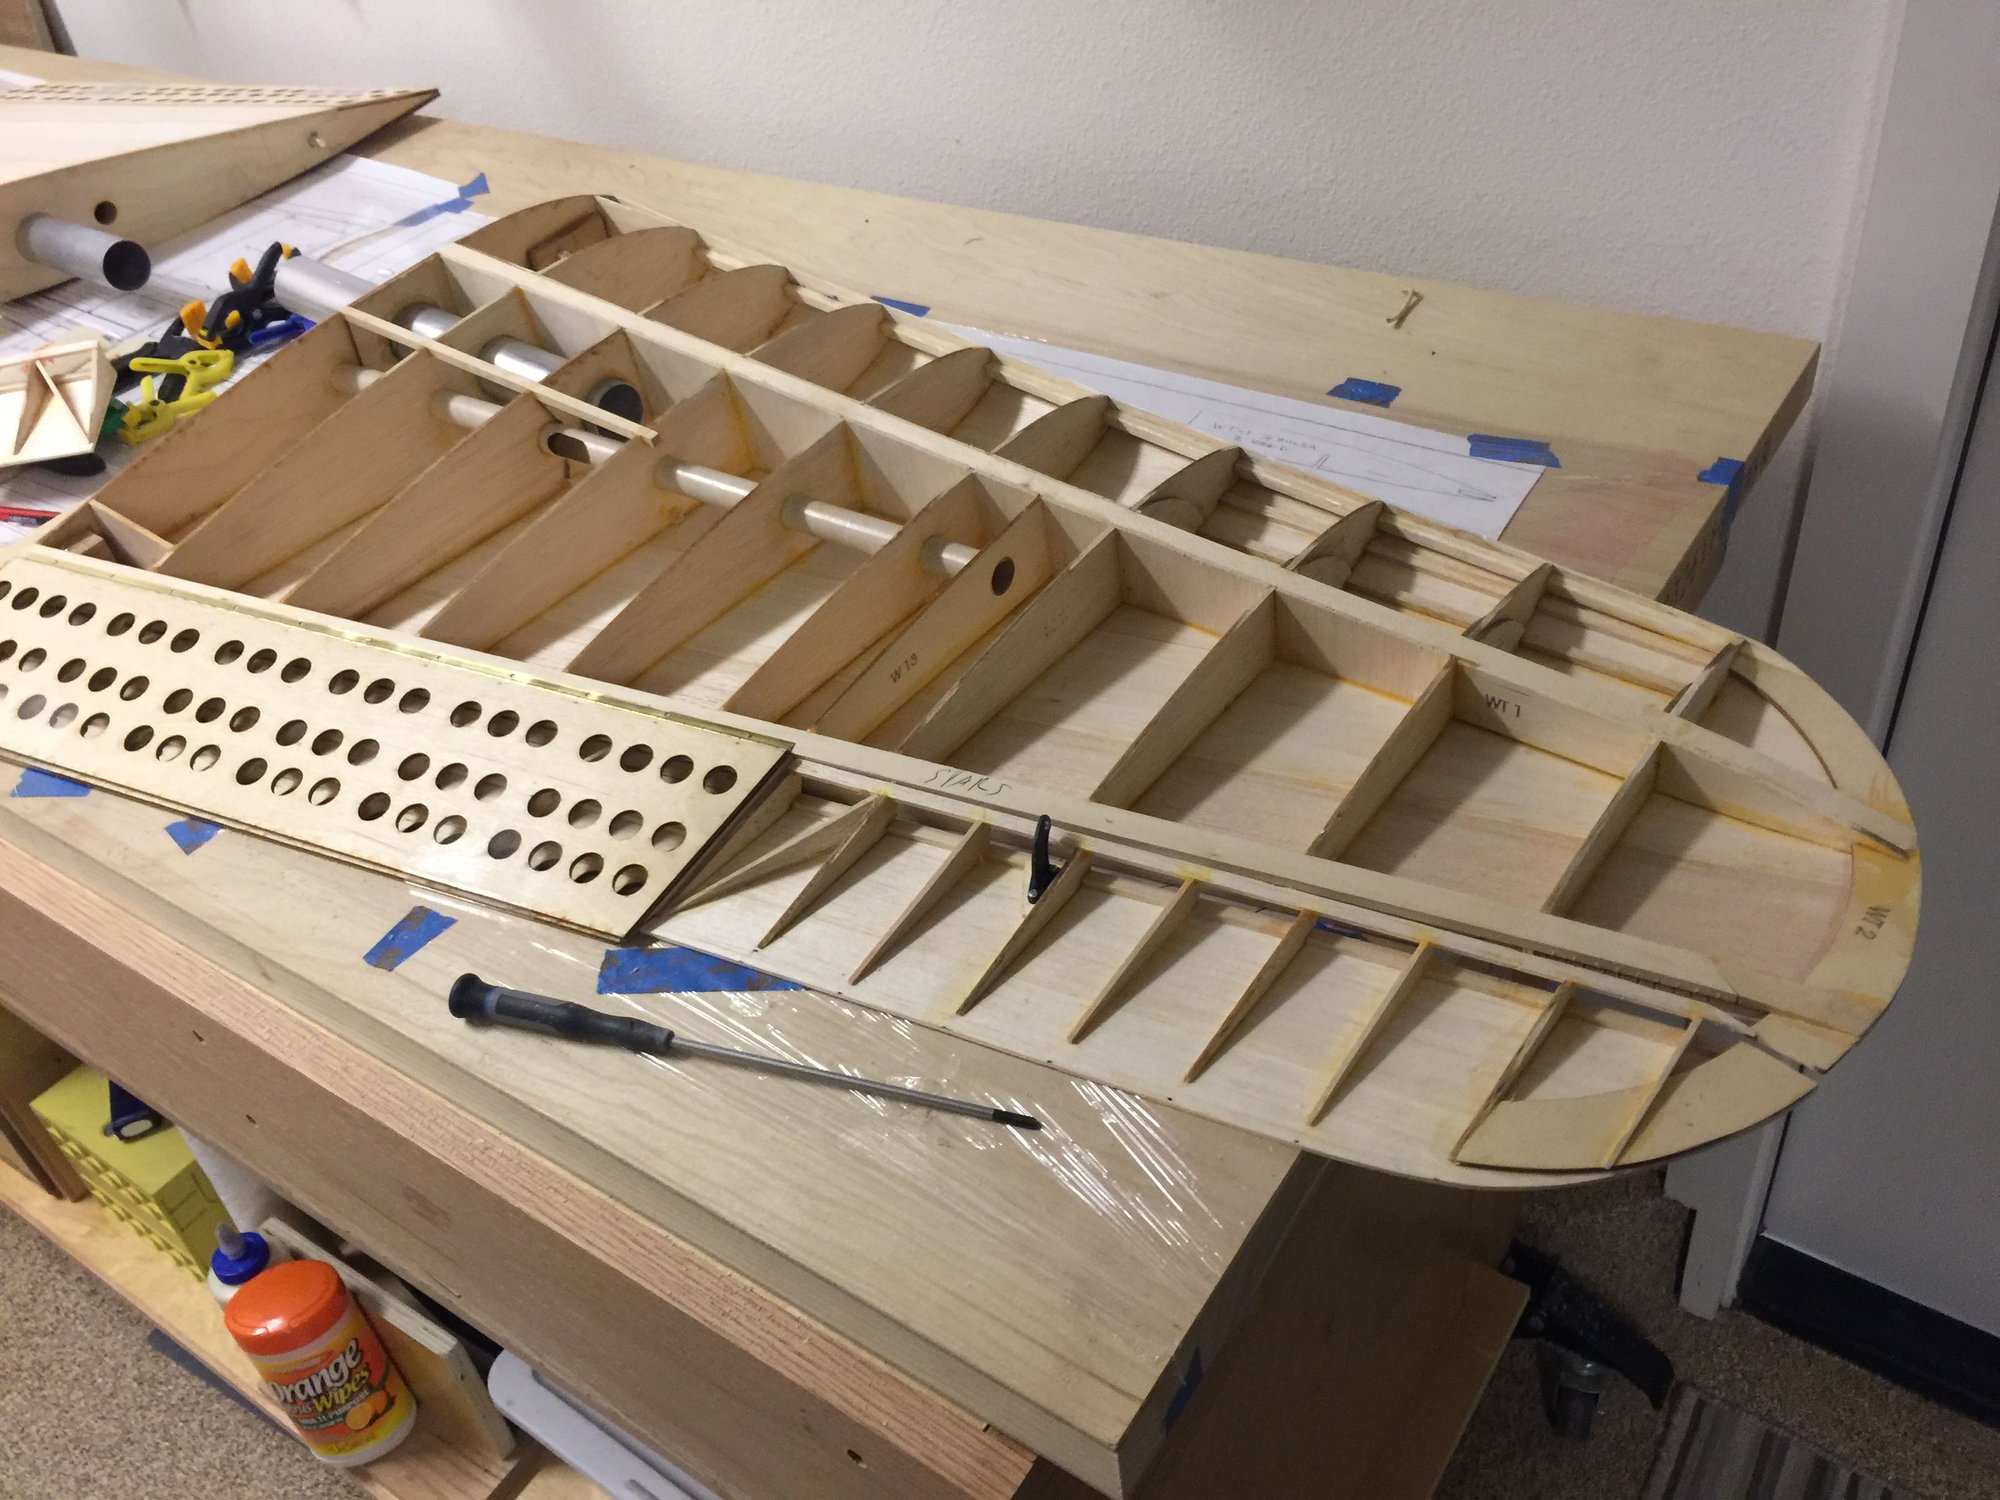
Rib placement was changed to the scale positions.
Sheeting added from main spar back.
Used Robart 3/4" 331 control horns attached to a ply base and set in epoxy against the main aileron spars.
G10 hinge points were added to the elevator and sandwiched between plywood. I did my best to get this set in epoxy and attached to the spars.

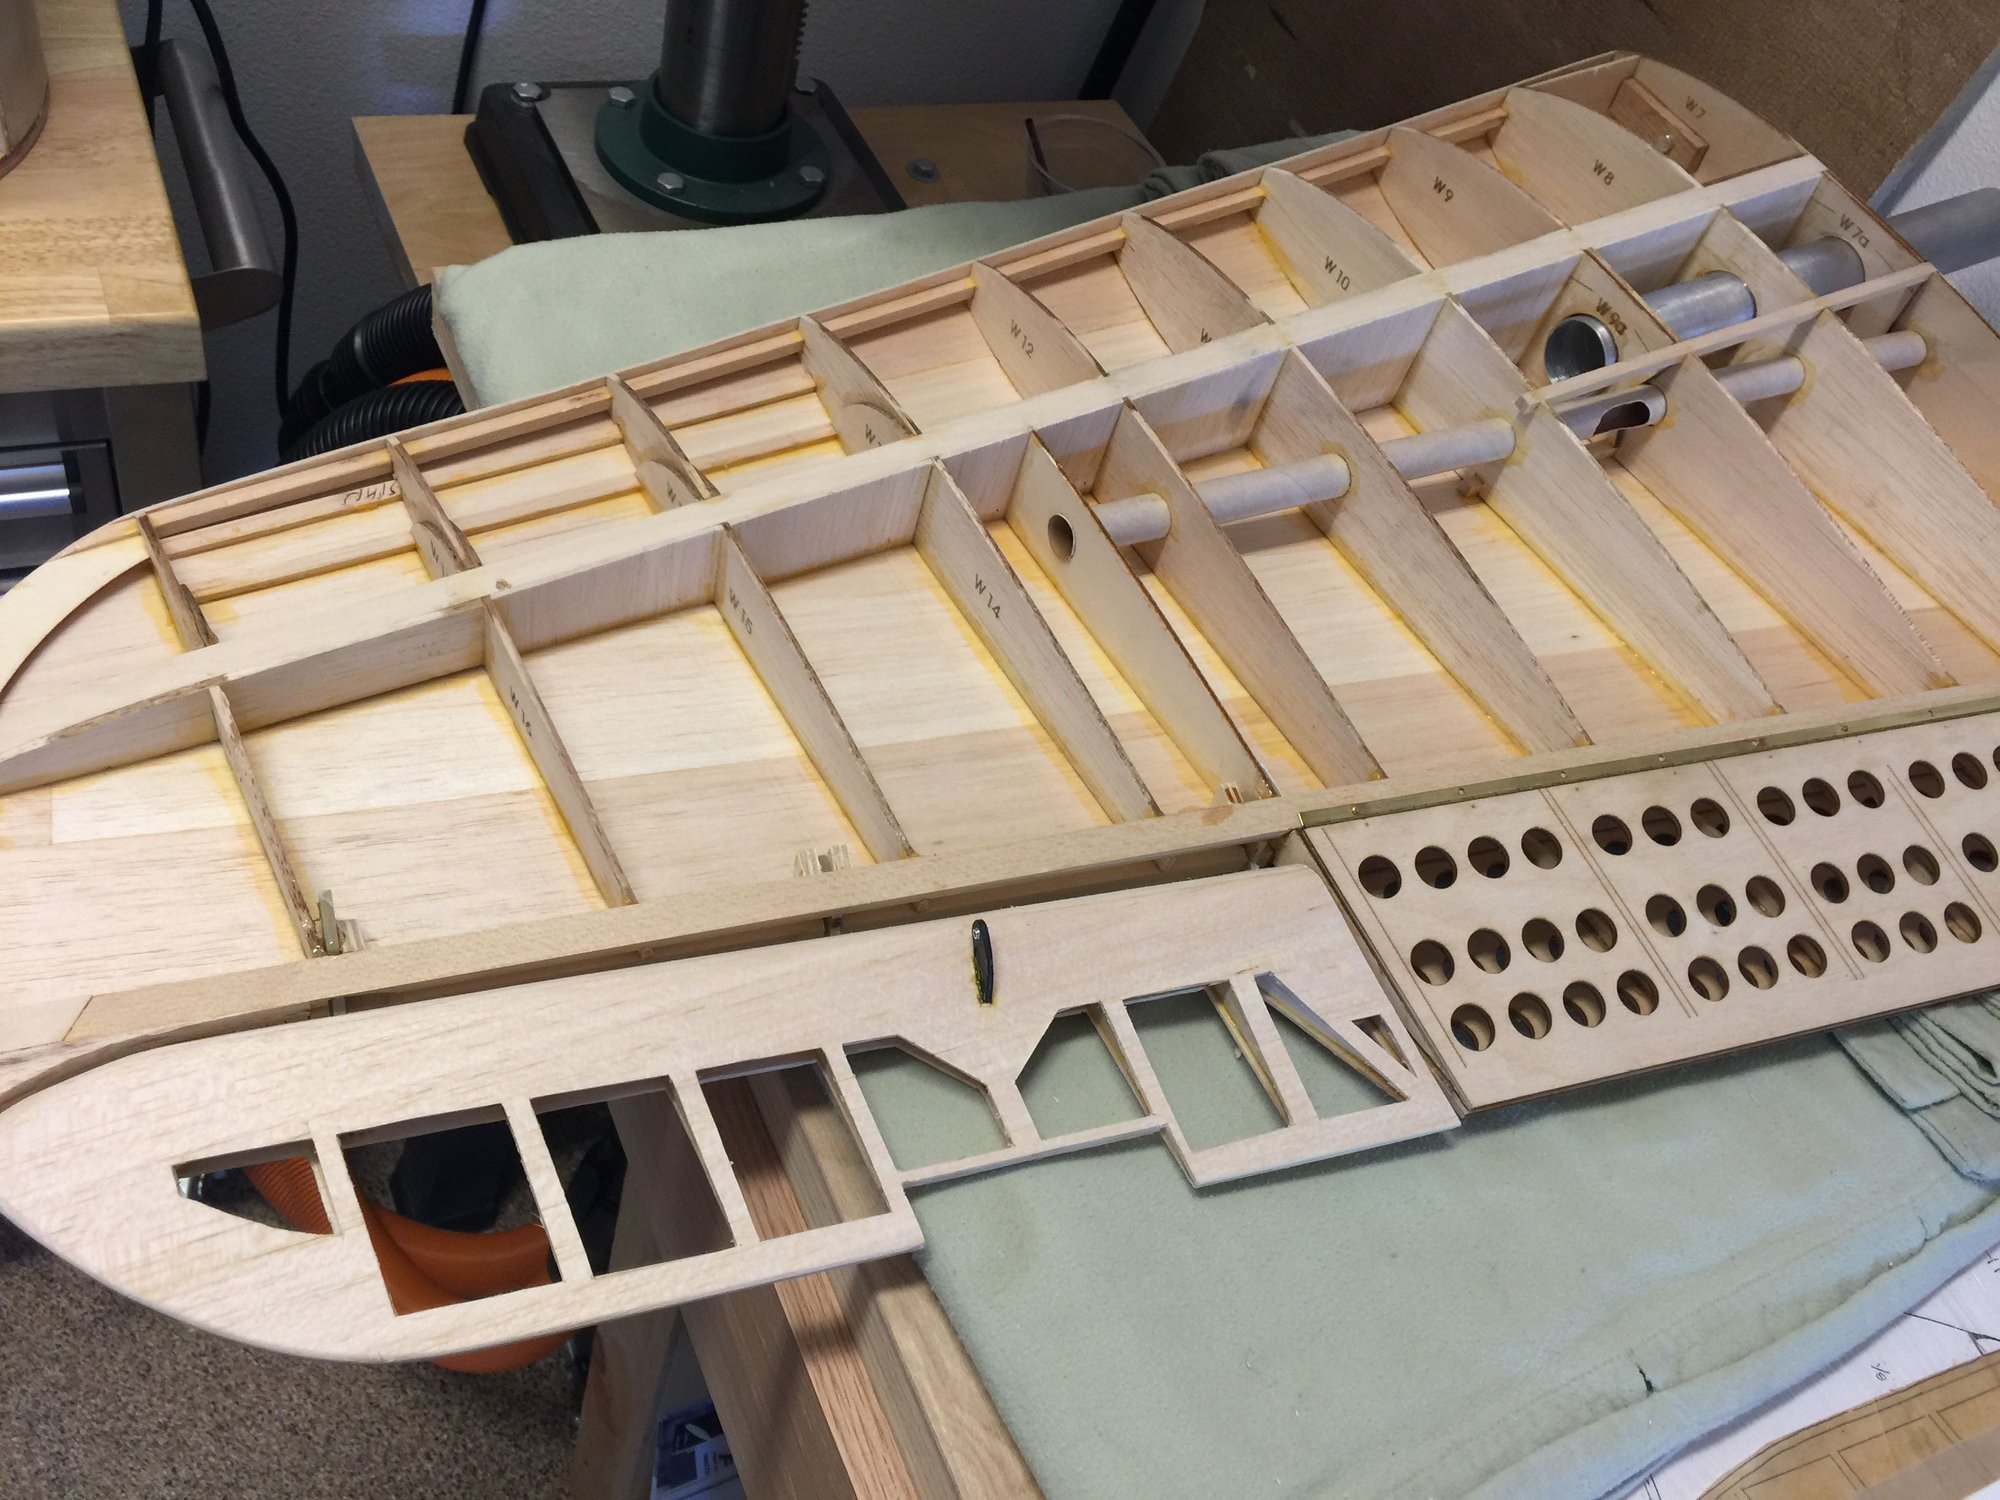
Beginning to layout the servo trays and hatches. I have seen more recent orientation of the servos on the side for the aileron servo. It's either this or going with way of a low profile servo as there is not much room toward the tip of the wing. I also moved the servo location out to mate with the control horn placement. A little closer to scale. I added to the wire tube.

 10-01-2018, 10:02 PM
#33
Thread Starter
Join Date: Sep 2014
Location: Scottsdale, AZ
Posts: 169
Likes: 0
Received 0 Likes
on
0 Posts
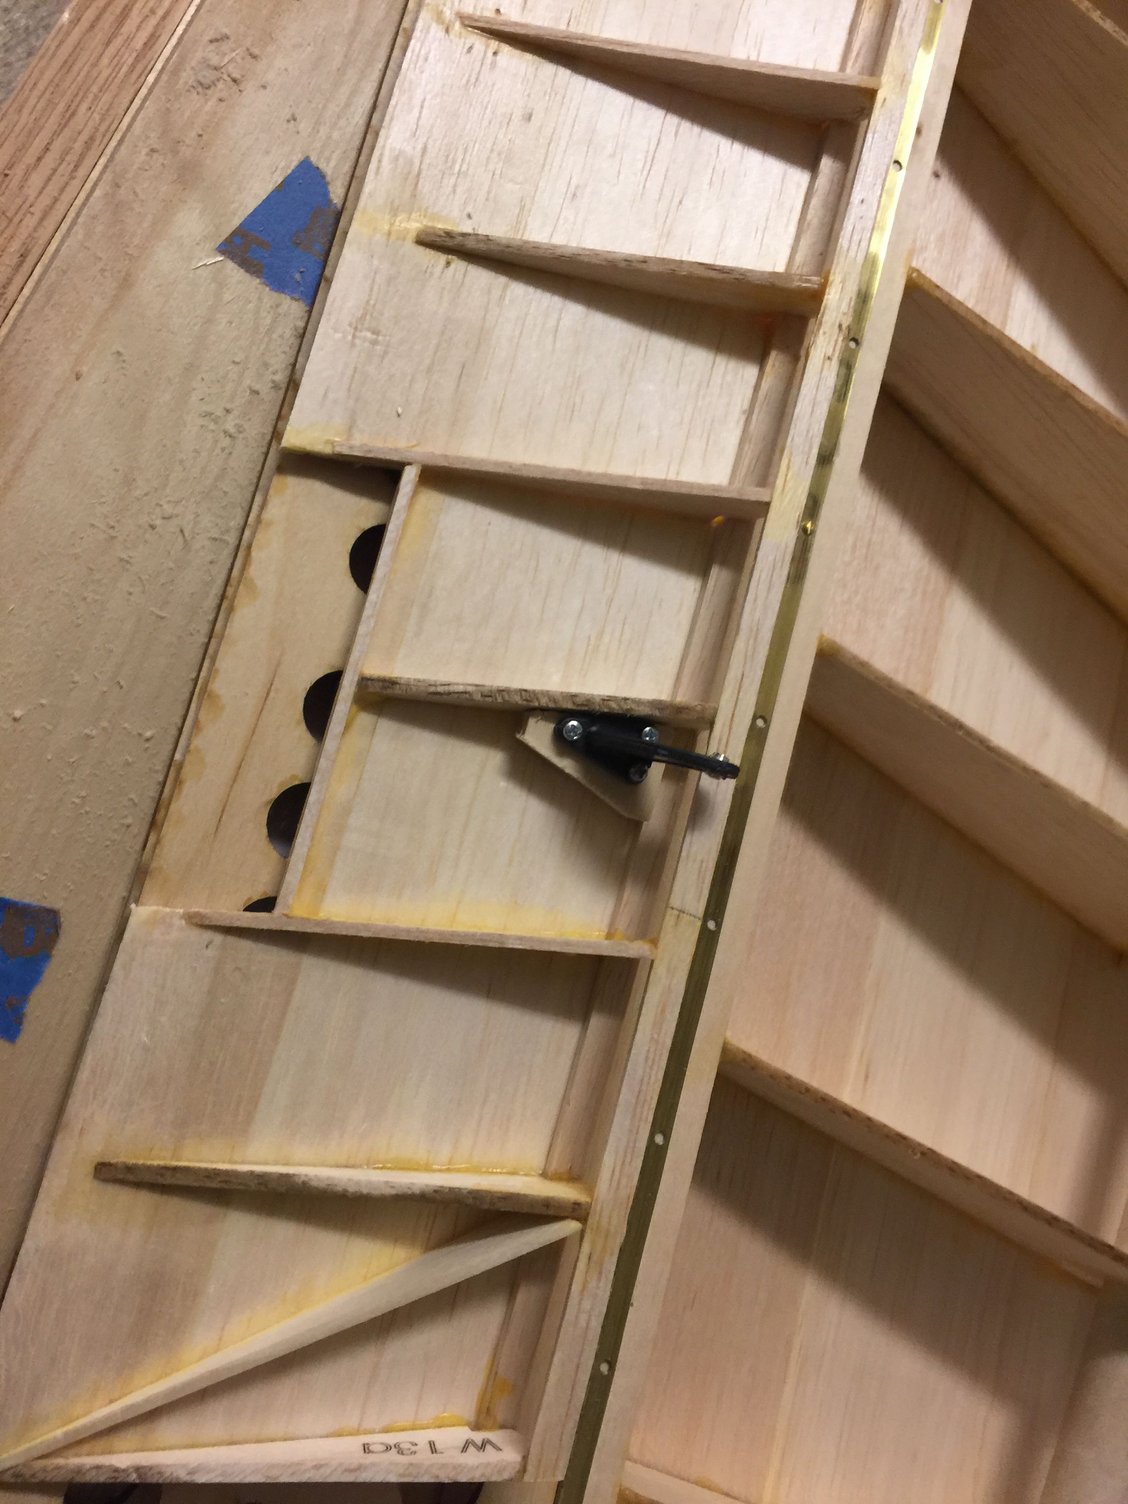
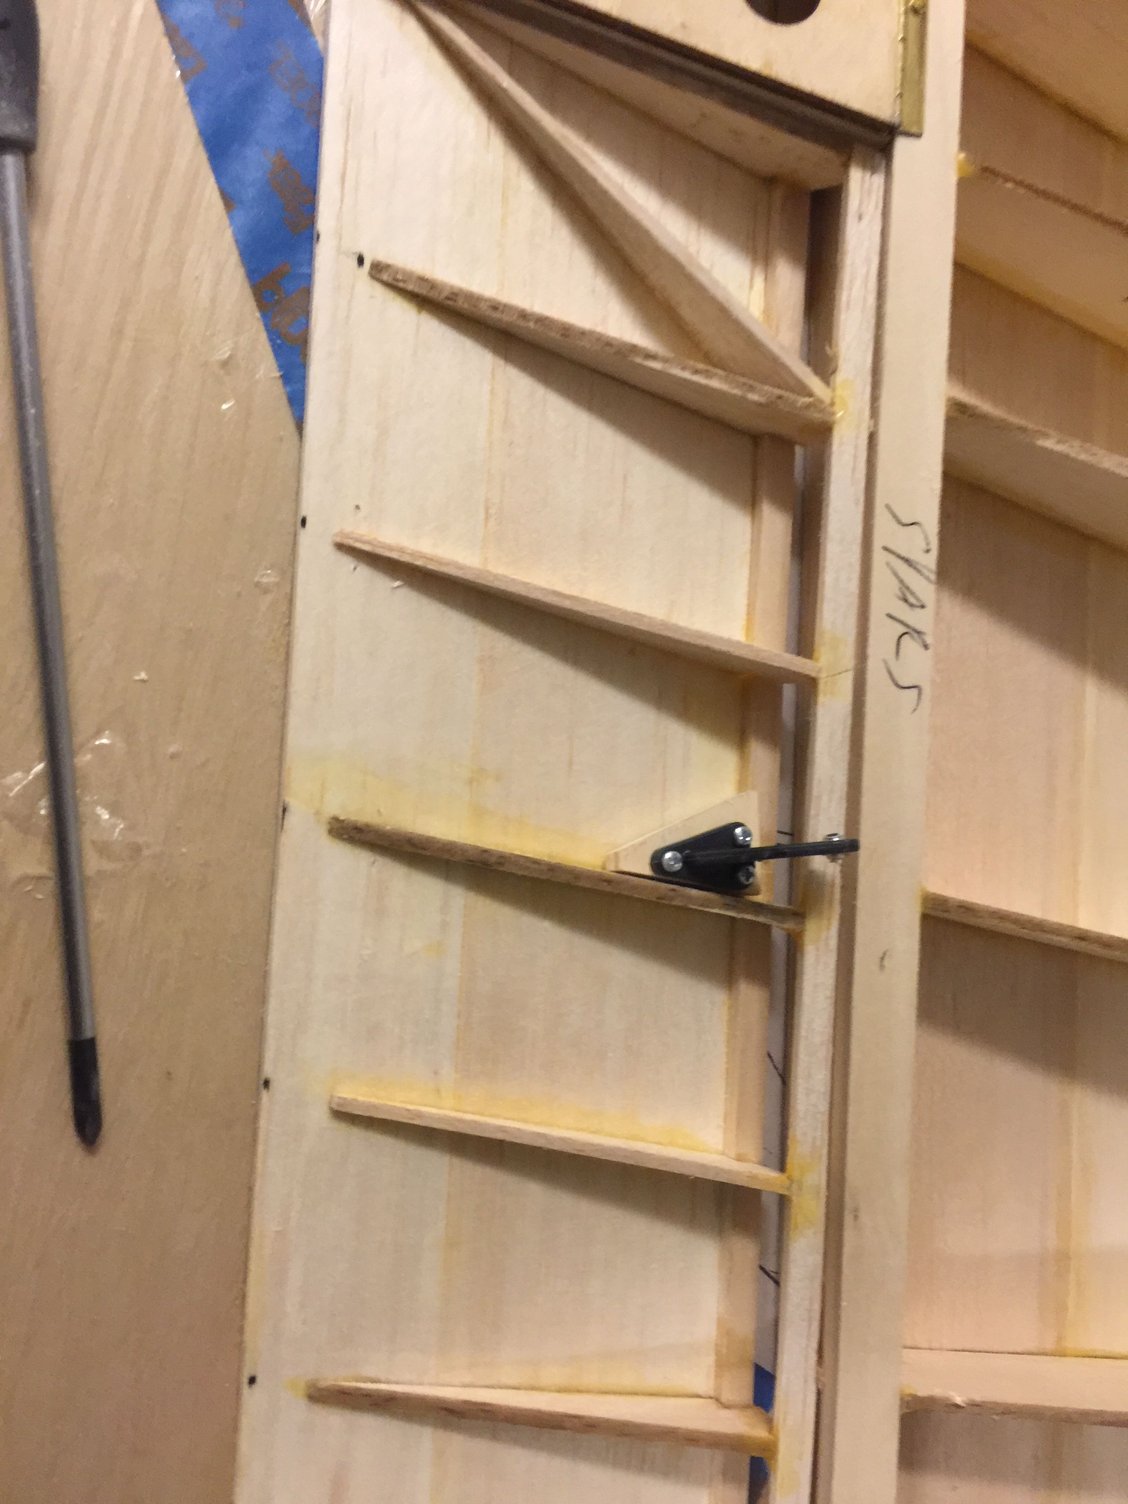
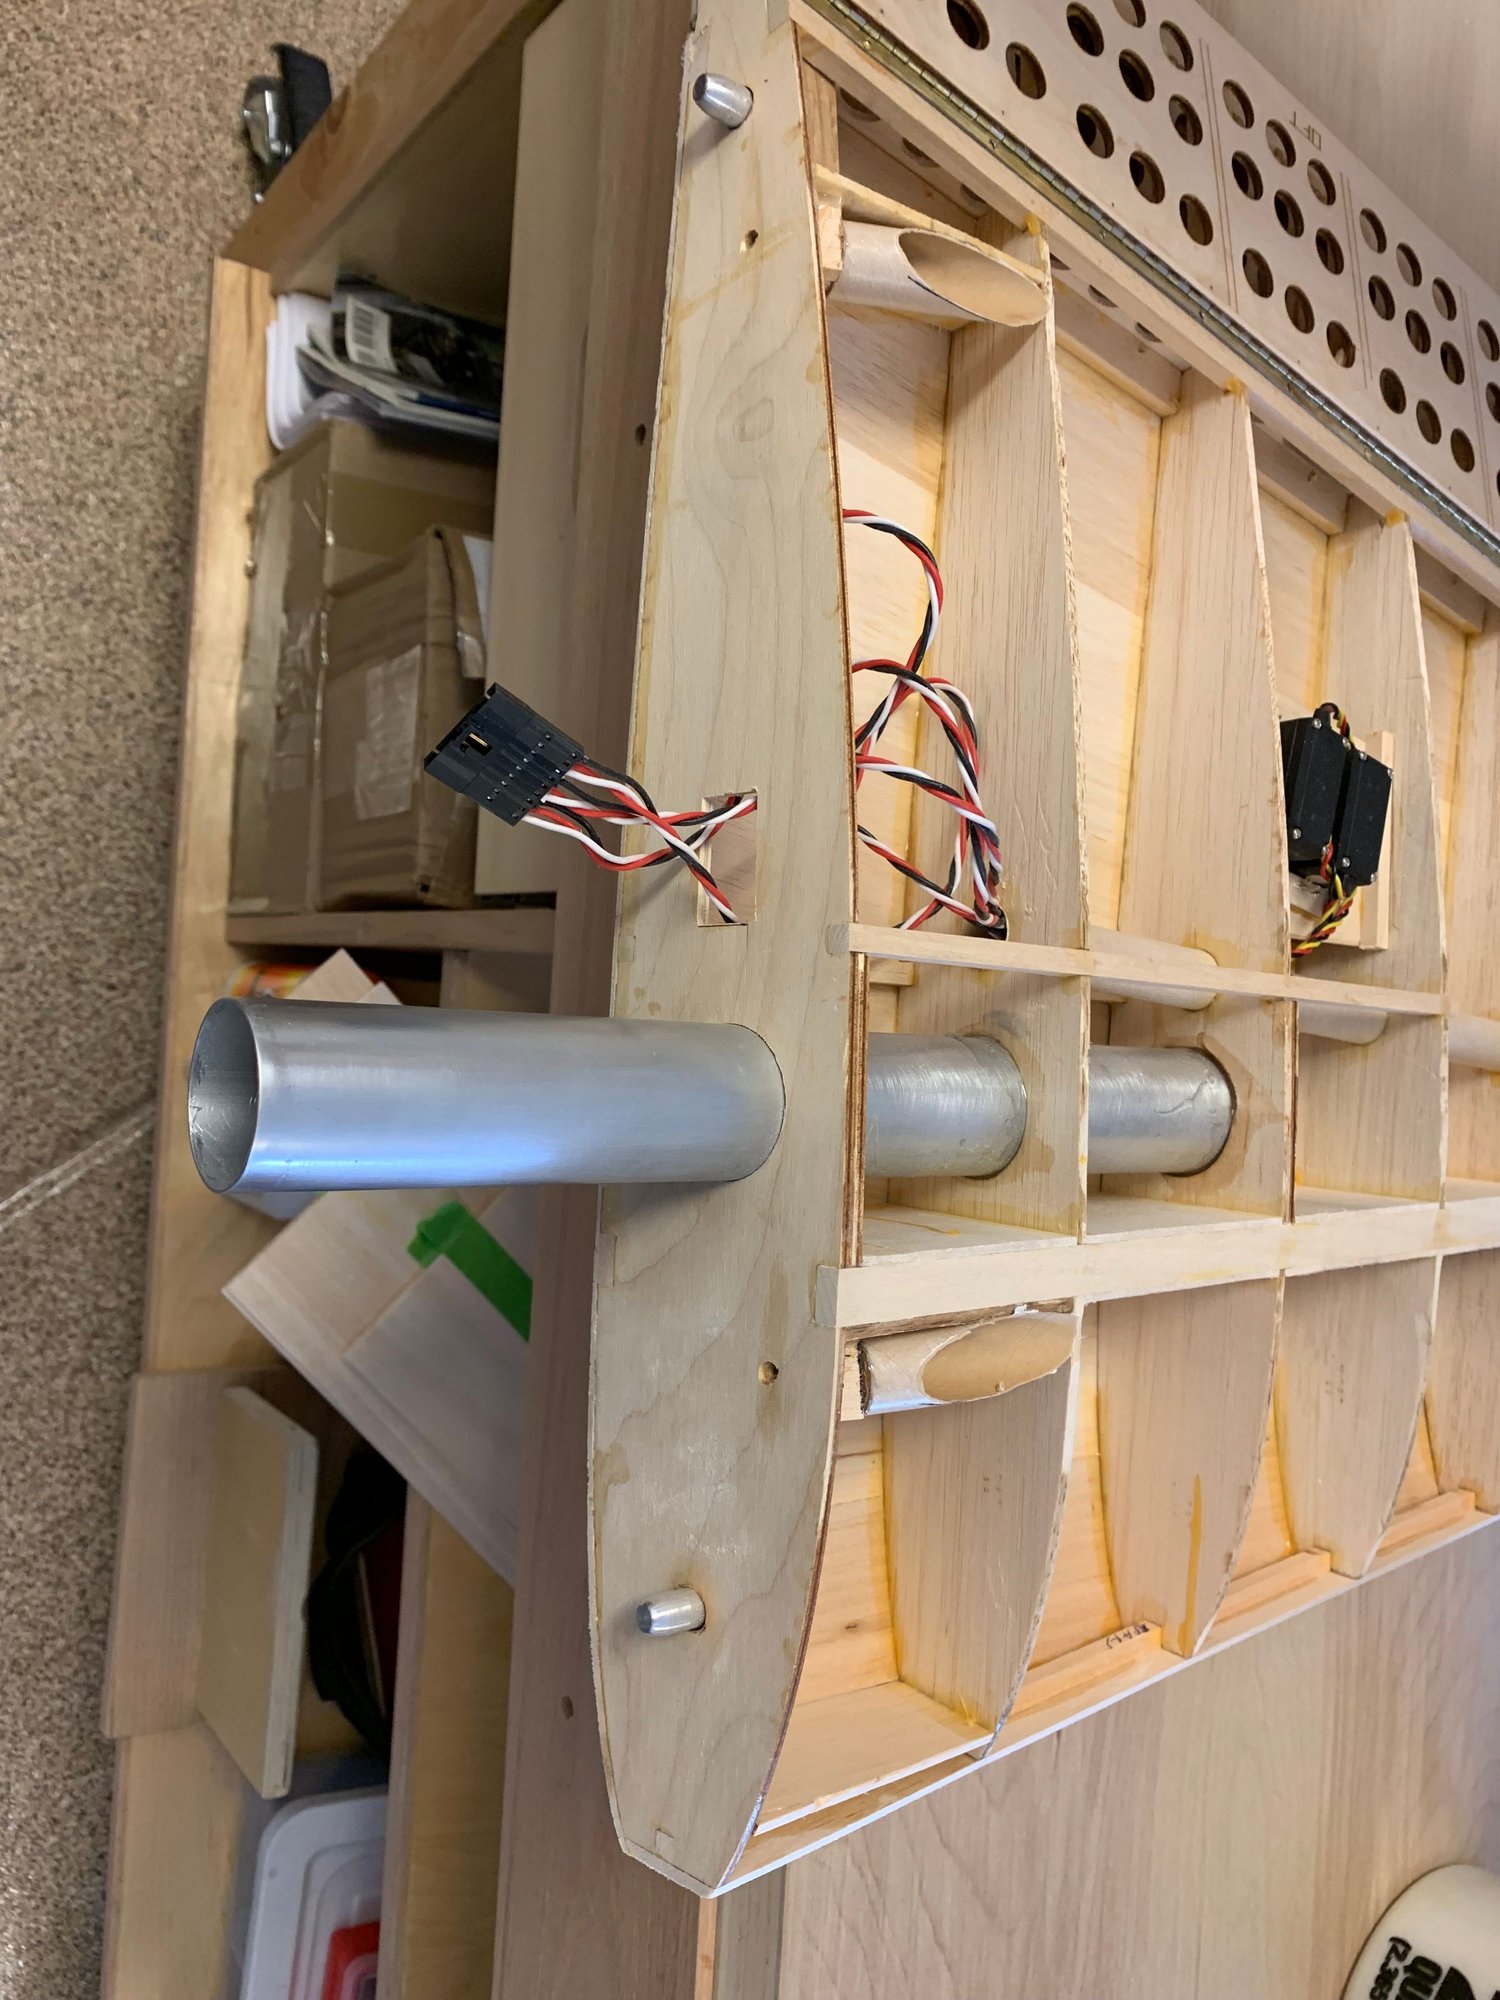
I was concerned about how exposed R13 was sandwiched in between the flaps and aileron. I gave a good bump on one and noticed it was lose. That made me think that I should go ahead and add a thin layer of G10 to keep this straight and strong.
Another view of the reinforcement to the tail of R13.
Here is the bottom view of the wing showing the hinge points. I used a wire to align the points on the aileron. Then I used the same wire to mark the drill points on the wing side arms. I finally got all things line up before setting the respective pieces in 30 min epoxy and hardwood shims. All in all, I'm pleased with the movement. I still need to add in the TE cap. On the top side, I'll need to radius the LE of the aileron and also extend the TE of the wing a bit.
10-06-2018, 06:43 AM
#34

A Great Build, enjoying your build. Agree with Chad, I learned "A LOT" from the guys here on RCU during my Charles Kellogg TBM Avenger Build (and still learning from these guys) and the guys on RCScalebuilder are just as informative. Keep up the great work. Chic
07-11-2019, 06:48 AM
#35
Thread Starter
Join Date: Sep 2014
Location: Scottsdale, AZ
Posts: 169
Likes: 0
Received 0 Likes
on
0 Posts
So I'm back in So Cal after spending the last 7 months in Scottsdale. I finished my bash of a VQ SBD there. It will be interesting to see how that will helps with this build as I get more into things. Right now, I'm working on getting the wings finished up so I can complete the mount to the fuse before starting the tail.
Changed out the control horn to this - a little bit more scale.
I have the stab and elevator all set & hinged. I'm still trying to figure out if I'm going to go all out and make the controls internal in the fuse.
Changed out the control horn to this - a little bit more scale.
I have the stab and elevator all set & hinged. I'm still trying to figure out if I'm going to go all out and make the controls internal in the fuse.
07-11-2019, 07:15 AM
#36
Thread Starter
Join Date: Sep 2014
Location: Scottsdale, AZ
Posts: 169
Likes: 0
Received 0 Likes
on
0 Posts
I added Merlyn locks (2) with topside access. I'll hide this under some type of not so scale looking hatch, but it will be more convenient. I did the same thing on my VQ and I liked the result. Trailing edge caps were added.
In the past, I didn't really like taking off the flaps because they were so hard to get back on. It never occurred to me that sharpening the wire pin would make threading so much more easy. I saw Sam's note on doing this to locate the points to drill on the elevator hinge, but didn't connect that with all of the pins in general. Big difference.
I'm still struggling on the servo connections. I think I have the aileron connections figured out. Even following what Spitzed had shown was not real easy. It was partly the reason I changed out the control horns. The flap servos are my lastest challenge. I will need to get different hardware. There is not a lot of wiggle room inside the servo bays.
Adding the trailing edge cap to the center section
07-13-2019, 09:32 AM
#38
Thread Starter
Join Date: Sep 2014
Location: Scottsdale, AZ
Posts: 169
Likes: 0
Received 0 Likes
on
0 Posts
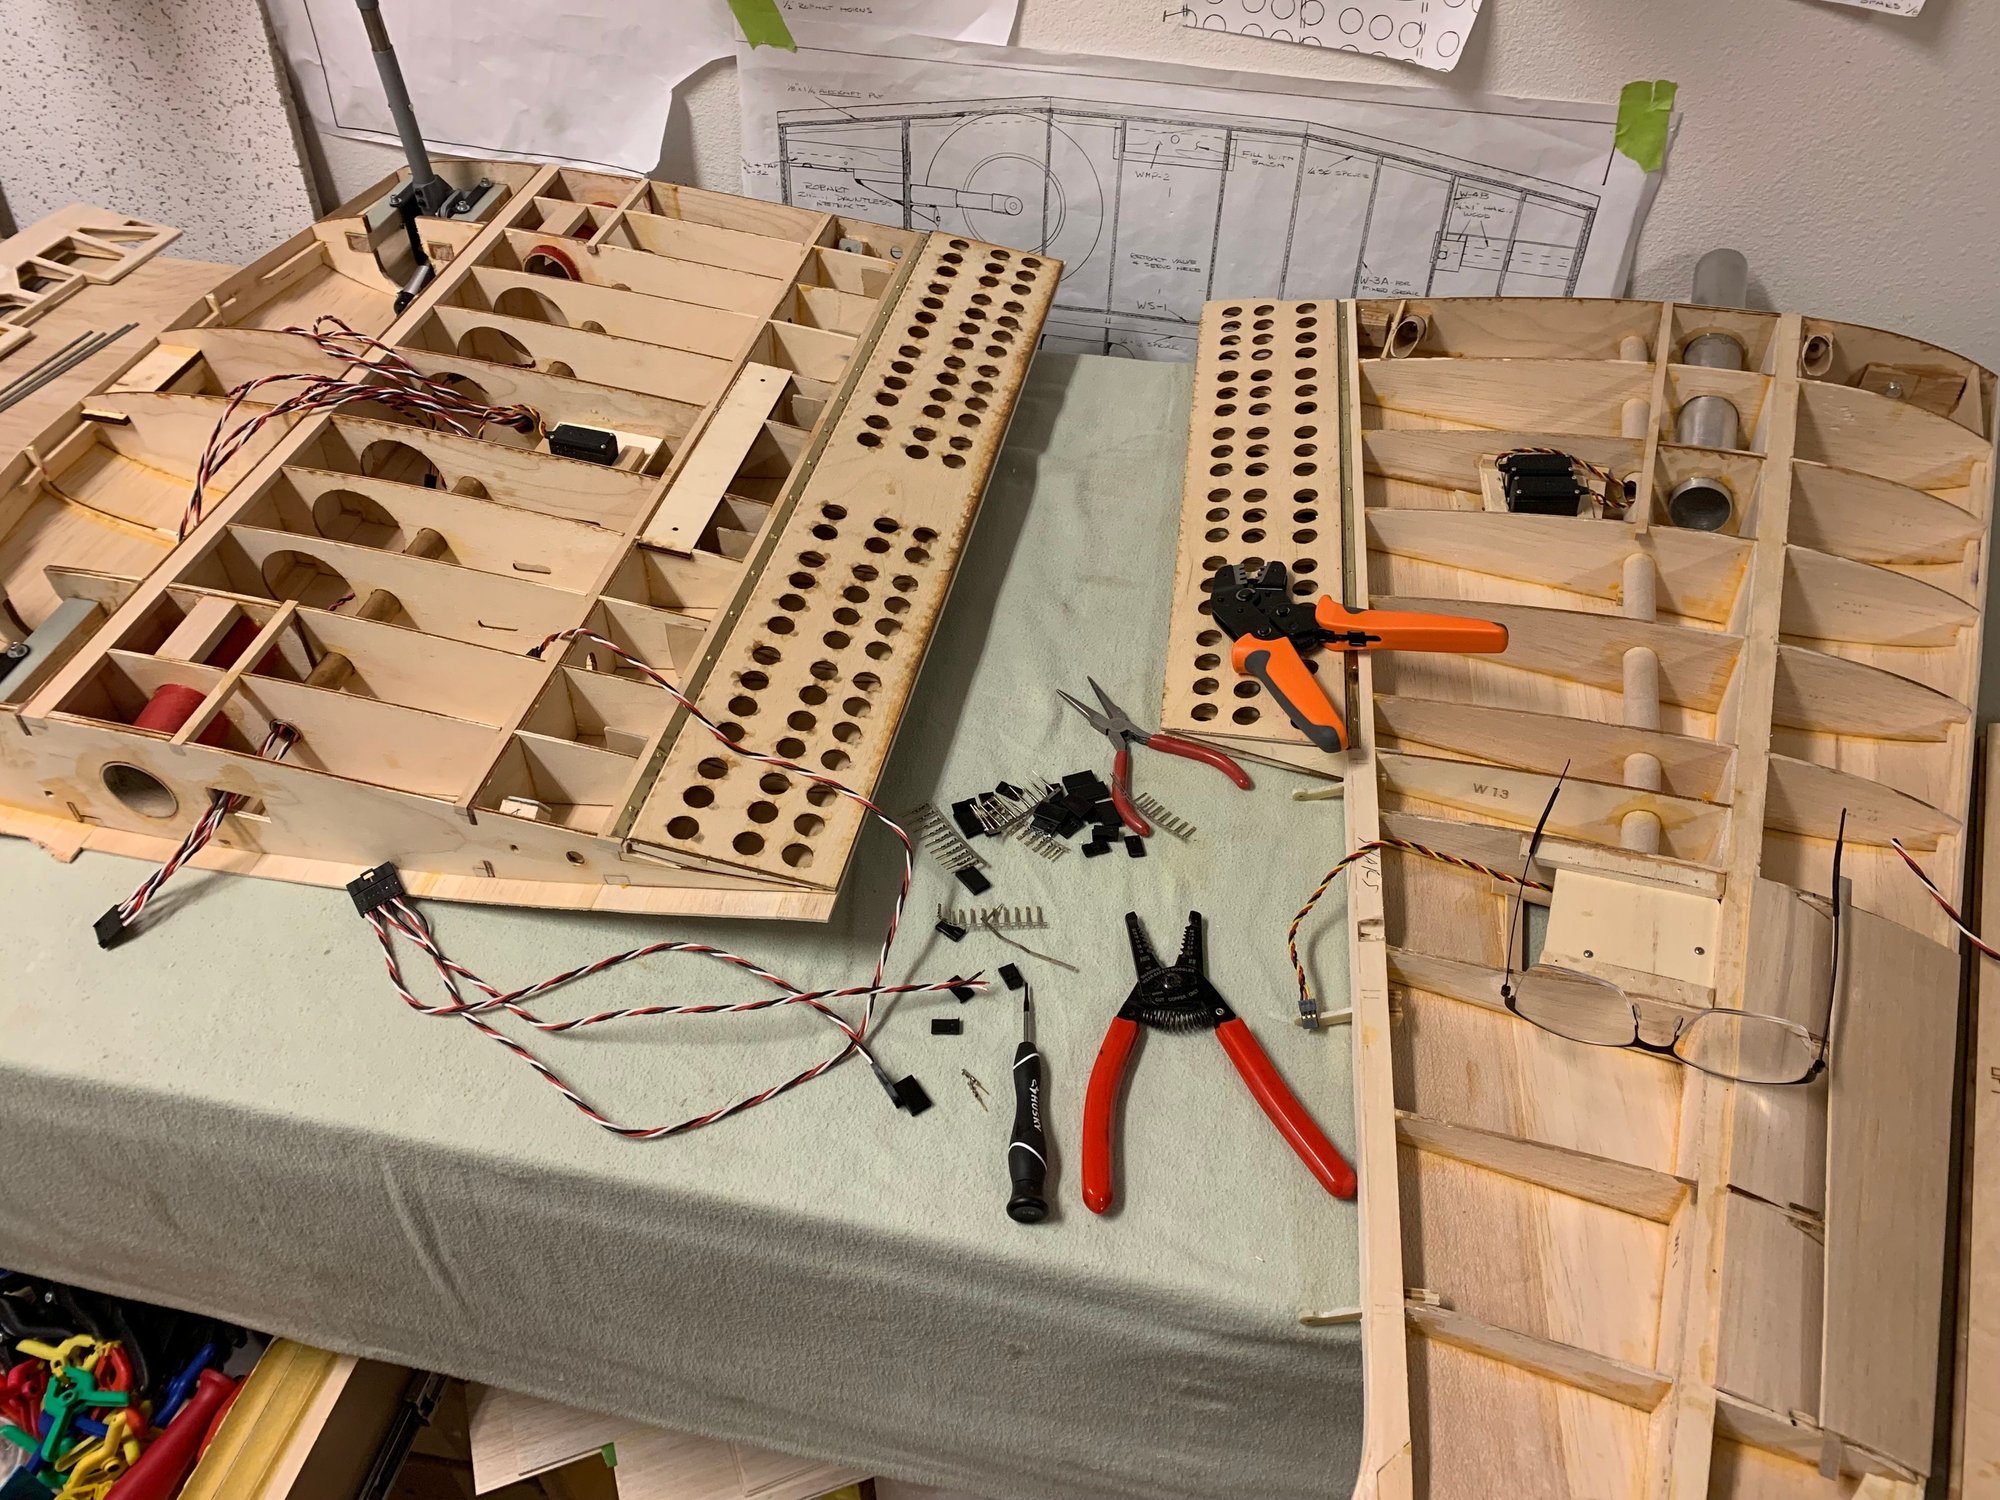
Making the wire harness. After ruining several of the pins, I realized that unlike the crimper I have at another location, this one is only for right handed people.
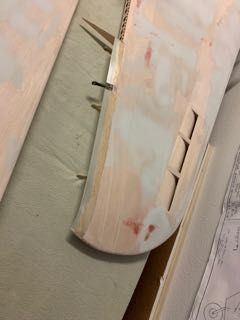
With the end cutout, I have lots of room to tuck the extra wire length into the wing.
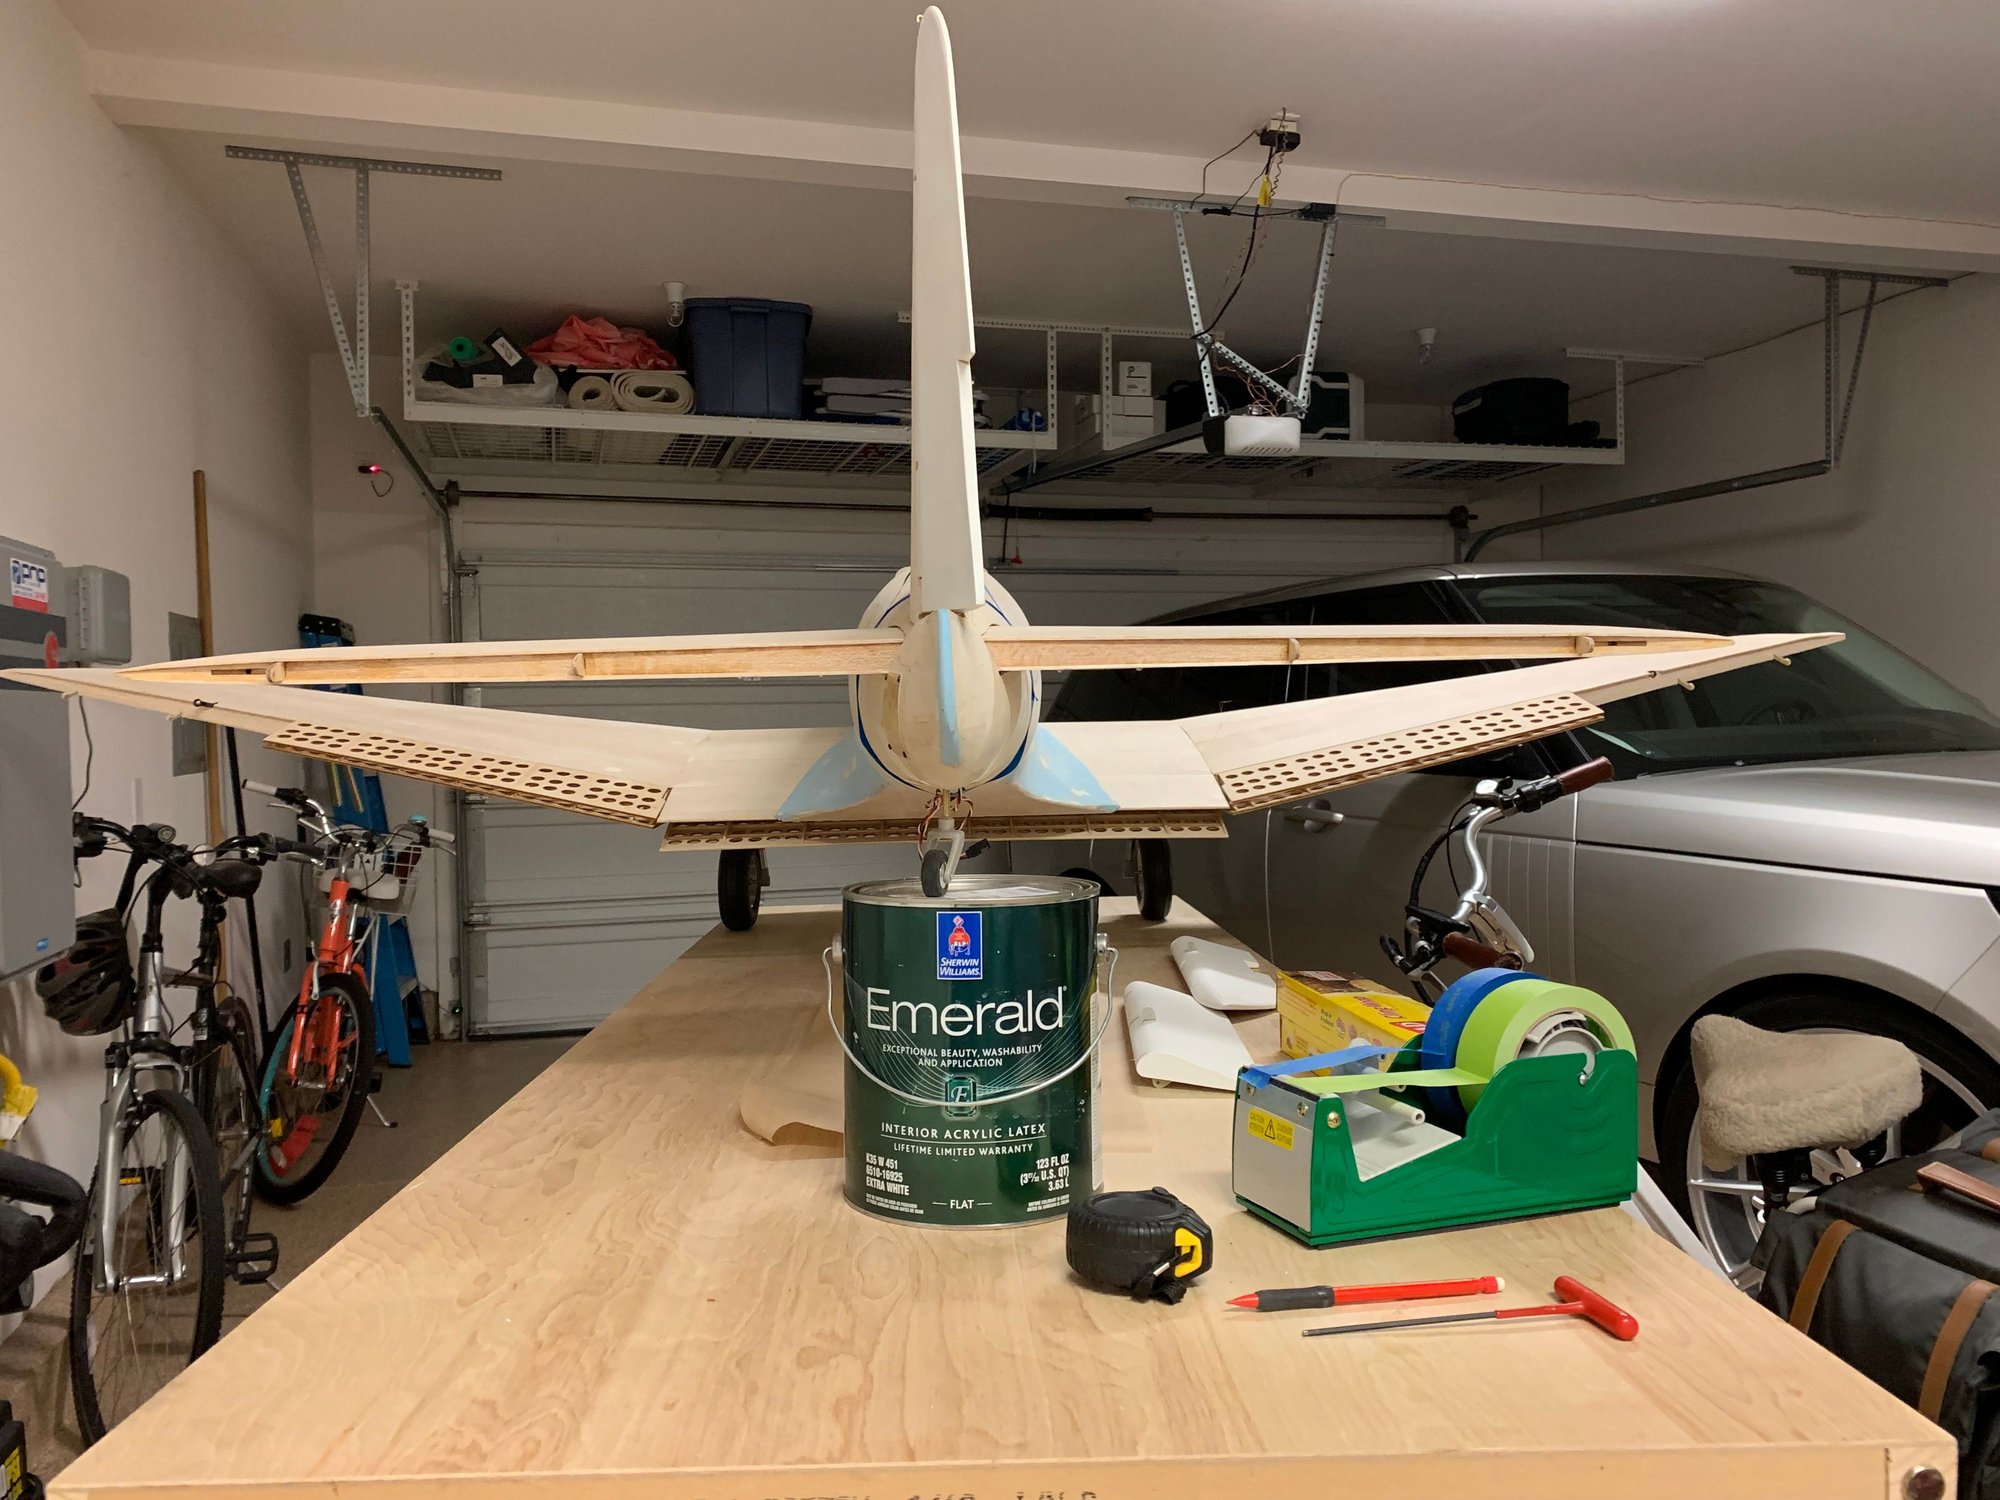
A quick check of the surfaces look Ok. I want to repeat this with the wing assembled and some blue tape on the front of the stab and fin so I can actually see it. I noticed I'm a little left of center in this shot.
Next on the list is to frame out the retract area, pre-drill the wing mounts, and assemble the control linkages for the flaps. I will also work on the fuse side of the mounts. I also planned to correct the wing faring width but need to find a sheet of ply to make new pieces. I'll button up some of the top side of the outer wings but still need to verify that the servos work well before they are all sealed up. I'd be interested in any comments regarding the pros and cons of tapping hard wood or blind nuts for the wing mounts. I'm looking forward to moving back to the tail section of the fuse.
08-02-2019, 09:28 AM
#39
Thread Starter
Join Date: Sep 2014
Location: Scottsdale, AZ
Posts: 169
Likes: 0
Received 0 Likes
on
0 Posts
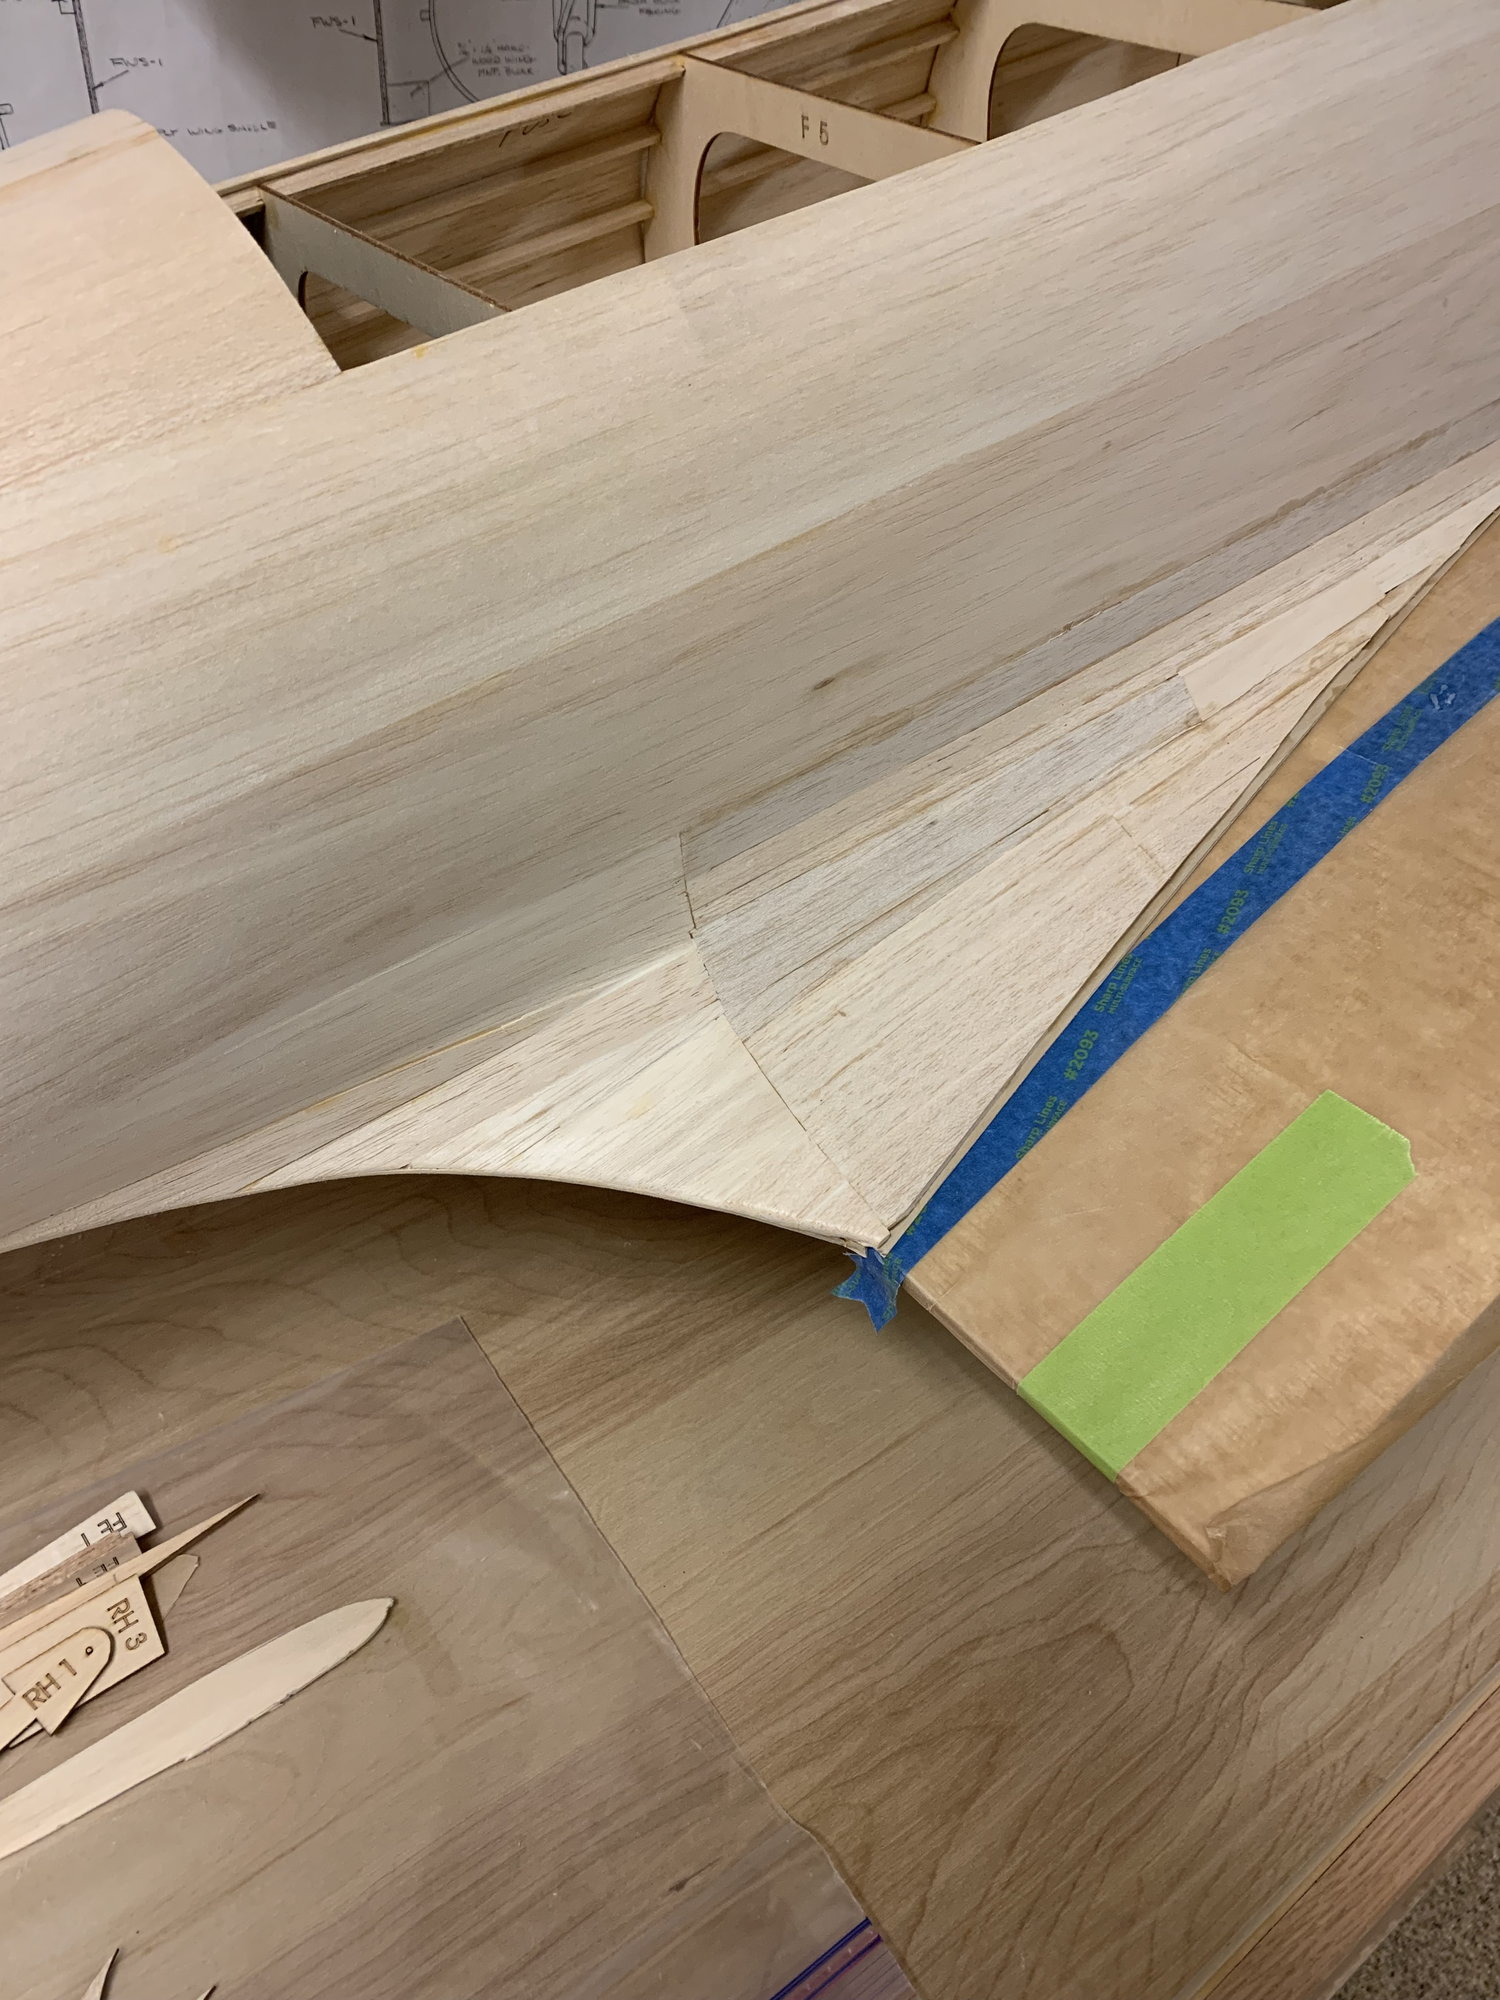
On the trailing edge, I want to have a hard back edge that the TE fits up against. I plan to use both the provided faring and wider pieces I cut.
The two pieces laminated together should add some strength in an otherwise weak area. 1/8" balsa will run over and up to the back of the basswood stop.
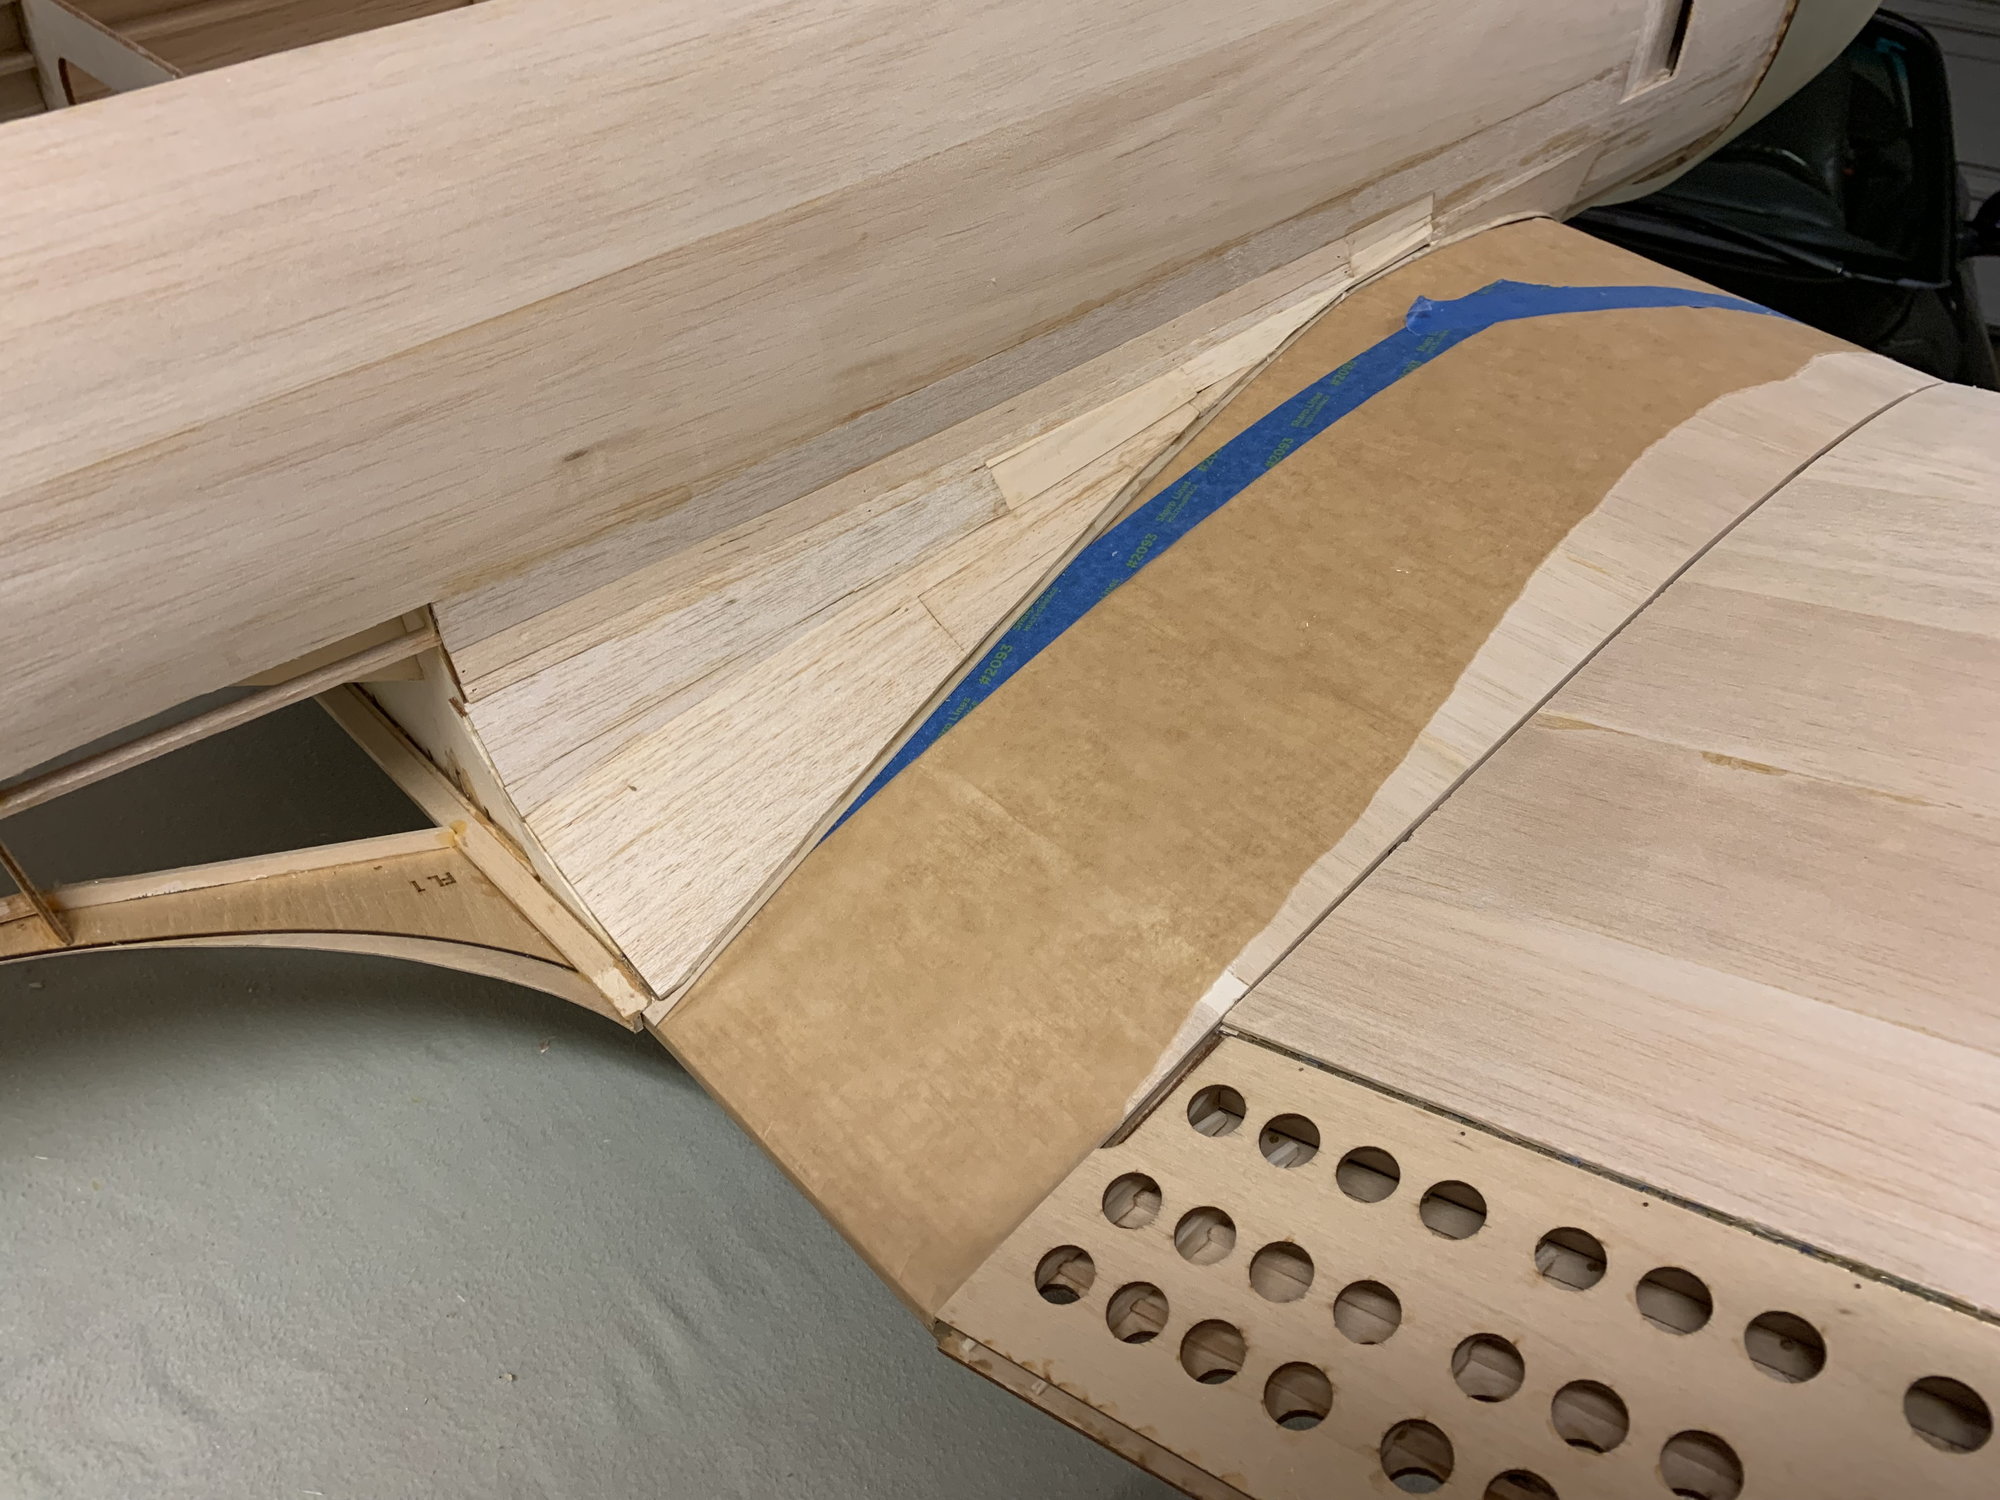
Lots of tiny pieces. I saw where Kalima (midastouch73) on RC Scale used ply instead. I think I'd like to try that next time. I have used Superfil to thin coat over this area. I find it earier to sand/contour and really adds strength along the edge.
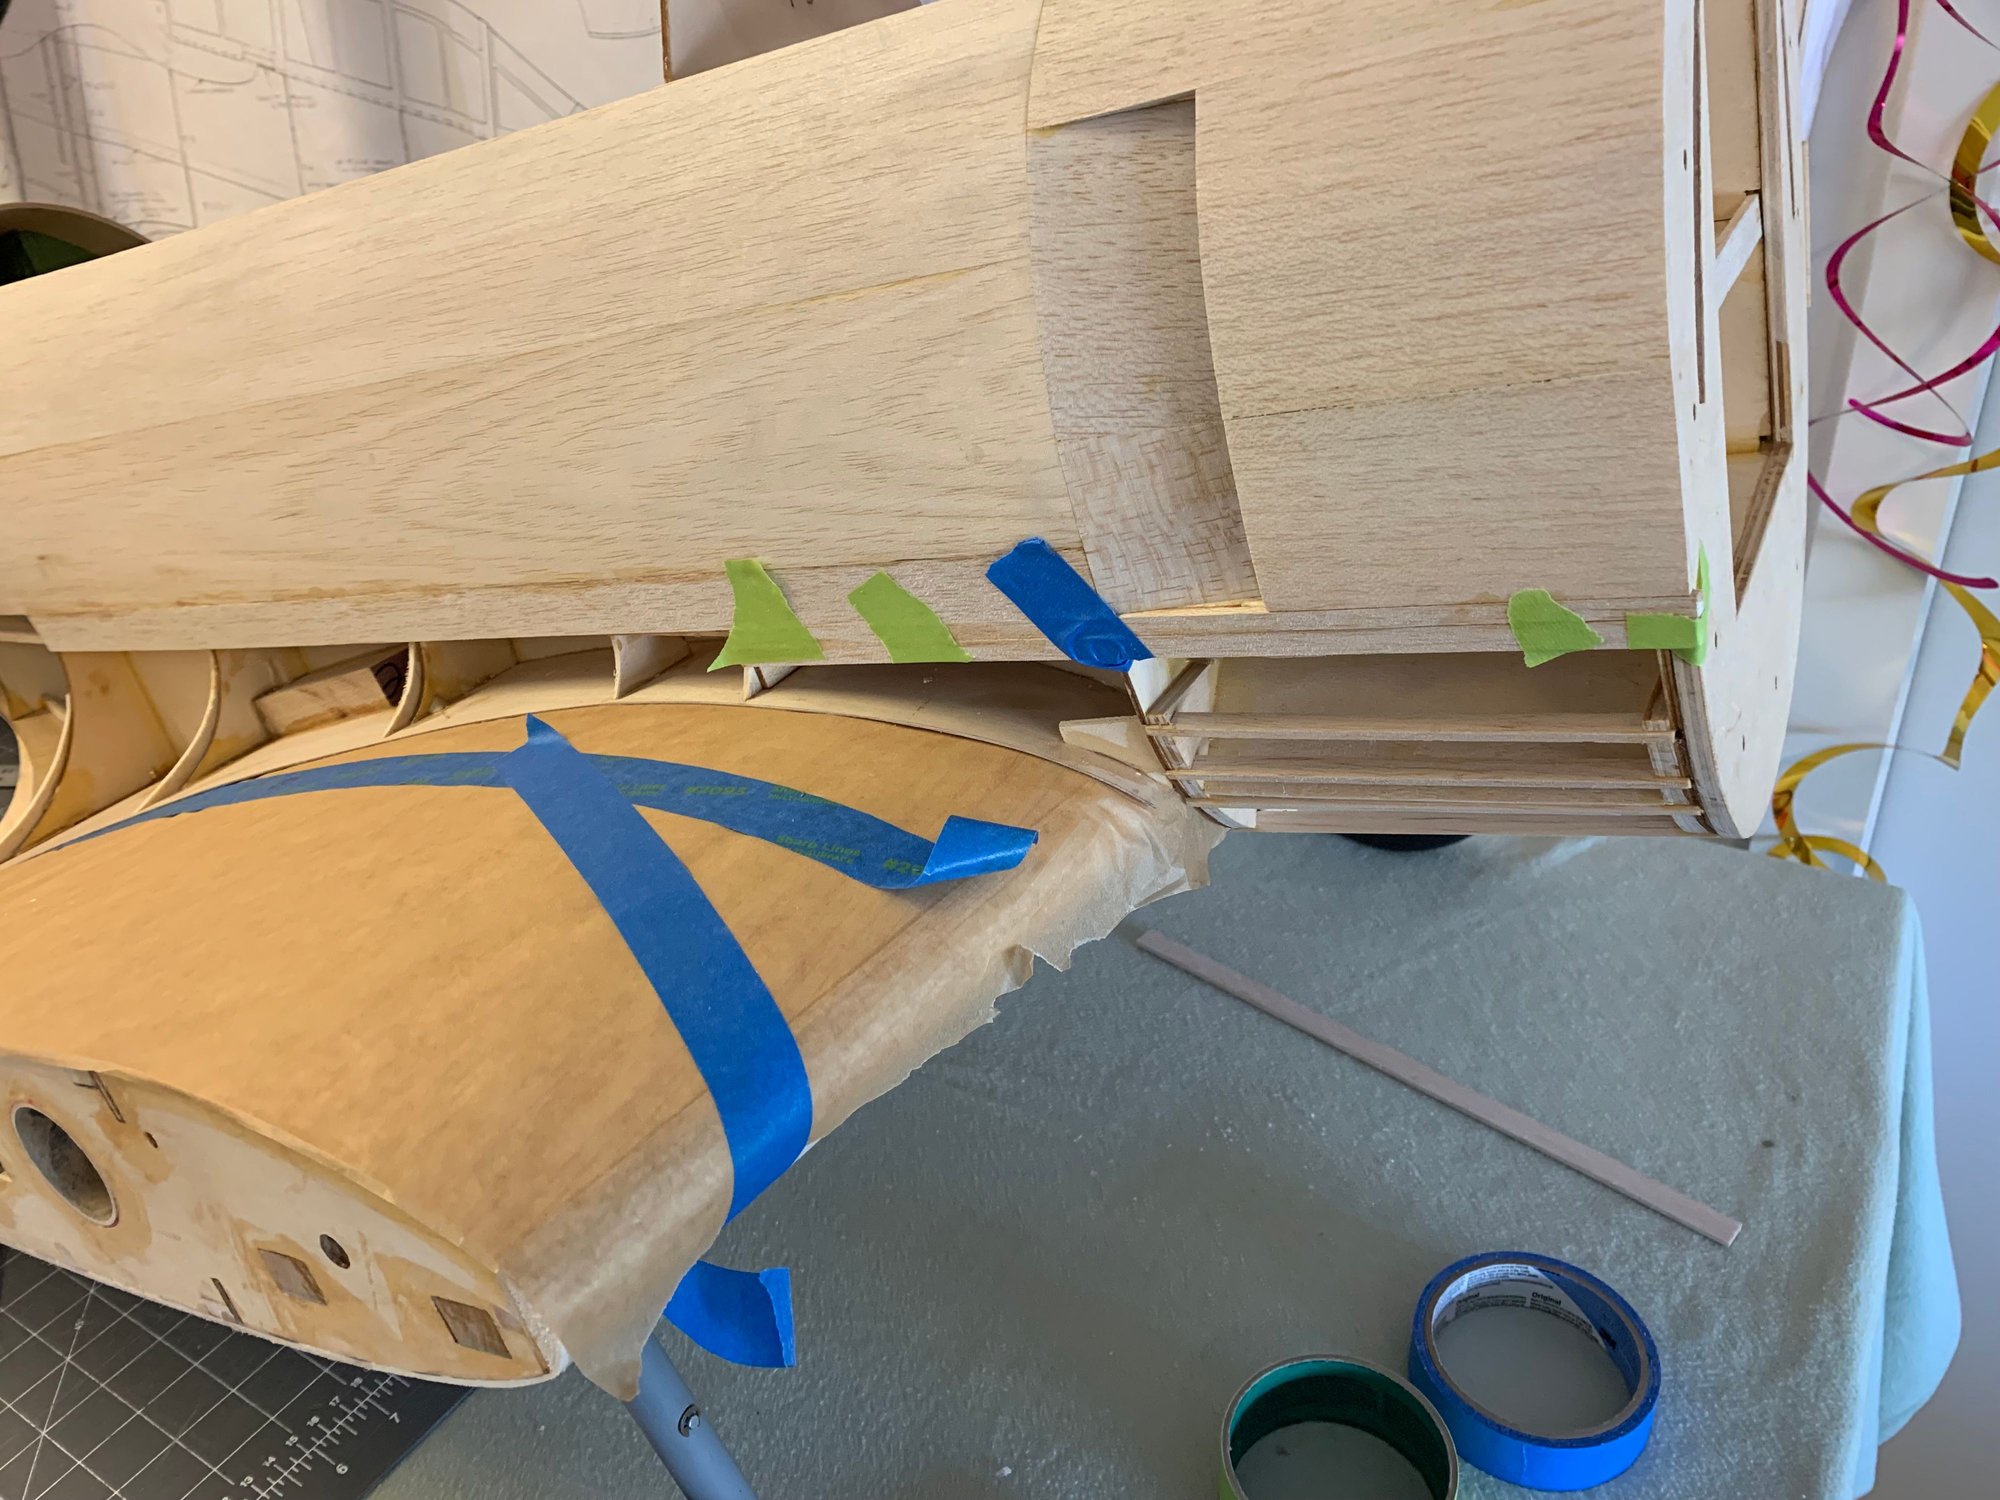
Mounts were finished and I added about 1" to the width of the faring at the TE.
08-02-2019, 09:36 AM
#40
Thread Starter
Join Date: Sep 2014
Location: Scottsdale, AZ
Posts: 169
Likes: 0
Received 0 Likes
on
0 Posts
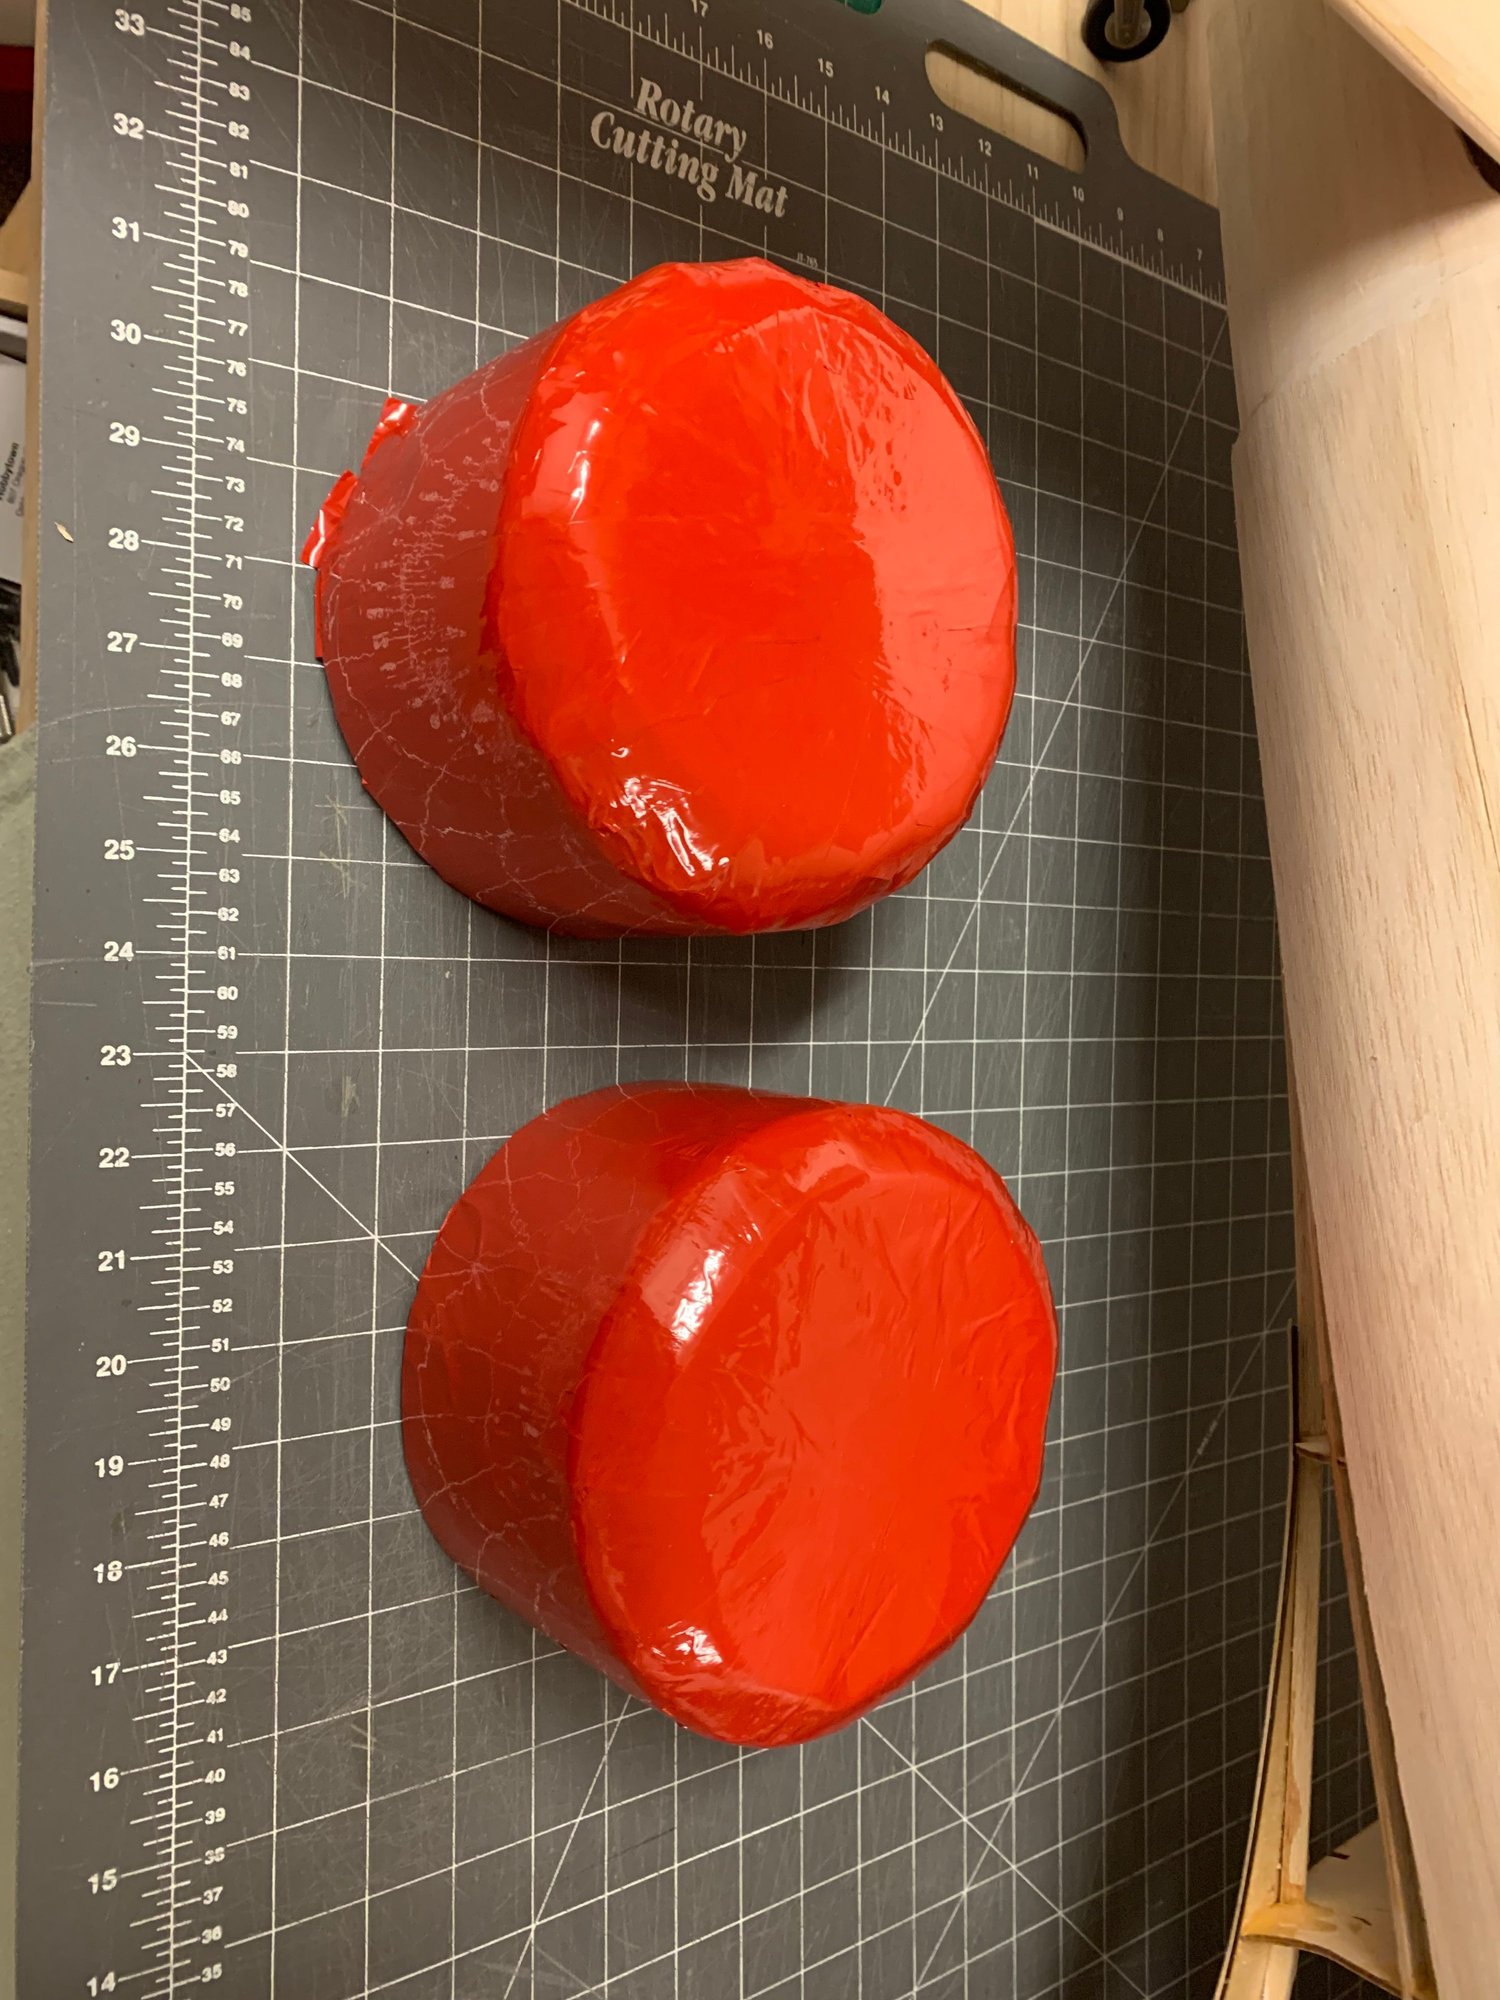
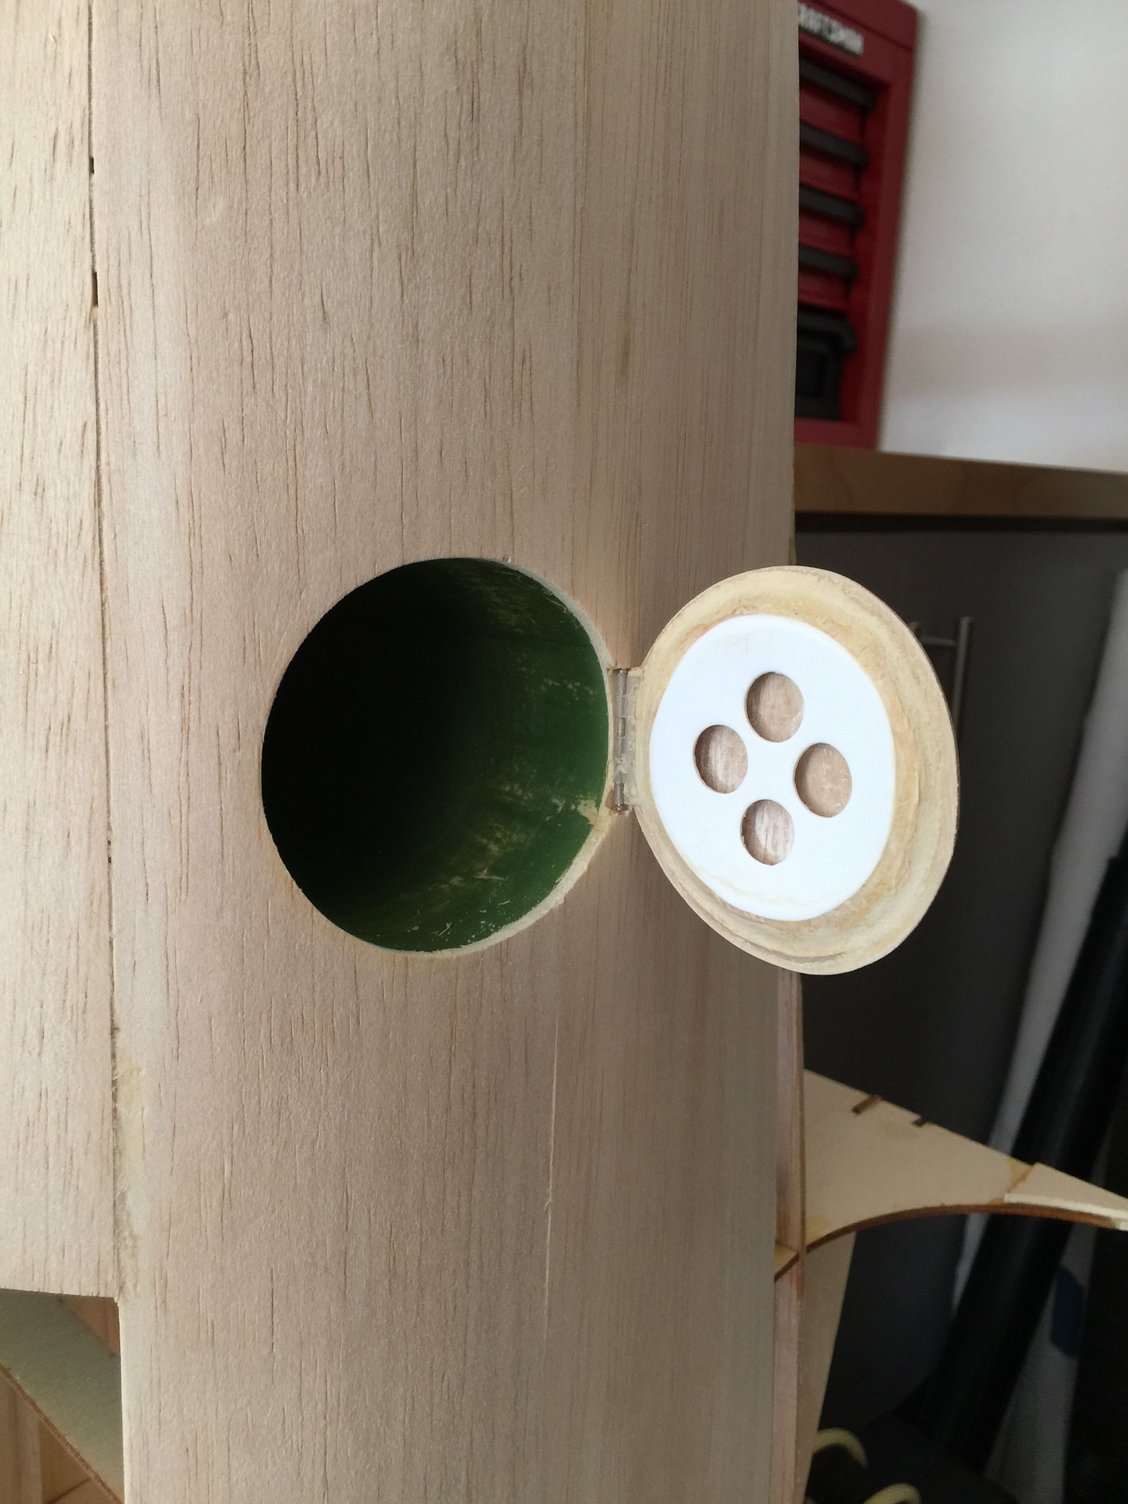
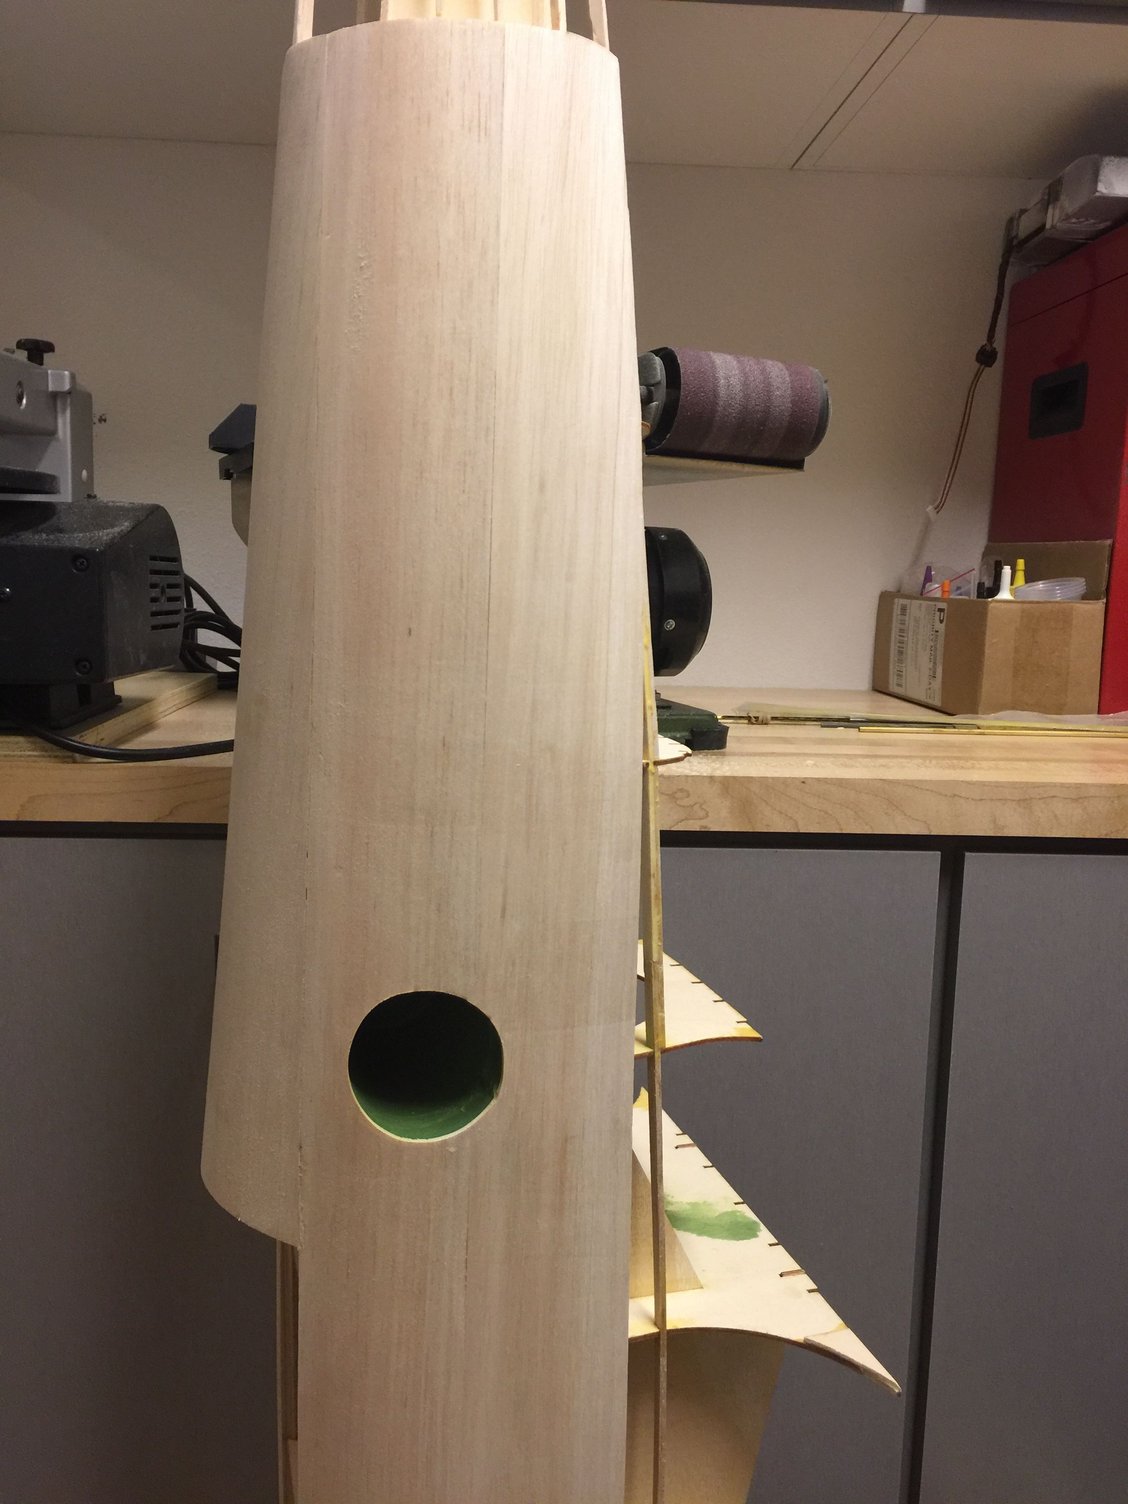
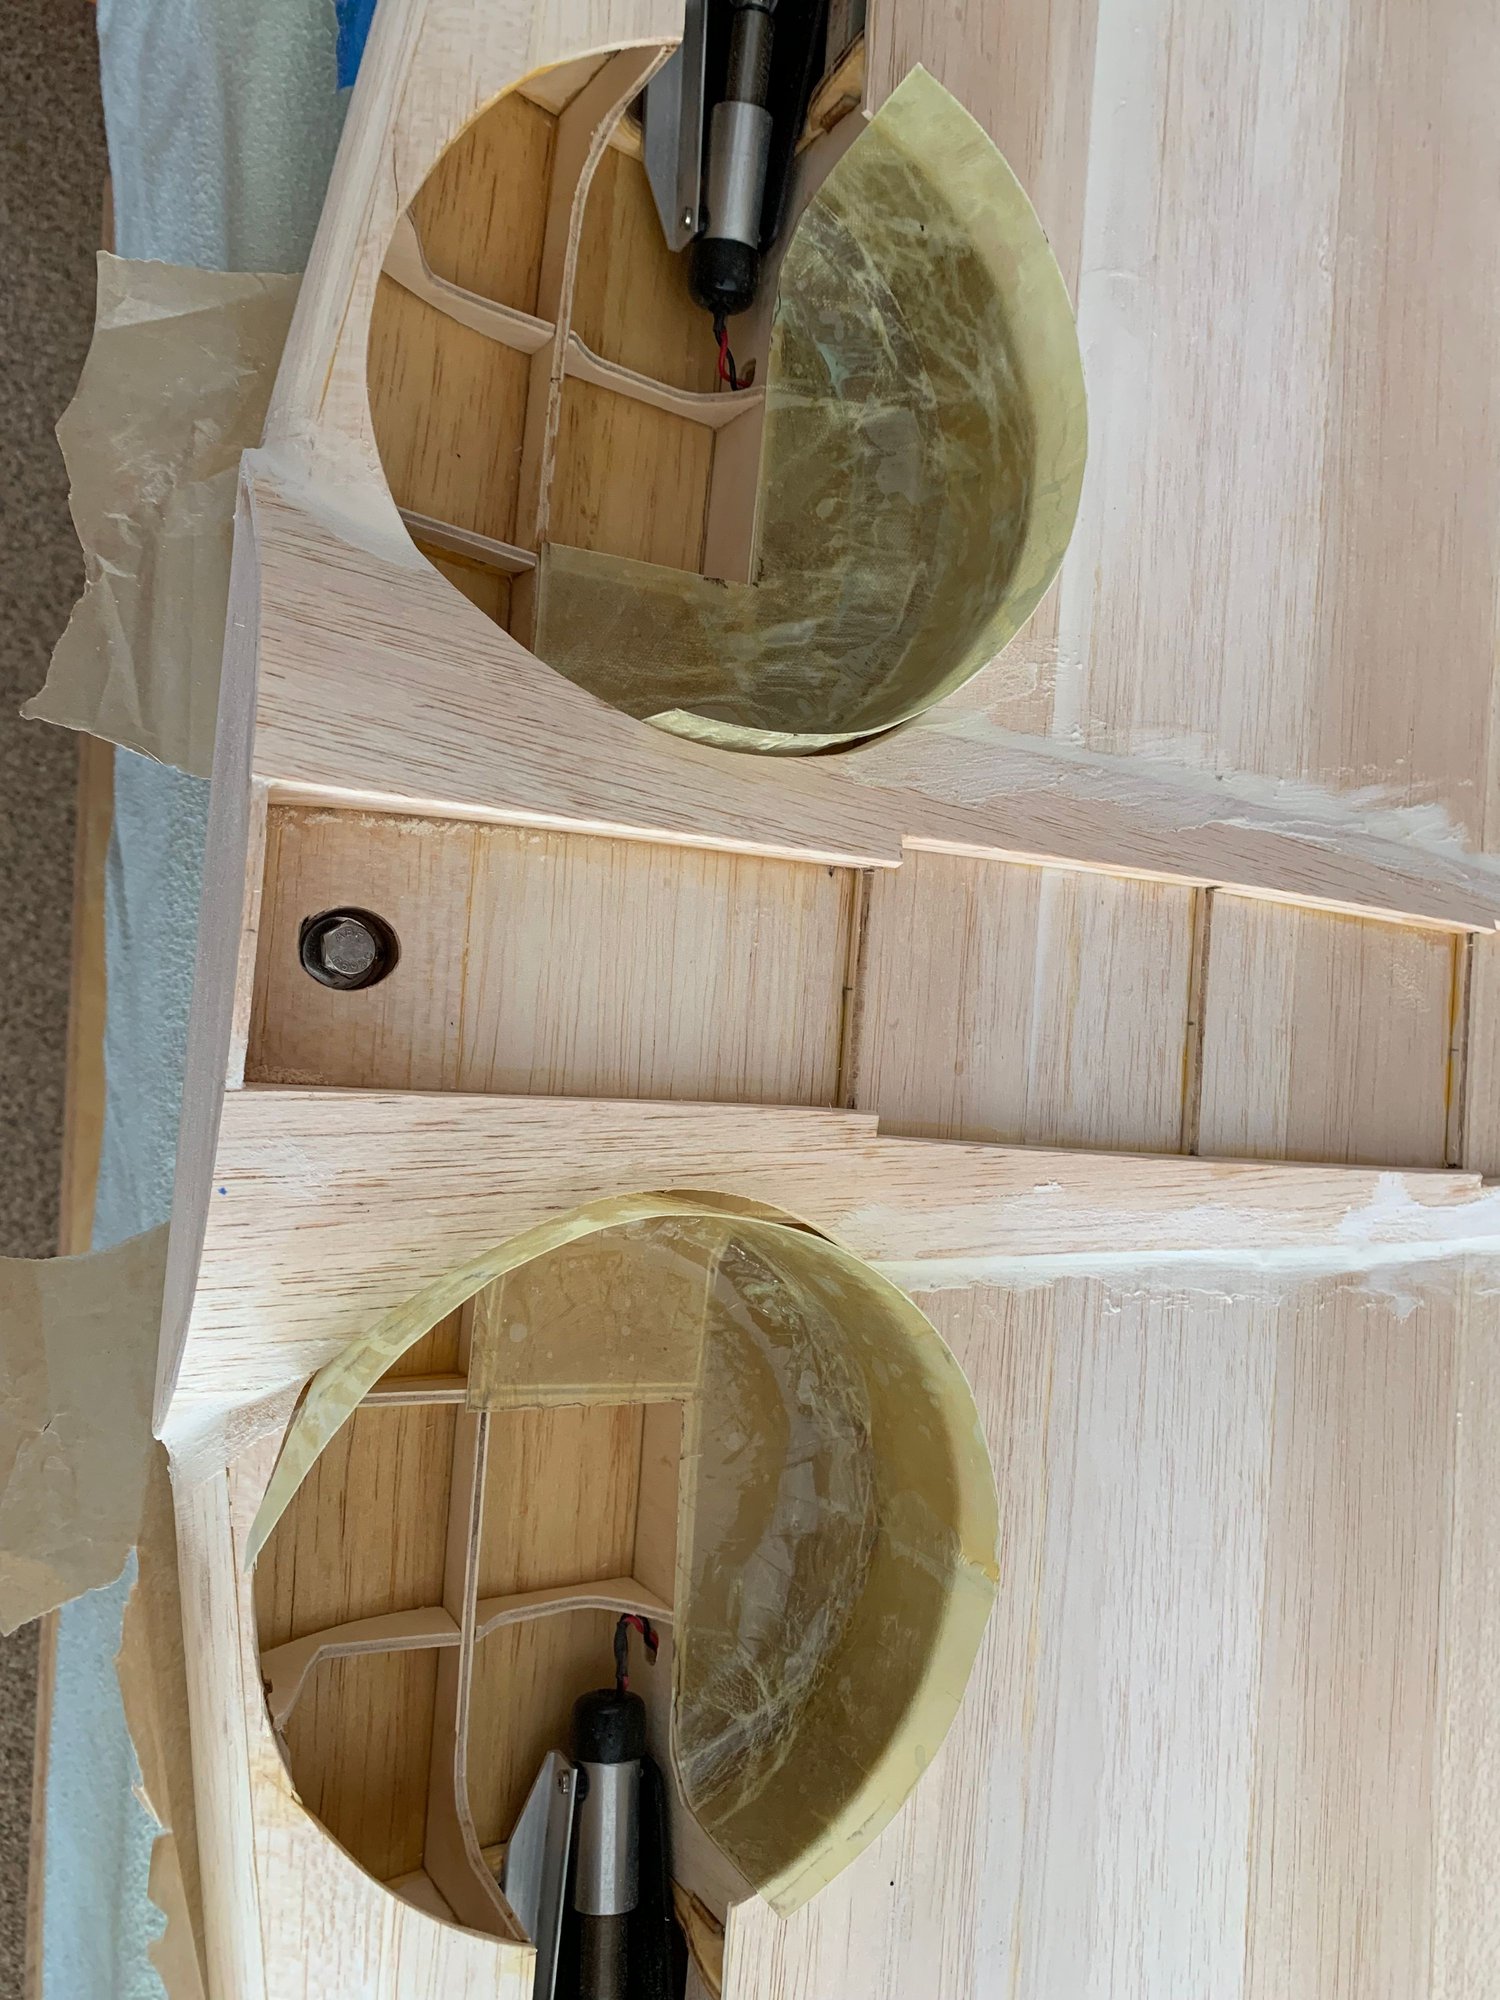
Plugs were made from purple foam. I used the wheelwell cutouts as a template. Monokote and with a layer of paste wax prior to FG.
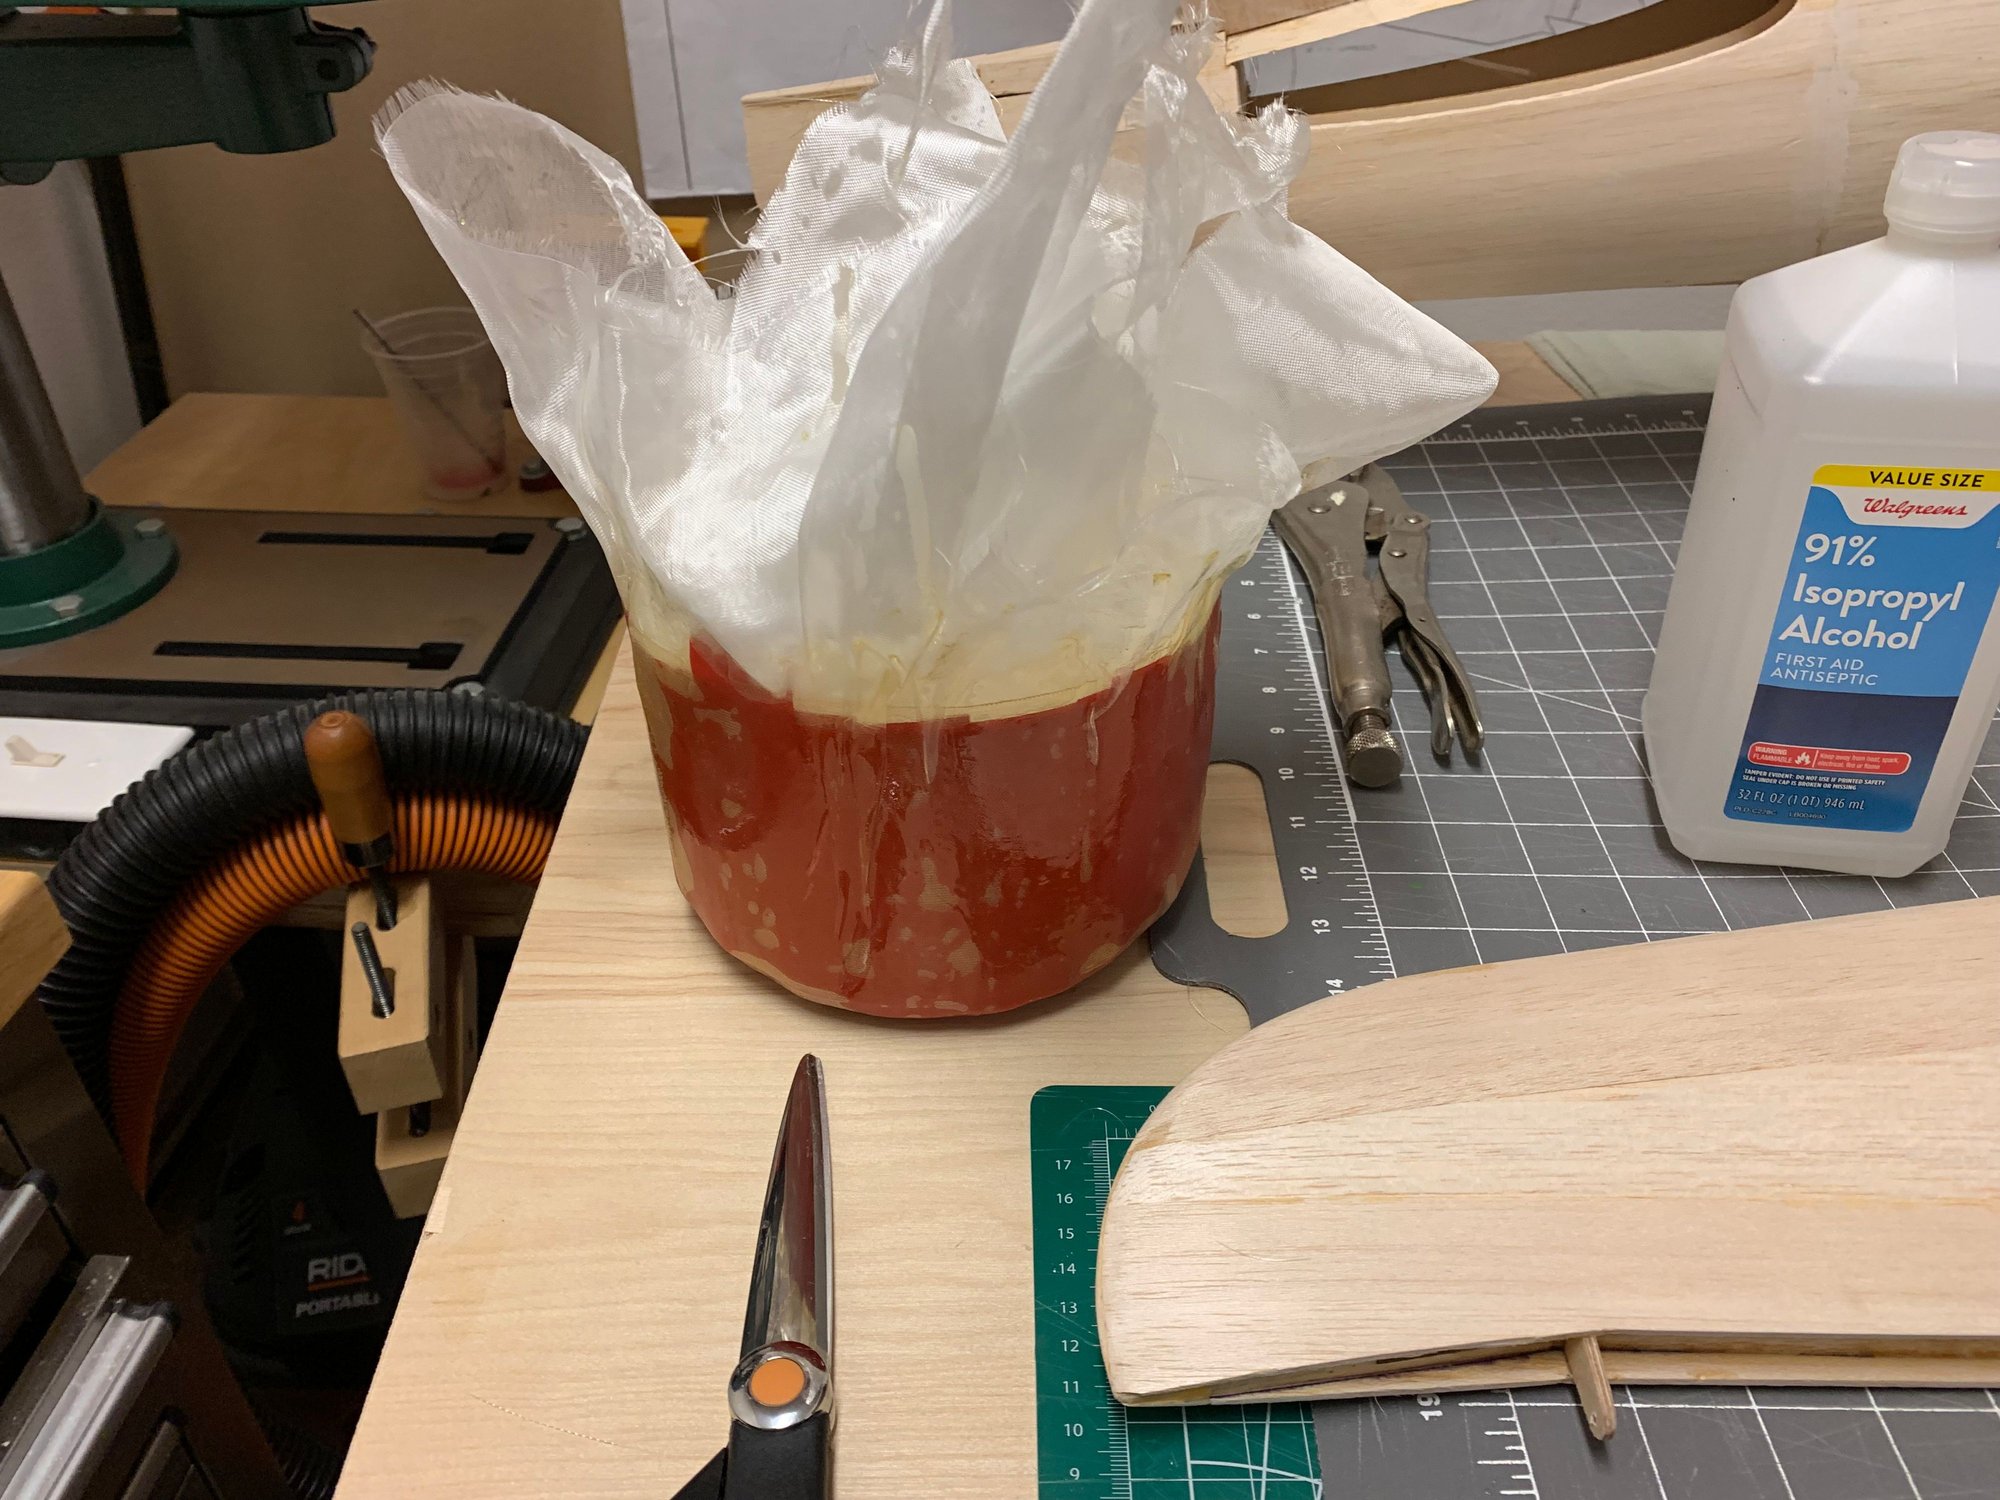
I used a 3/4 oz layer first, followed by 2 oz, 5 (two pieces - top and side), and one more 3/4 oz layer. I'm not an expert at this, it's just what I'm used to using.
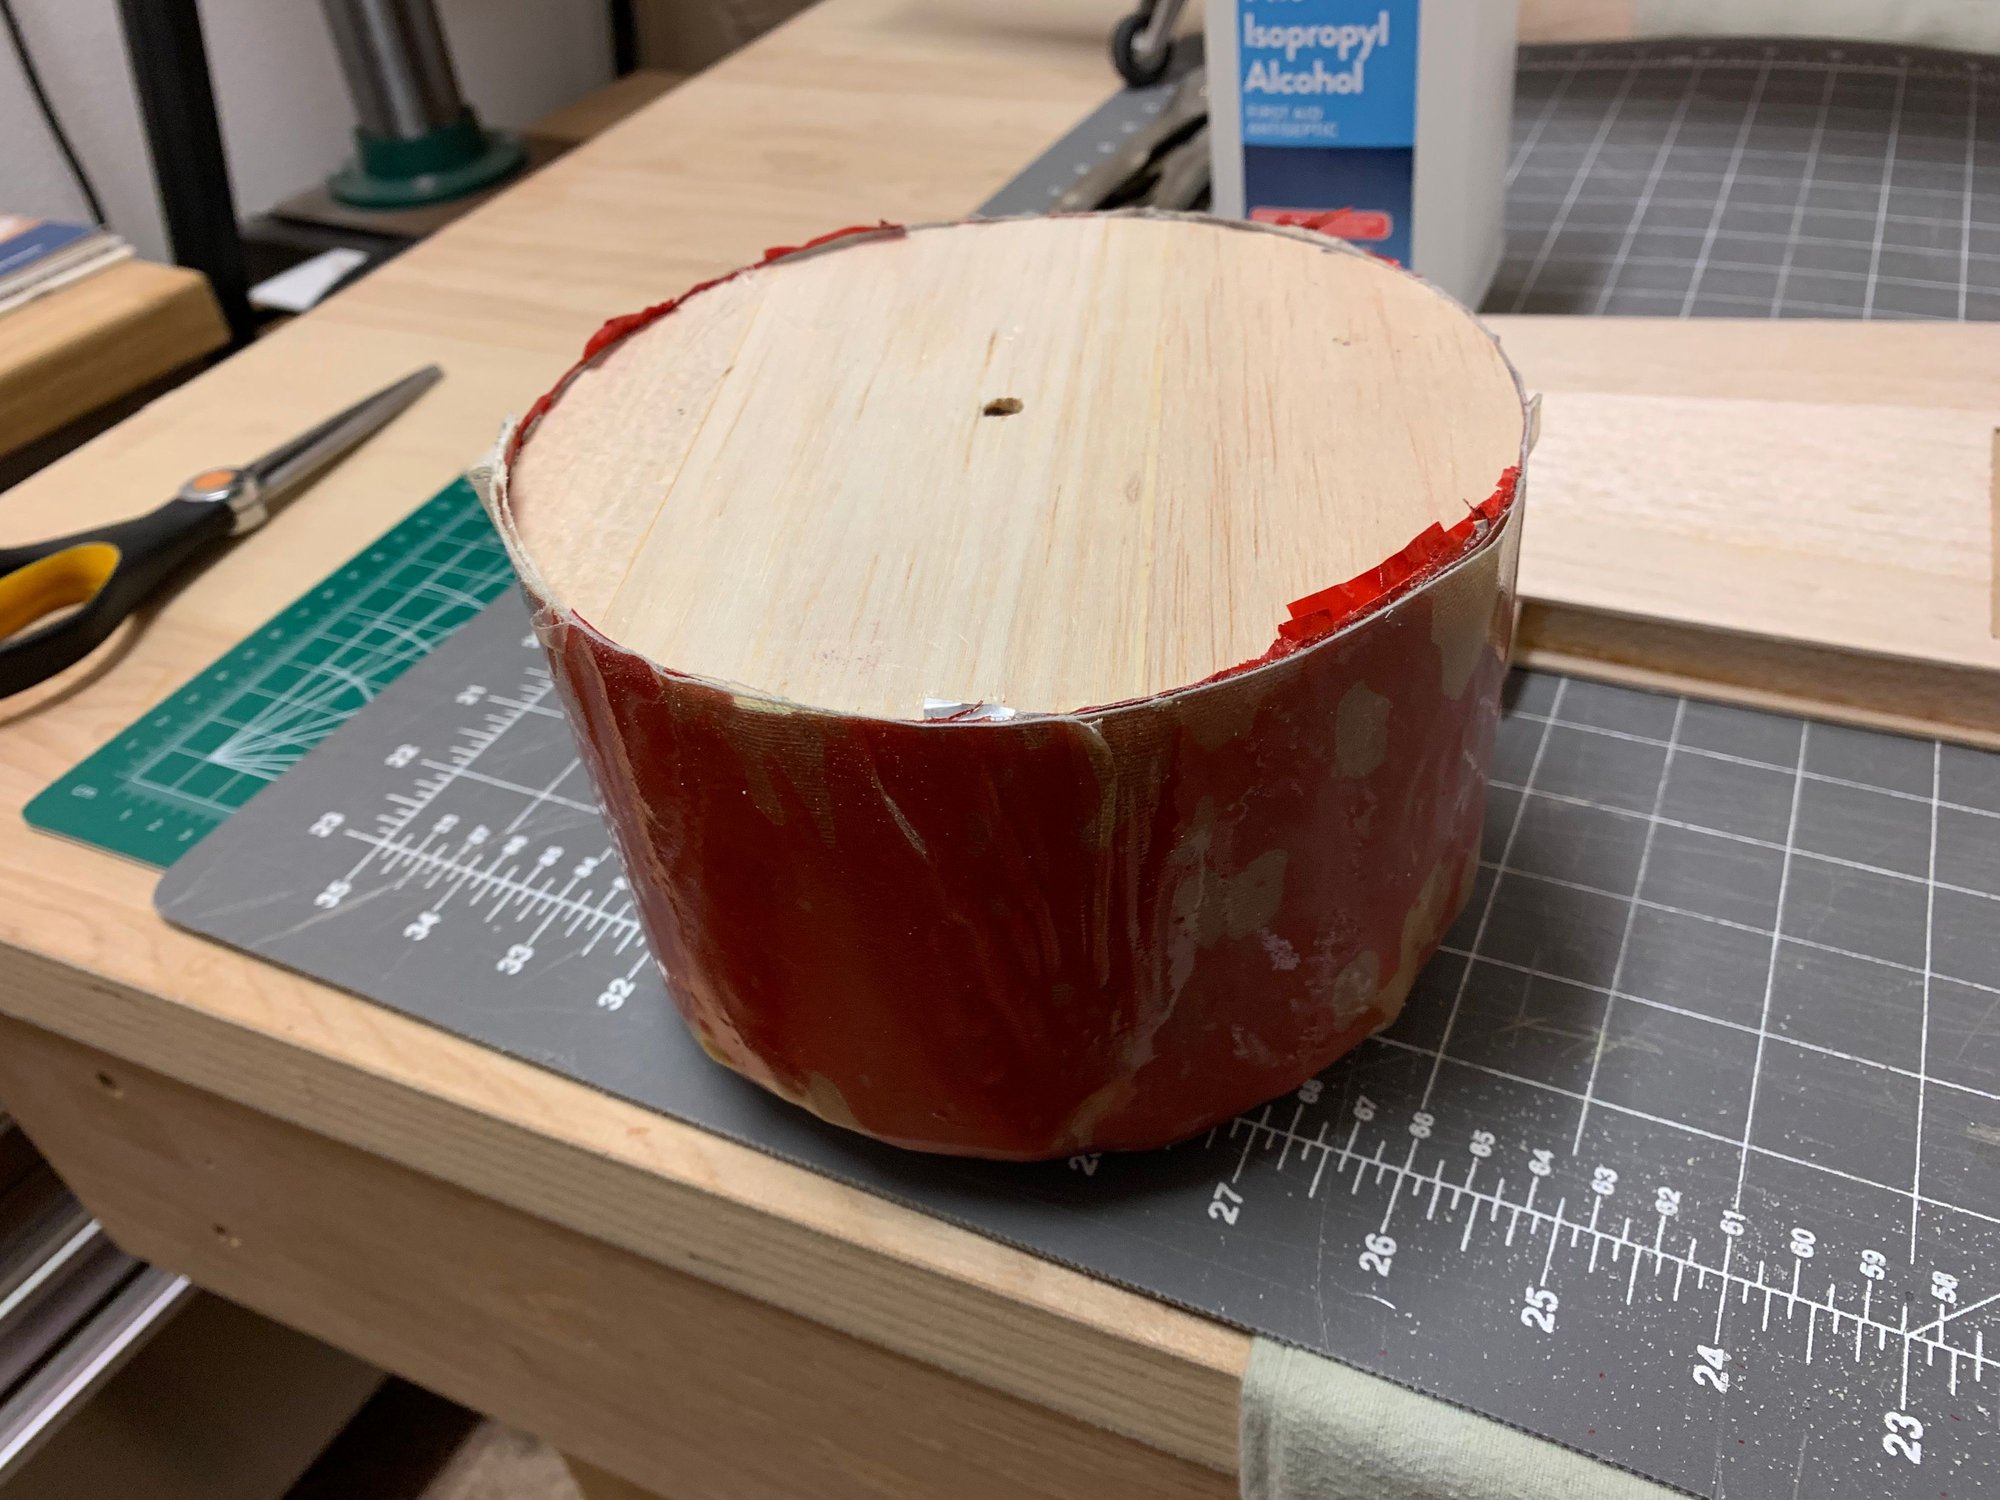
Not it's time to get the foam out. I don't use the acetone melting method and probably should. Digging this stuff out is a pain.
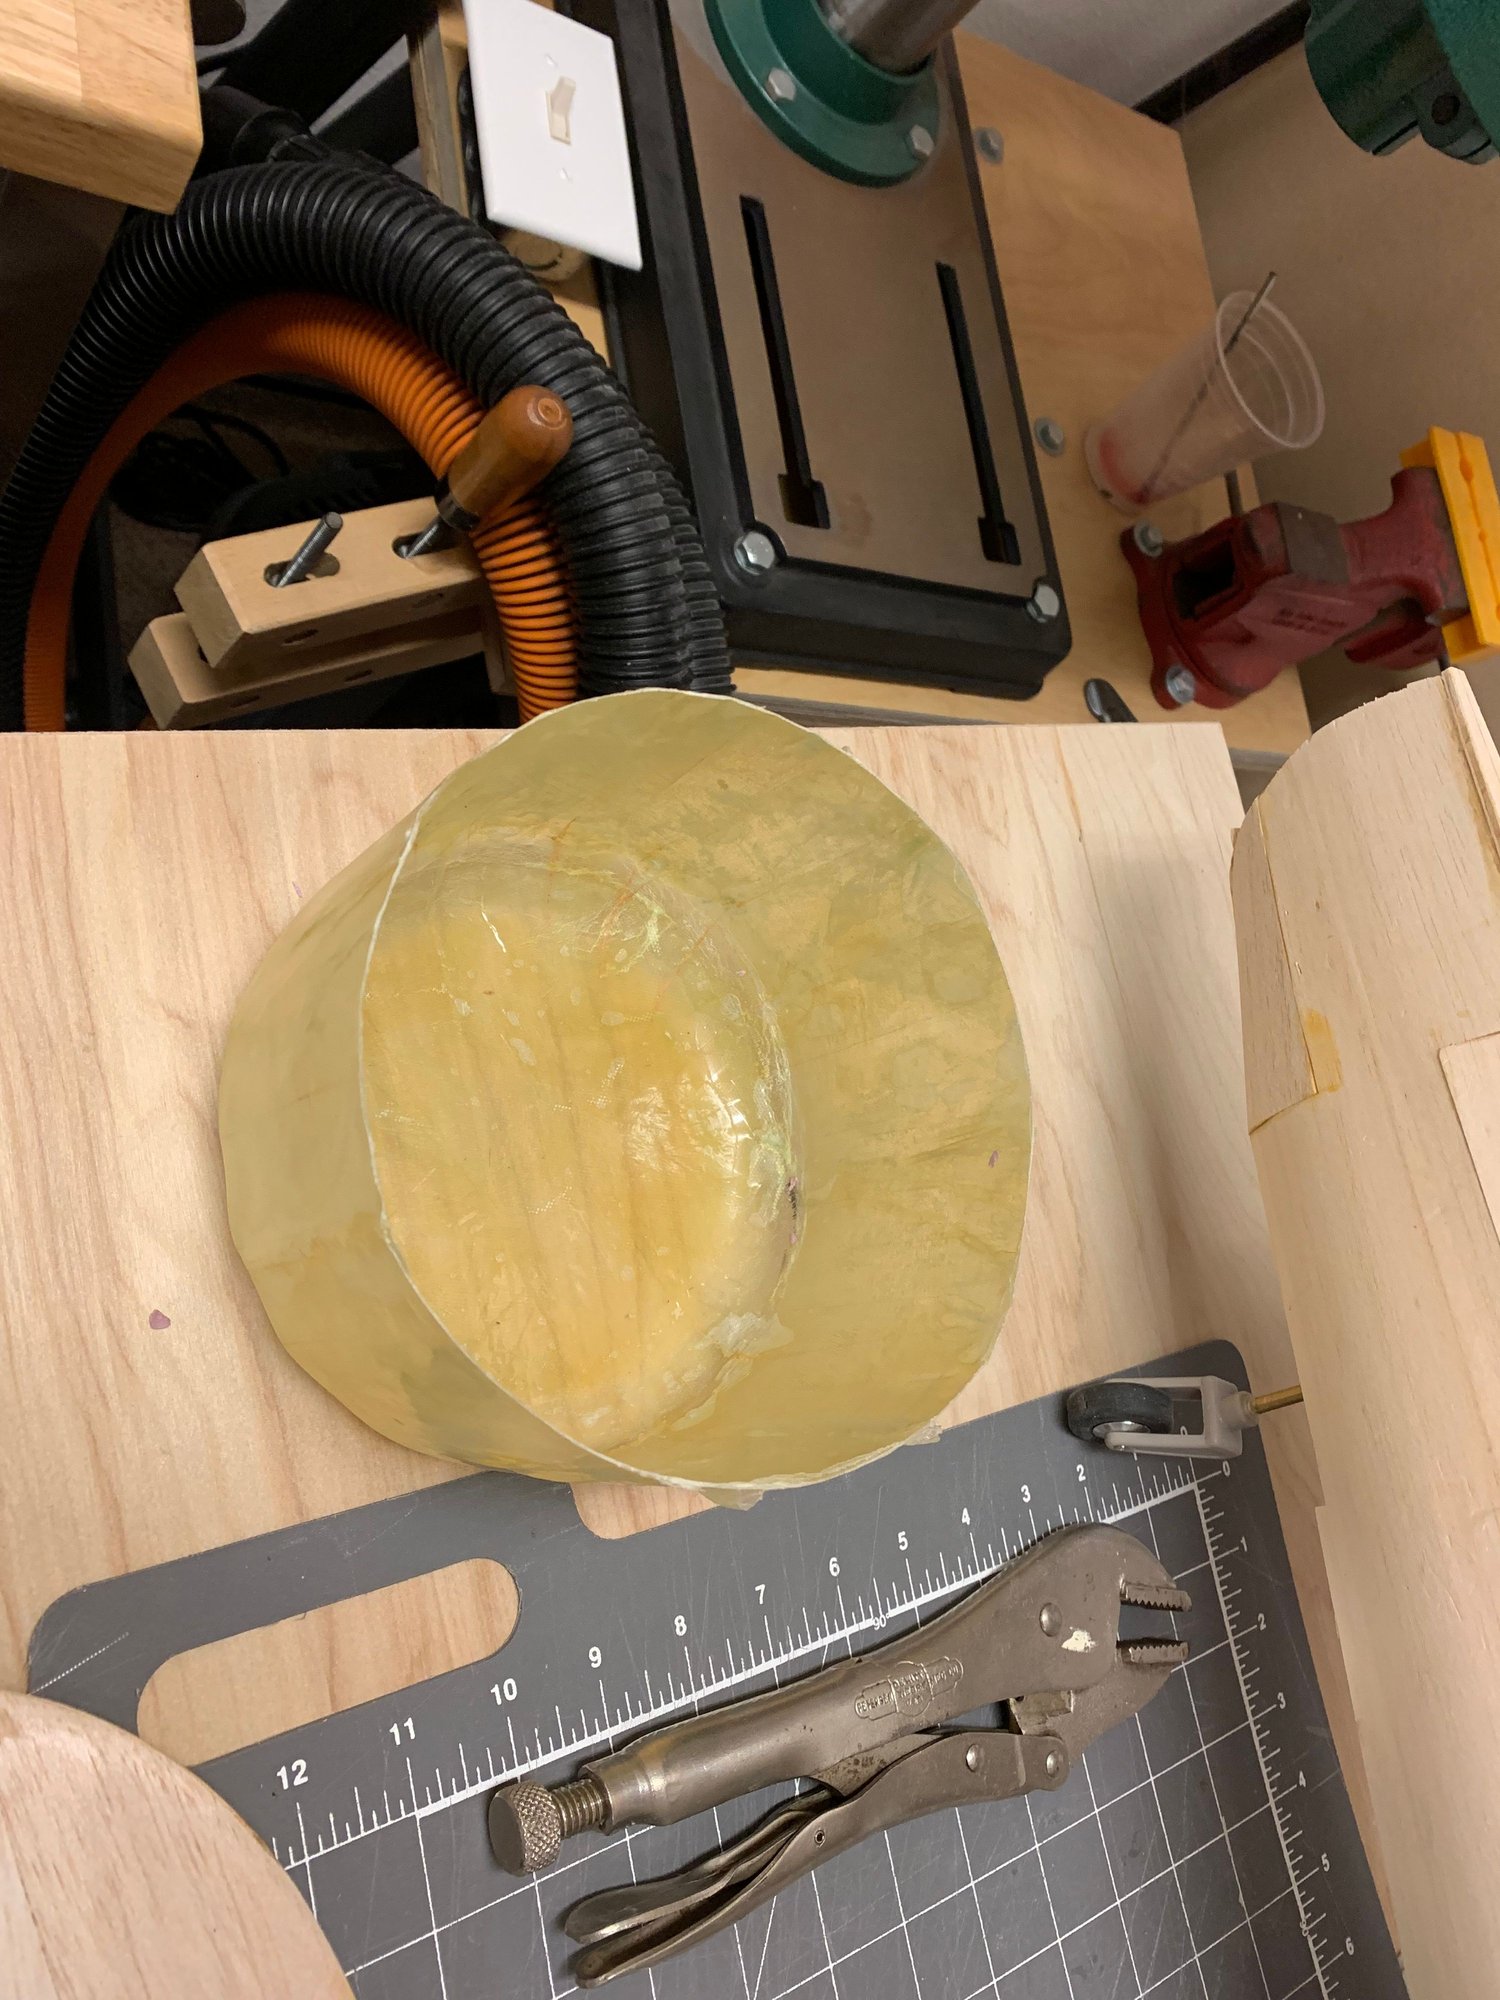
The completed part. I only made one first in case there was a dimensional issue or some other problem. In reality, you only need a little over half in the scale version. So one doesn't quite make it work. I will most likely use a little Superfil around the inside to smooth it out.
08-02-2019, 11:34 PM
#41
Thread Starter
Join Date: Sep 2014
Location: Scottsdale, AZ
Posts: 169
Likes: 0
Received 0 Likes
on
0 Posts
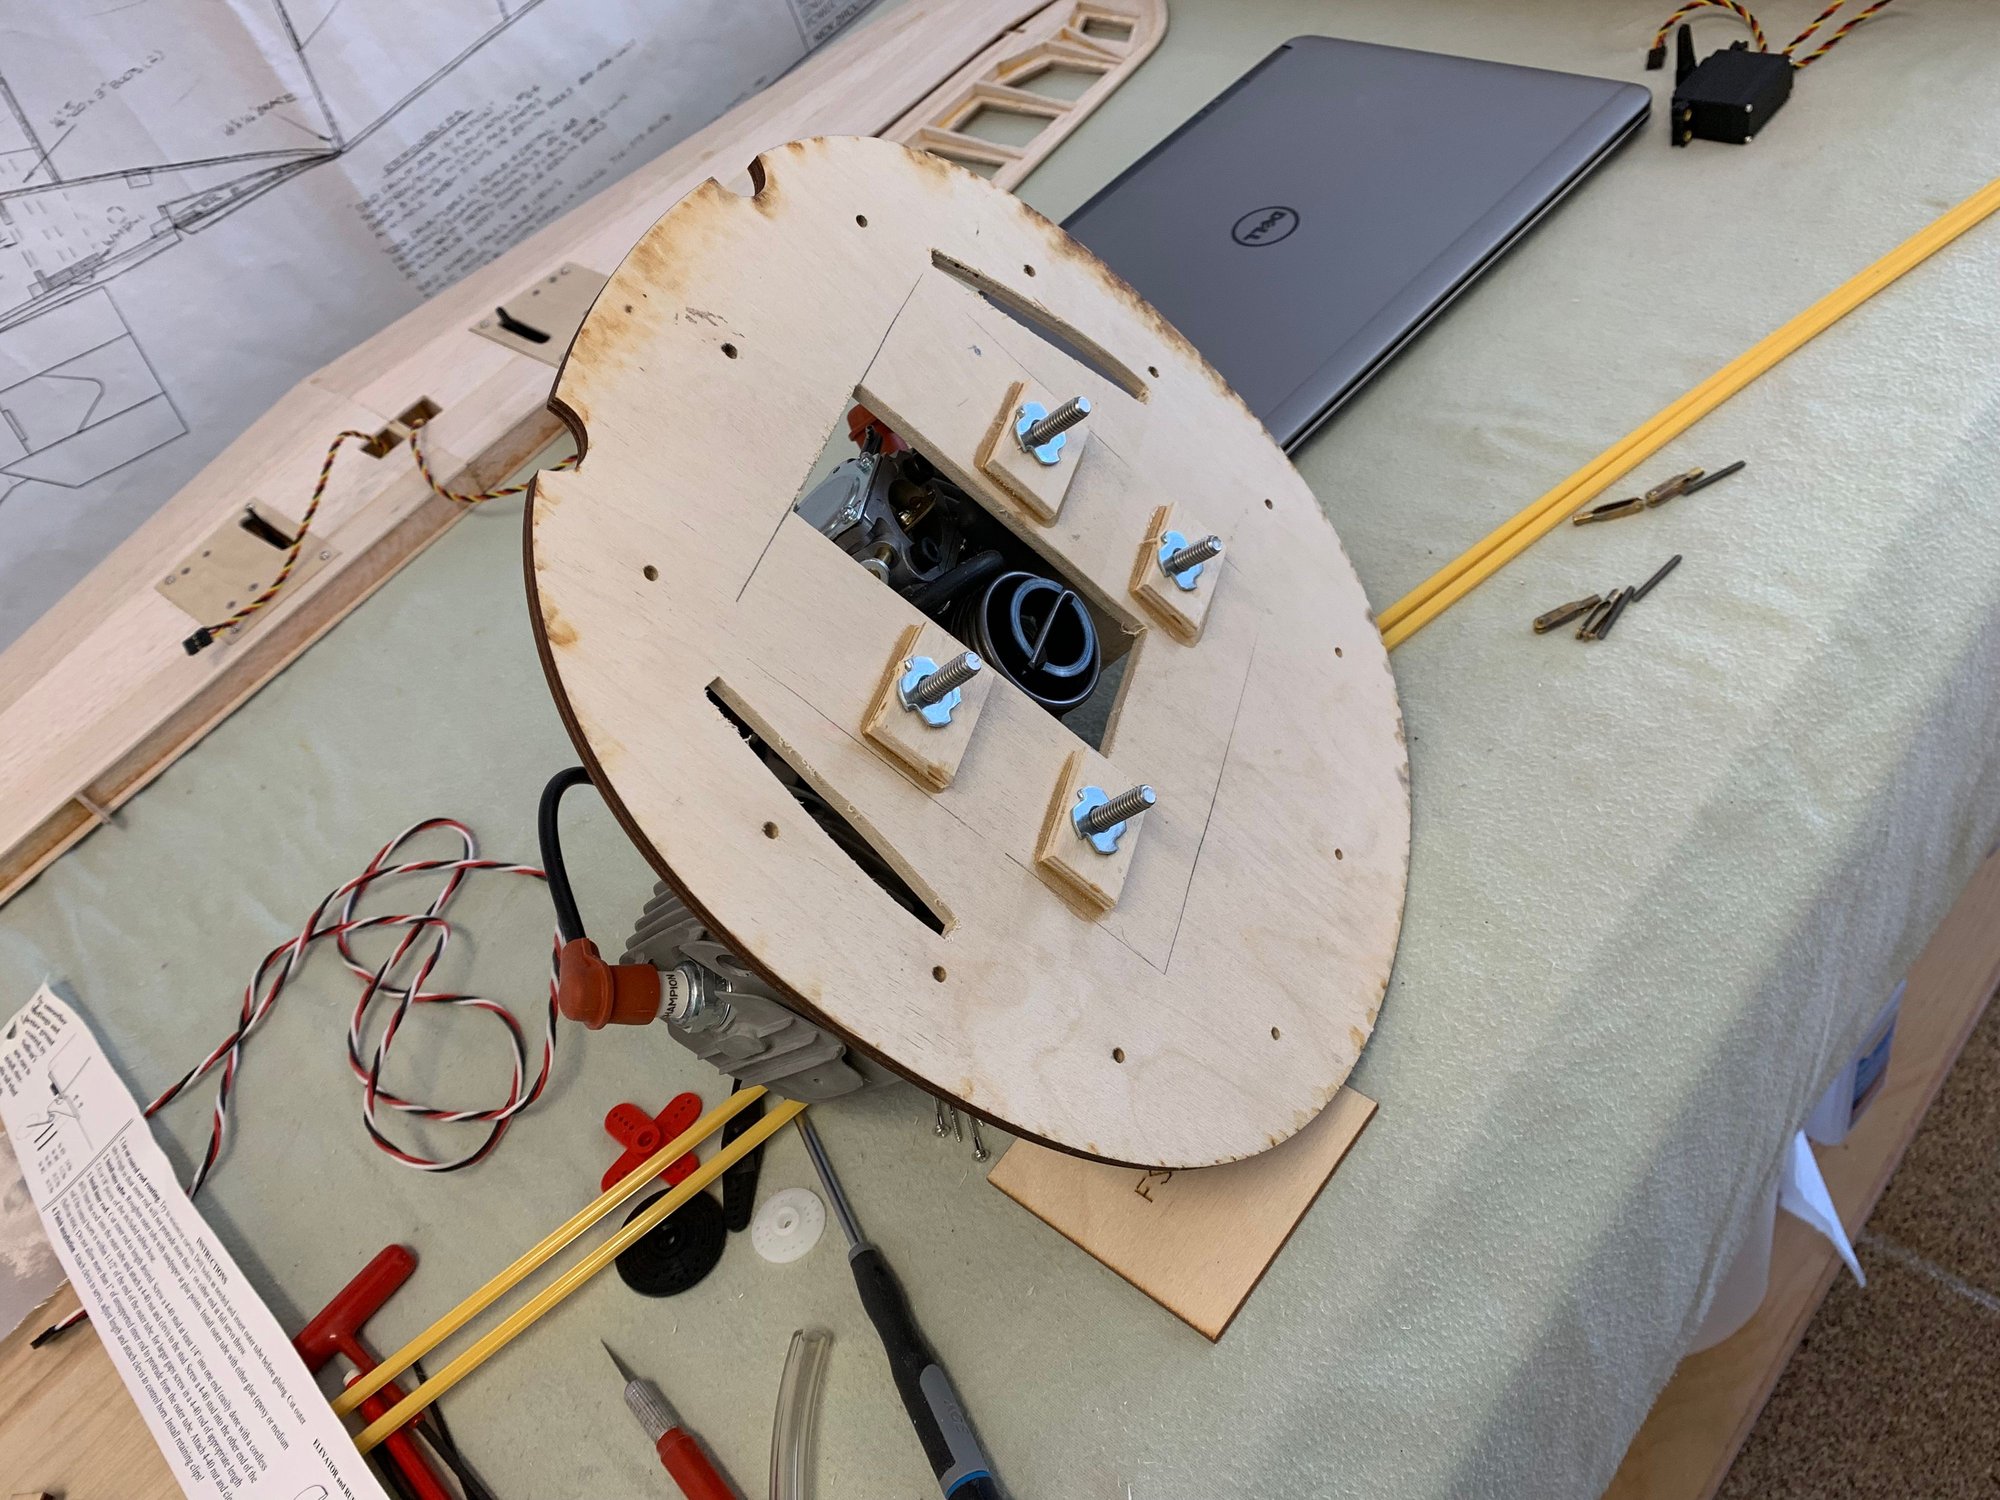
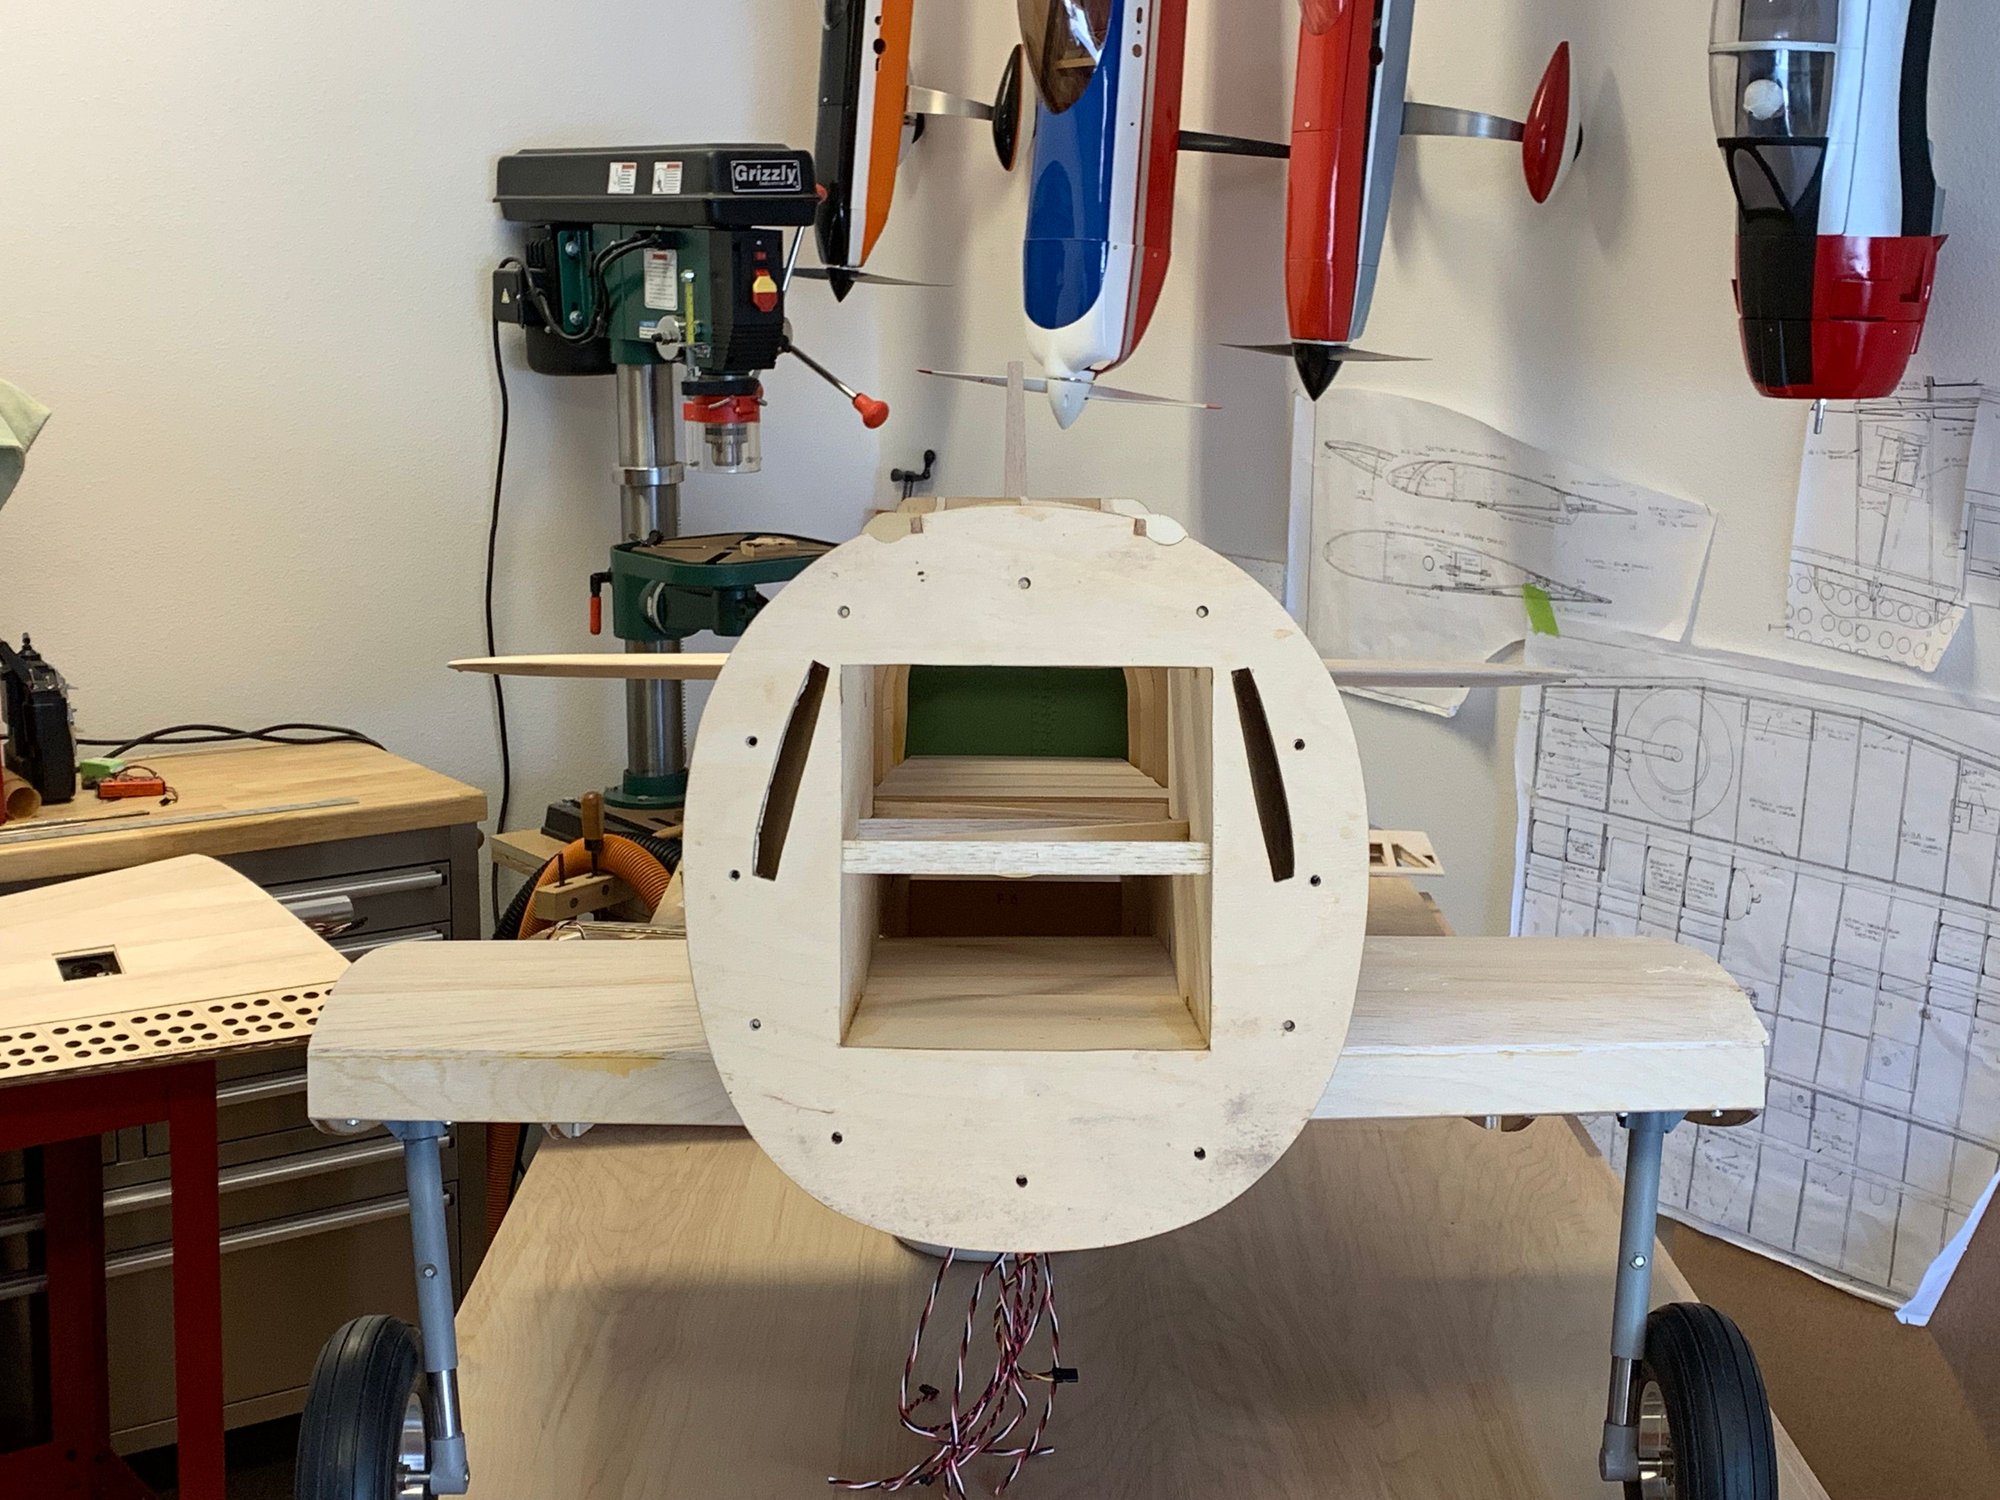
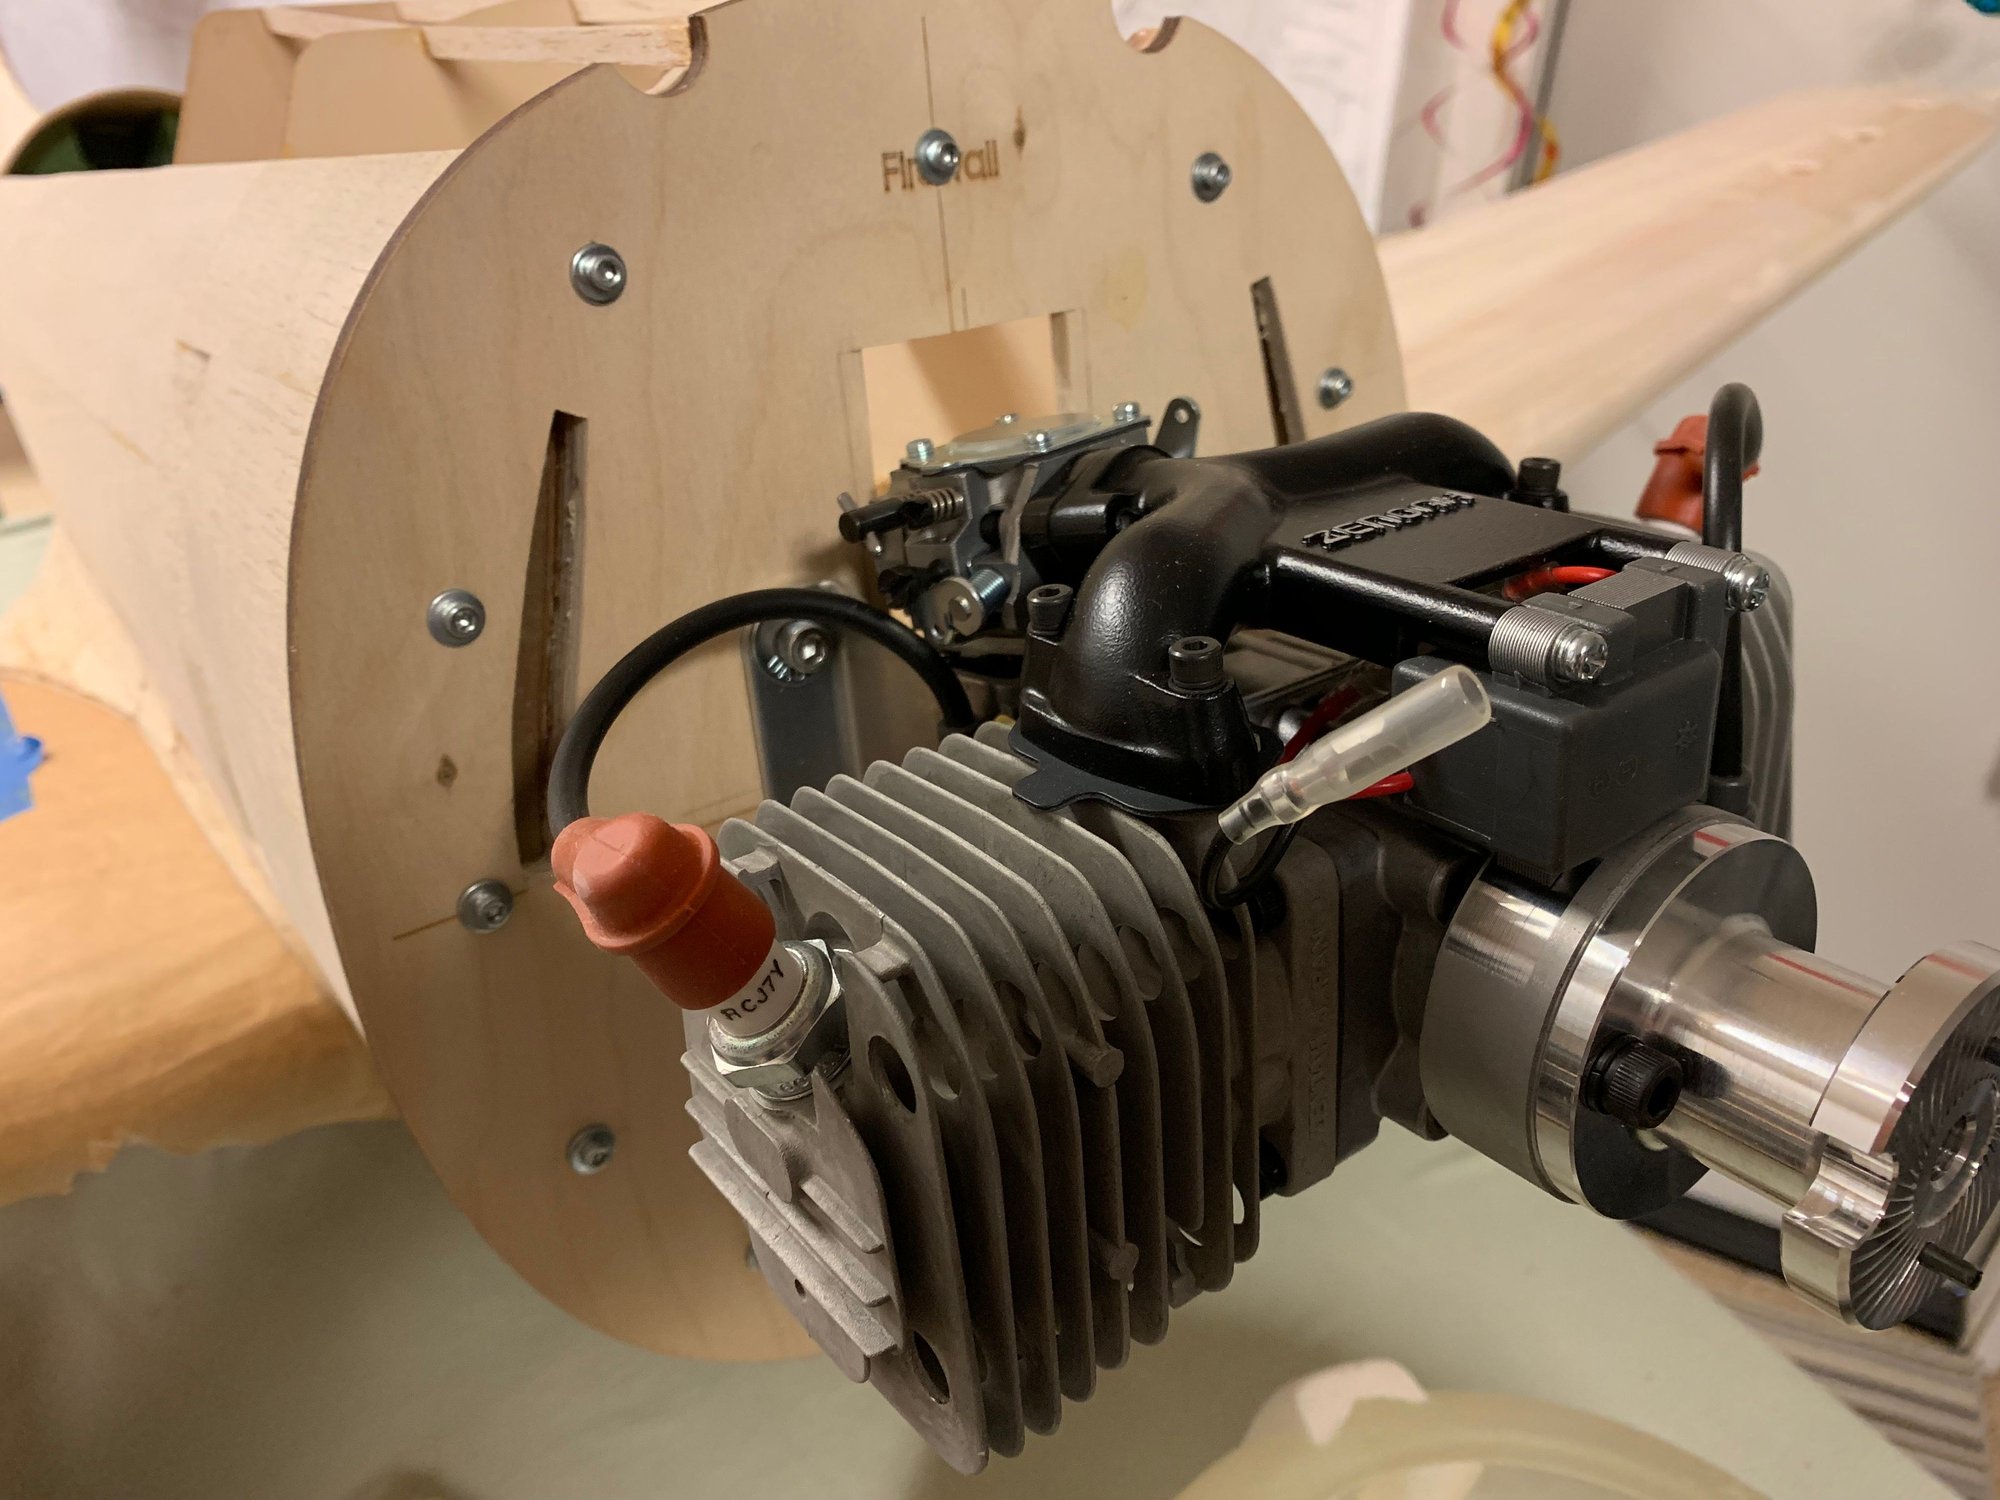
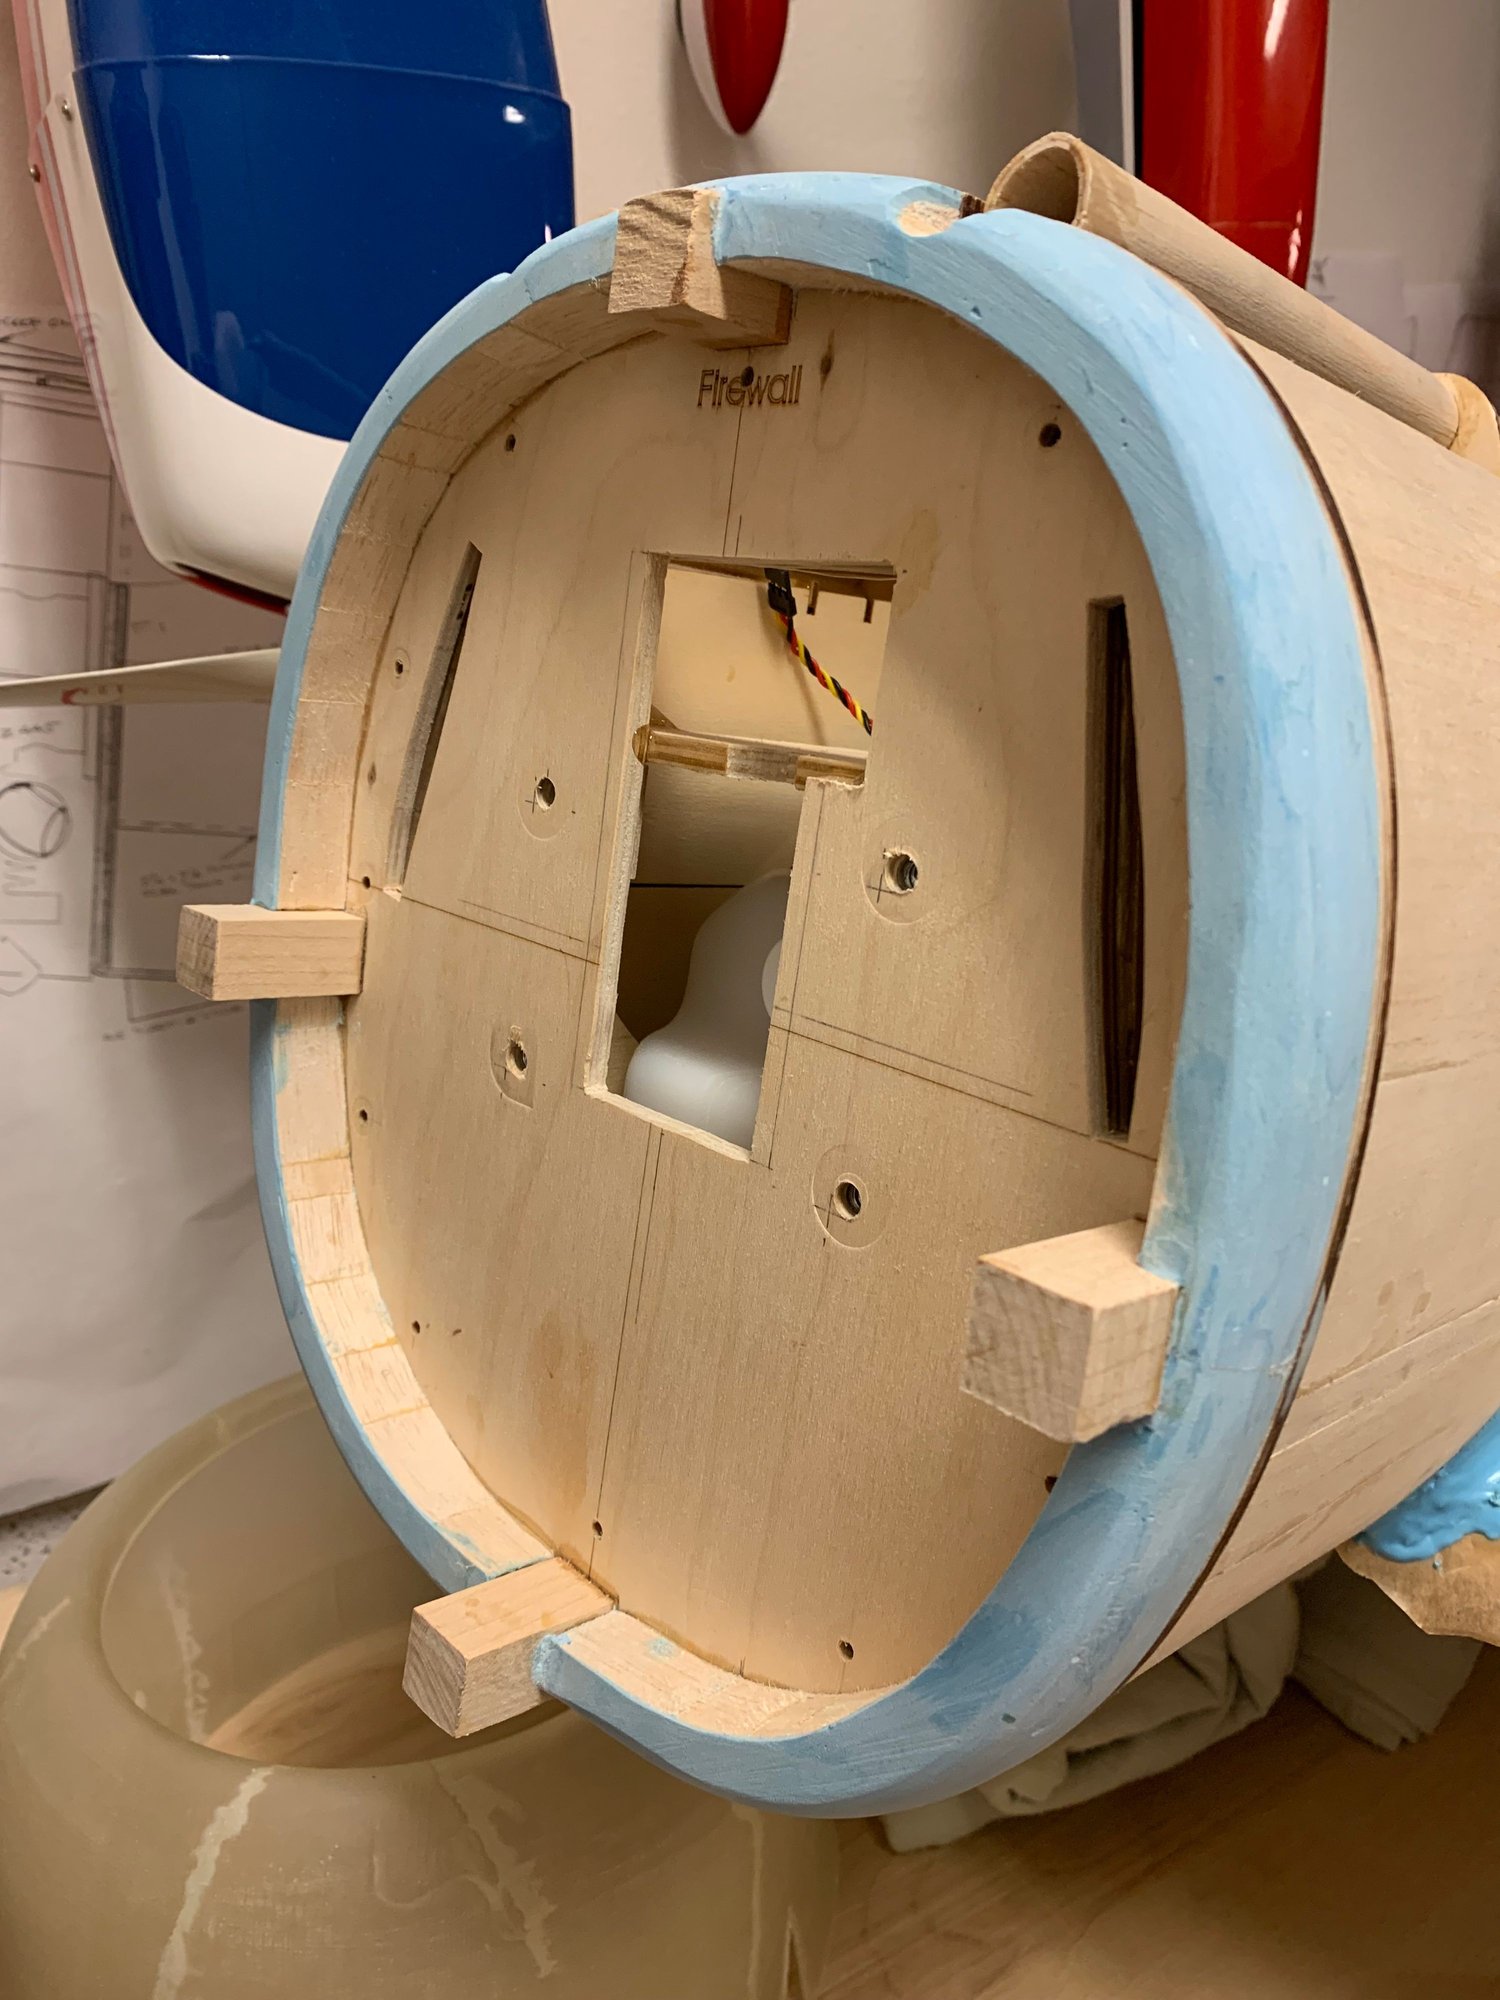
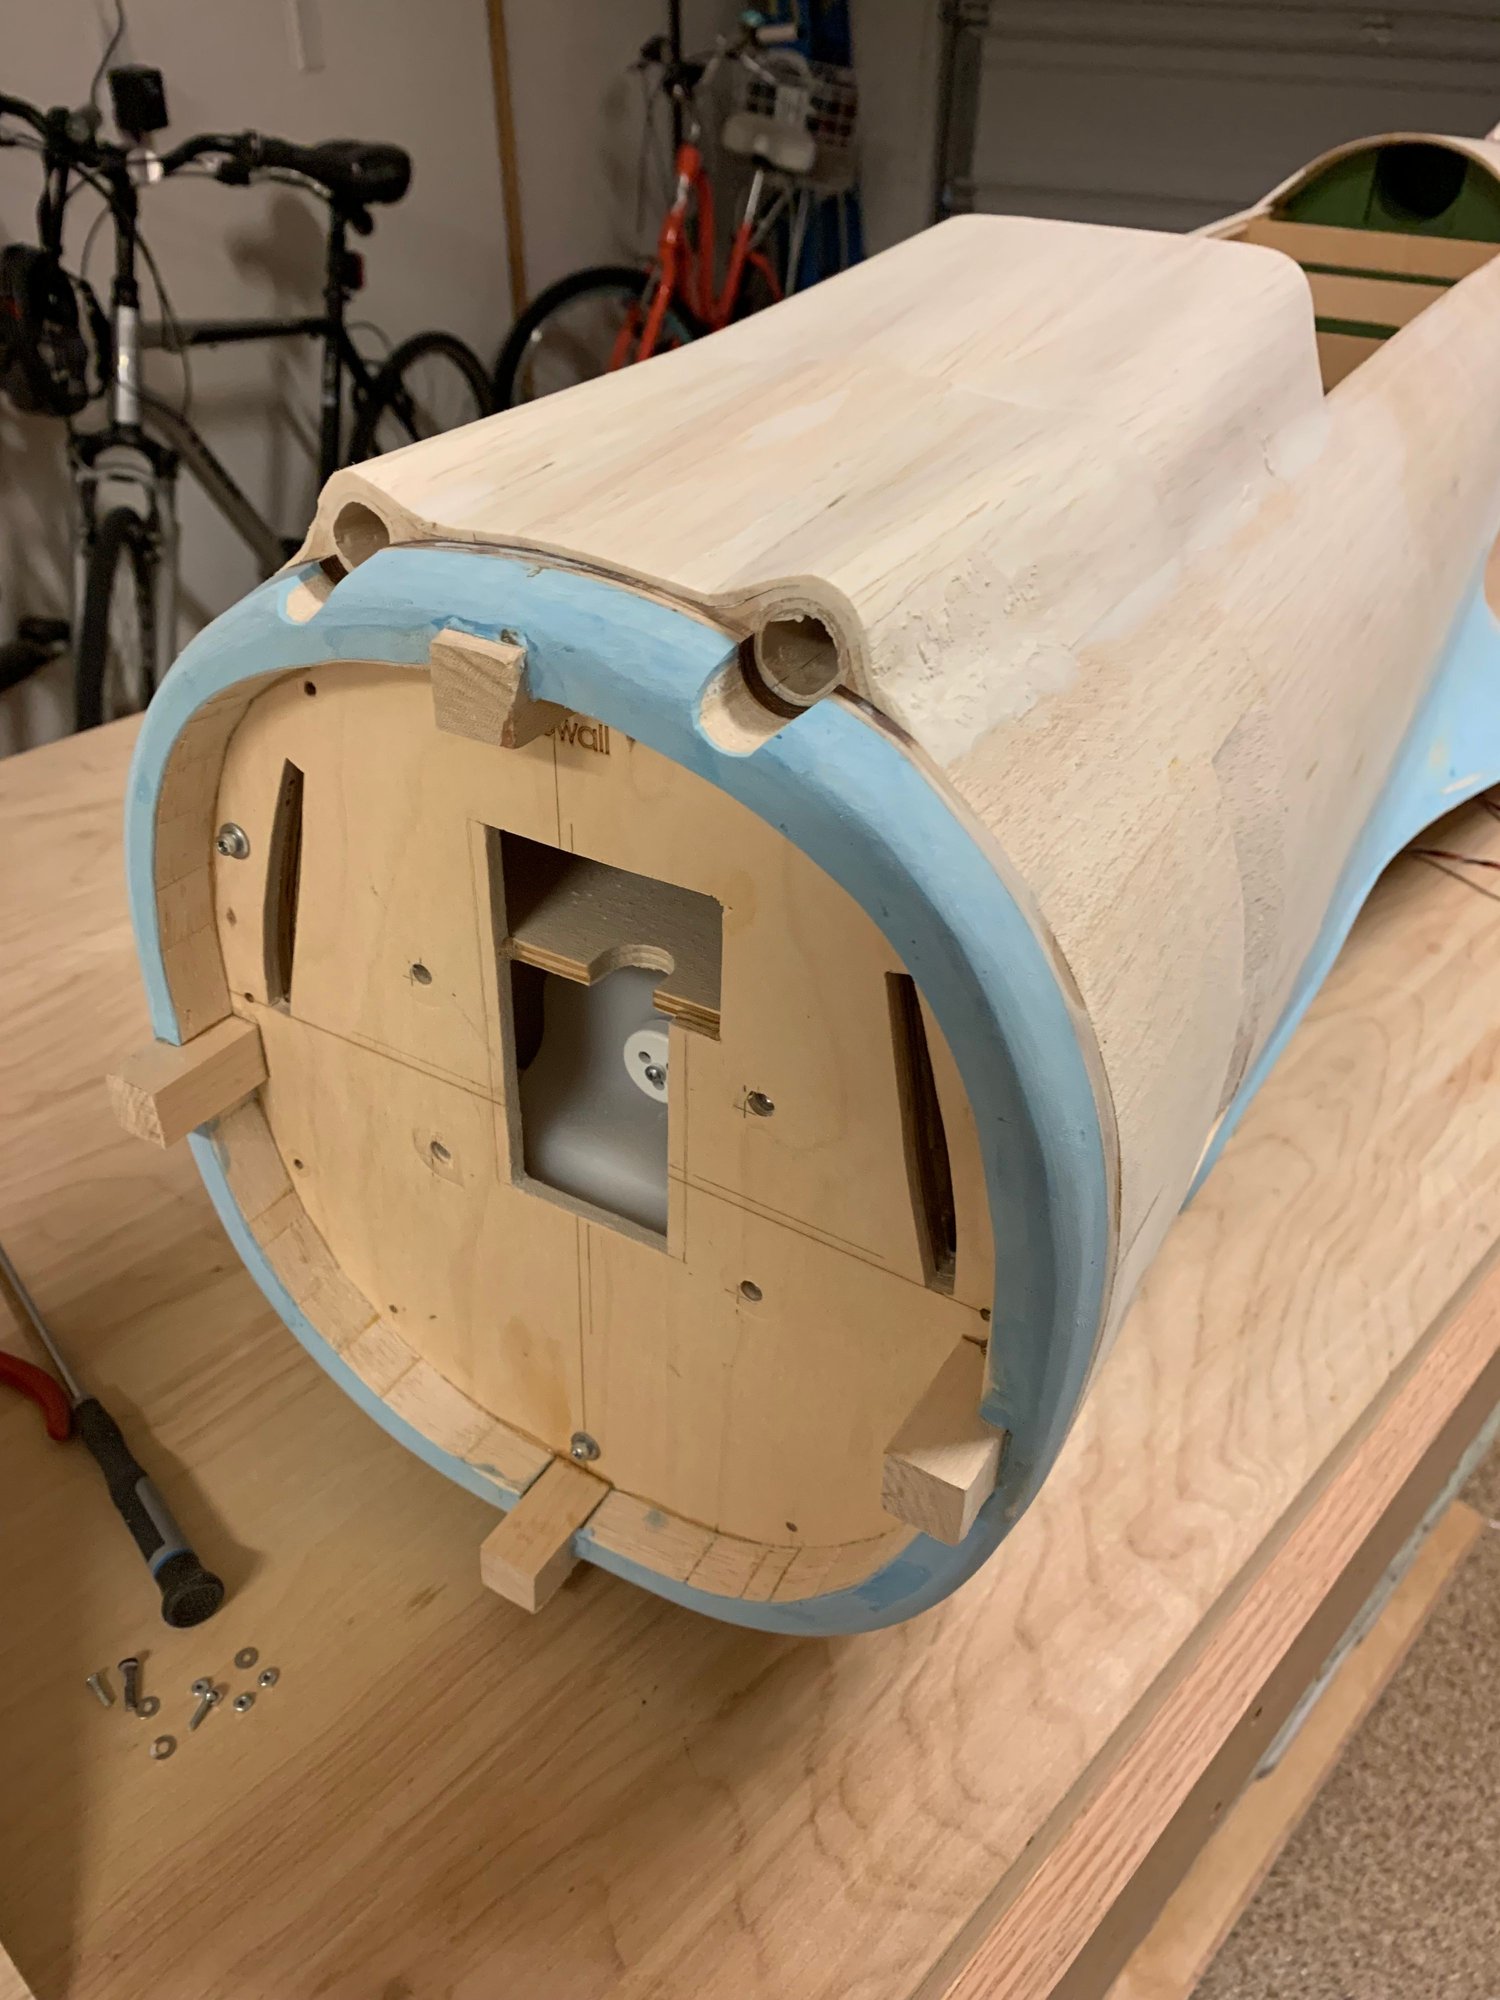
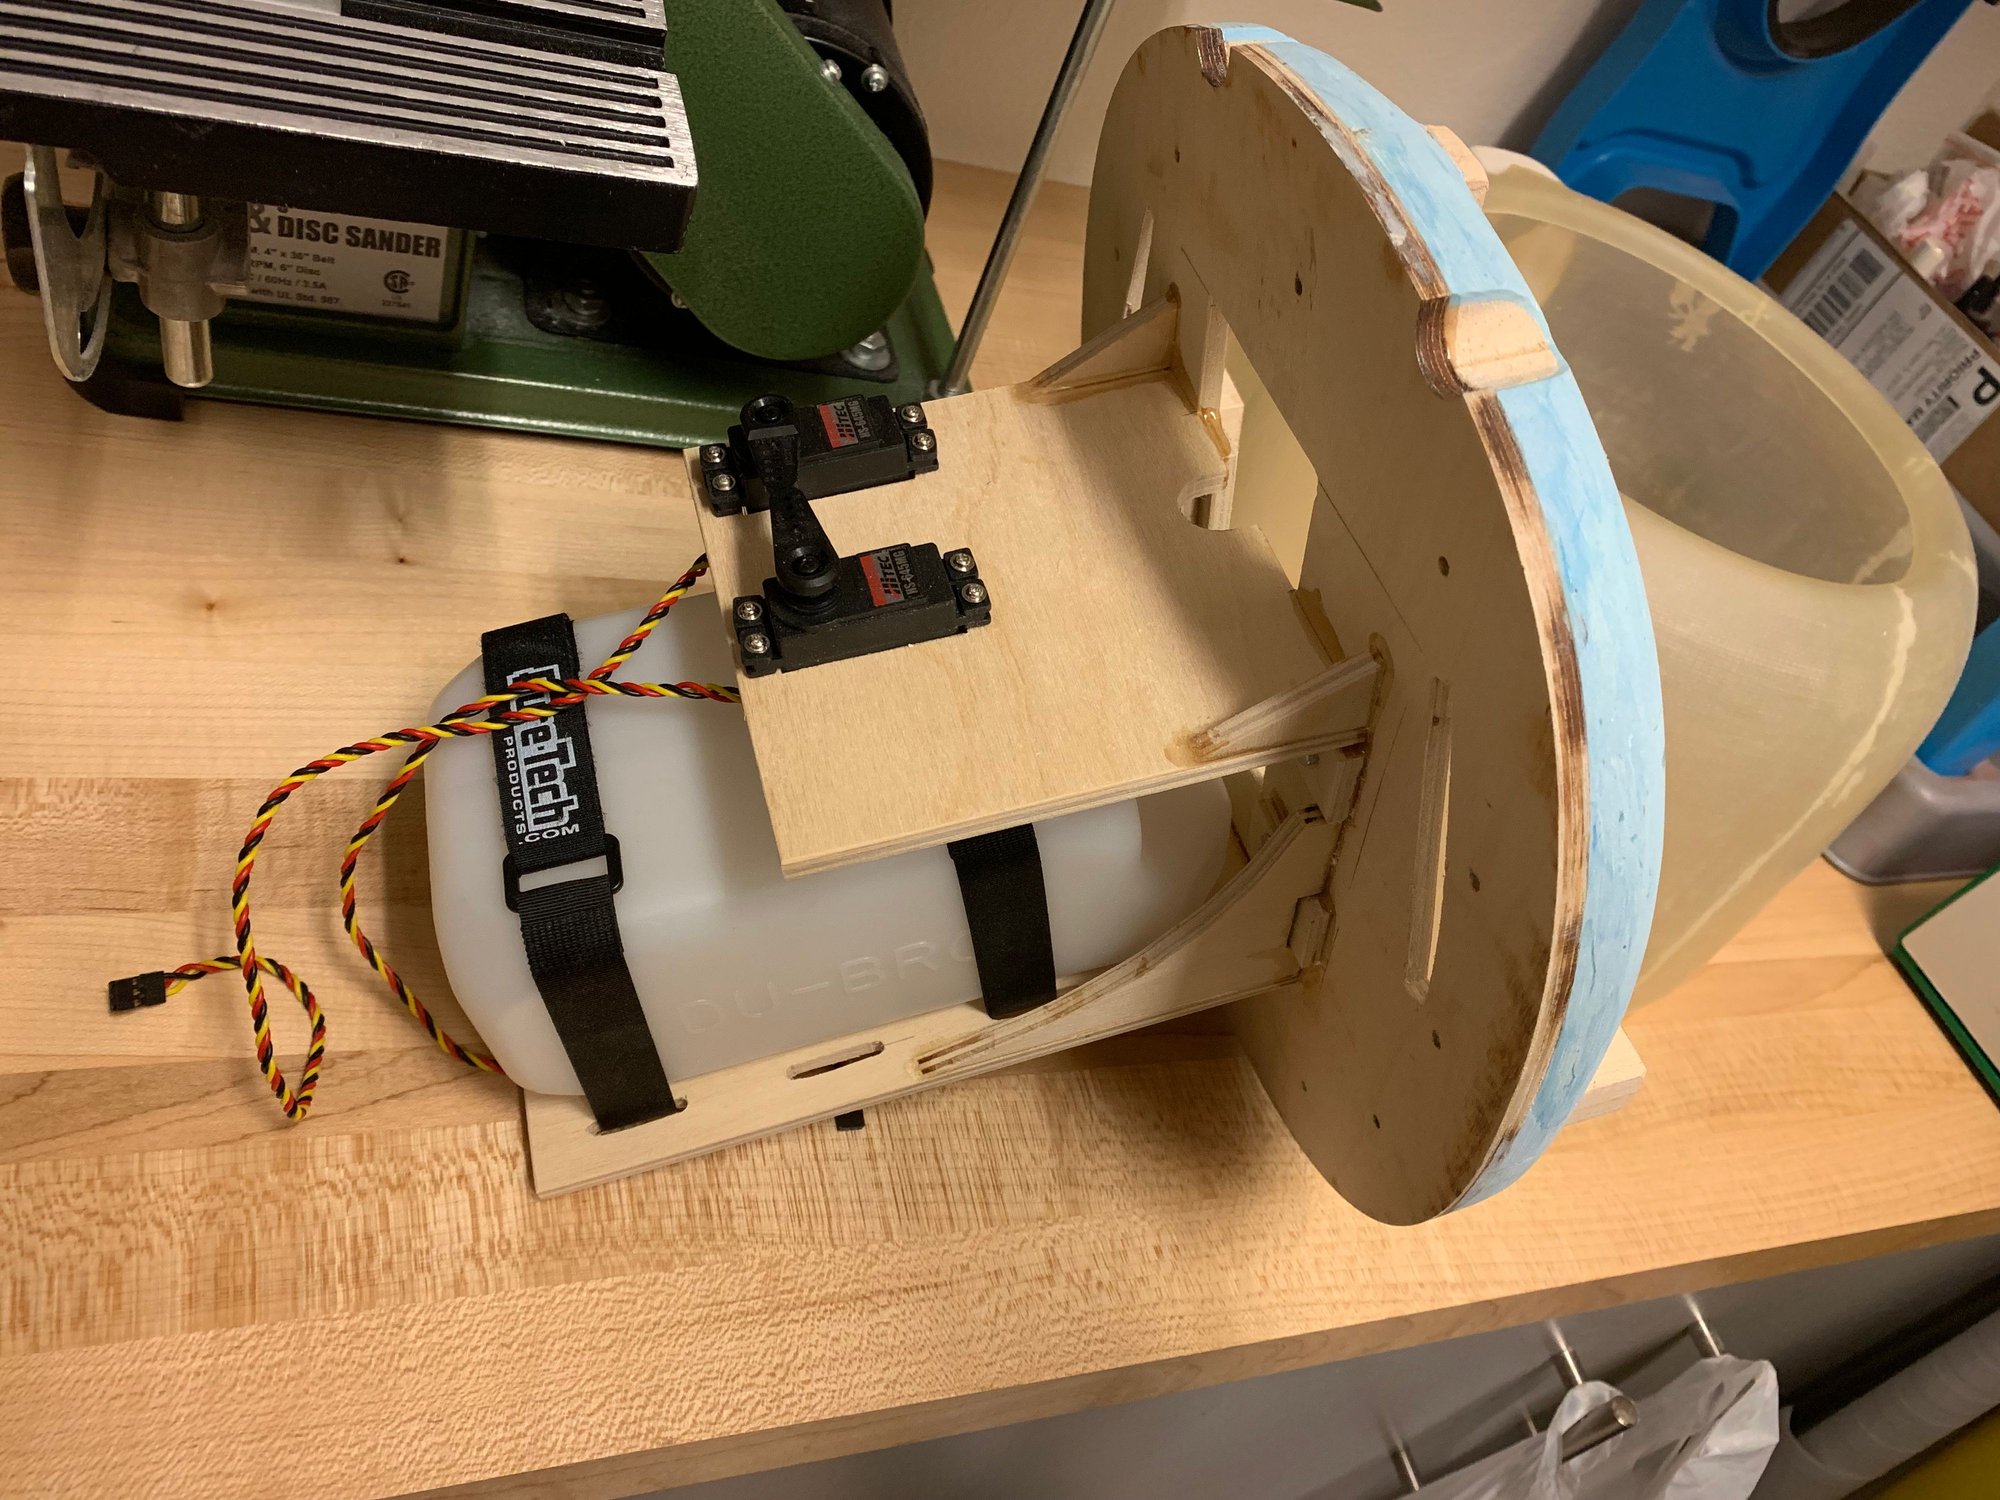
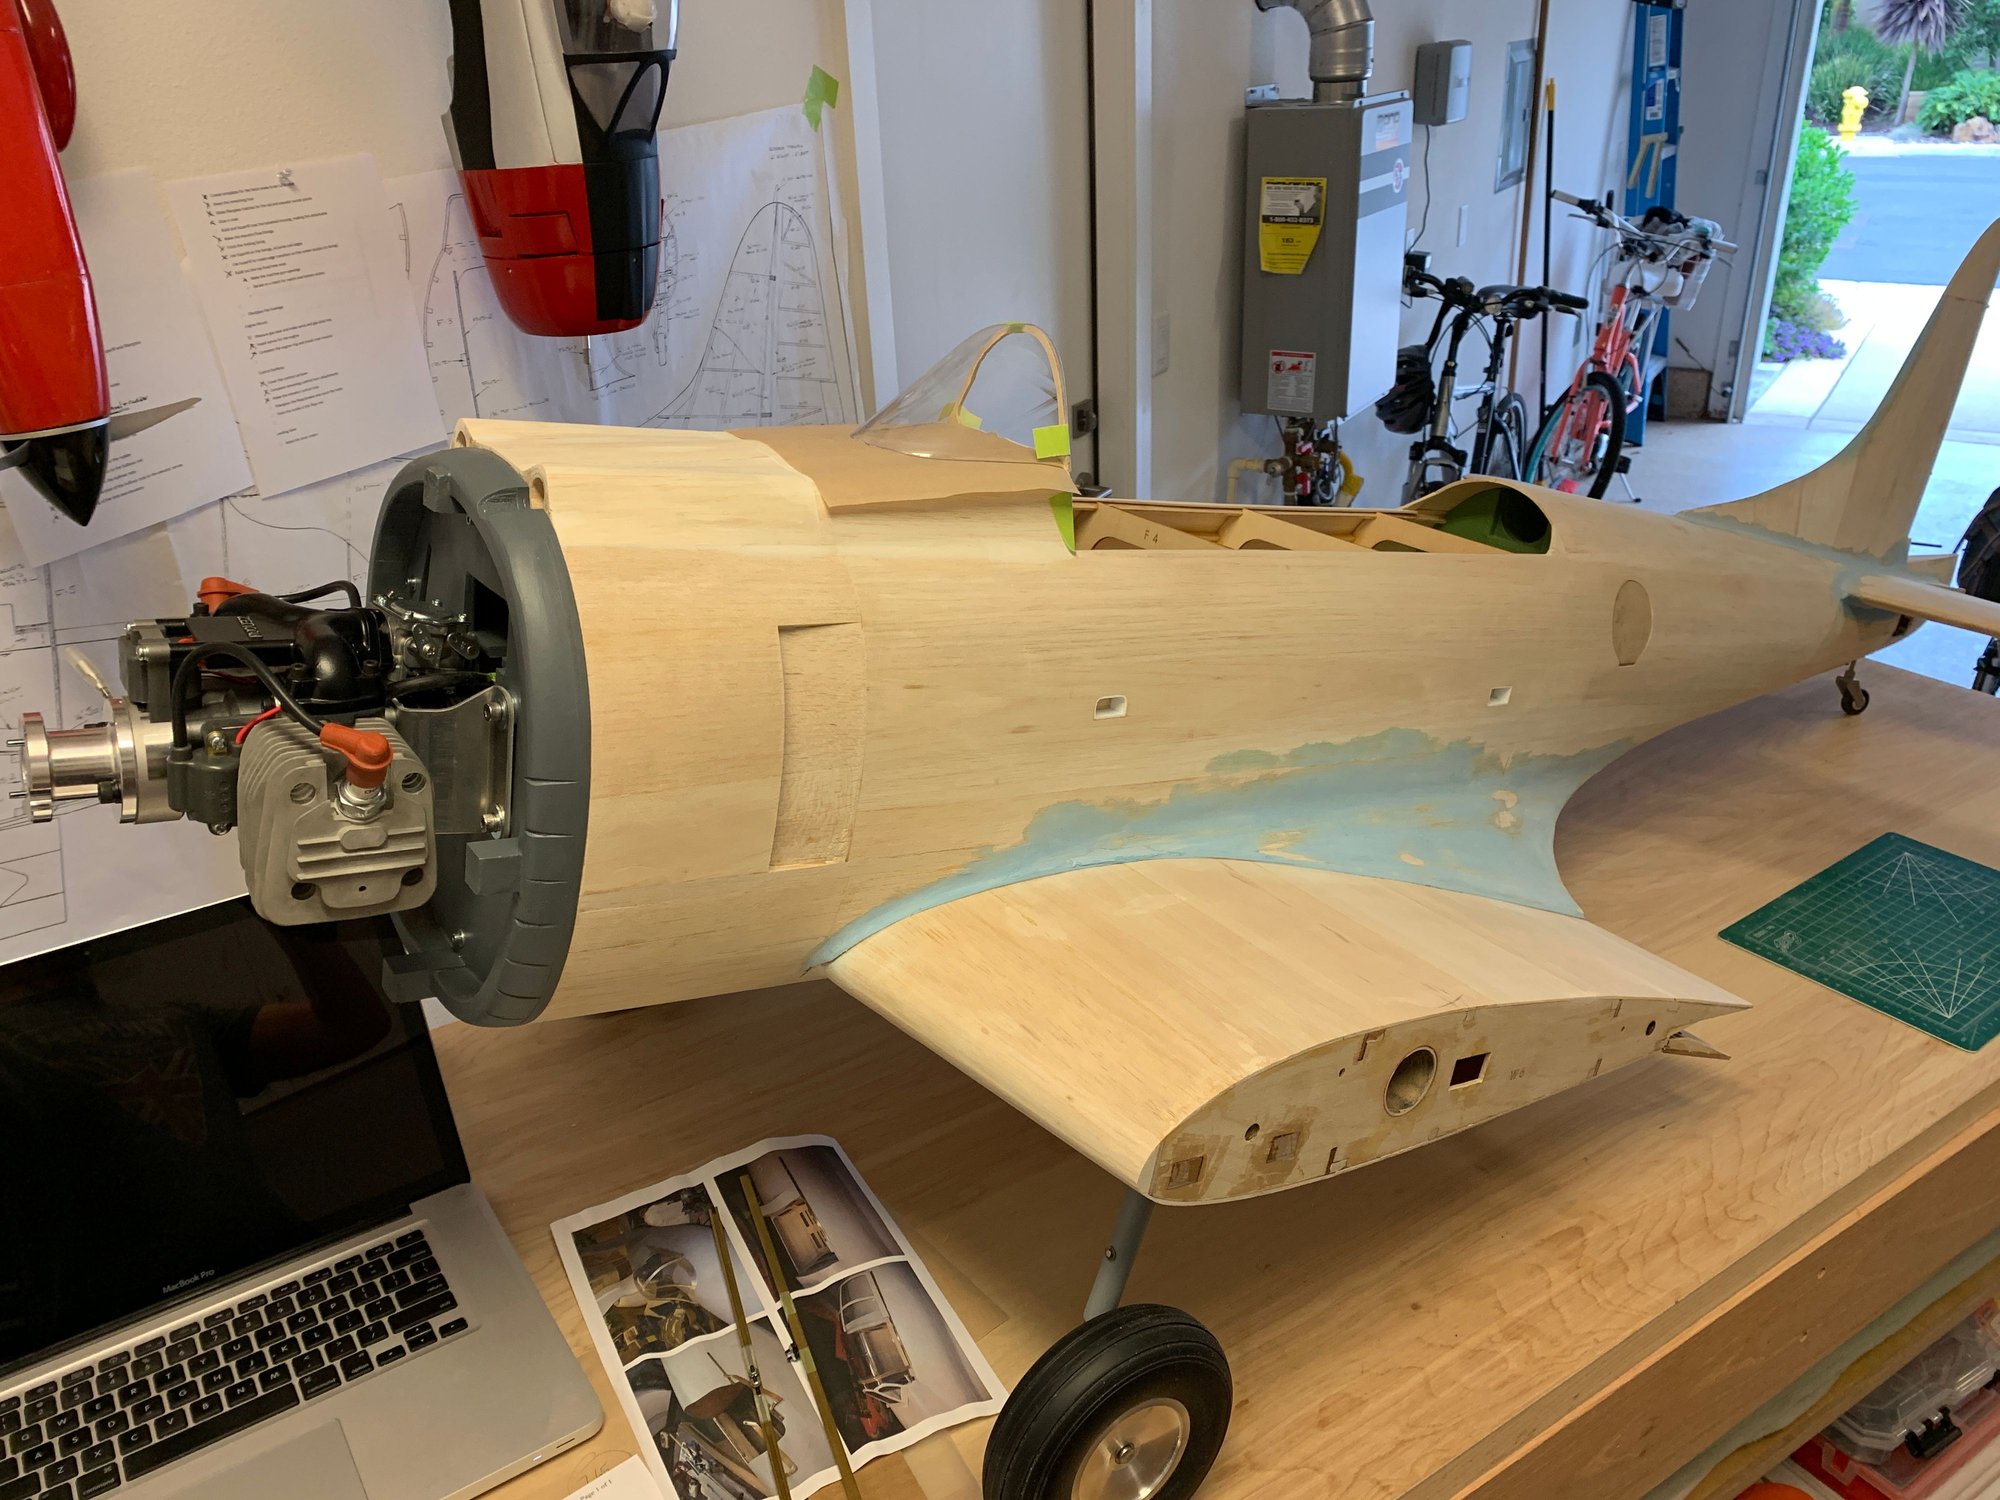
Copied Sam P's removable firewall idea. I'll add the servo and gas tank trays next, after I confirm the right spacing.
Hard to believe this isn't enough weight by itself.

I wasn't sure if others put in the 1 degree down/1 degree right offset, but I did the calculation and used washers to get the right placement of the hub in the center. Seems to have worked out fine.
09-15-2019, 10:12 AM
#42
Thread Starter
Join Date: Sep 2014
Location: Scottsdale, AZ
Posts: 169
Likes: 0
Received 0 Likes
on
0 Posts
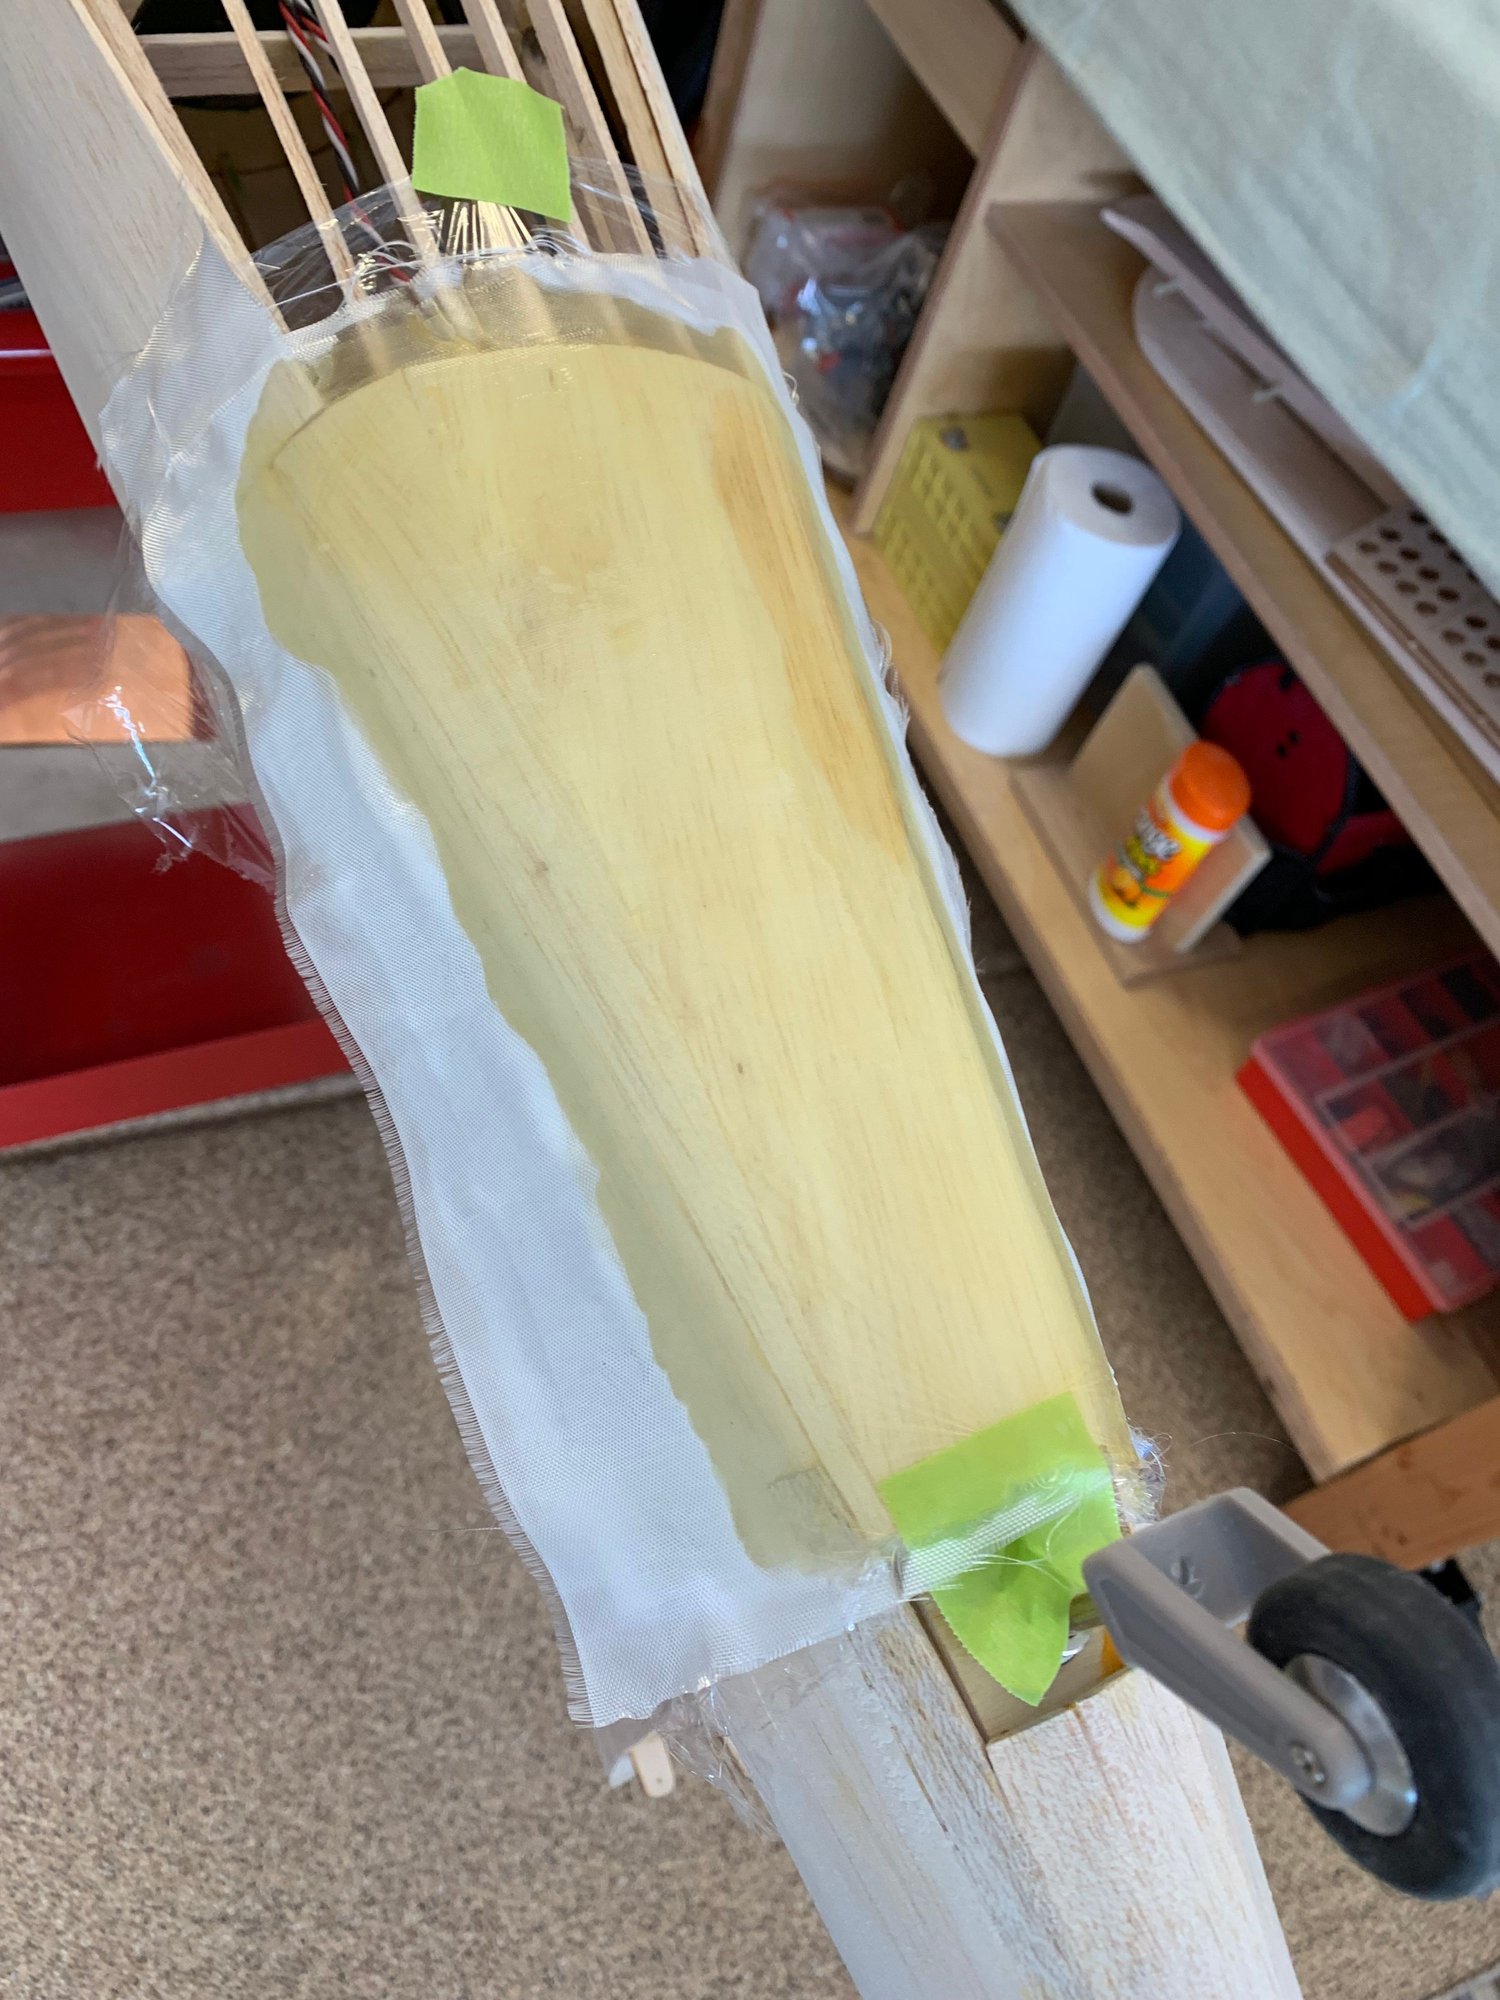
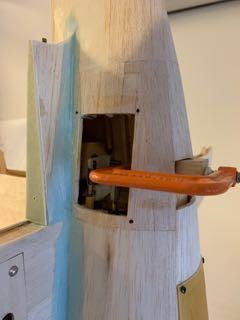
I needed to add access hatches for the elevator servo connections and the rudder/tail wheel controls. I used Zpoxy and several layers of FG over Saran Wrap. The rudder/tail wheel area is tight and right under where the elevator/fuse fillet goes.
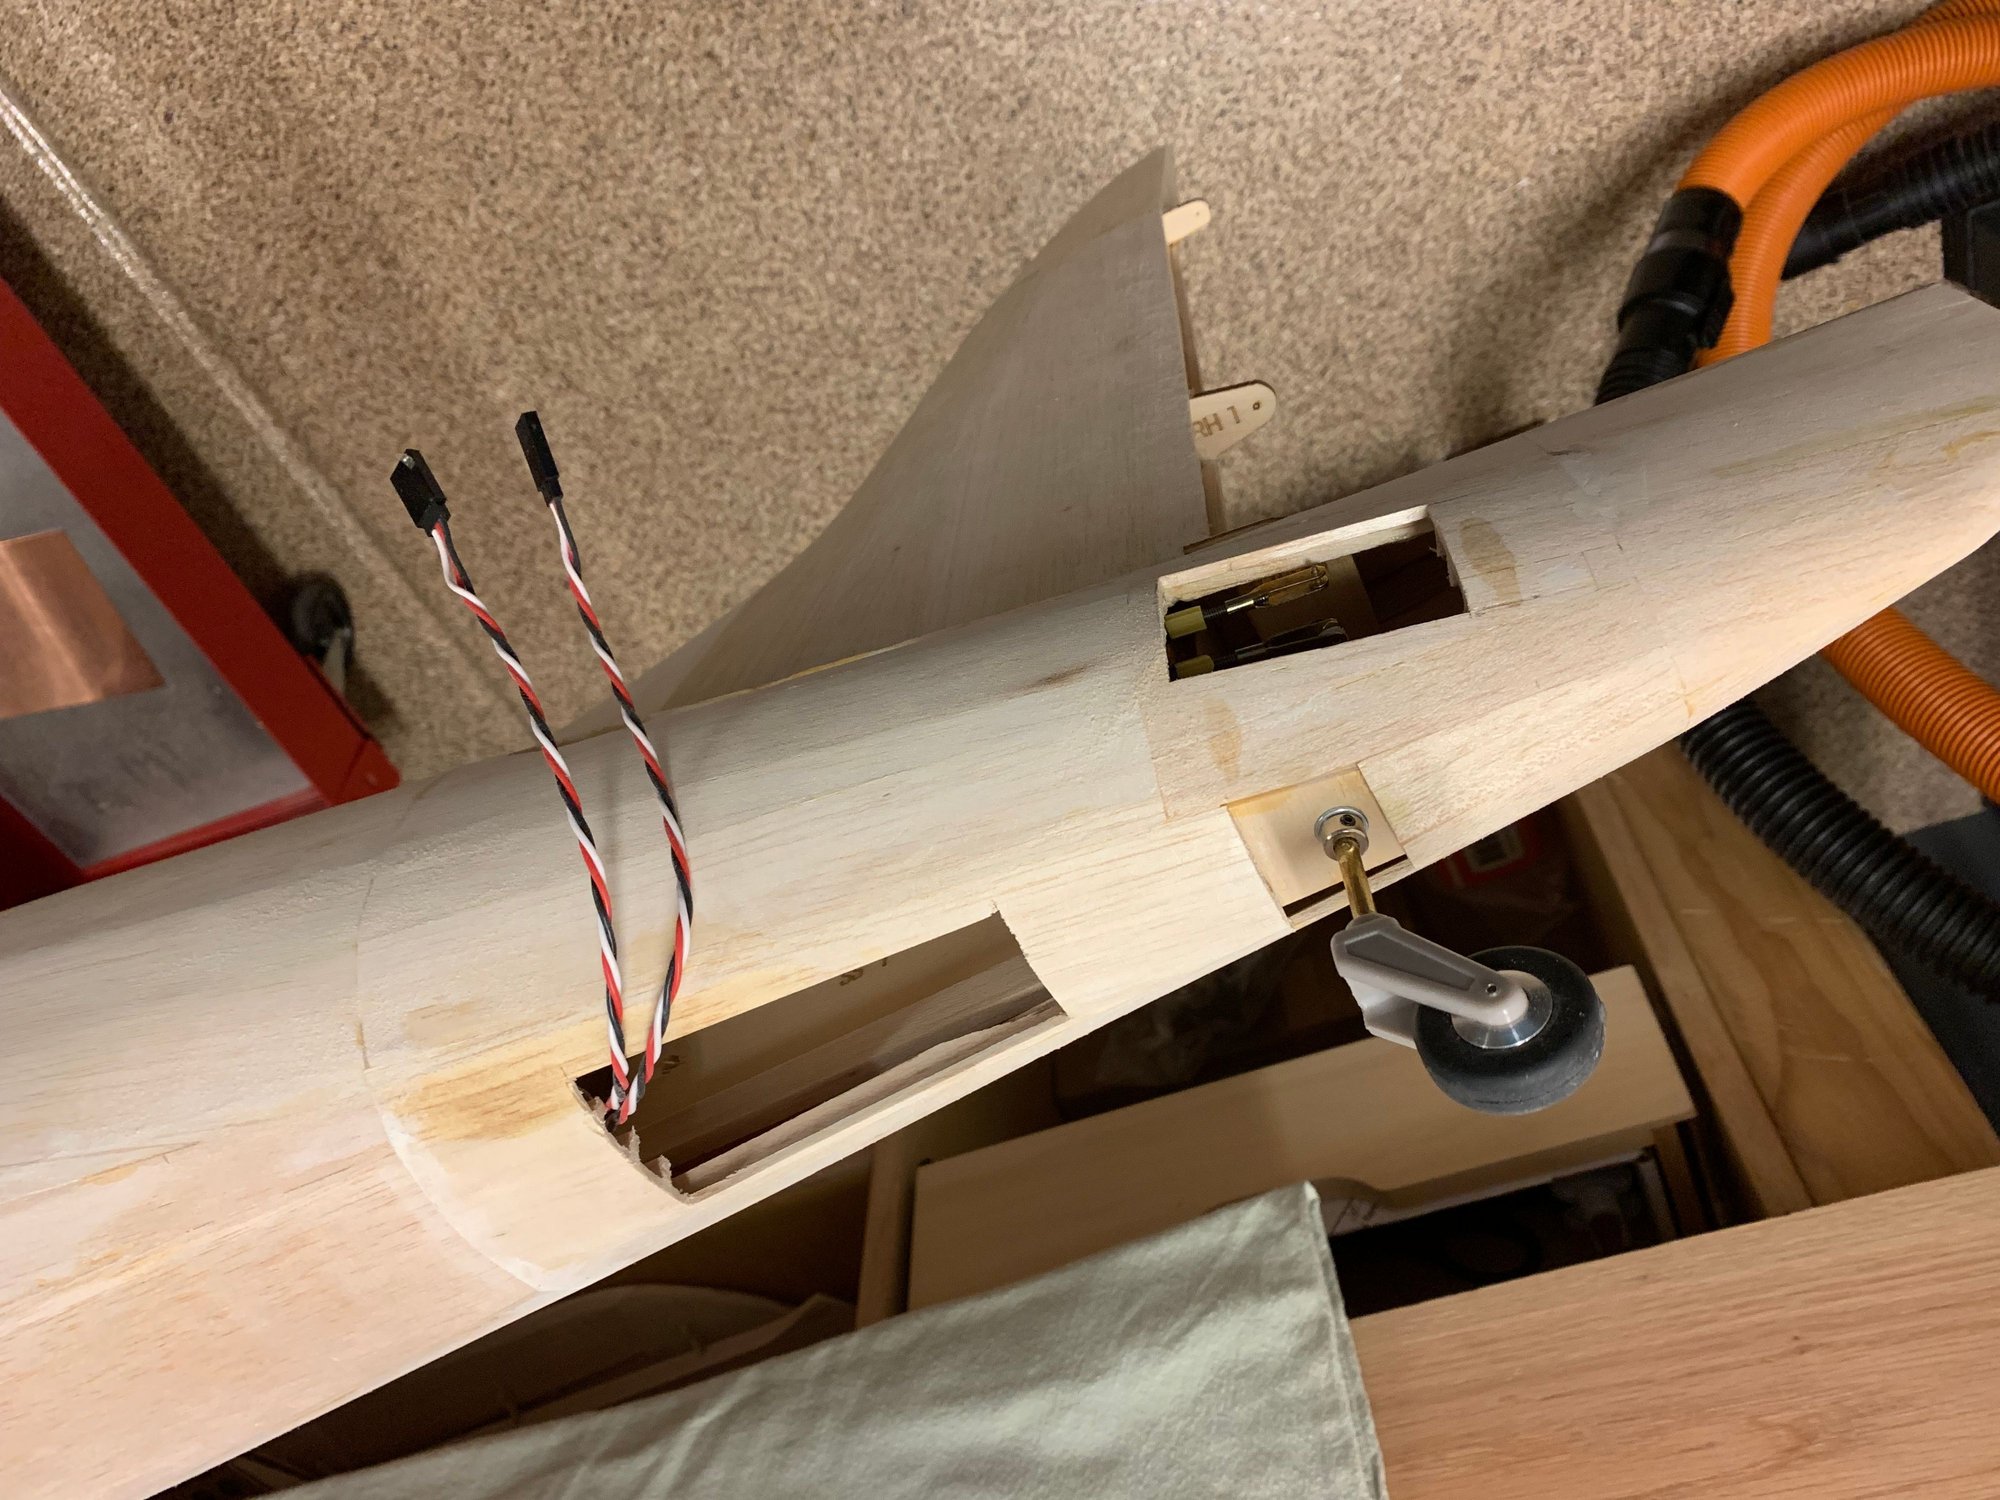
Openings were cut, wires luckily were not.
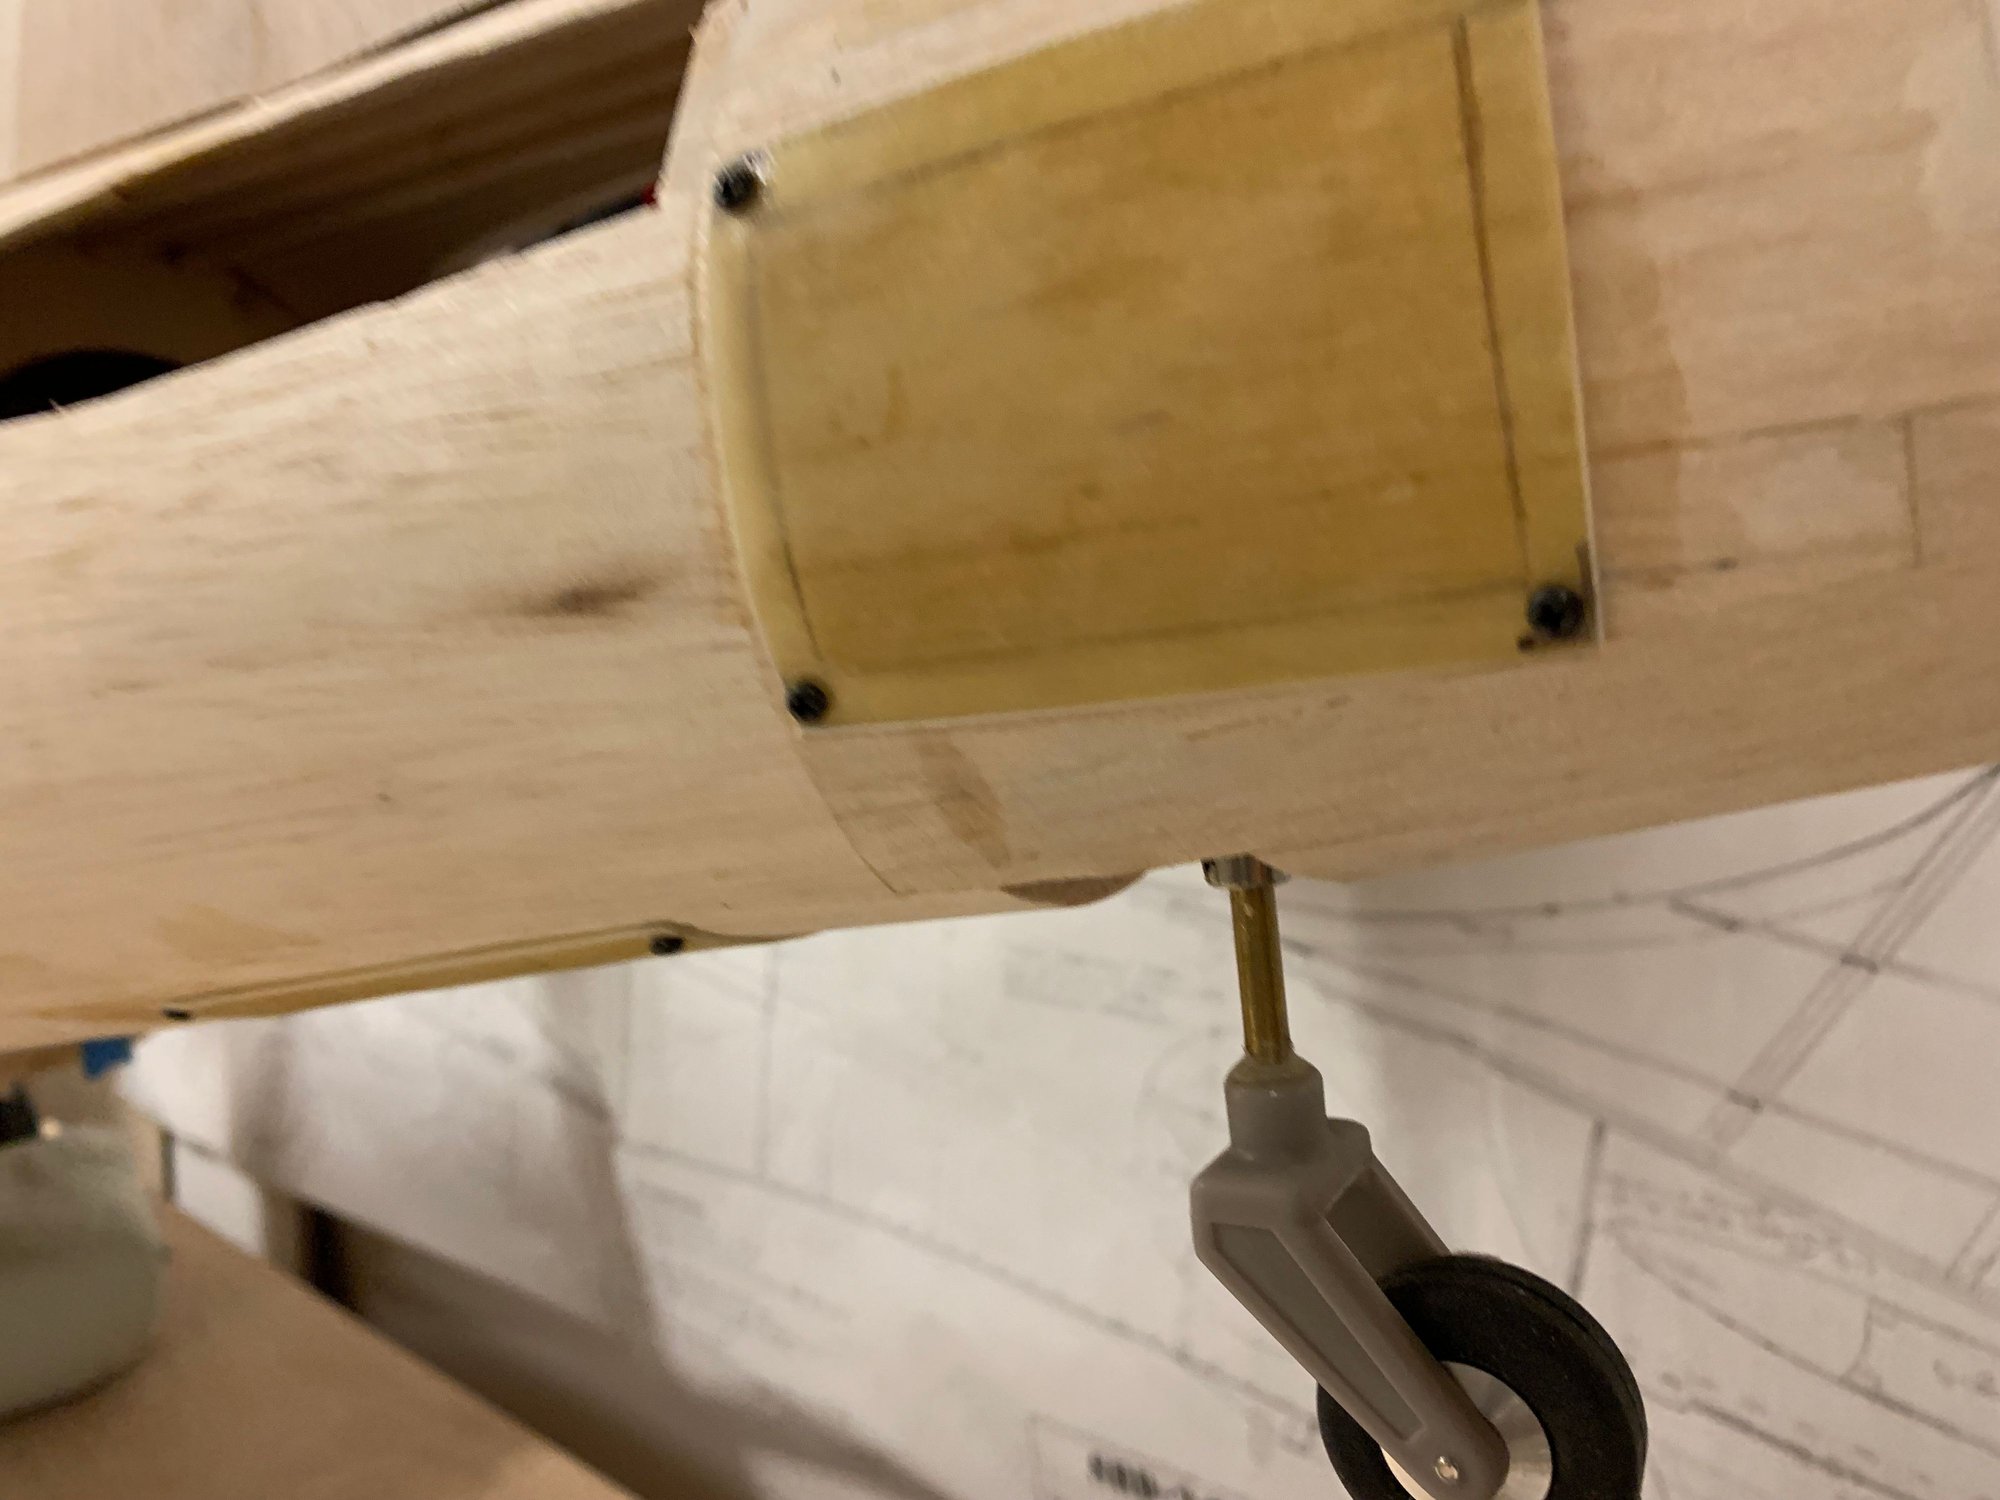
I ended up gluing the cut out balsa to the back of the FG hatch, deciding that I preferred the overlap of the hatch vs. a flush fit.

Both hatches will be well out of sight anyway
09-15-2019, 10:43 AM
#43
Thread Starter
Join Date: Sep 2014
Location: Scottsdale, AZ
Posts: 169
Likes: 0
Received 0 Likes
on
0 Posts
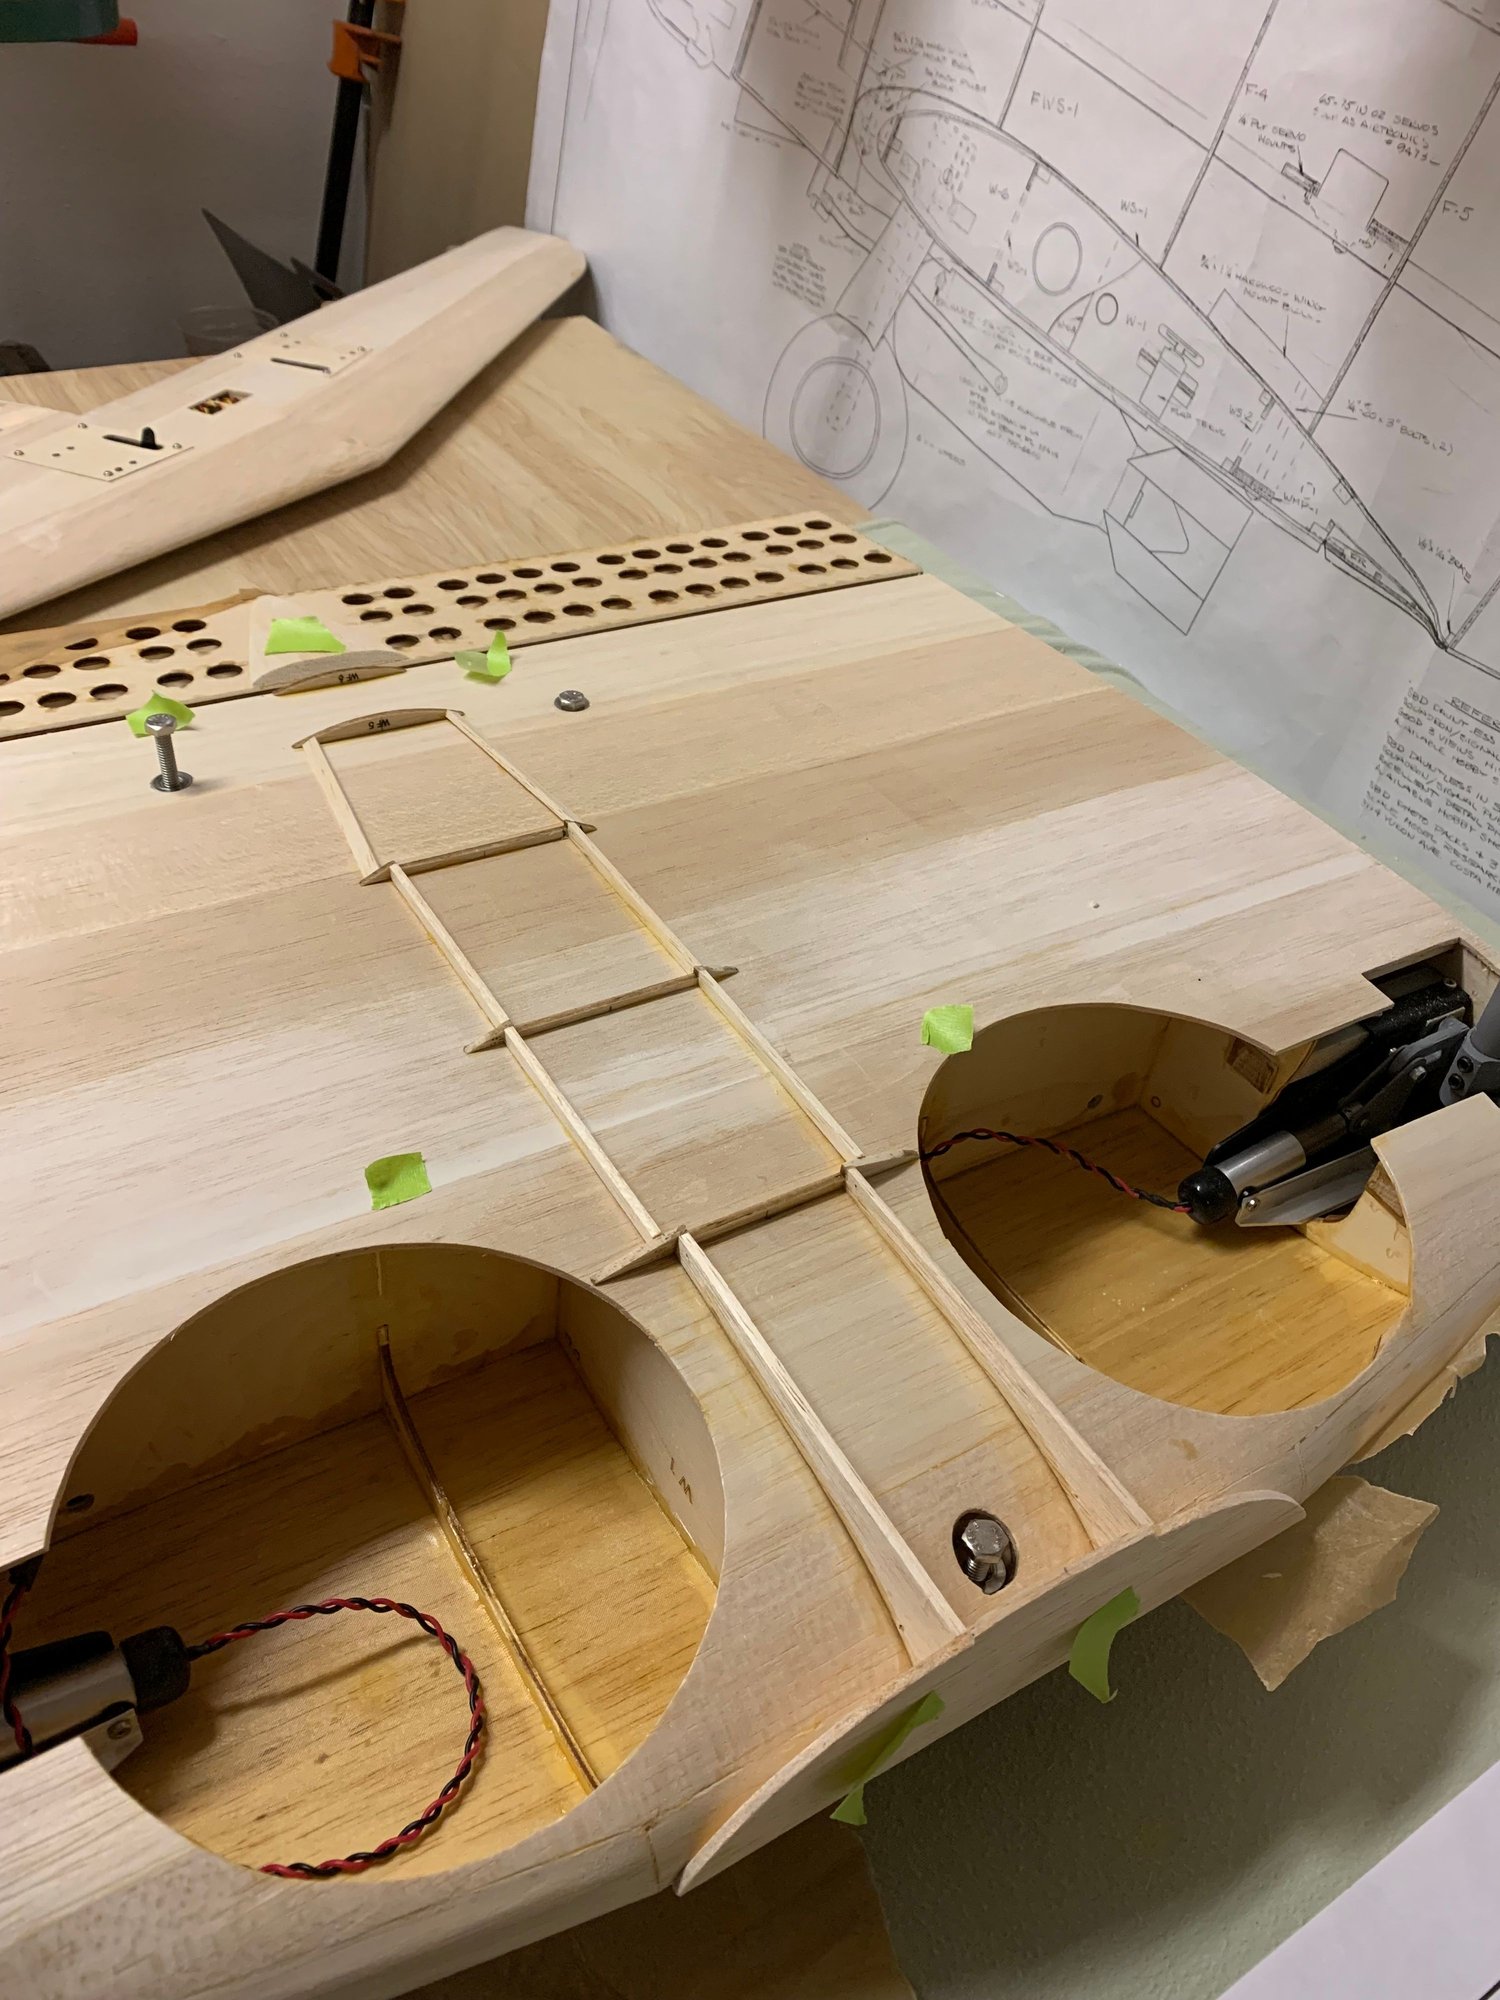
I plan to add the remaining detail after I glass the underside. I also learned that I should not choose soft material as dings are unavoidable.
It's amazing how little of the molded wheel wells get used.
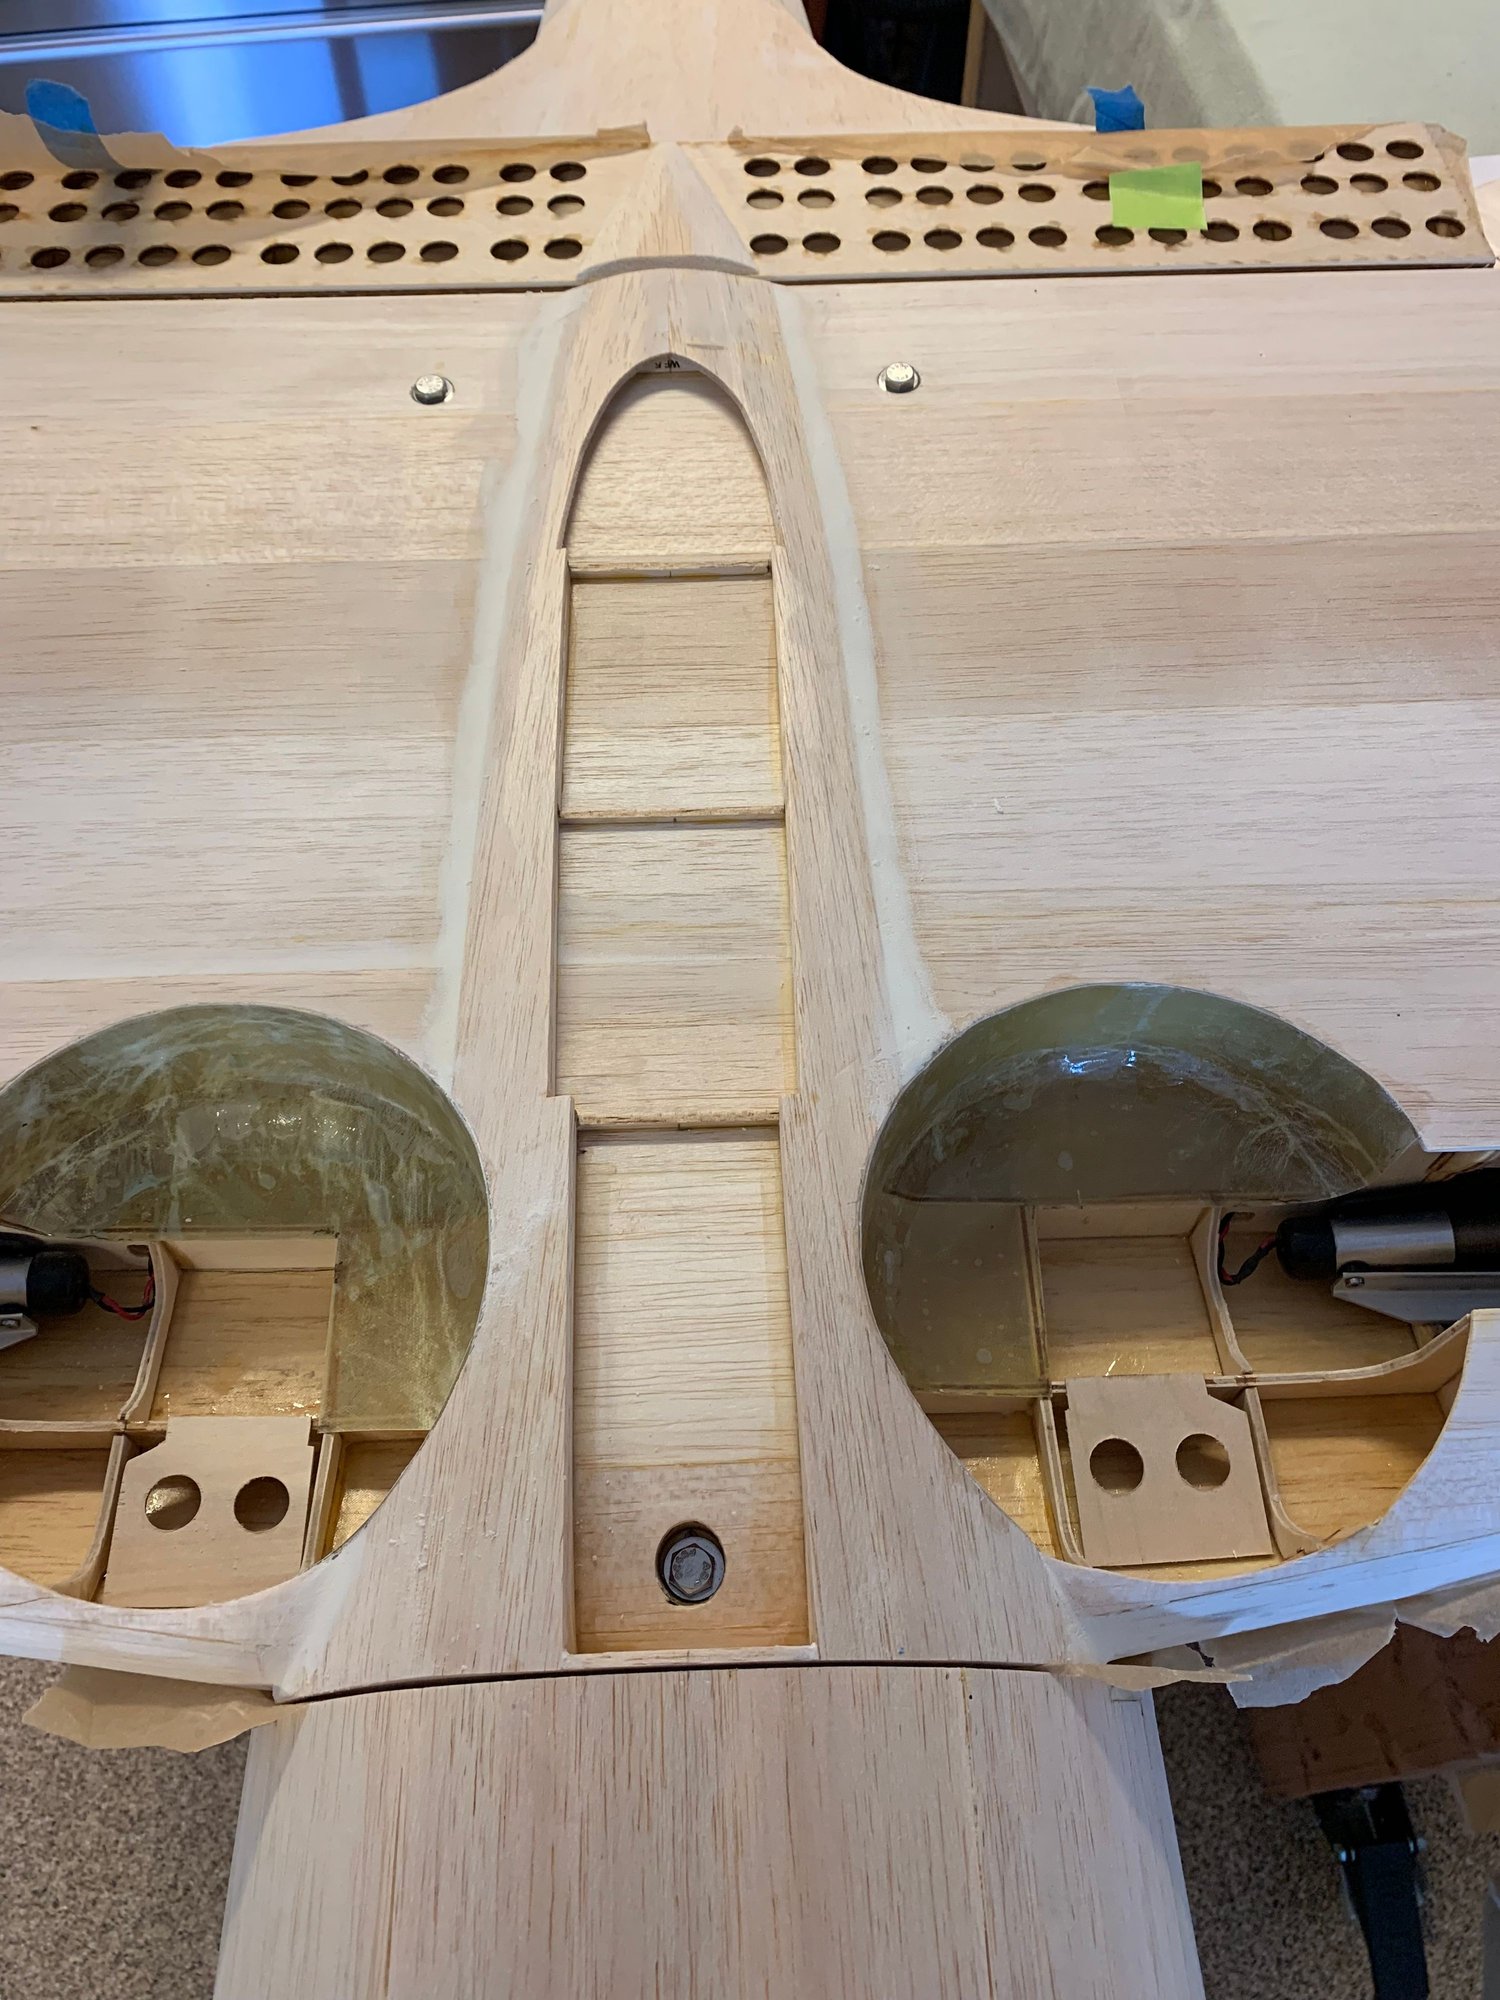
This is the extent of the scale features I added. I will need to putty and smooth out the inside of the FG.
I ended up doing this in many small pieces. Maybe next time I will try this will thin plywood. I saw midastouch/Kalima on RC Scalebuilders did a really nice job. I'll be going back to his thread when I start the cockpit kit.
09-15-2019, 10:59 AM
#44
Thread Starter
Join Date: Sep 2014
Location: Scottsdale, AZ
Posts: 169
Likes: 0
Received 0 Likes
on
0 Posts
Things lined up pretty well. The elevator servo hatch was useful in getting more epoxy into the stab joint.
I installed the side supports to create the right inset of the dash.
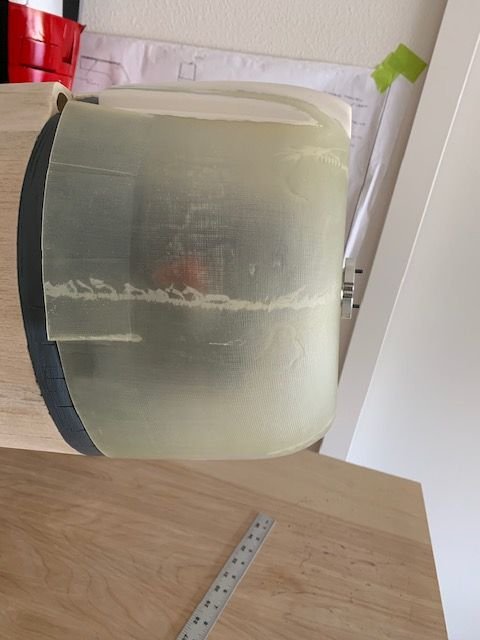
Here is the cowl ring I built up. I make it out of balsa and then skim coat it with Superfil.
I used two layers of 1/32" balsa wrapped around a metal rod that was about 15mm in diameter.
All of the top fuse is covered. I opted to do this in two layers of thinner balsa so I could get the contours. 1/8" balsa is tough to bend.
For more detail on this, go to Sam's thread.
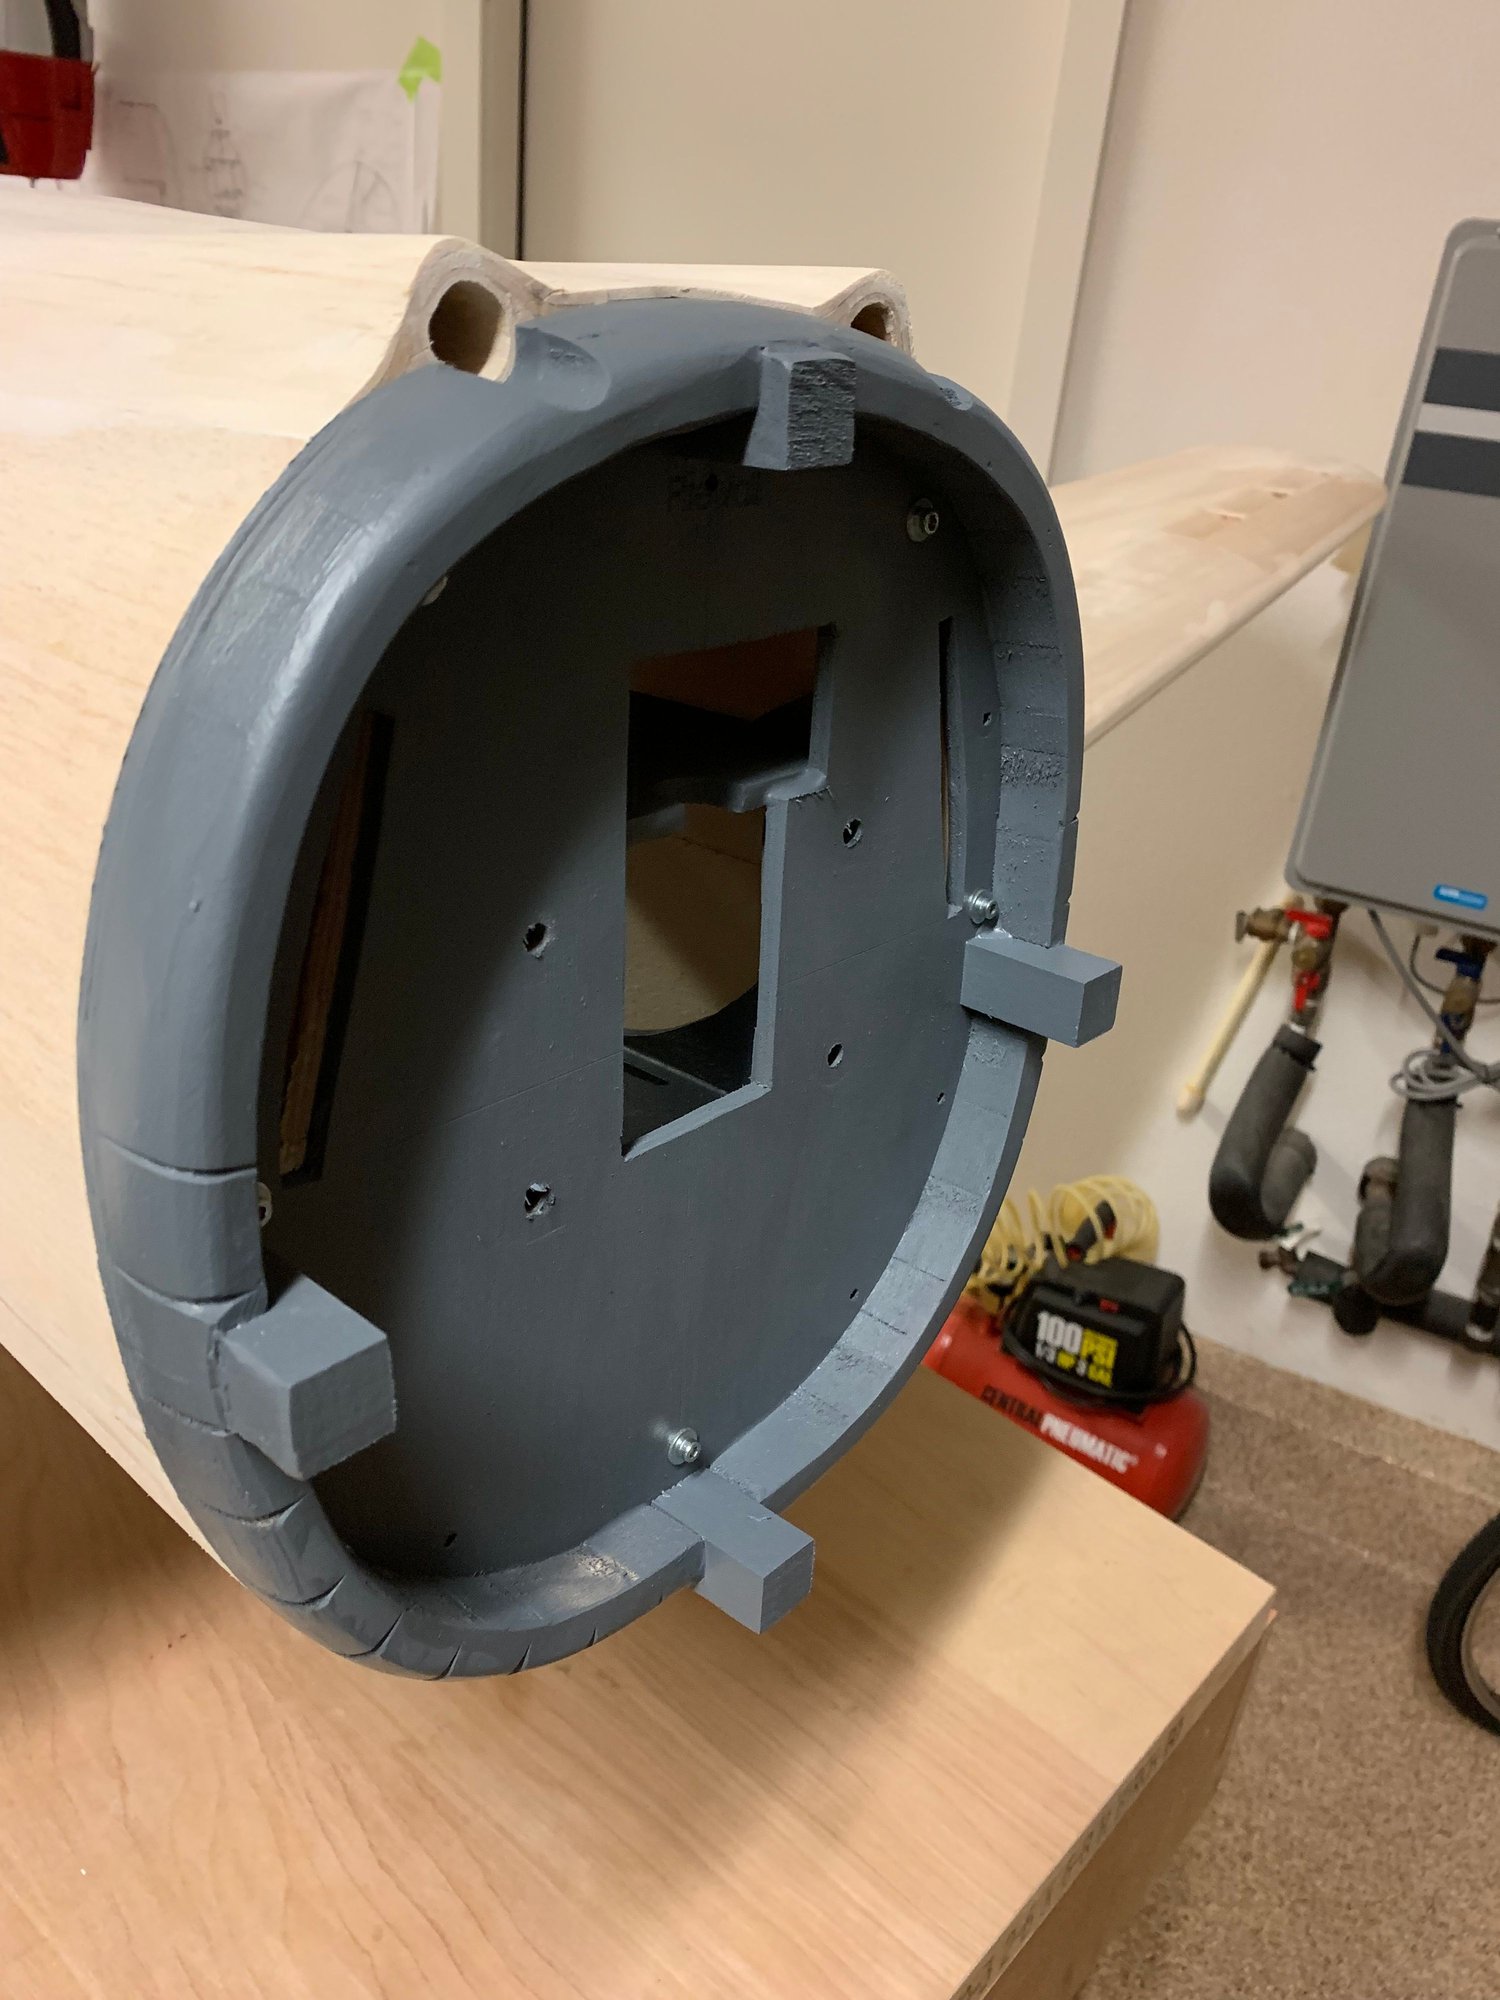
I primed this and worked on the blending to the fuse. On some of the SBD-5's that I've seen, the rings are painted silver. On SBD-3's, I don't see as many painted silver.
At this point, I'm working to get the plane all ready for FG'ing. I just wanted to get the windscreen shaped with the support frame cut out and the top of the fuse cut out. This is about as far as I'll get for the next few months.
09-20-2019, 09:04 AM
#45
Thread Starter
Join Date: Sep 2014
Location: Scottsdale, AZ
Posts: 169
Likes: 0
Received 0 Likes
on
0 Posts
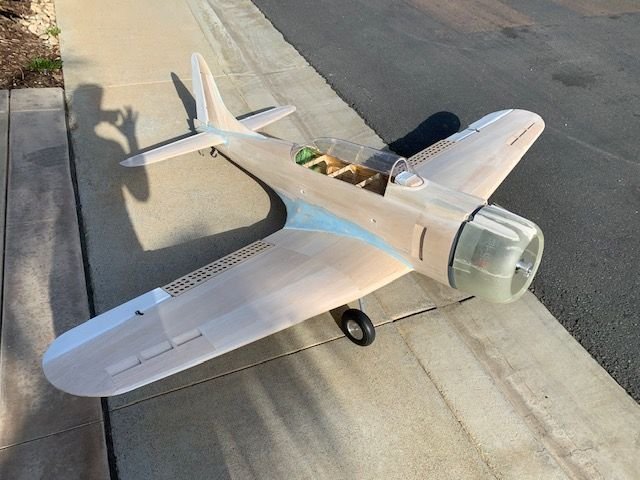
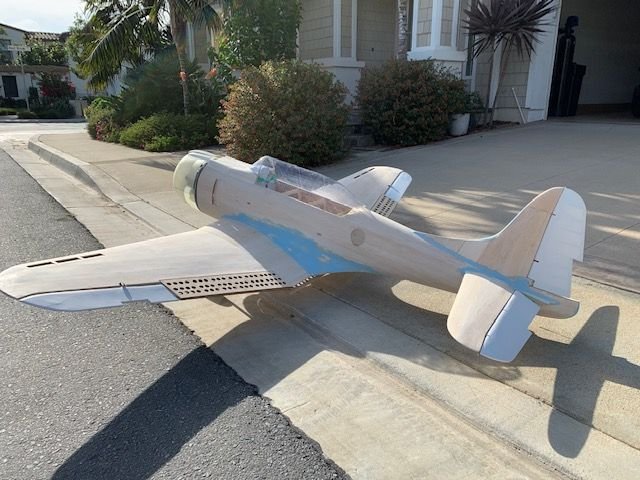
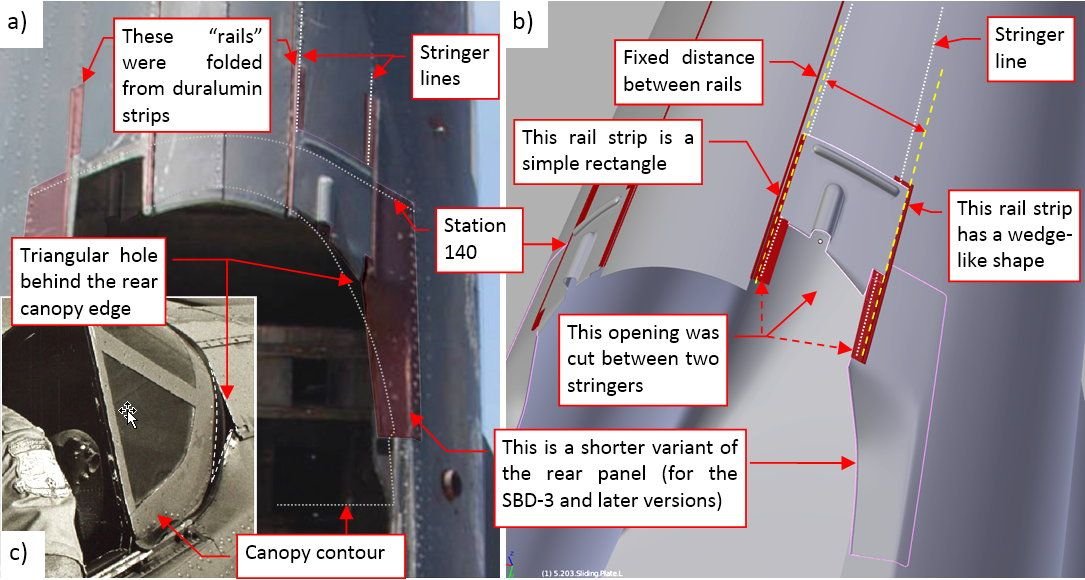
All parts on the plane, but the canopy and cowl are just set in place at this point. I will need to figure out how the rails for the canopy go. I've seen 2 approaches, and I'm not sure which is scale but I have the books to check. Or I may follow Tom P's advice and leave them fixed.

So I have a question - how would you store the fuse for 7 months in 60% humidity climate? I'm assuming that with all the sheeting and Superfil filets it should be stable. Having said that, I don't know the strength of Superfil at the thin layer I have. I had planned to get the glass on and a few coats of polycrilic. I plan to remove the engine mount (gray piece) and stand the fuse upright.

I am tentatively Ok with the control surfaces. My approach to finishing this will be to lay down some rivets and then add the appropriate strips of Solartex carefully over. The detail is really only seen close up, but anything more like pinking strips just seems to be too much.
At this point, I'm just looking at the prop clearance to get an idea of where and how I'll attach this cowl mount brackets. I'll do a little more to make sure I have the cowl spaced so the face is parallel to the prop, but this looks pretty good to me.
Finished making the cut out for the windscreen and control panel. I added the opening for the front guns to rest and have cut that detail from the dbalsa panel.
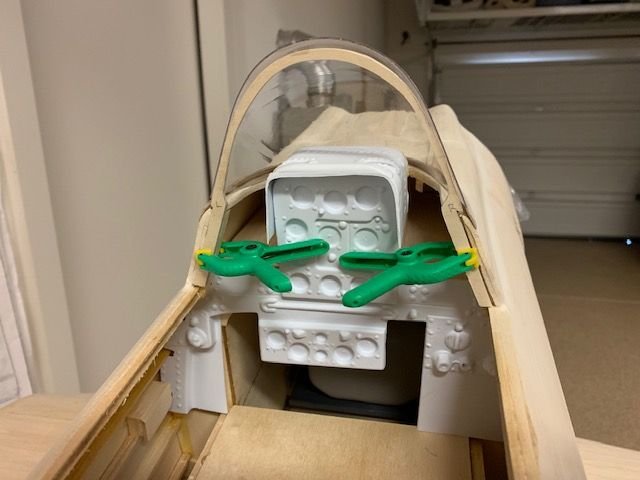
My initial fit of parts. I know that I will need to put the floor panels in first, but I needed to see how the dash parts came together in relation to the windscreen. If anyone knows of a good thread for putting in a dbalsa cockpit, not necessarily a SBD, please let me know. Tom's detail is, of course, great. For example, I assume I need to fill in some of the raised areas with balsa and support other areas (like the lower dash) will ply. I see some people screw these in and other epoxy.
06-18-2020, 10:37 AM
#46
Thread Starter
Join Date: Sep 2014
Location: Scottsdale, AZ
Posts: 169
Likes: 0
Received 0 Likes
on
0 Posts
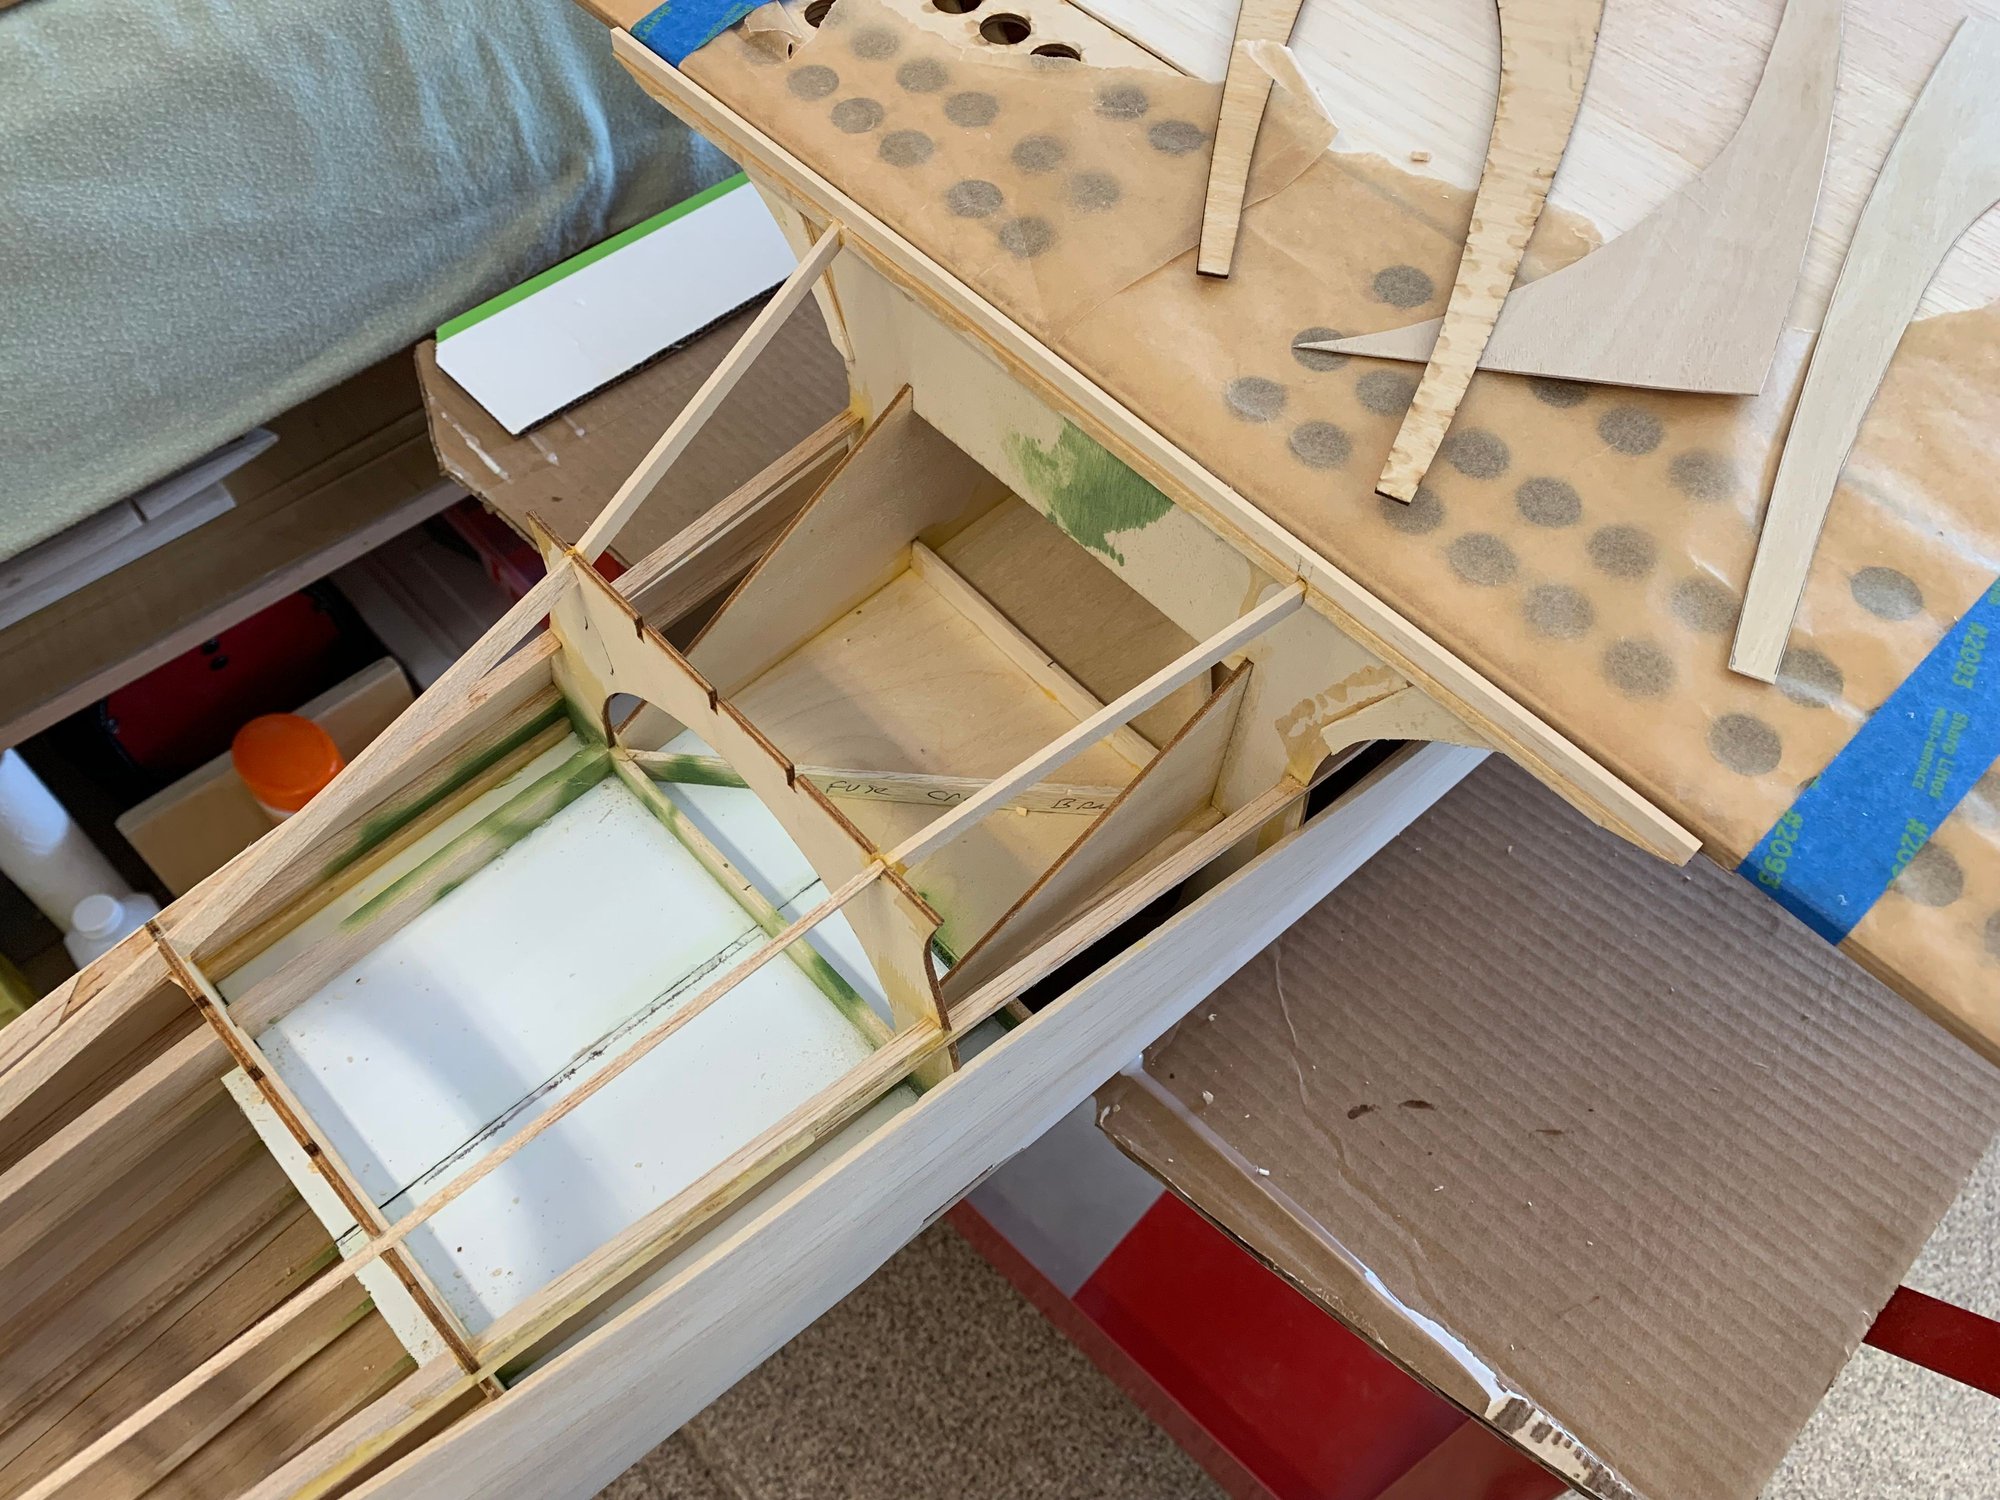
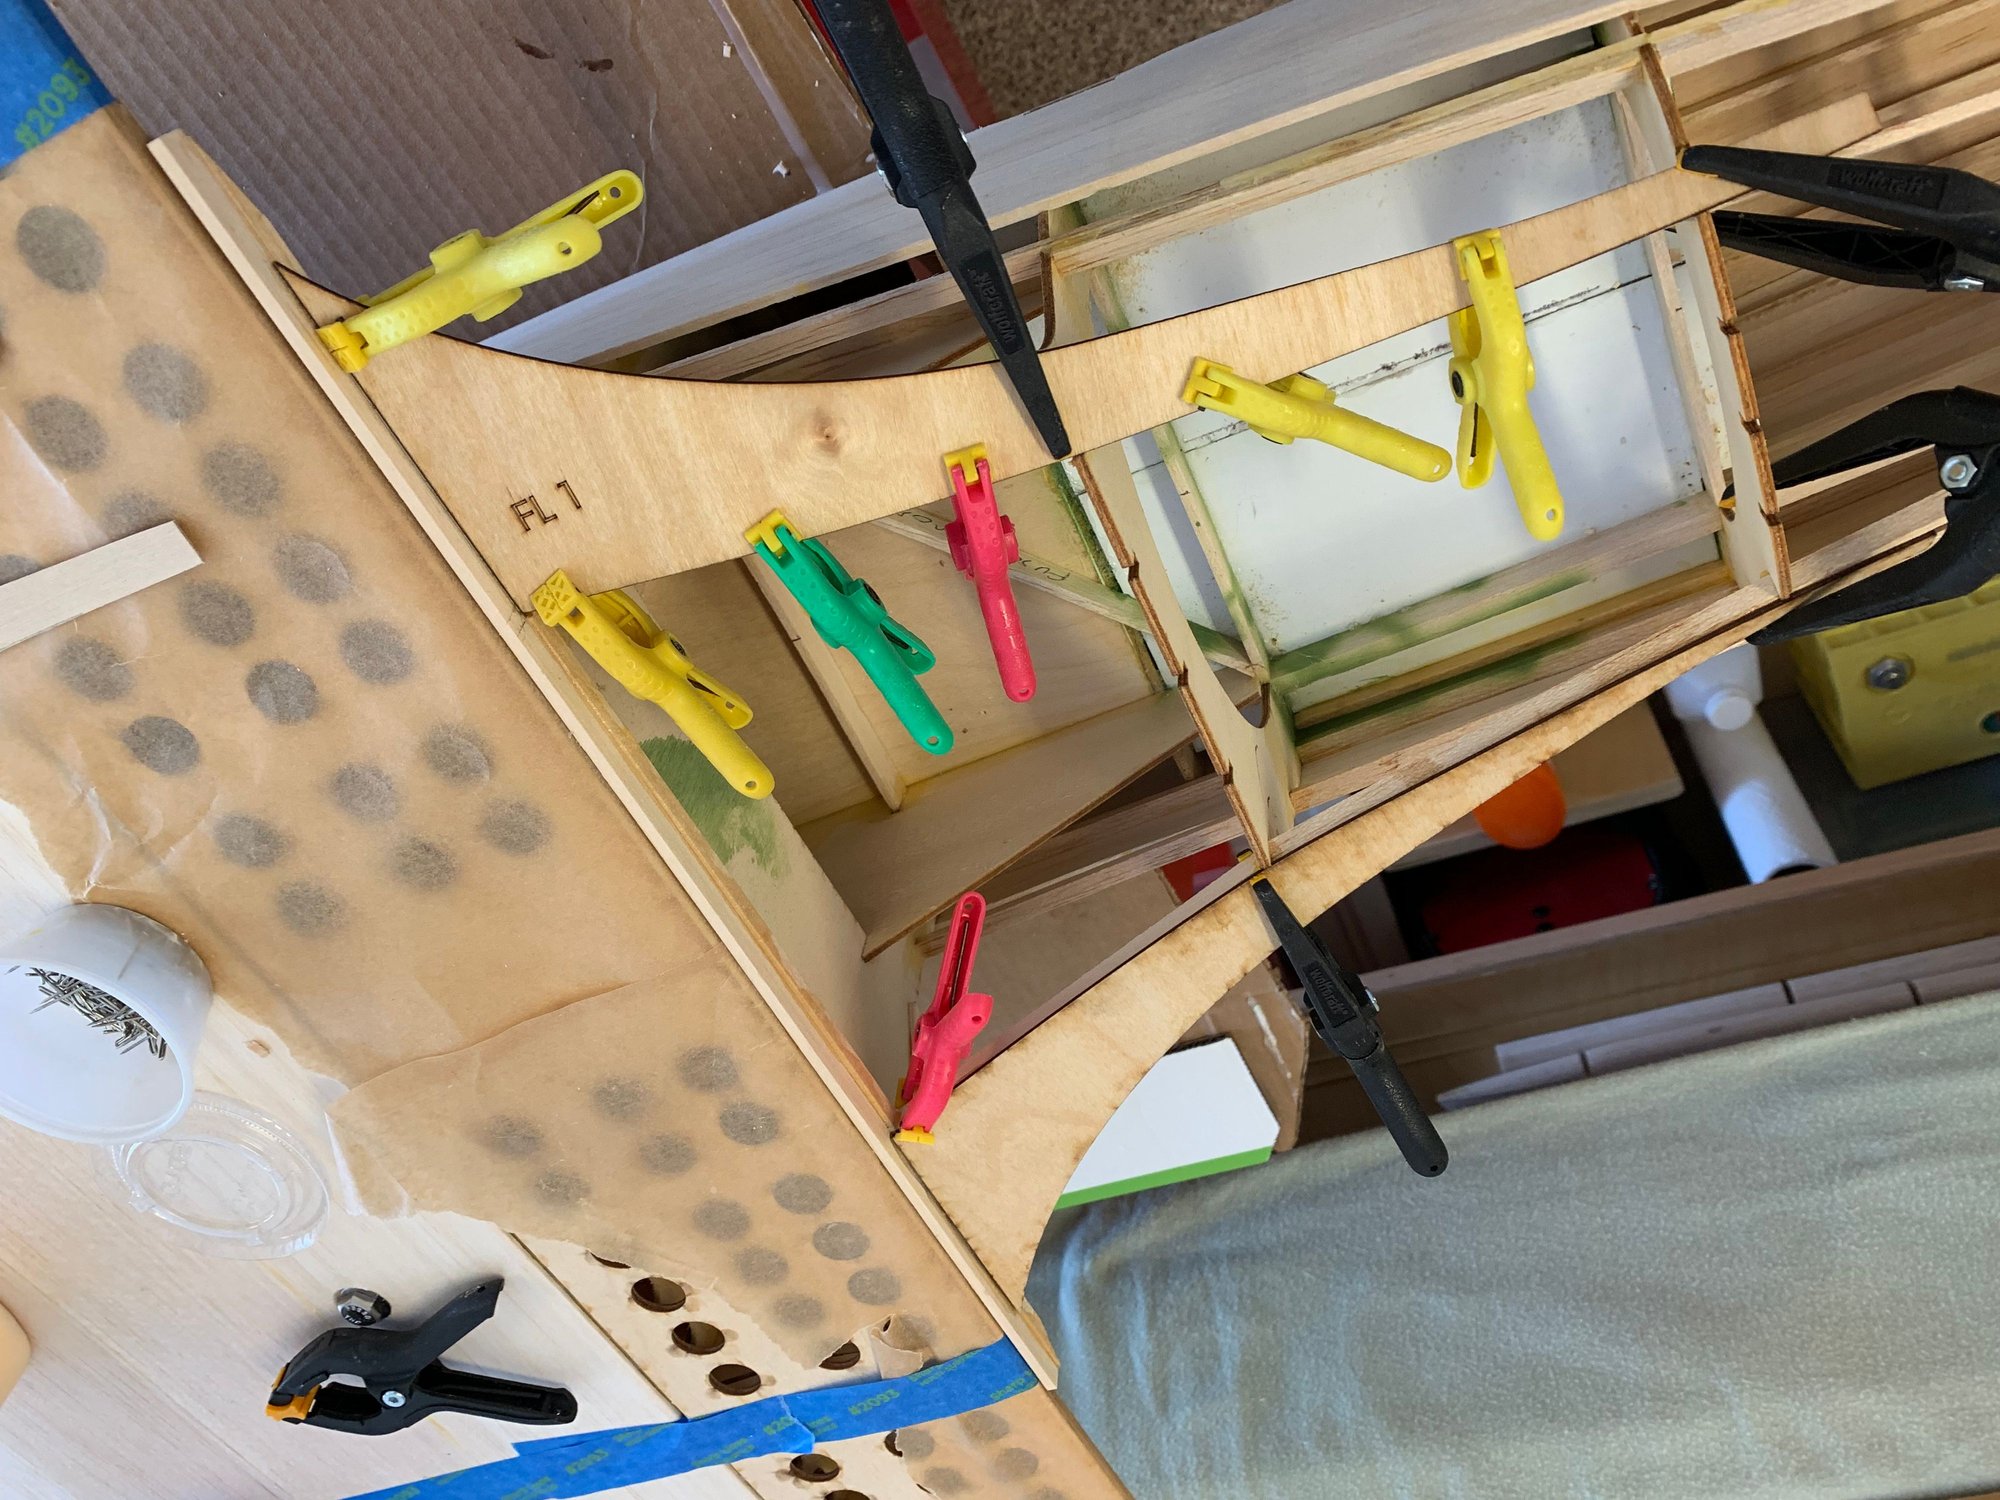
Getting back to the SBD, I'm doing some work to get the main cockpit area ready as well as figure out how to install the canopy rails. I decided to put the rails in flush with the slots facing up. This way they won't be so obvious if I decide to revert back to a fixed canopy. At this point, I will only have the pilot canopy slide back.
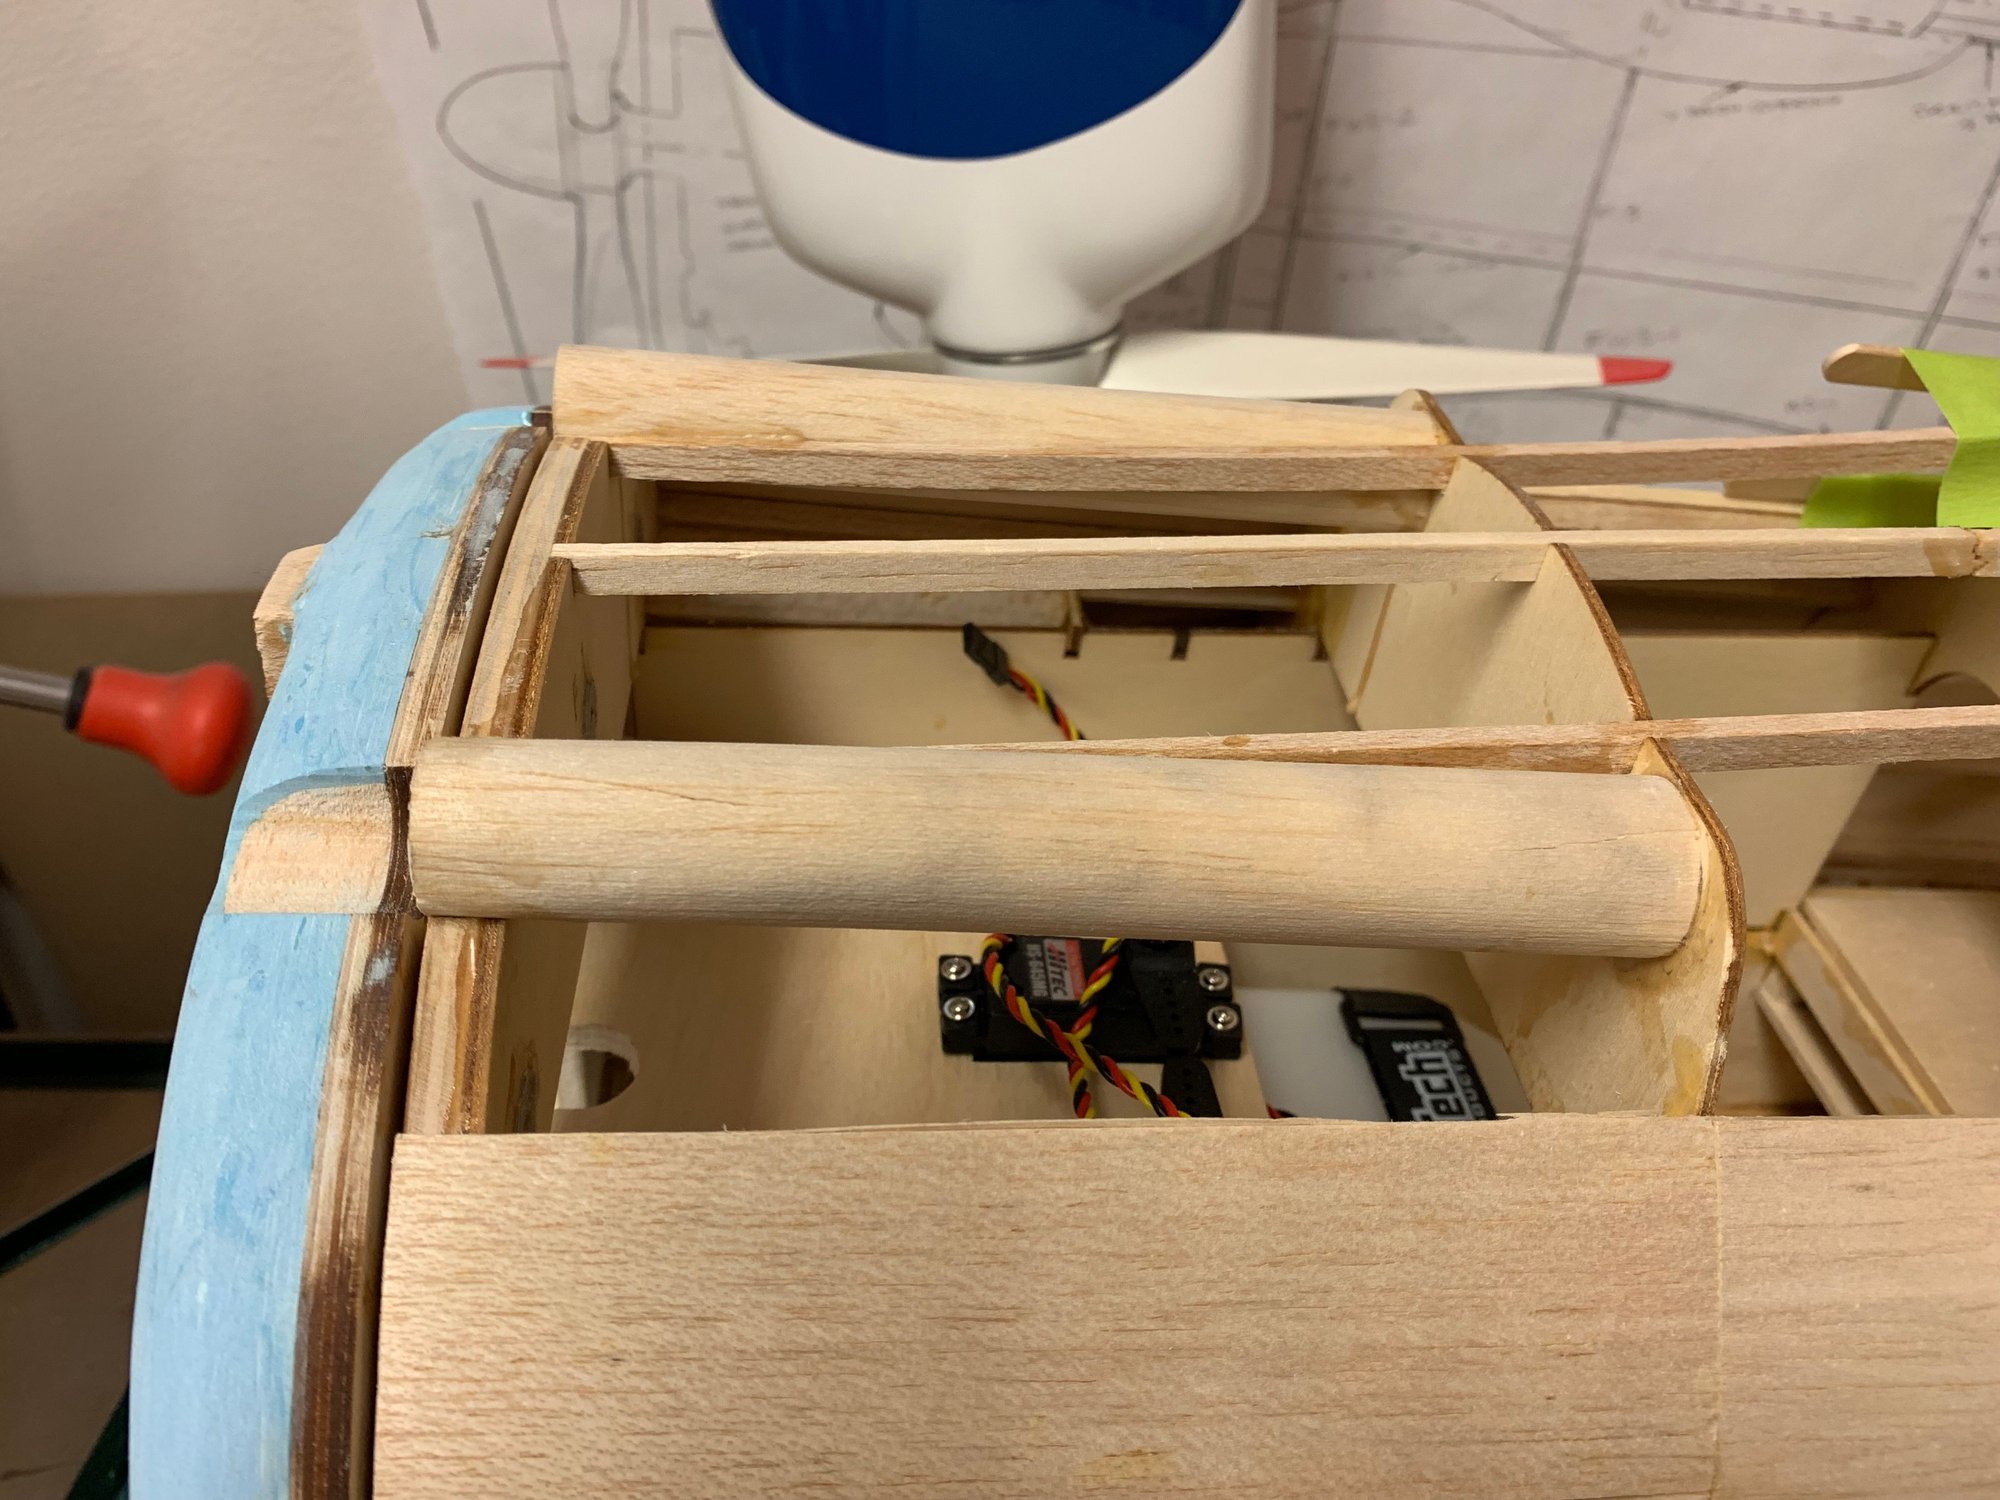
The center section/radio top was reinforced with some basswood braces and thin ply on top.
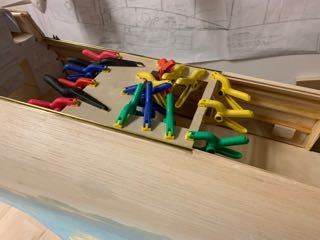
I also realized that I may have placed my rear gunner wall back a little too far. Dbalsa suggests 21.5" for the distance from the pilot dash to the gunner rear wall. I think it will be Ok based on looking at a pic from Witold's thread.
The center section/radio top was reinforced with some basswood braces and thin ply on top.
I also realized that I may have placed my rear gunner wall back a little too far. Dbalsa suggests 21.5" for the distance from the pilot dash to the gunner rear wall. I think it will be Ok based on looking at a pic from Witold's thread.
07-02-2020, 06:45 PM
#47
Thread Starter
Join Date: Sep 2014
Location: Scottsdale, AZ
Posts: 169
Likes: 0
Received 0 Likes
on
0 Posts
Getting back at this build, I realized that similar to my Bates F4U, I'm not liking how the ailerons are set up. The horns were too high, causing them to swing too far into the trailing edge of the wing. And if I had it all to do over again, I would have probably opted for a smaller size connector. But that ship has sailed.
The before picture
I filled in the holes with a mixture of glass balls and epoxy and added 0.020" G10 on each side. Then drilled holes and shortened the horns, giving this after picture, which in turn greatly reduced the notch in the trailing edge.
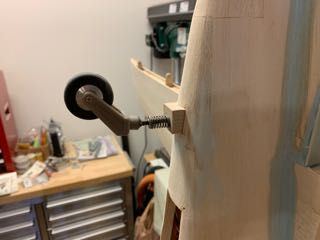
I also liked how other did the tailwheel, so I opted to add a hardwood block and spring. I also removed the shaft in the wheel housing and used a 5/32" rod, threaded the end, and JB welded that in place to get the right overall length. I'm much happier with this tailwheel.
Two steps back, one step forward. Or at least it always feels that way.
As of the moment, I'm in the throws of sanding, filling and glassing. I'm doing peel/ply on the wing sections and will most likely use poly acrylic on the fuse. Not much rocket science there, but it's teaching me that the real art to a smooth surface starts way before sheeting. I need to get better at sanding the ribs - note to self.
I'm also patiently following boB's build over on RCSB. Great work over there.
The before picture
I filled in the holes with a mixture of glass balls and epoxy and added 0.020" G10 on each side. Then drilled holes and shortened the horns, giving this after picture, which in turn greatly reduced the notch in the trailing edge.
I also liked how other did the tailwheel, so I opted to add a hardwood block and spring. I also removed the shaft in the wheel housing and used a 5/32" rod, threaded the end, and JB welded that in place to get the right overall length. I'm much happier with this tailwheel.
Two steps back, one step forward. Or at least it always feels that way.
As of the moment, I'm in the throws of sanding, filling and glassing. I'm doing peel/ply on the wing sections and will most likely use poly acrylic on the fuse. Not much rocket science there, but it's teaching me that the real art to a smooth surface starts way before sheeting. I need to get better at sanding the ribs - note to self.
I'm also patiently following boB's build over on RCSB. Great work over there.
07-14-2020, 04:51 PM
#48
Thread Starter
Join Date: Sep 2014
Location: Scottsdale, AZ
Posts: 169
Likes: 0
Received 0 Likes
on
0 Posts
Need some help with the control surface covering. I've seen many techniques on this, starting with Tom Pierce and followed by many others.
I see a mix of techniques used, some depicting rivets and others showing the tape/rib lacing method. I found an interesting pdf (ama_Ch03.pdf) which explains both. But which was used at the time SBD's were produced? I'm assuming that not everything we see on planes seen in present day is factory original.
There are pictures that show the fabric over rivets which create a ridge effect
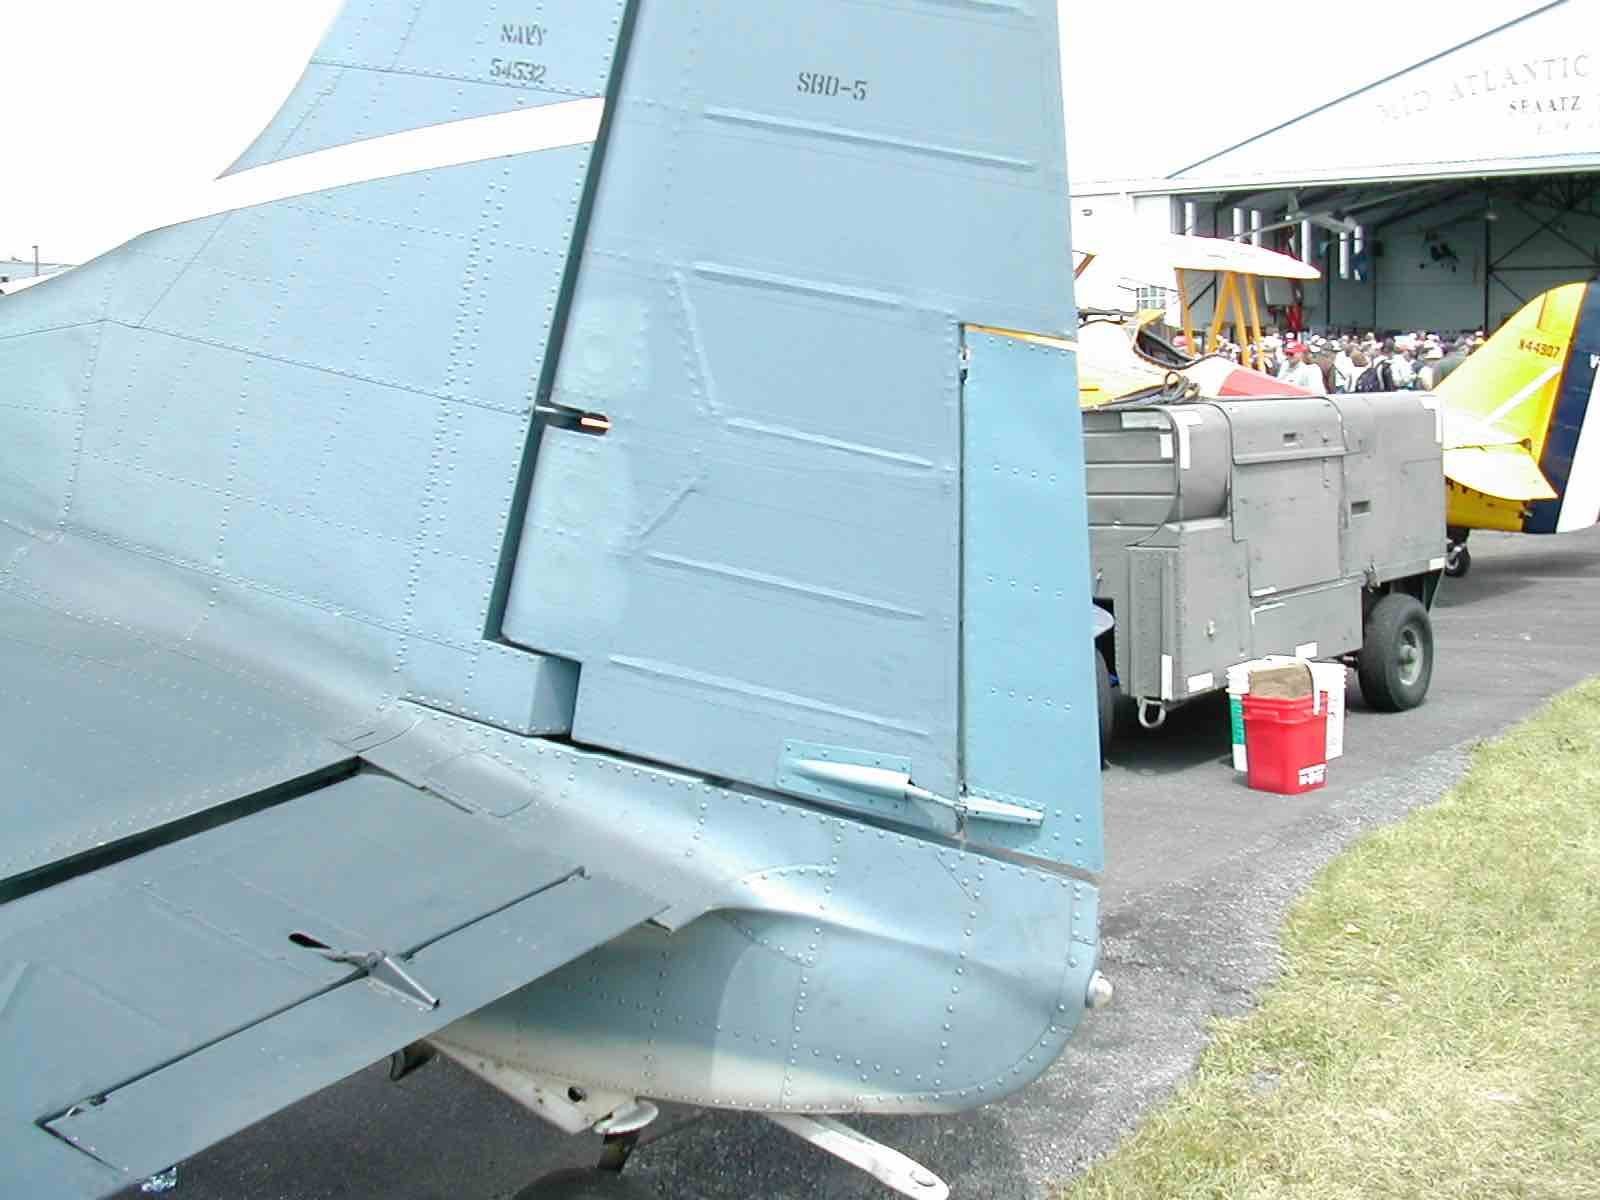
you can see the rivet heads on the rudder and elevator
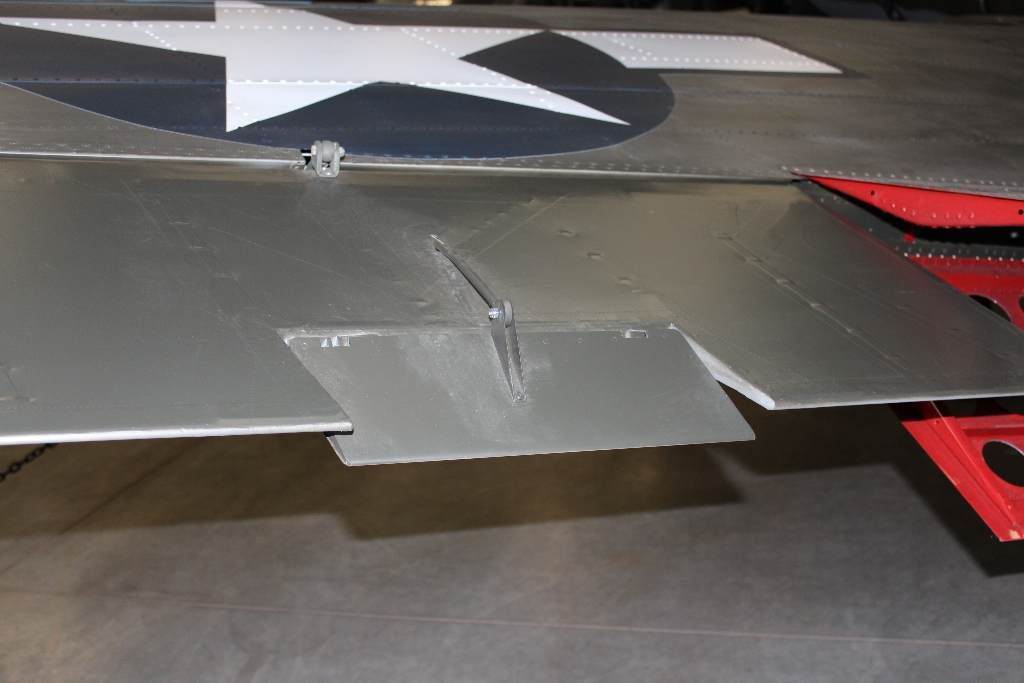
And then you see the raised dashes from the lacing cord in the pic below. I had planned to glue a thin styrene strips to simulate the fabric tape that the lacing cord wraps over.
I've started the rudder and put rivets with tape over the top. It's thin enough to look scale and creates the same type of ridge (if you don't go crazy heating the tape up between rivets).

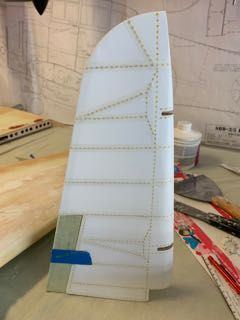
Next, I'd like to hear what folks have to say about the trim tab hinges - again I see two types: a two way hinge with pins on the top/bottom sides and a (for the lack of the right technical terms) universal ball joint type of hinge point.
I see a mix of techniques used, some depicting rivets and others showing the tape/rib lacing method. I found an interesting pdf (ama_Ch03.pdf) which explains both. But which was used at the time SBD's were produced? I'm assuming that not everything we see on planes seen in present day is factory original.
There are pictures that show the fabric over rivets which create a ridge effect
you can see the rivet heads on the rudder and elevator
And then you see the raised dashes from the lacing cord in the pic below. I had planned to glue a thin styrene strips to simulate the fabric tape that the lacing cord wraps over.
I've started the rudder and put rivets with tape over the top. It's thin enough to look scale and creates the same type of ridge (if you don't go crazy heating the tape up between rivets).
Next, I'd like to hear what folks have to say about the trim tab hinges - again I see two types: a two way hinge with pins on the top/bottom sides and a (for the lack of the right technical terms) universal ball joint type of hinge point.
Last edited by BatteryBob; 07-14-2020 at 04:56 PM.
07-20-2020, 01:25 PM
#50
Thread Starter
Join Date: Sep 2014
Location: Scottsdale, AZ
Posts: 169
Likes: 0
Received 0 Likes
on
0 Posts
Thanks for the words of encouragement. It probably couldn't have come at a better time.
There are times where I question if I'm qualified to glue popsicle sticks together with Elmer's glue.
I was getting to that point of fiberglassing, starting with the wings. I did the peel/ply method for all 3 sections. I've done this before and have only had some minor pin holes - so my plan was not to be too aggressive with mixing.
Noticed a few larger bubbles that I fixed. After some prep, I sprayed up the first primer to check things out. That's when I realized I had a major disaster on my hands.
I had some major wrinkles/bubbles. Not everywhere, but enough to be a major problem.
It could be due to a number of issues:
Poor prep/cleanliness of the wood
Old epoxy
Wrong type of peel/ply scrim
Didn't wait long enough for the epoxy to cure
Epoxy didn't wet out the wood well enough
Epoxy didn't like the filler I was using
Insufficient epoxy mixing/shouldn't have thinned with alcohol
I started working on removing the bubbles, one by one, but on some of the panel sides, it was just too much. I got a bit desperate and pulled off the sheeting on one panel side. I was about to put it all in a box and light a match. Still might.
I believe I will try to sand through to a least open up these areas and re-glass.
So looking over the list, I don't think it was surface prep. It could be outgassing from some of the filler if it wasn't fully cured. Never heard of that before. The peel/ply was not the usual stuff I get at Hobby Lobby. It was not as easy to pull off, and I also think I didn't wait long enough. I ran out of my open bottles of Zpoxy mid way through the outer panels. The center section was a new set of Zpoxy bottles, but still at least a year old. No issues with the center section, but I also let this cure a lot longer - over a day. I'm doing this all in humid S. California coast weather - not the best for any work with resins, paints etc. I cut the Zpoxy with some denatured alcohol to make sure it was flowing well into the glass/wood. But the way it lifted off, it's like no wood pulled up at all. Not sure if this means a mixing issue or the alcohol impacted the bonding of the epoxy.
If I'm lucky enough to get the outer panels re-sheeted or sanded well enough, I'm going to use my West Systems epoxy and skip the peel ply. Part of the reason why I opted to not use polyacrylic on the wings was the wait time for that stuff to dry where I live.
Let me know if you guys have any of your own war stories or suggestions. Stay tuned. I hope to be back at it some day.
Last edited by BatteryBob; 07-20-2020 at 02:14 PM.