


1/7 Scale Blackburn Buccaneer All Composite Scratch Build
 11-26-2018, 05:15 AM
#126

You are not going to do a JWM with this, so go 80mm..no one will notice!
Even a small gap with the correct spacing will purge the fuselage of not air. I think you will be fine
Dave
Even a small gap with the correct spacing will purge the fuselage of not air. I think you will be fine
Dave
 11-26-2018, 05:38 AM
#127

Dave,
Yes, the plan is to have a functional speedbrake (next on the design list), so yes, there should be some air paths around that area.
Due to the small size of the scale engine exhaust nozzle openings, they are only 76mm in diameter. Gaspar recommends no less than a 68mm diameter pipe for his Jets Munts Merlin 100XBL, so that only leaves a 4mm wide annulus for the outer pipe. No wide air gap around the outer pipe to help with fuselage venting unfortunately.
The pipe will sit in the fuselage like the Ultra Flash, with the outer pipe wall touching the end of the fuselage opening.
I would leave the arrestor hook recess as an opening initially to get more fuselage pressure relief.
Paul
I have recently installed a JetsMunt Merlin 100 ( a. superb engine) in my new Sabre. It uses a BVM Ram 500 bypass only a little larger, about 15 mm, in diameter than the engine case, feeding a custom, BVM made, jet pipe of 60 mm diameter with an outer tube diameter of 80 mm. The outer pipe is 34 INCHES long, the inner exhaust some 3 inches forward of the outer.
Compared with the free installation in a BobCat the egt is very slightly higher and thrust down a tad as one might expect but nothing significant. It all works perfectly and should suit your Bucc. Well.
Splendid project!
DG
Last edited by David Gladwin; 11-26-2018 at 06:02 AM.
11-26-2018, 06:36 AM
#128

Dave,
Thanks, I may just be able to trim back the rear of the nacelle by the exhaust to get an 80mm opening - should not be noticeable.
David G - thanks, that is great info about the small diameter pipe with such a long length - it makes me consider the forward install option a bit more seriously with the bent pipe. I would anticipate some more losses due to the bends compared to a straight pipe.
Paul
11-26-2018, 09:58 AM
#129
Paul, some more info which might help :
The Sabre intake is about 3.5 inches diameter tapering at the bypass to 3 inches, increasing velocity, dropping pressure. Not ideal but it all fits the Sabre.
The intake is 24 inches long so my total installation should be OK for your Bucc.
The Bypass is just 1 cm greater than the engine case diameter.
I did some work on the Sabre today , no sign of any heat problems.
Never flew a Bucc. several former RAF colleagues did, they loved it.
Went like stink at low level but not much use at altitude , and needed wing and stab blow to get reasonable approach speeds .
Hope this helps.
David G.
Last edited by David Gladwin; 11-26-2018 at 10:04 AM.
11-26-2018, 10:12 AM
#130

If you make the Y pipe with a shorter initial tube and Inconel splltter, you might be able to reduce the Y angle below 40 degrees.
As you get closer to 30 degrees, the efficiency of the pipe will increase proportionally.
I think that the single engine version is a very valid option and will appeal most of the people for its simplicity.
11-26-2018, 10:15 AM
#131
Dave,
Due to the small size of the scale engine exhaust nozzle openings, they are only 76mm in diameter. Gaspar recommends no less than a 68mm diameter pipe for his Jets Munts Merlin 100XBL, so that only leaves a 4mm wide annulus for the outer pipe. No wide air gap around the outer pipe to help with fuselage venting unfortunately.
I would leave the arrestor hook recess as an opening initially to get more fuselage pressure relief.
Paul
I have this exact pipe working on the Crusader. With a 4 mm air cooling gap.
Most of our larger engine pipes use a 5 mm air gap.
BTW, have a quick look at this article if you have not read it already. This might help you to plan your themal management at the design stage.
https://www.ultimate-jets.net/blogs/...avs-and-models


 12-01-2018, 10:08 AM
#137
Dave,
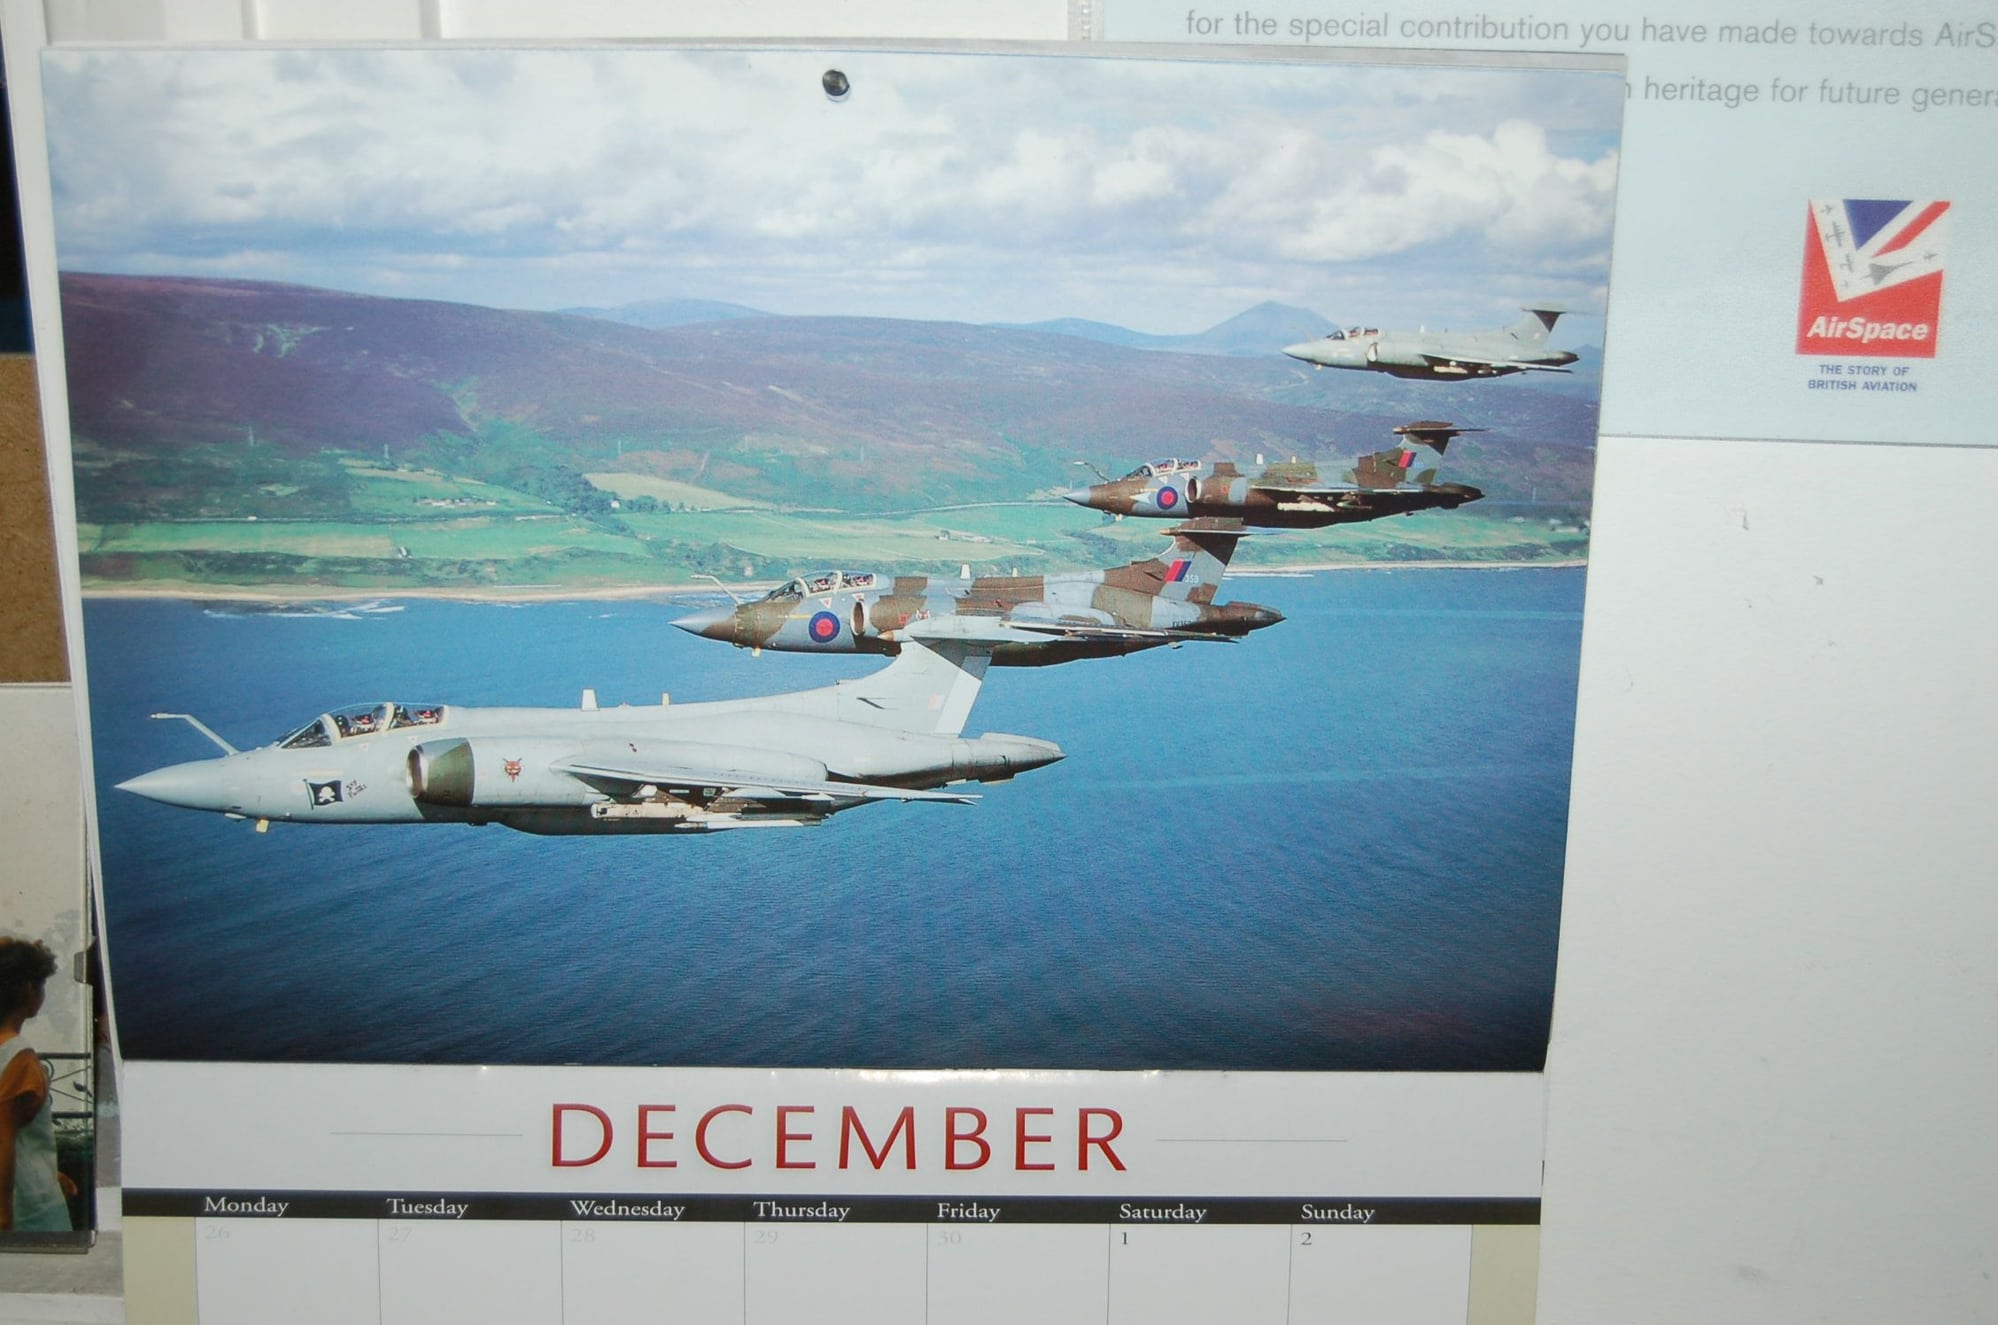
Classic shot and good motivation.
My current front runner for a color scheme is one of the wrap-around green/ grey camo RAF ones. Don't really like the early gloss camo & lower grey schemes. The later all grey ones aren't bad either.
Not much visible progress this week, have been working some unscheduled repairs to my Hunter.
I have been working all the minor filling and sanding on the fuselage plugs getting them ready for adding primer - blending the major sections so that the joints are smooth, glassing the ply bulkheads and access hatch areas and filling in any defects. I still have a couple of minor bumps in the rear fuselage that I can feel but not see that I need to work on. Hopefully I can get the fin fixed on this weekend.
Paul
12-03-2018, 05:02 AM
#139
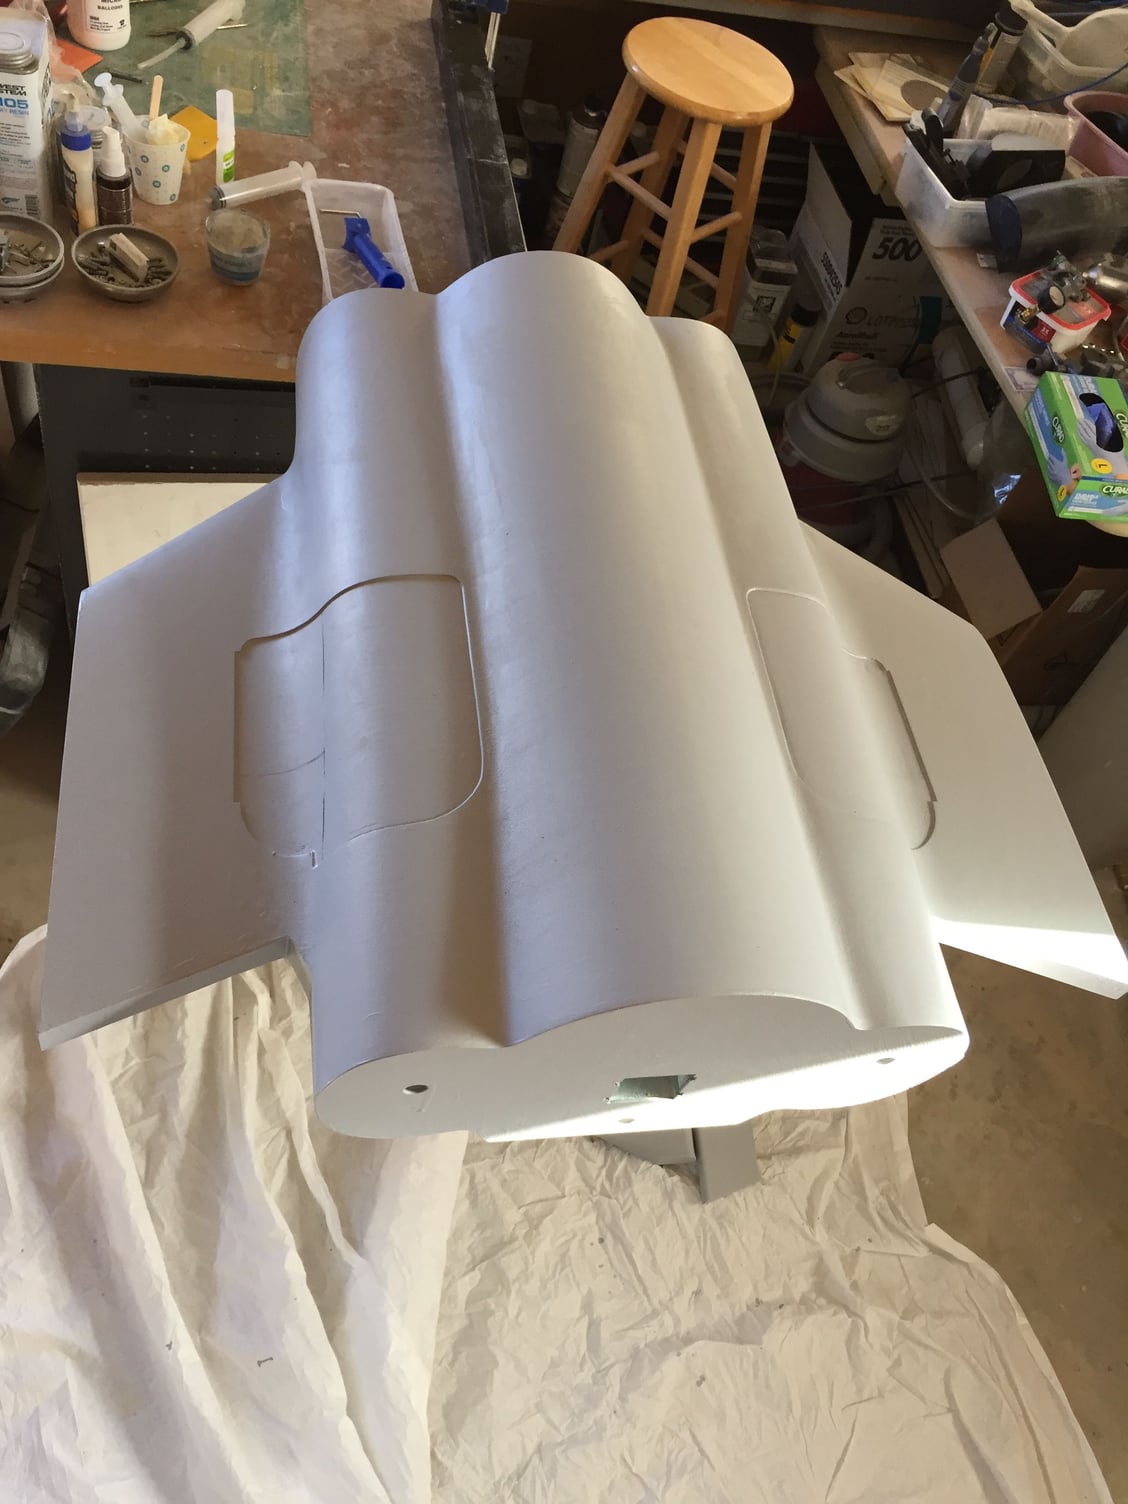
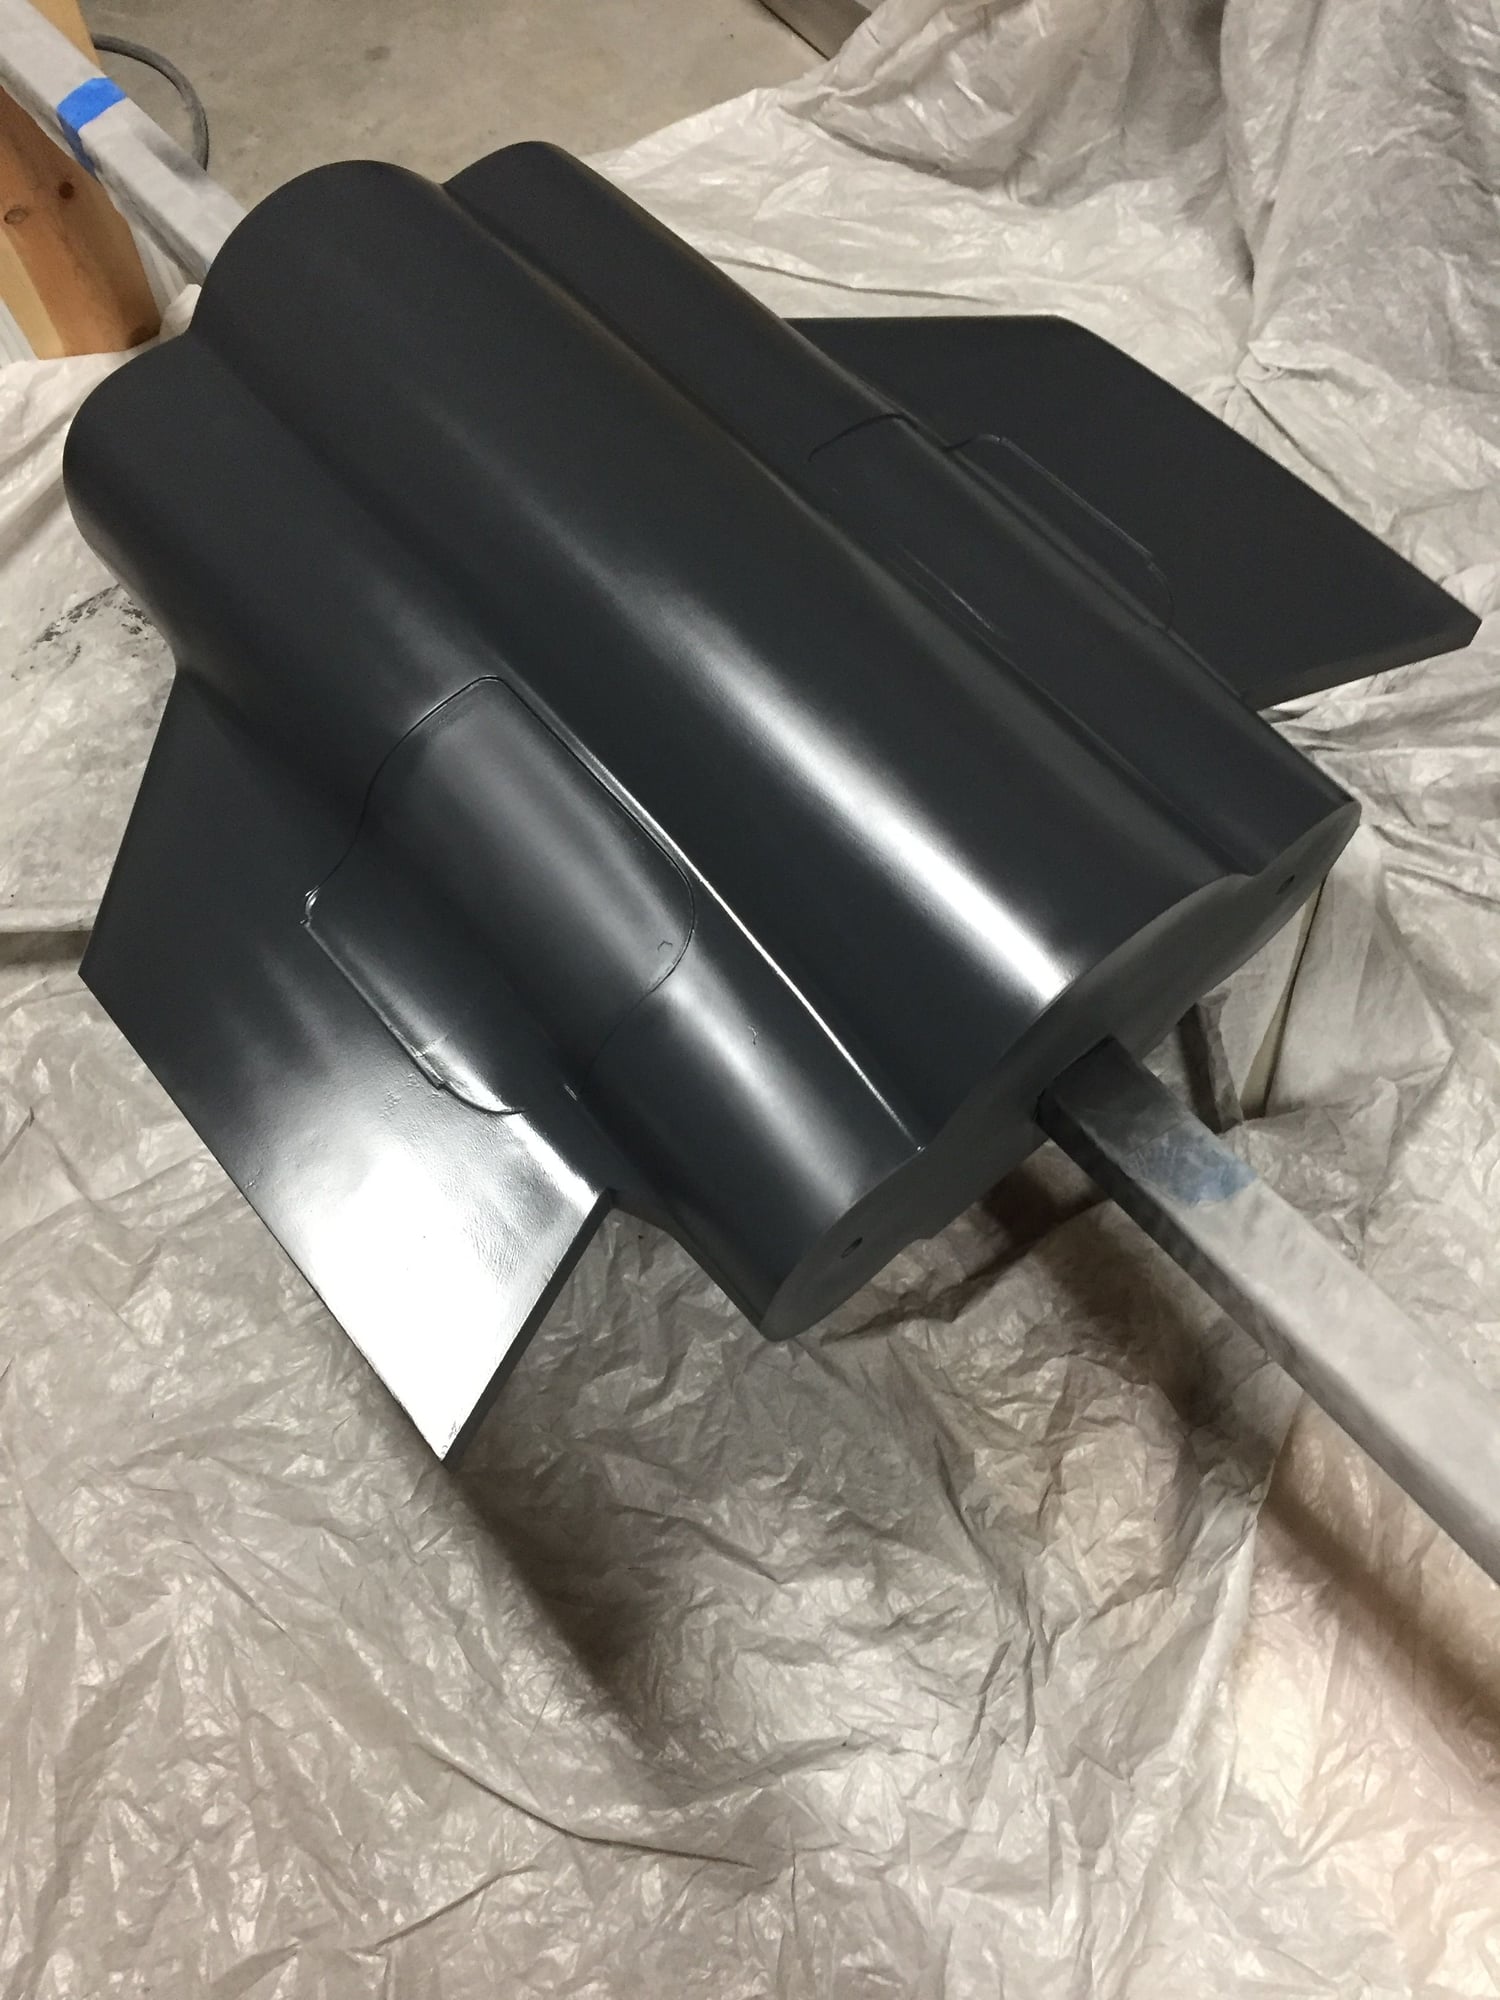
Managed to get the fin bonded onto the rear fuselage. Set up the center and rear fuselage on the stand and jigged it level along the wing tube and then used a laser level to get the fin vertical.
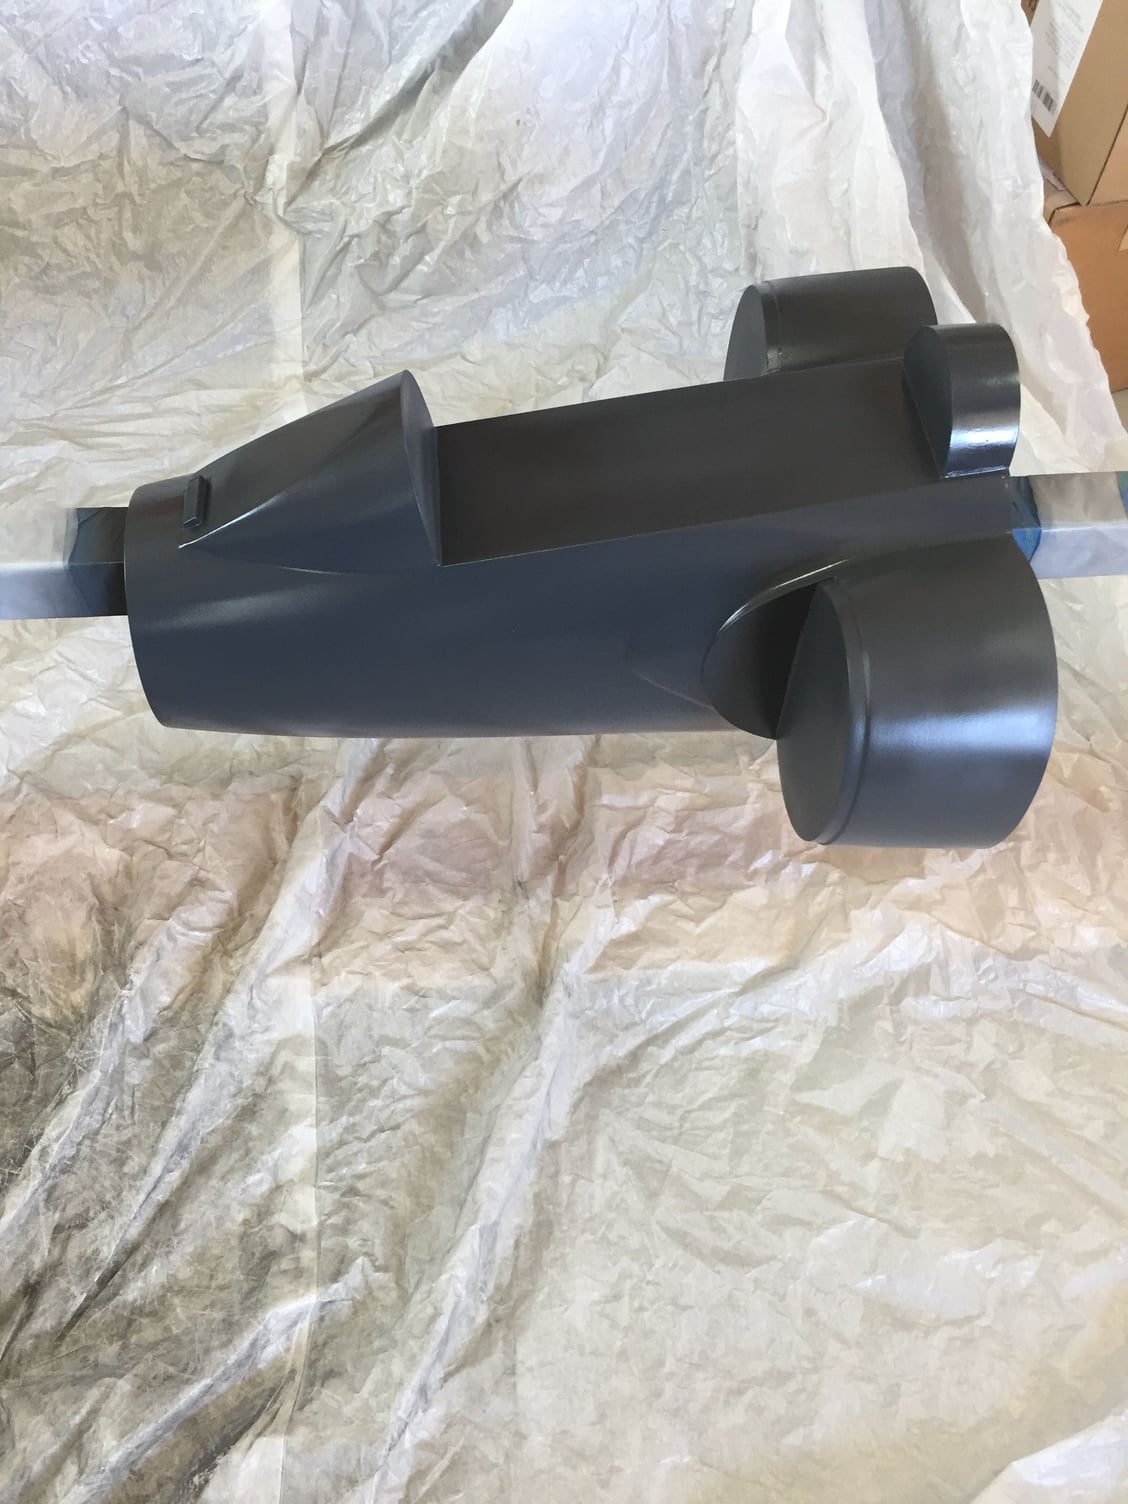
All major sections of the fuselage plug are now done, with the exception of the speedbrake.
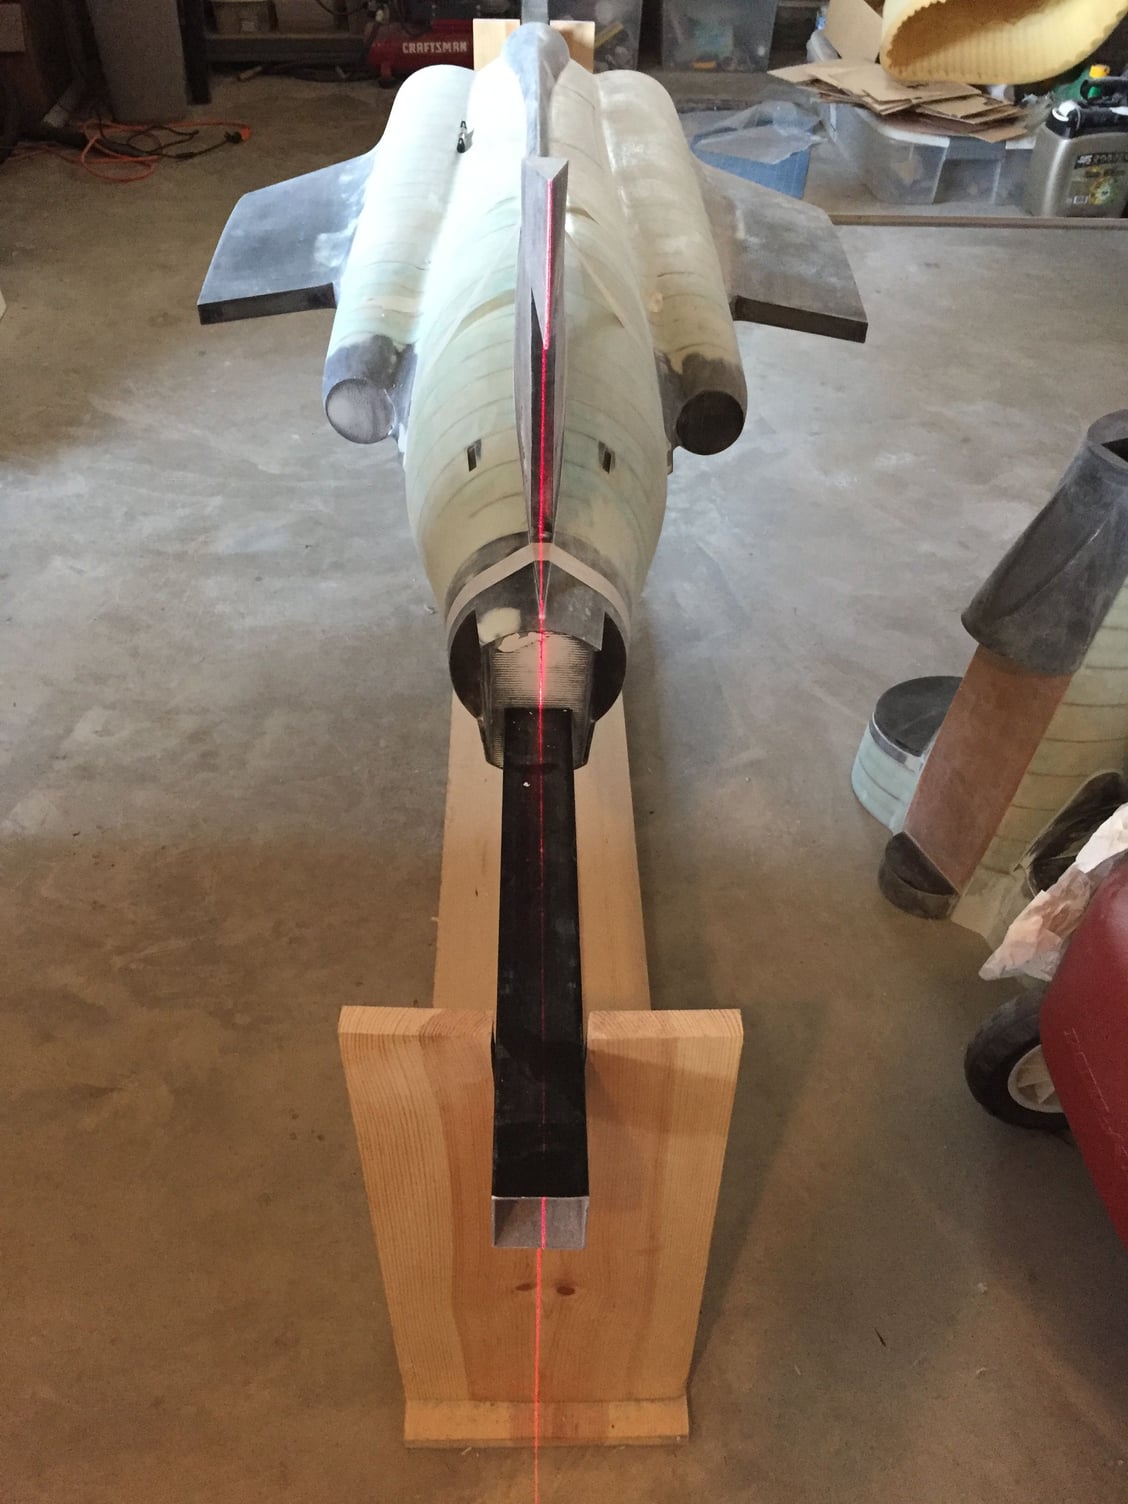

All major sections of the fuselage plug are now done, with the exception of the speedbrake.
 12-09-2018, 09:29 AM
#141
Feels like a slow week - got bogged down in CAD work on the speedbrake.
Managed to get the forward fuselage plug primered and surface coated.
The first coat of 2k car primer was bulked out with micro-balloons and applied with a 2" foam roller to force the primer into the weave pores. This was applied fairly heavily. Once cured it sanded easily with 80grit to a very smooth surface with no noticeable pin holes. A second coat of primer (without any micro-balloons) was applied, again with a 2" roller.
With the second coat rubbed down with 180grit and some final minor defects filled, I sprayed on the first layer of Duratec surface coat. Will see how well it sands, but I'm hoping for just one more layer.
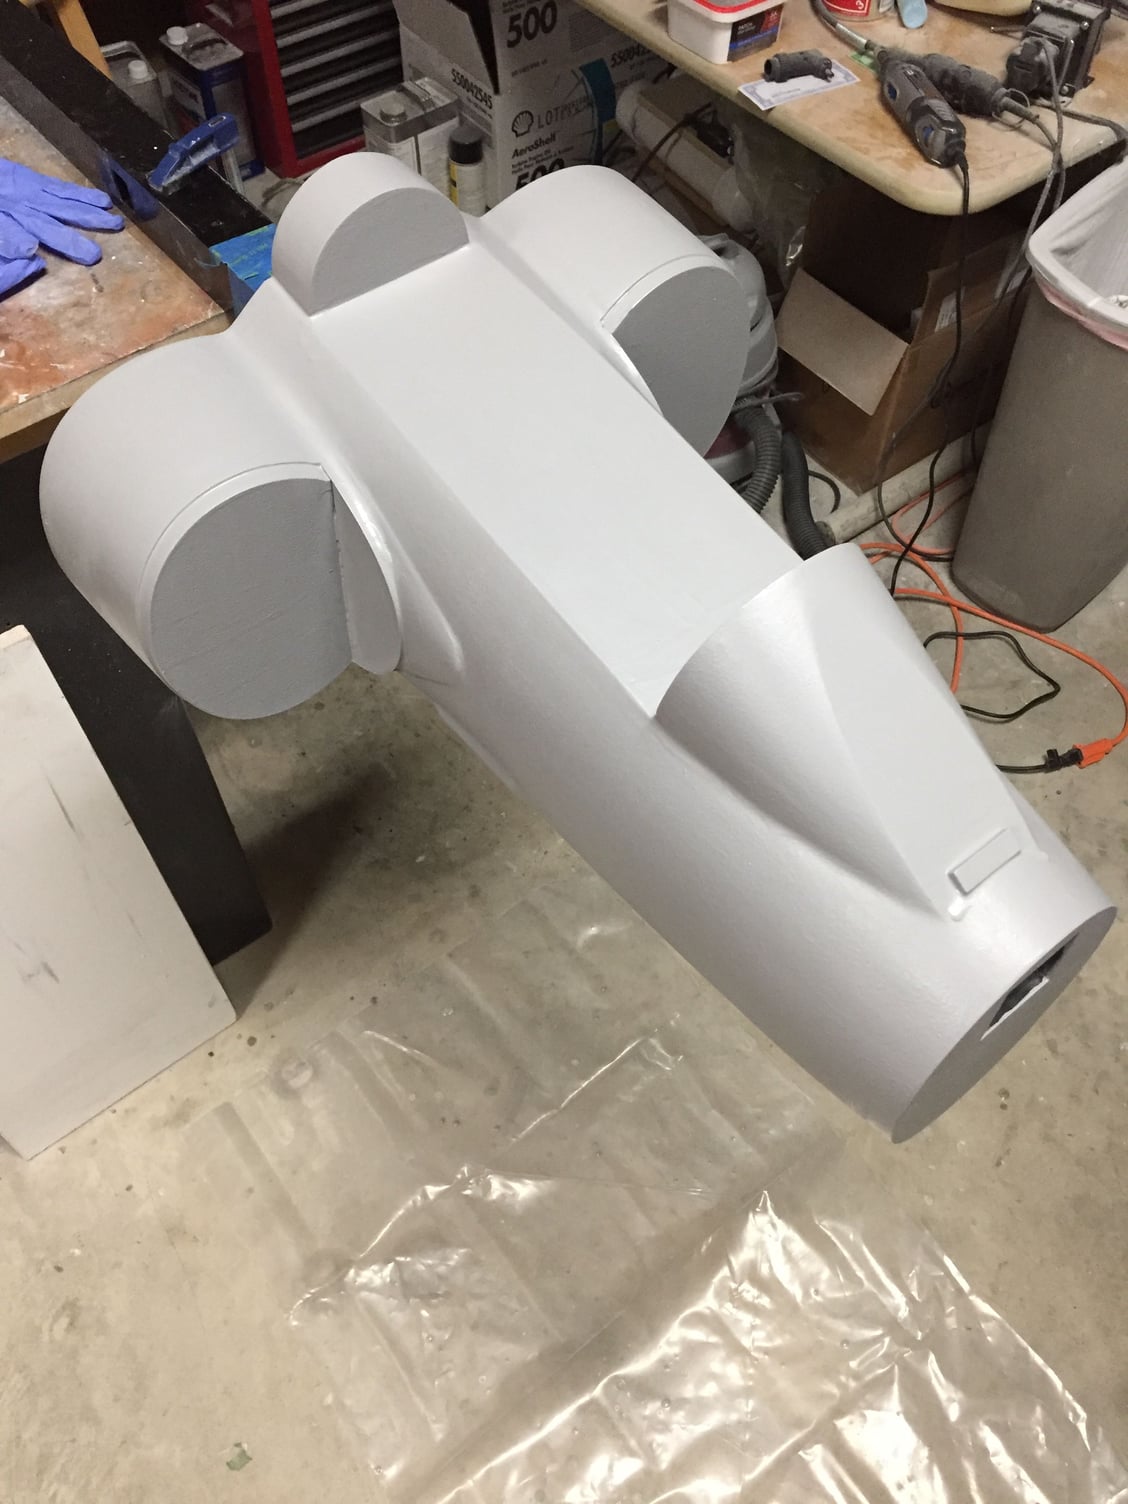
Paul
Managed to get the forward fuselage plug primered and surface coated.
The first coat of 2k car primer was bulked out with micro-balloons and applied with a 2" foam roller to force the primer into the weave pores. This was applied fairly heavily. Once cured it sanded easily with 80grit to a very smooth surface with no noticeable pin holes. A second coat of primer (without any micro-balloons) was applied, again with a 2" roller.
With the second coat rubbed down with 180grit and some final minor defects filled, I sprayed on the first layer of Duratec surface coat. Will see how well it sands, but I'm hoping for just one more layer.
Paul
Last edited by JSF-TC; 12-09-2018 at 09:32 AM.
12-11-2018, 06:26 PM
#144
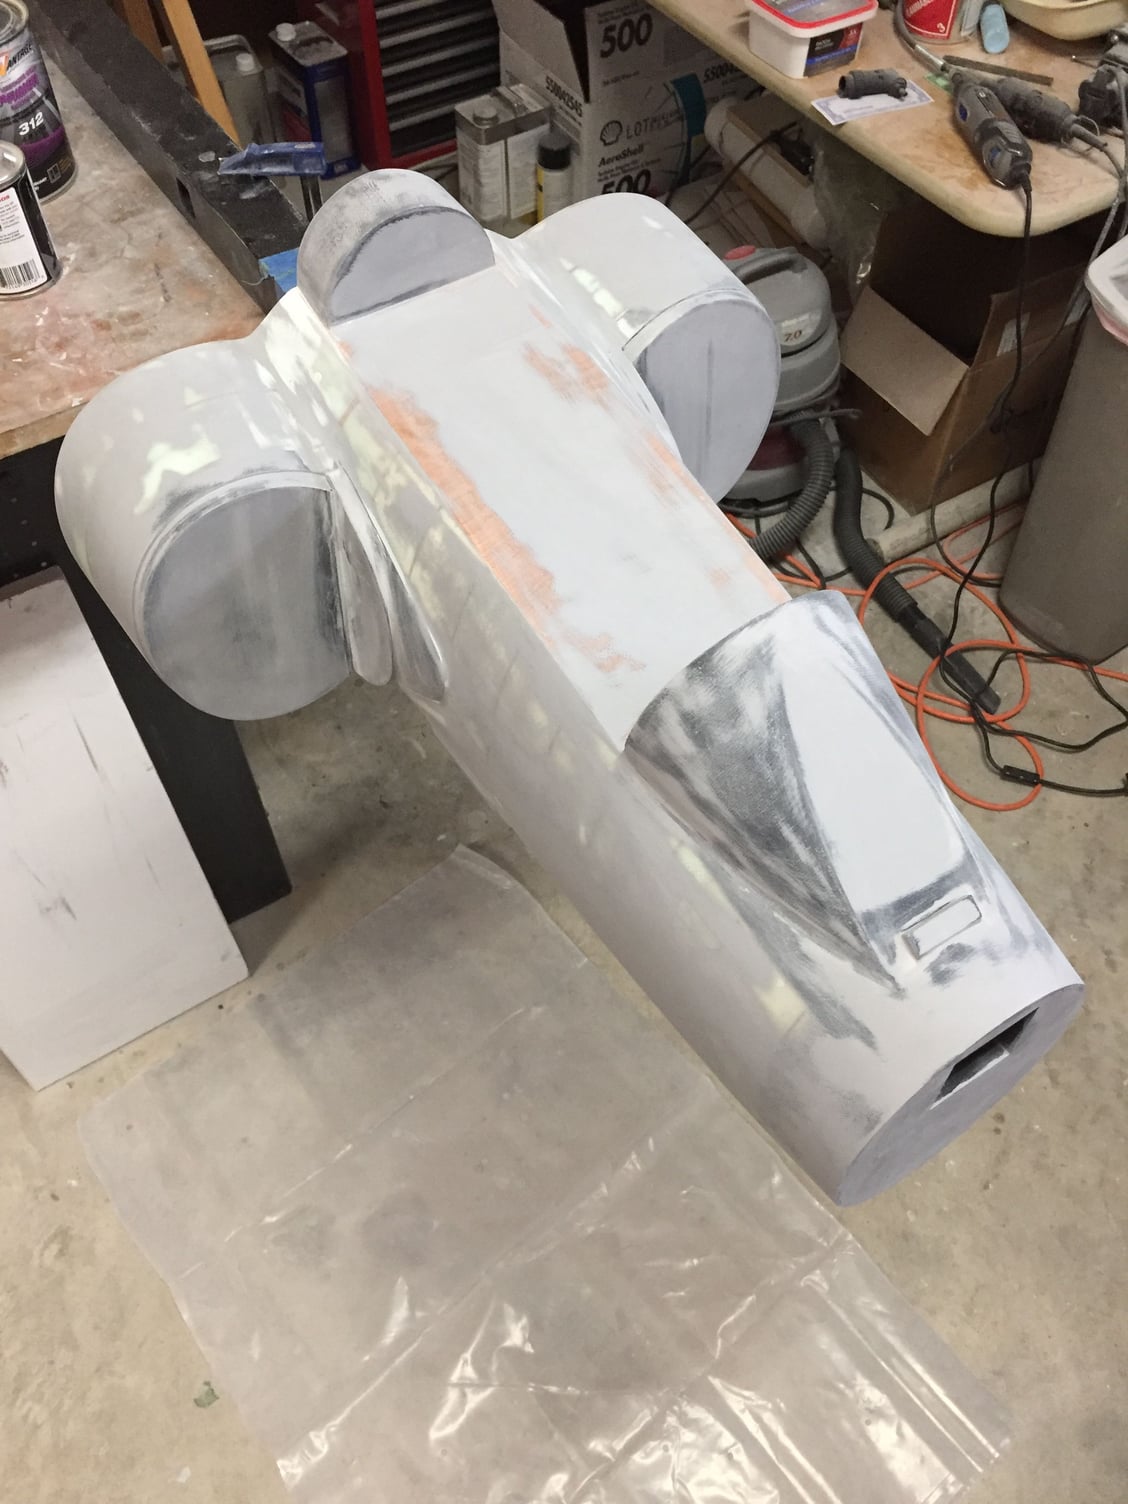
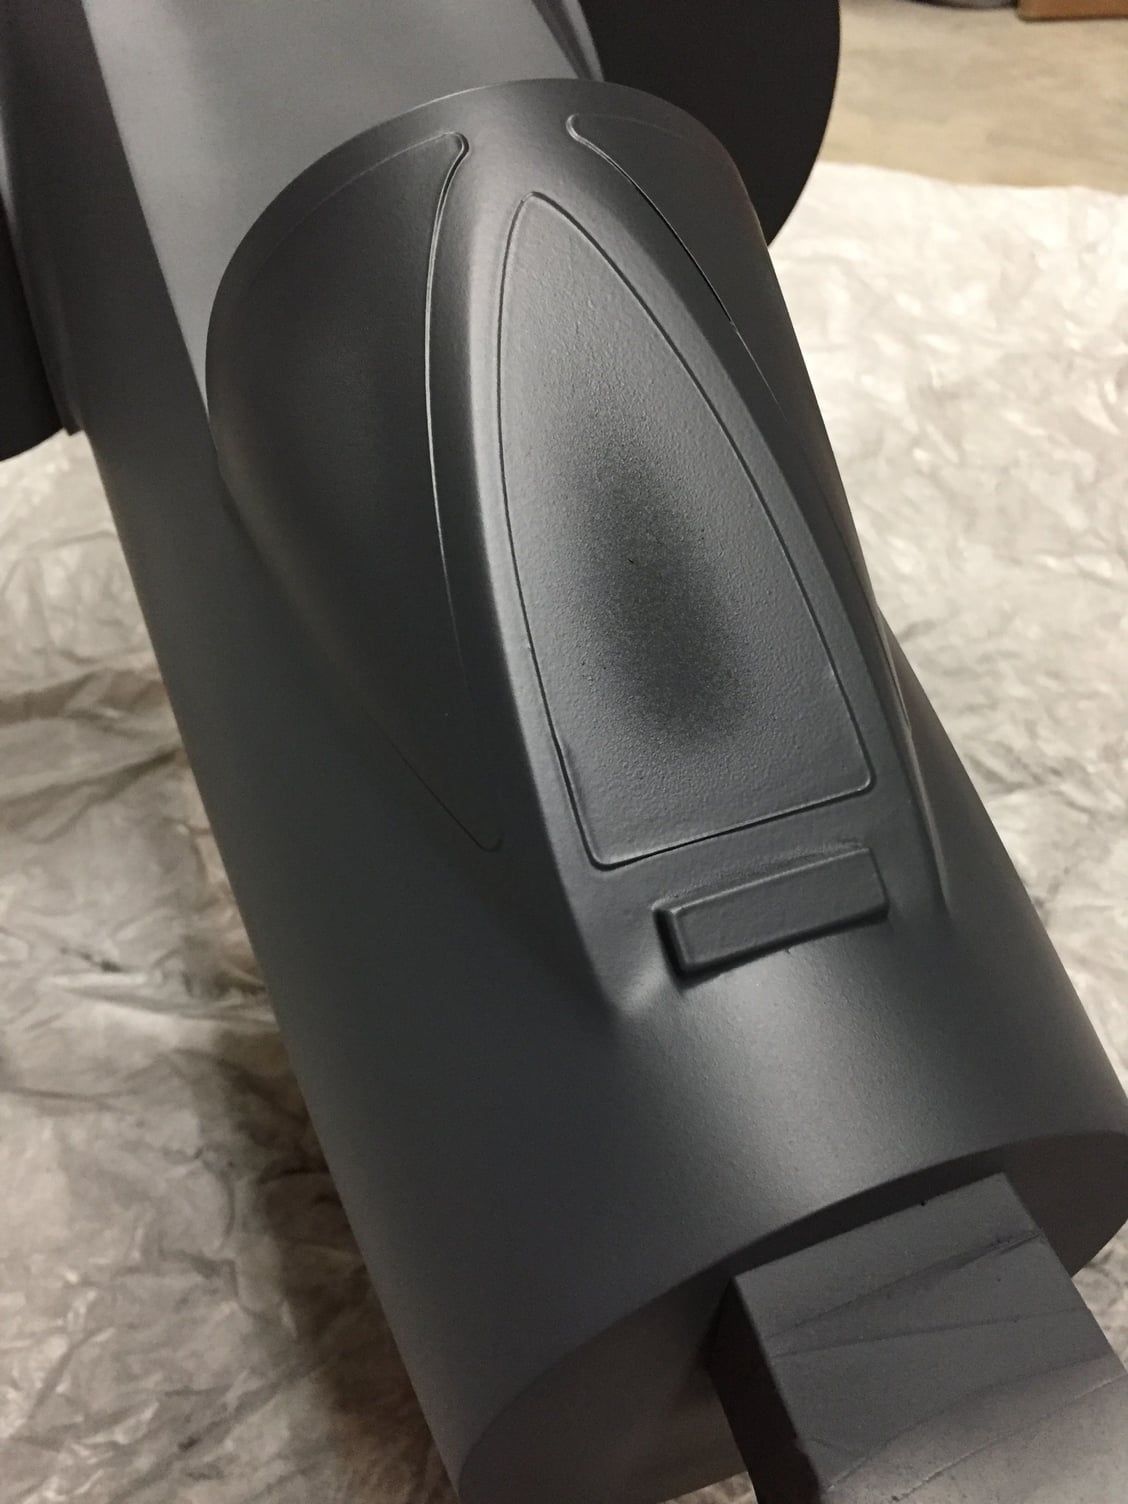
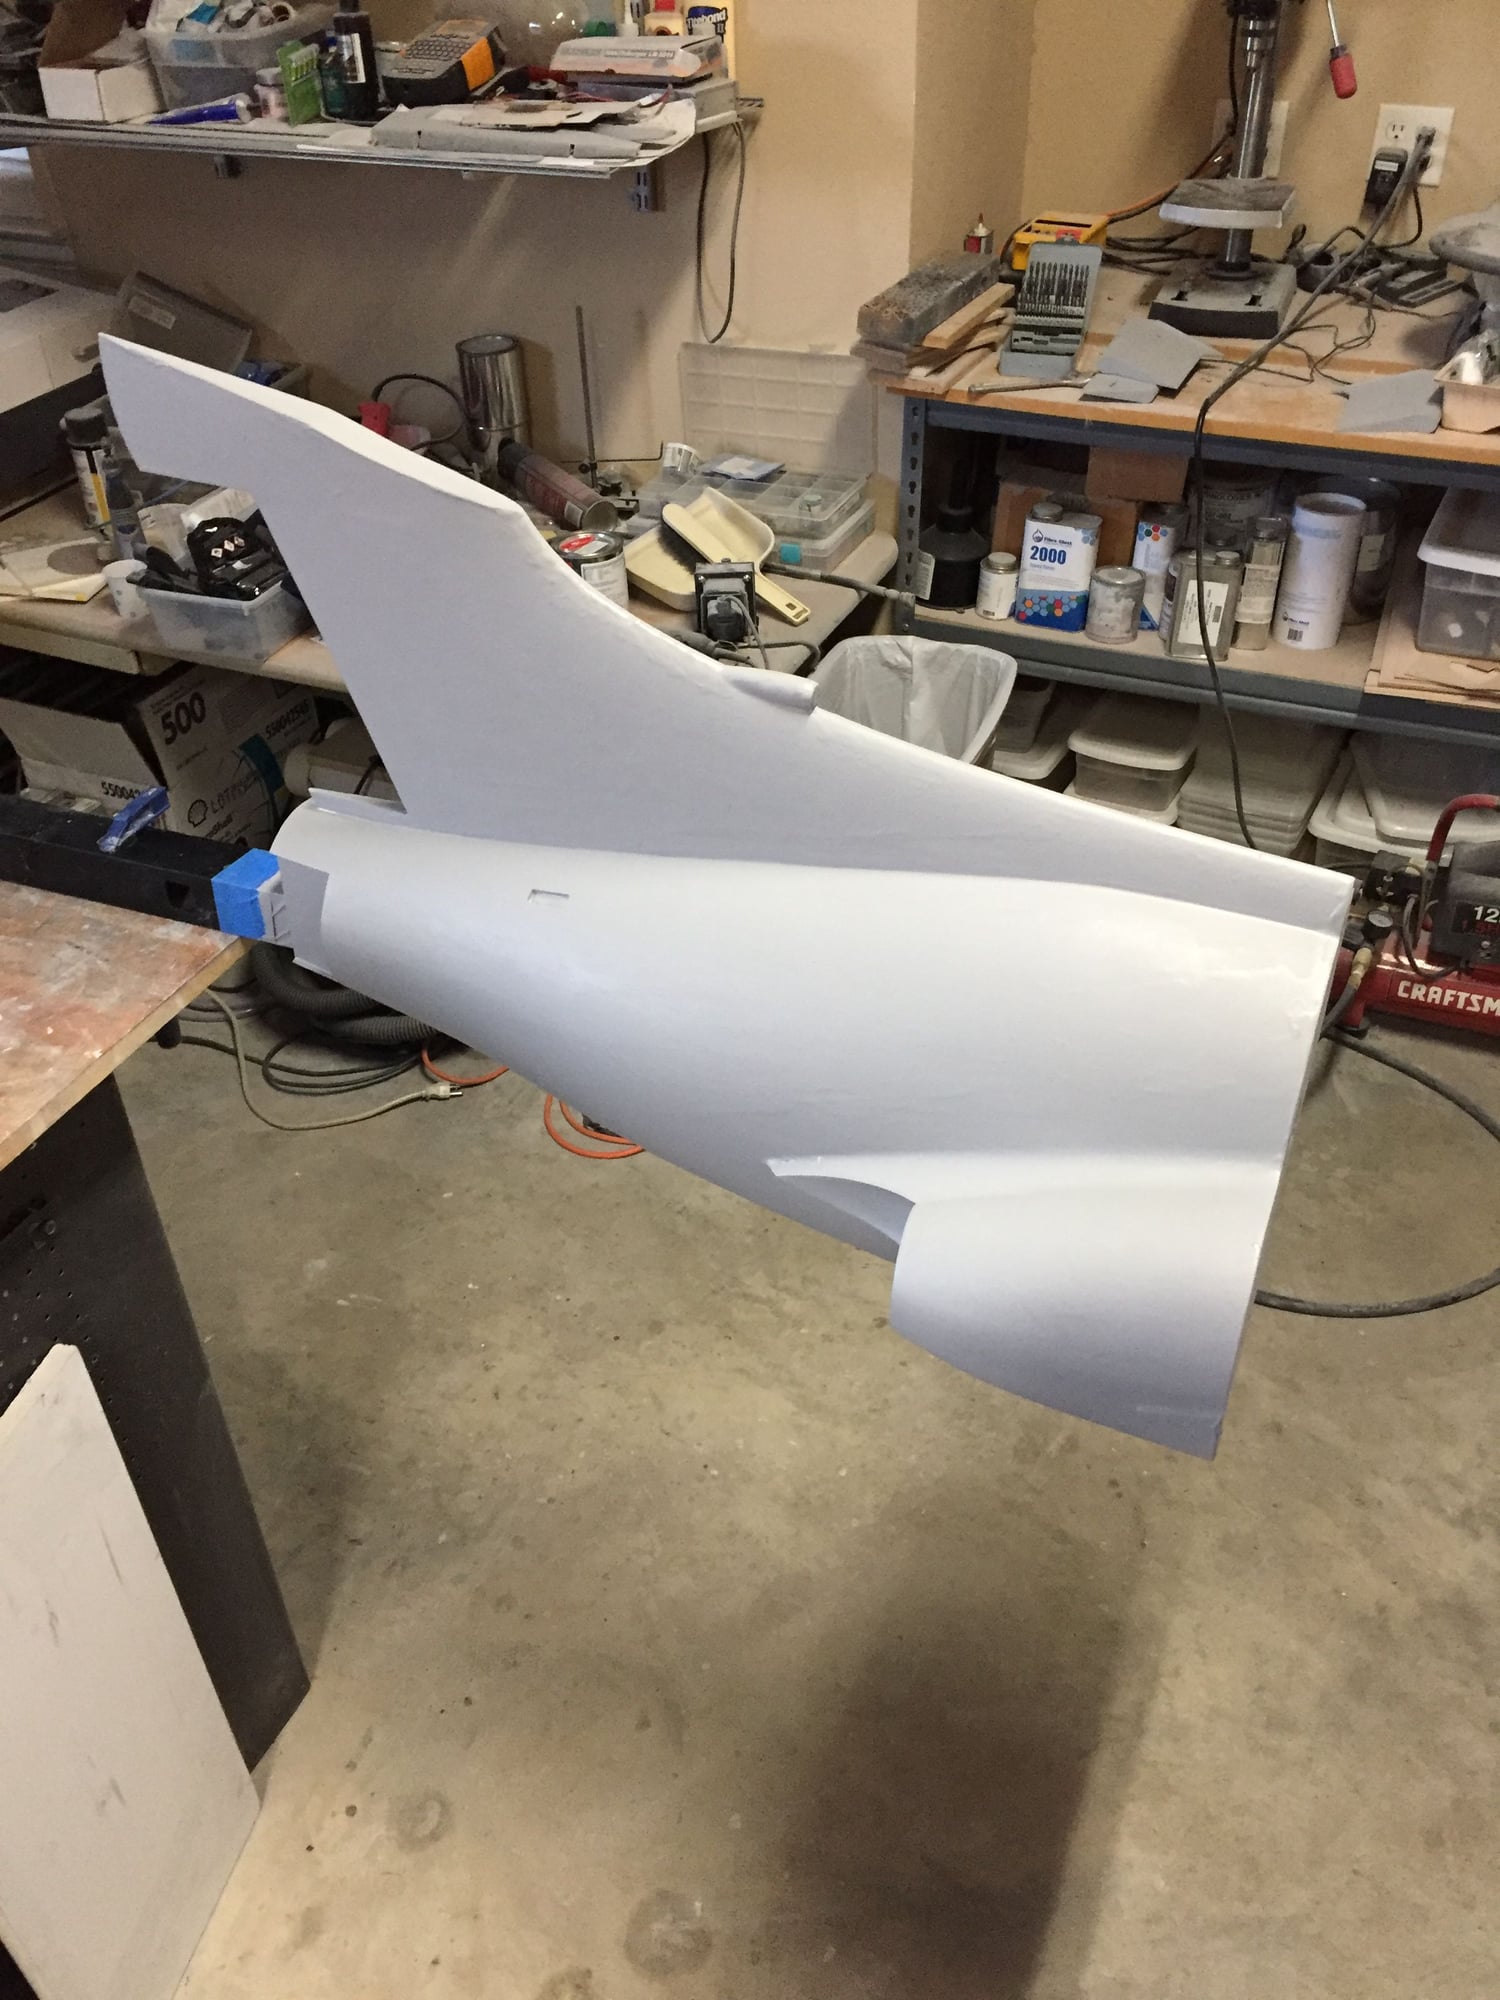
Rubbed the first layer down with 180grit. Worked the windshield down to 800grit then fixed on a mask for the transparency areas. Sprayed the entire foward fuselage plug with another heavy layer of Duratec, building it up around the windshield transparency masks.
Once cured, I rubbed the windshield down to expose the masks initially with 180grit, then again working down to 800grit. Once the masks were removed, a light rub with rubbing compound started to develop the final surface, which now has a raised windshield frame area which will serve as an edge when cutting out the frame.
A couple of minor areas where I rubbed entirely through the Duratec, but it shouldn't impact the mold.
Paul
Last edited by JSF-TC; 12-11-2018 at 06:29 PM.
12-16-2018, 10:40 AM
#146
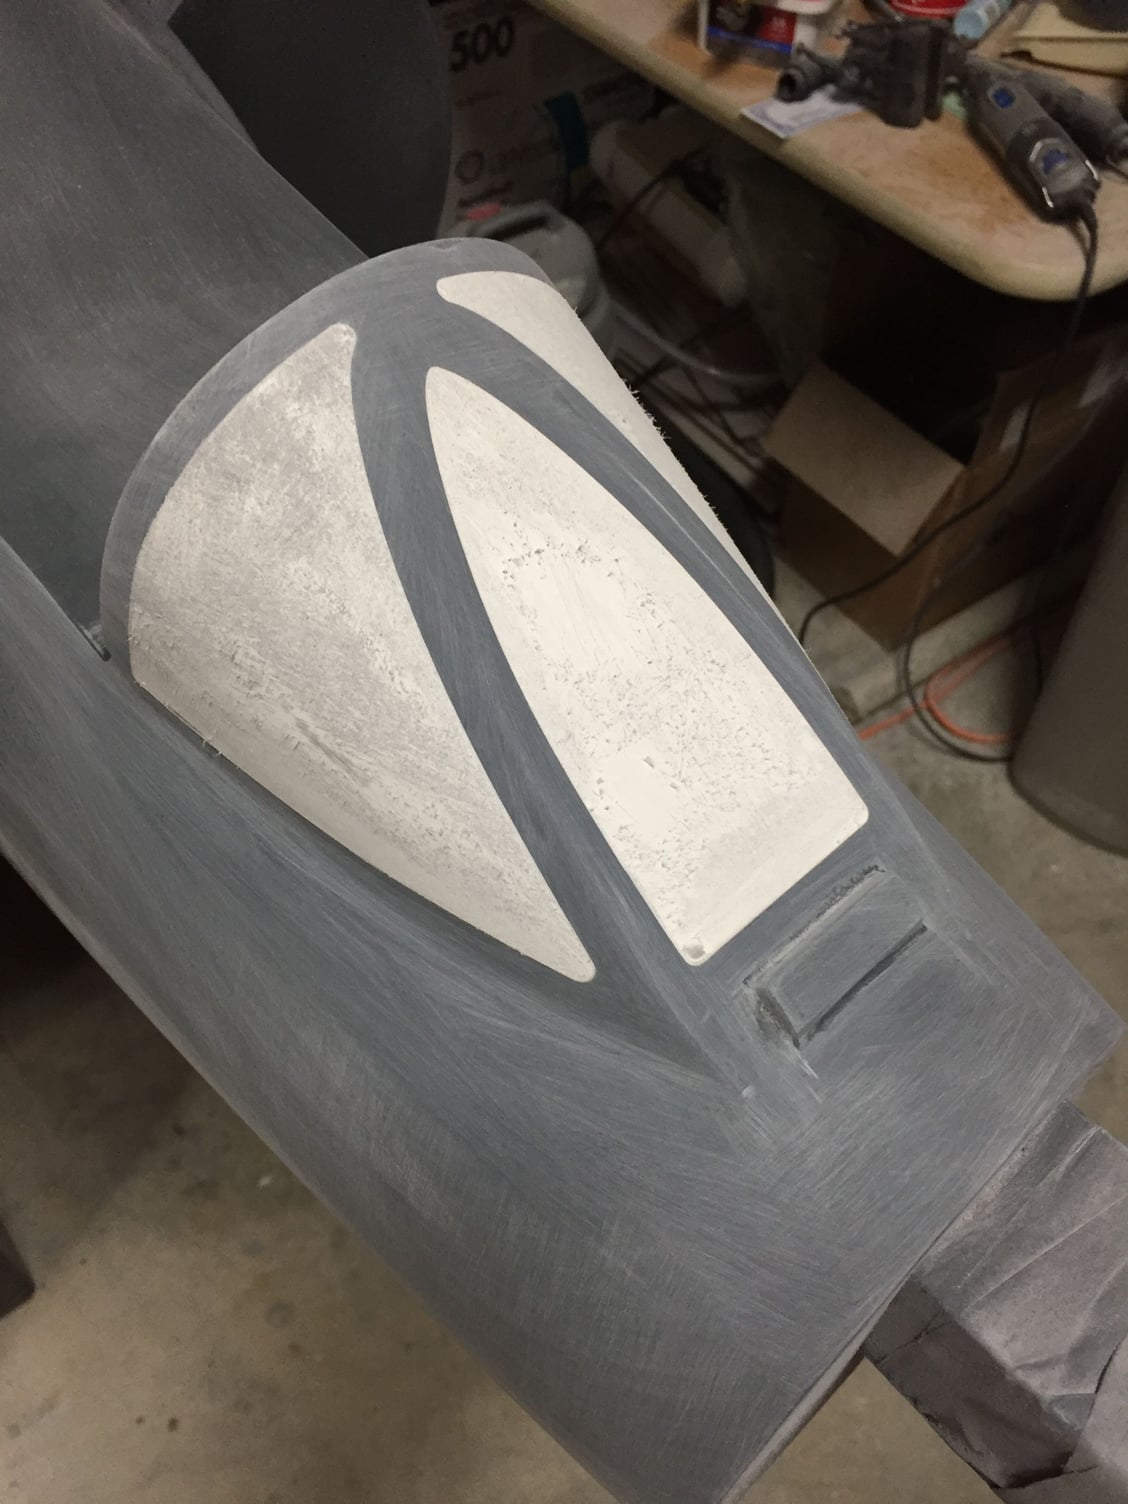
Completed preparation of the center fuselage plug and applied the first coat of primer with micro-balloons to fill the weave.
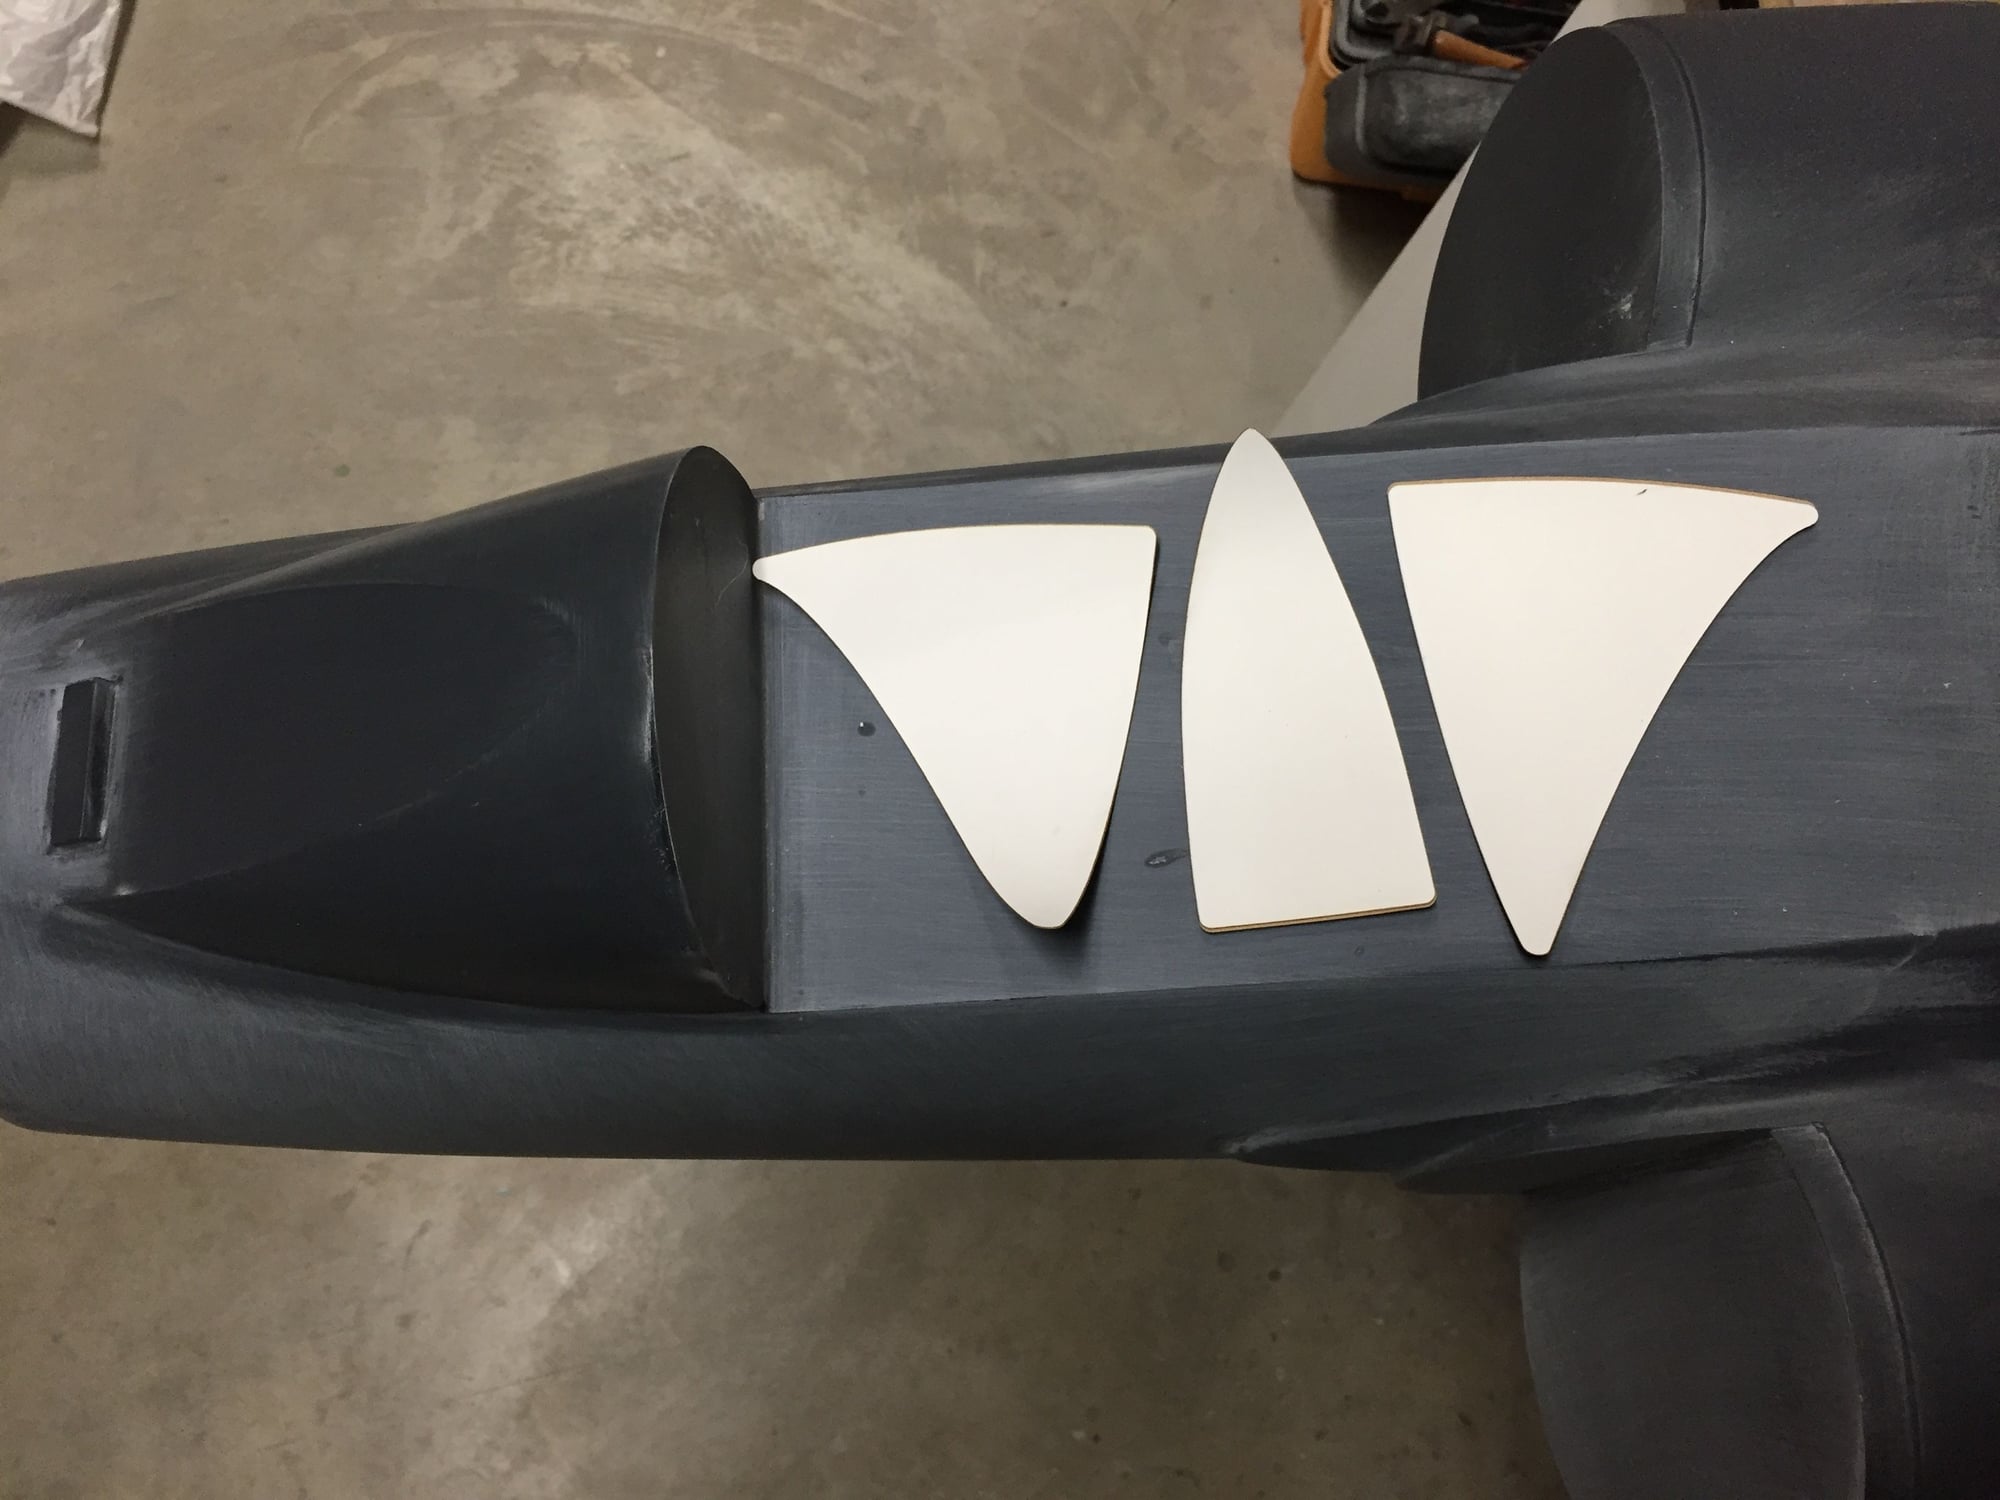
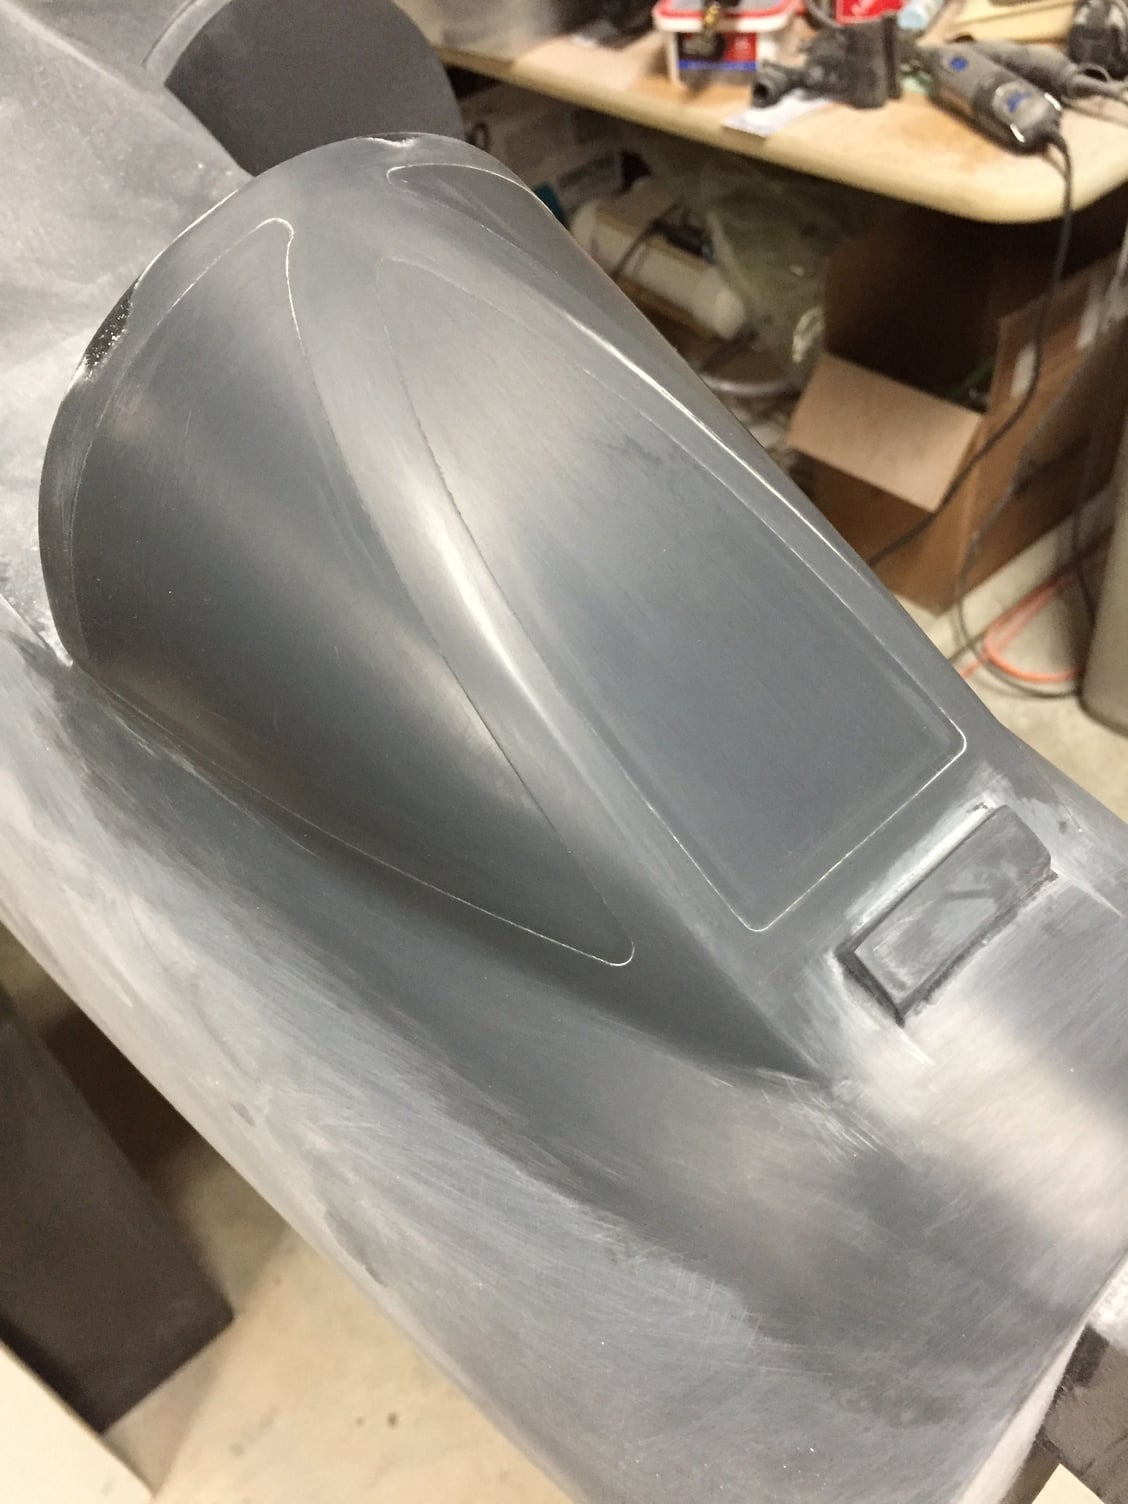
The windshield de-icer vent bump that I added to the forward fuselage has been bothering me - it just didn't look correct. I eventually found a photograph that showed the error so I decided to remove it and add it later as a scale detail part to the finished fuselage molding. I also took the opportunity to correct the windshield outline which needed a cut-out in the lower right hand corner for the windshield wiper mounting. Still got to rub it down to the final surface finish.
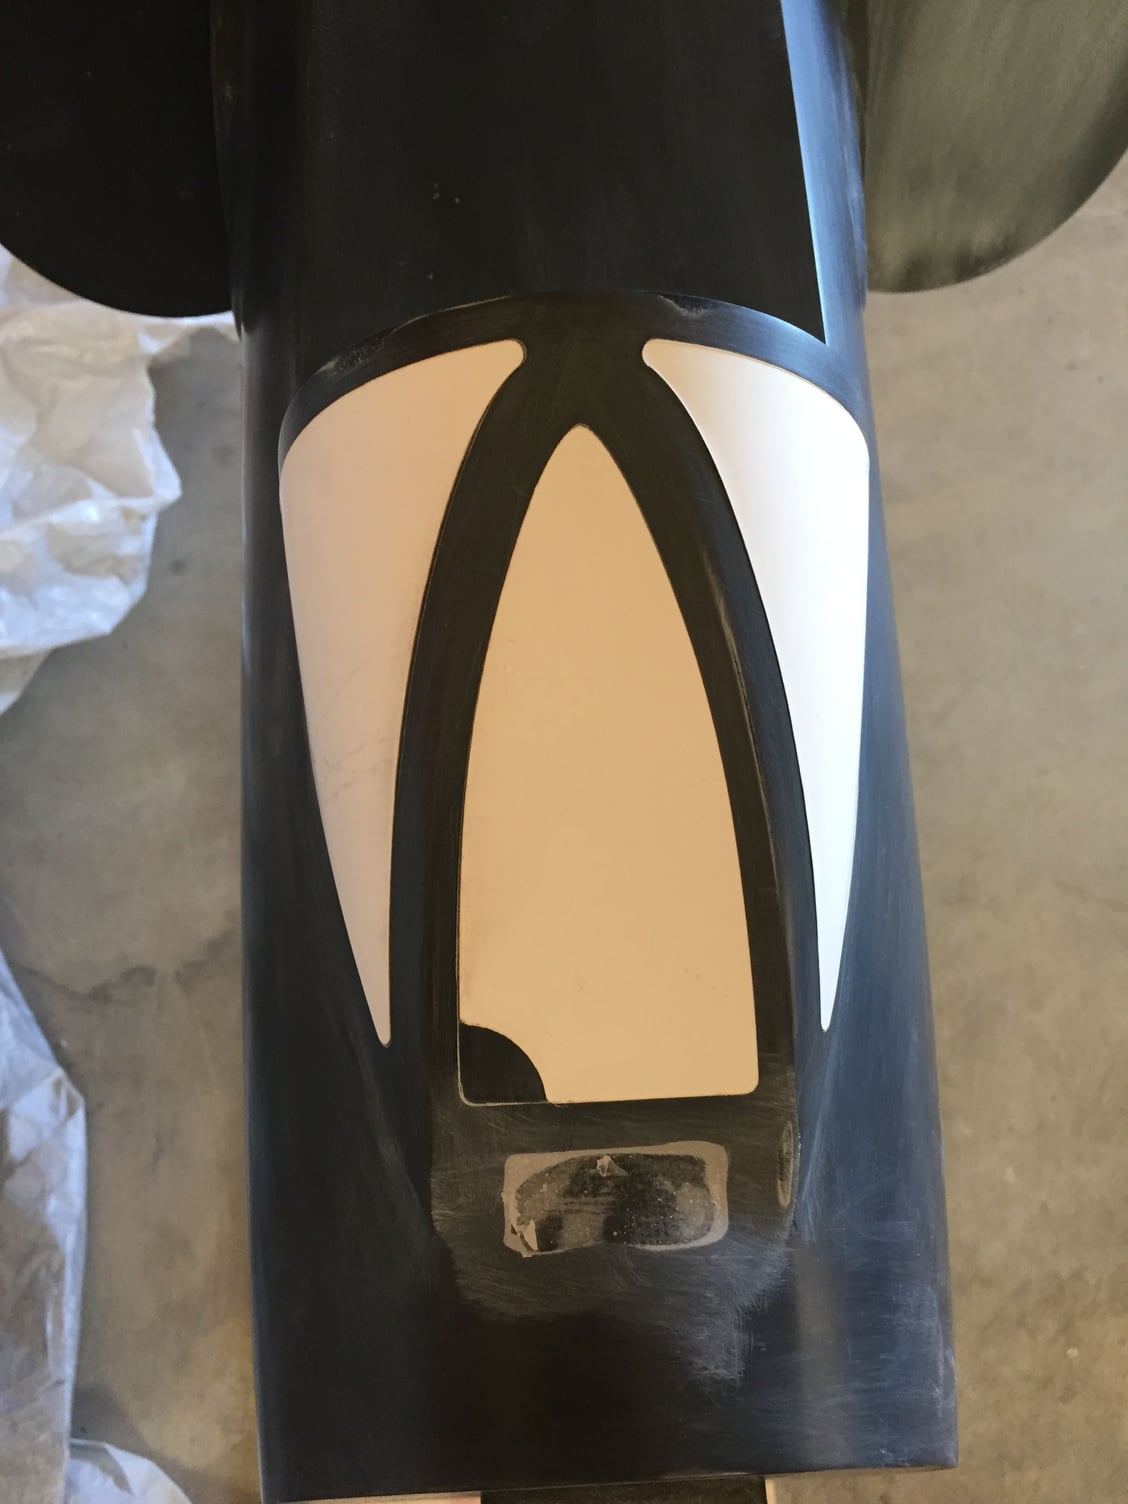
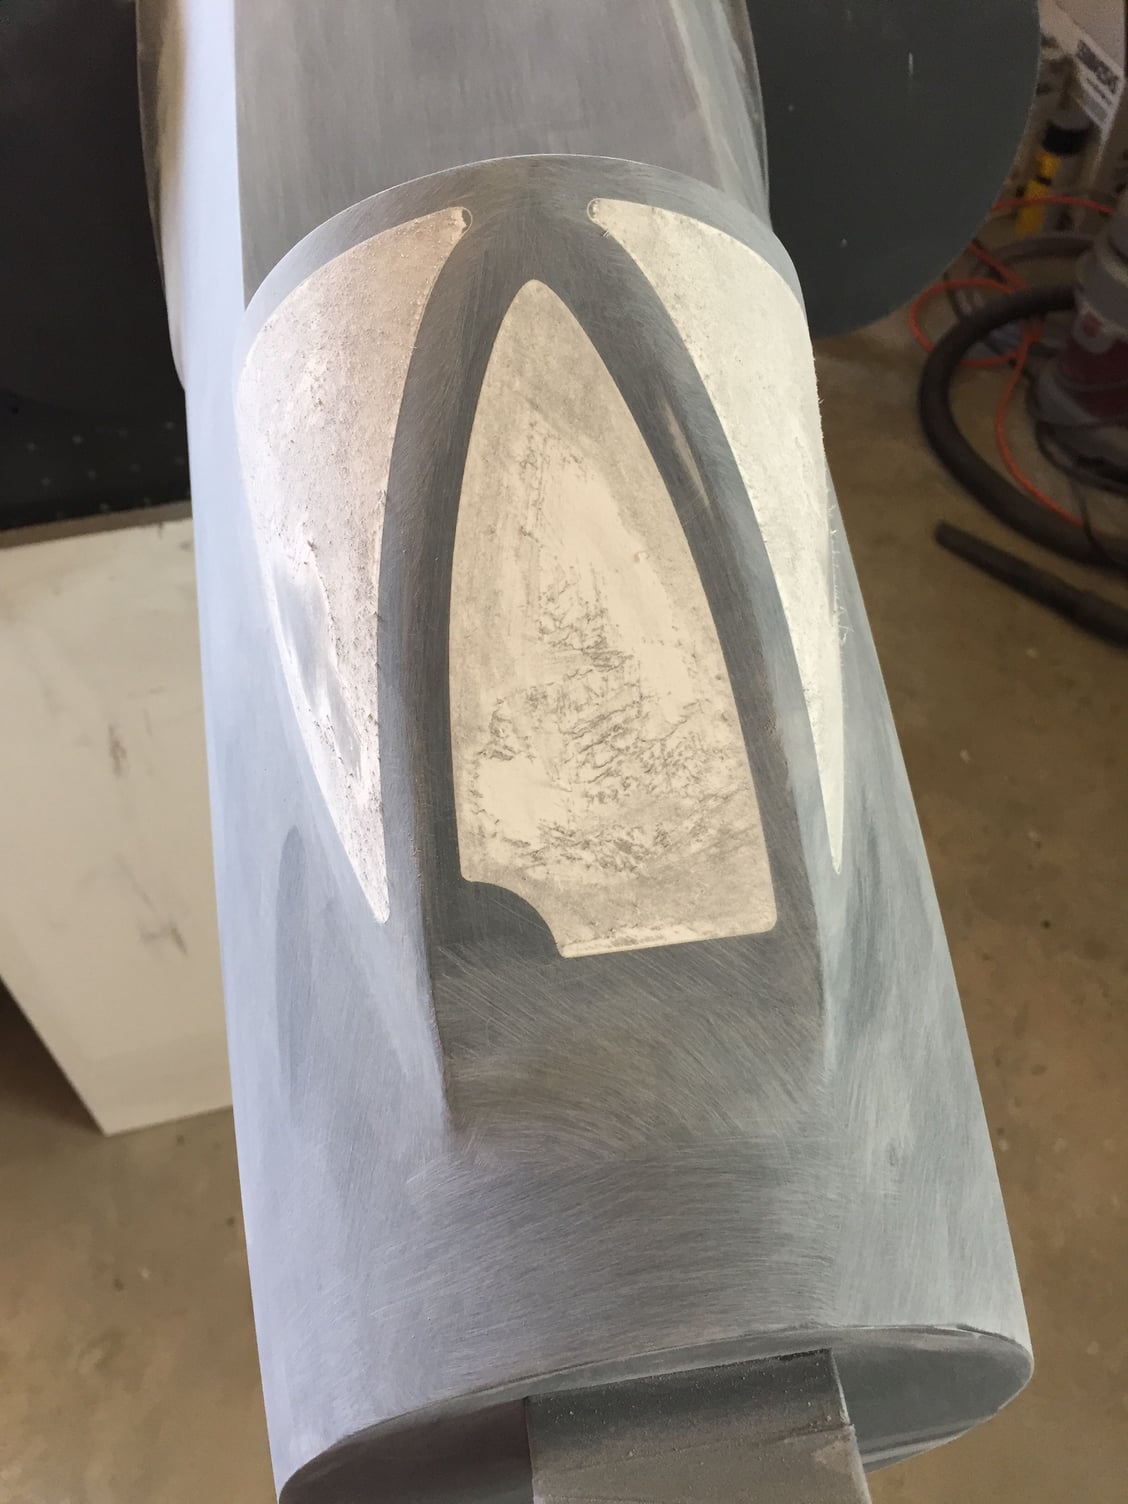
The windshield de-icer vent bump that I added to the forward fuselage has been bothering me - it just didn't look correct. I eventually found a photograph that showed the error so I decided to remove it and add it later as a scale detail part to the finished fuselage molding. I also took the opportunity to correct the windshield outline which needed a cut-out in the lower right hand corner for the windshield wiper mounting. Still got to rub it down to the final surface finish.
Last edited by JSF-TC; 12-16-2018 at 10:43 AM.
12-22-2018, 07:39 PM
#147
Got the first prototype of the speedbrake mechanism working. Video at the link below. Have already got some improvements in the works.
Speedbrake Video
Going to be busy sanding after Christmas. Center fuselage has the first coat of Duratec surfacing primer applied, and the rear fuselage has the first coat of basic primer and micro-balloons applied with a roller.
Speedbrake Video
Going to be busy sanding after Christmas. Center fuselage has the first coat of Duratec surfacing primer applied, and the rear fuselage has the first coat of basic primer and micro-balloons applied with a roller.
Last edited by JSF-TC; 12-22-2018 at 07:43 PM.
12-23-2018, 11:31 AM
#148
F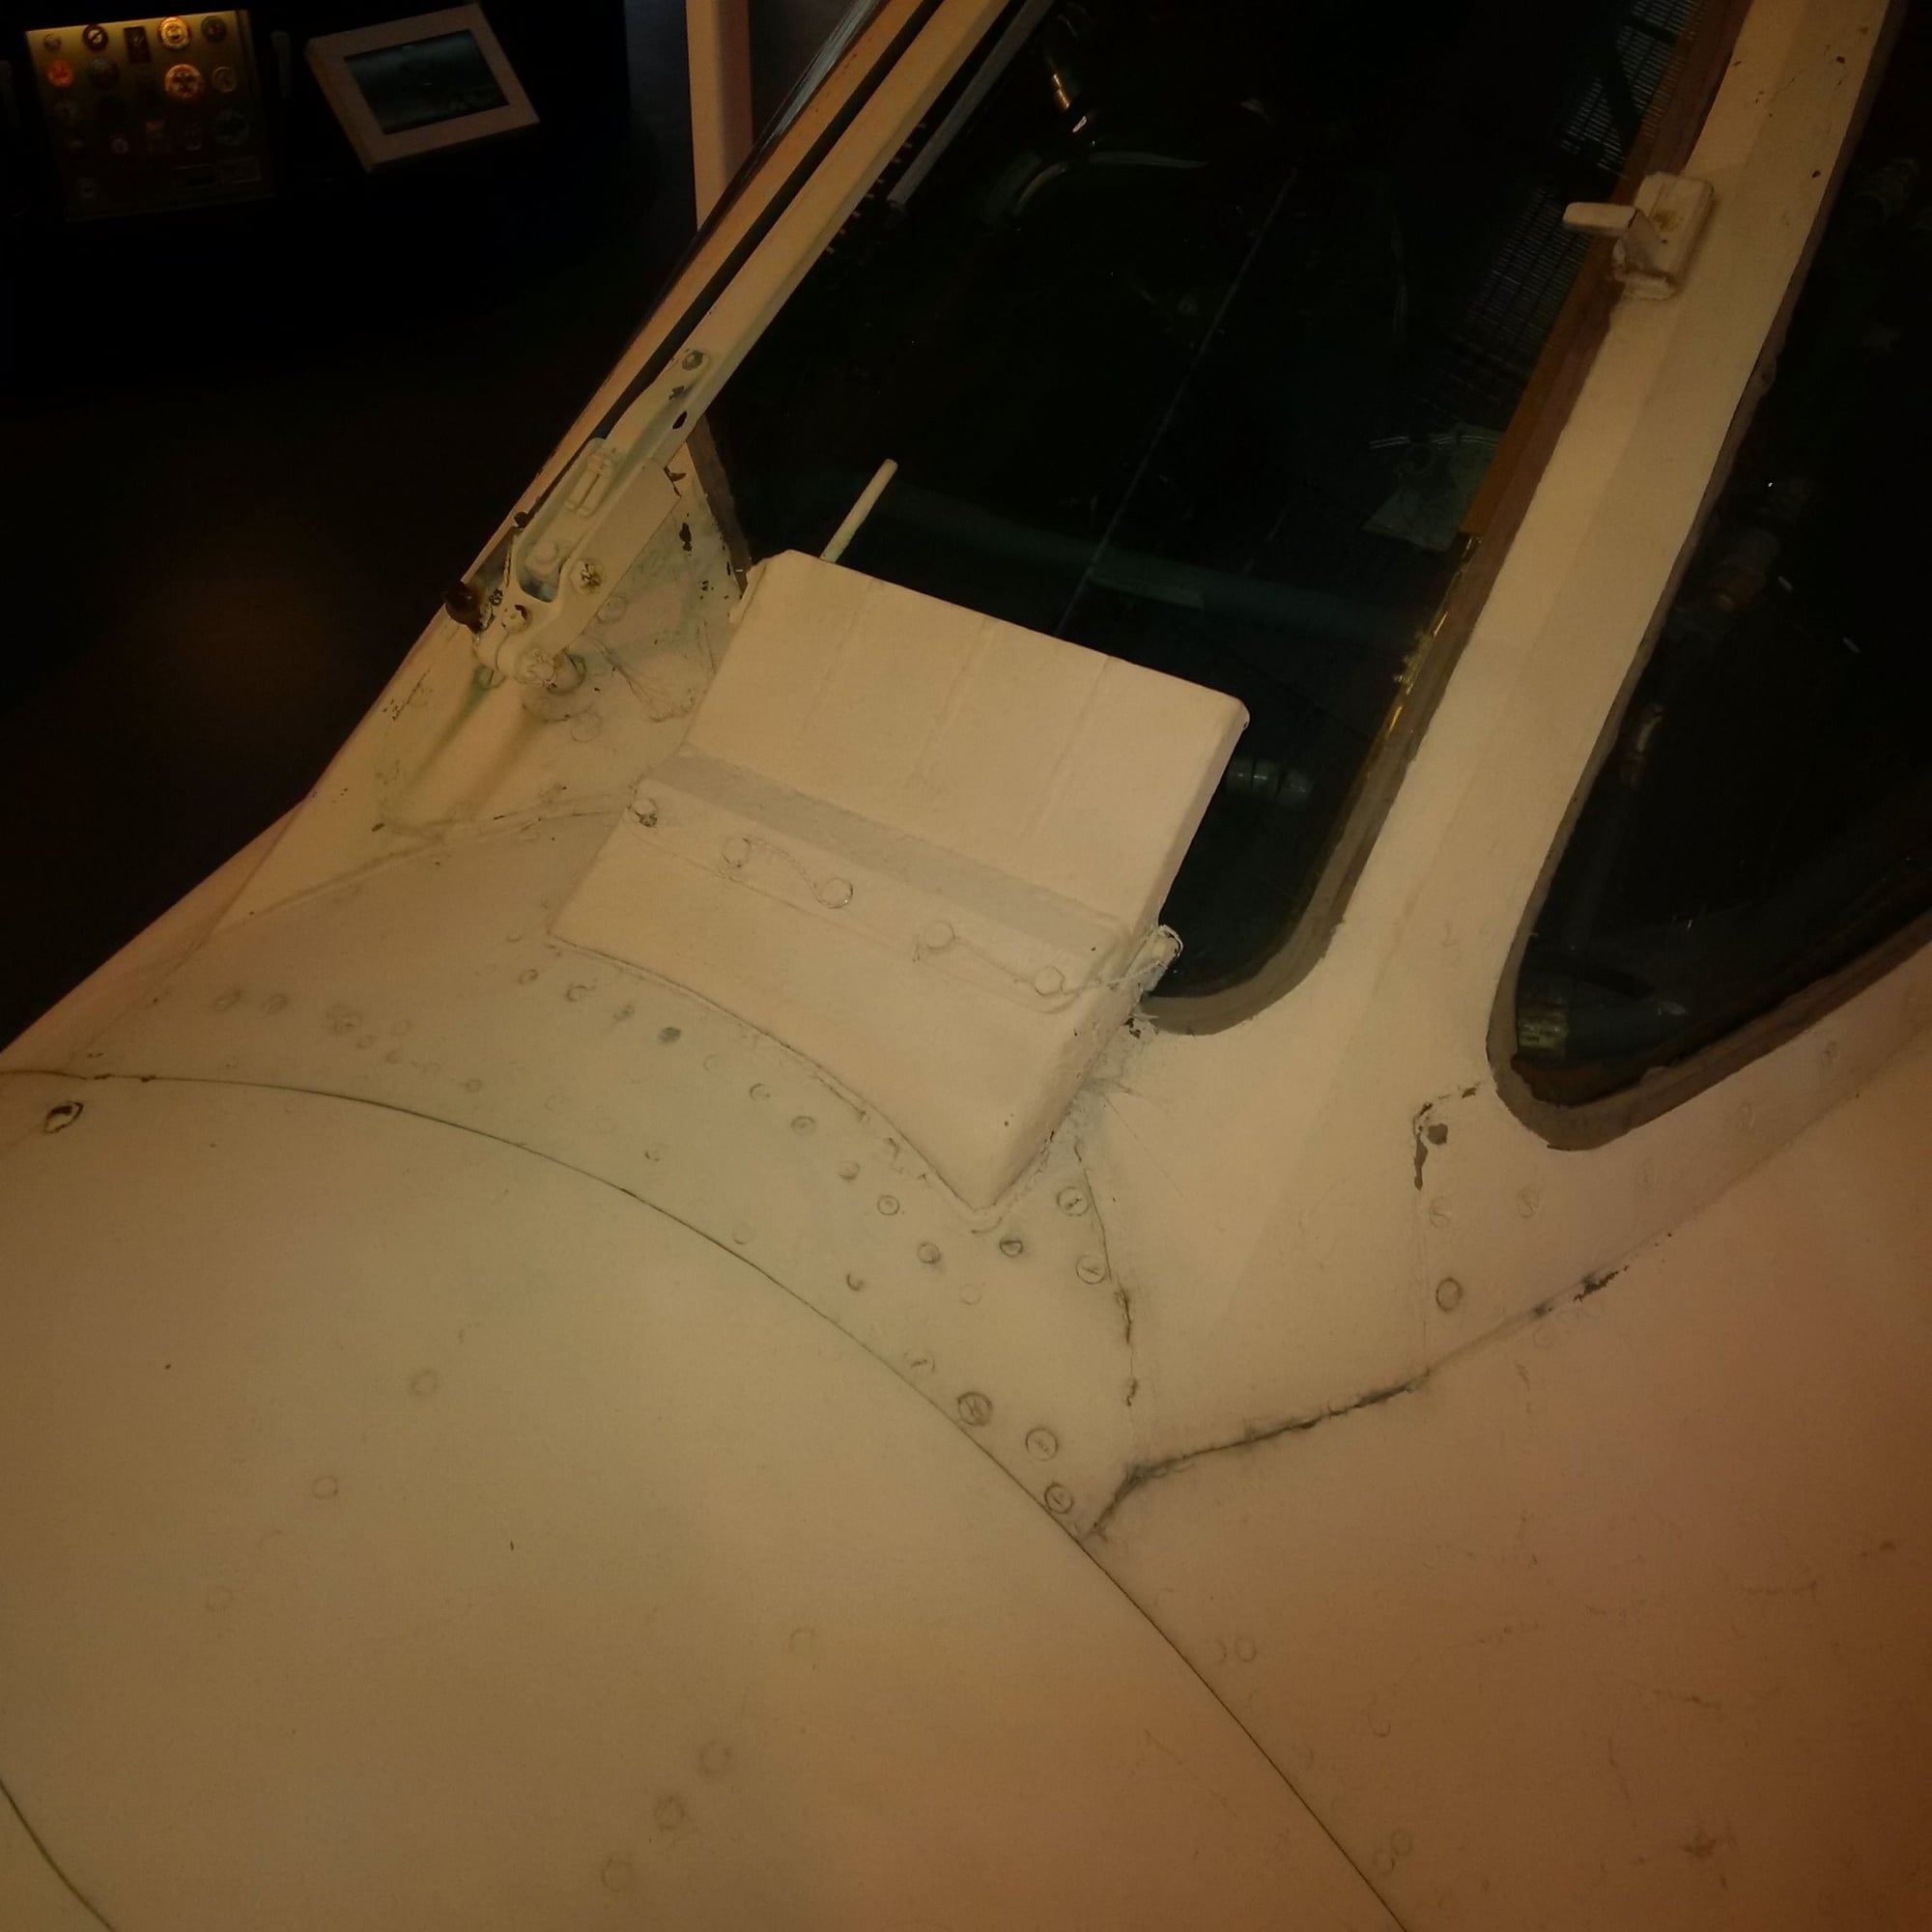
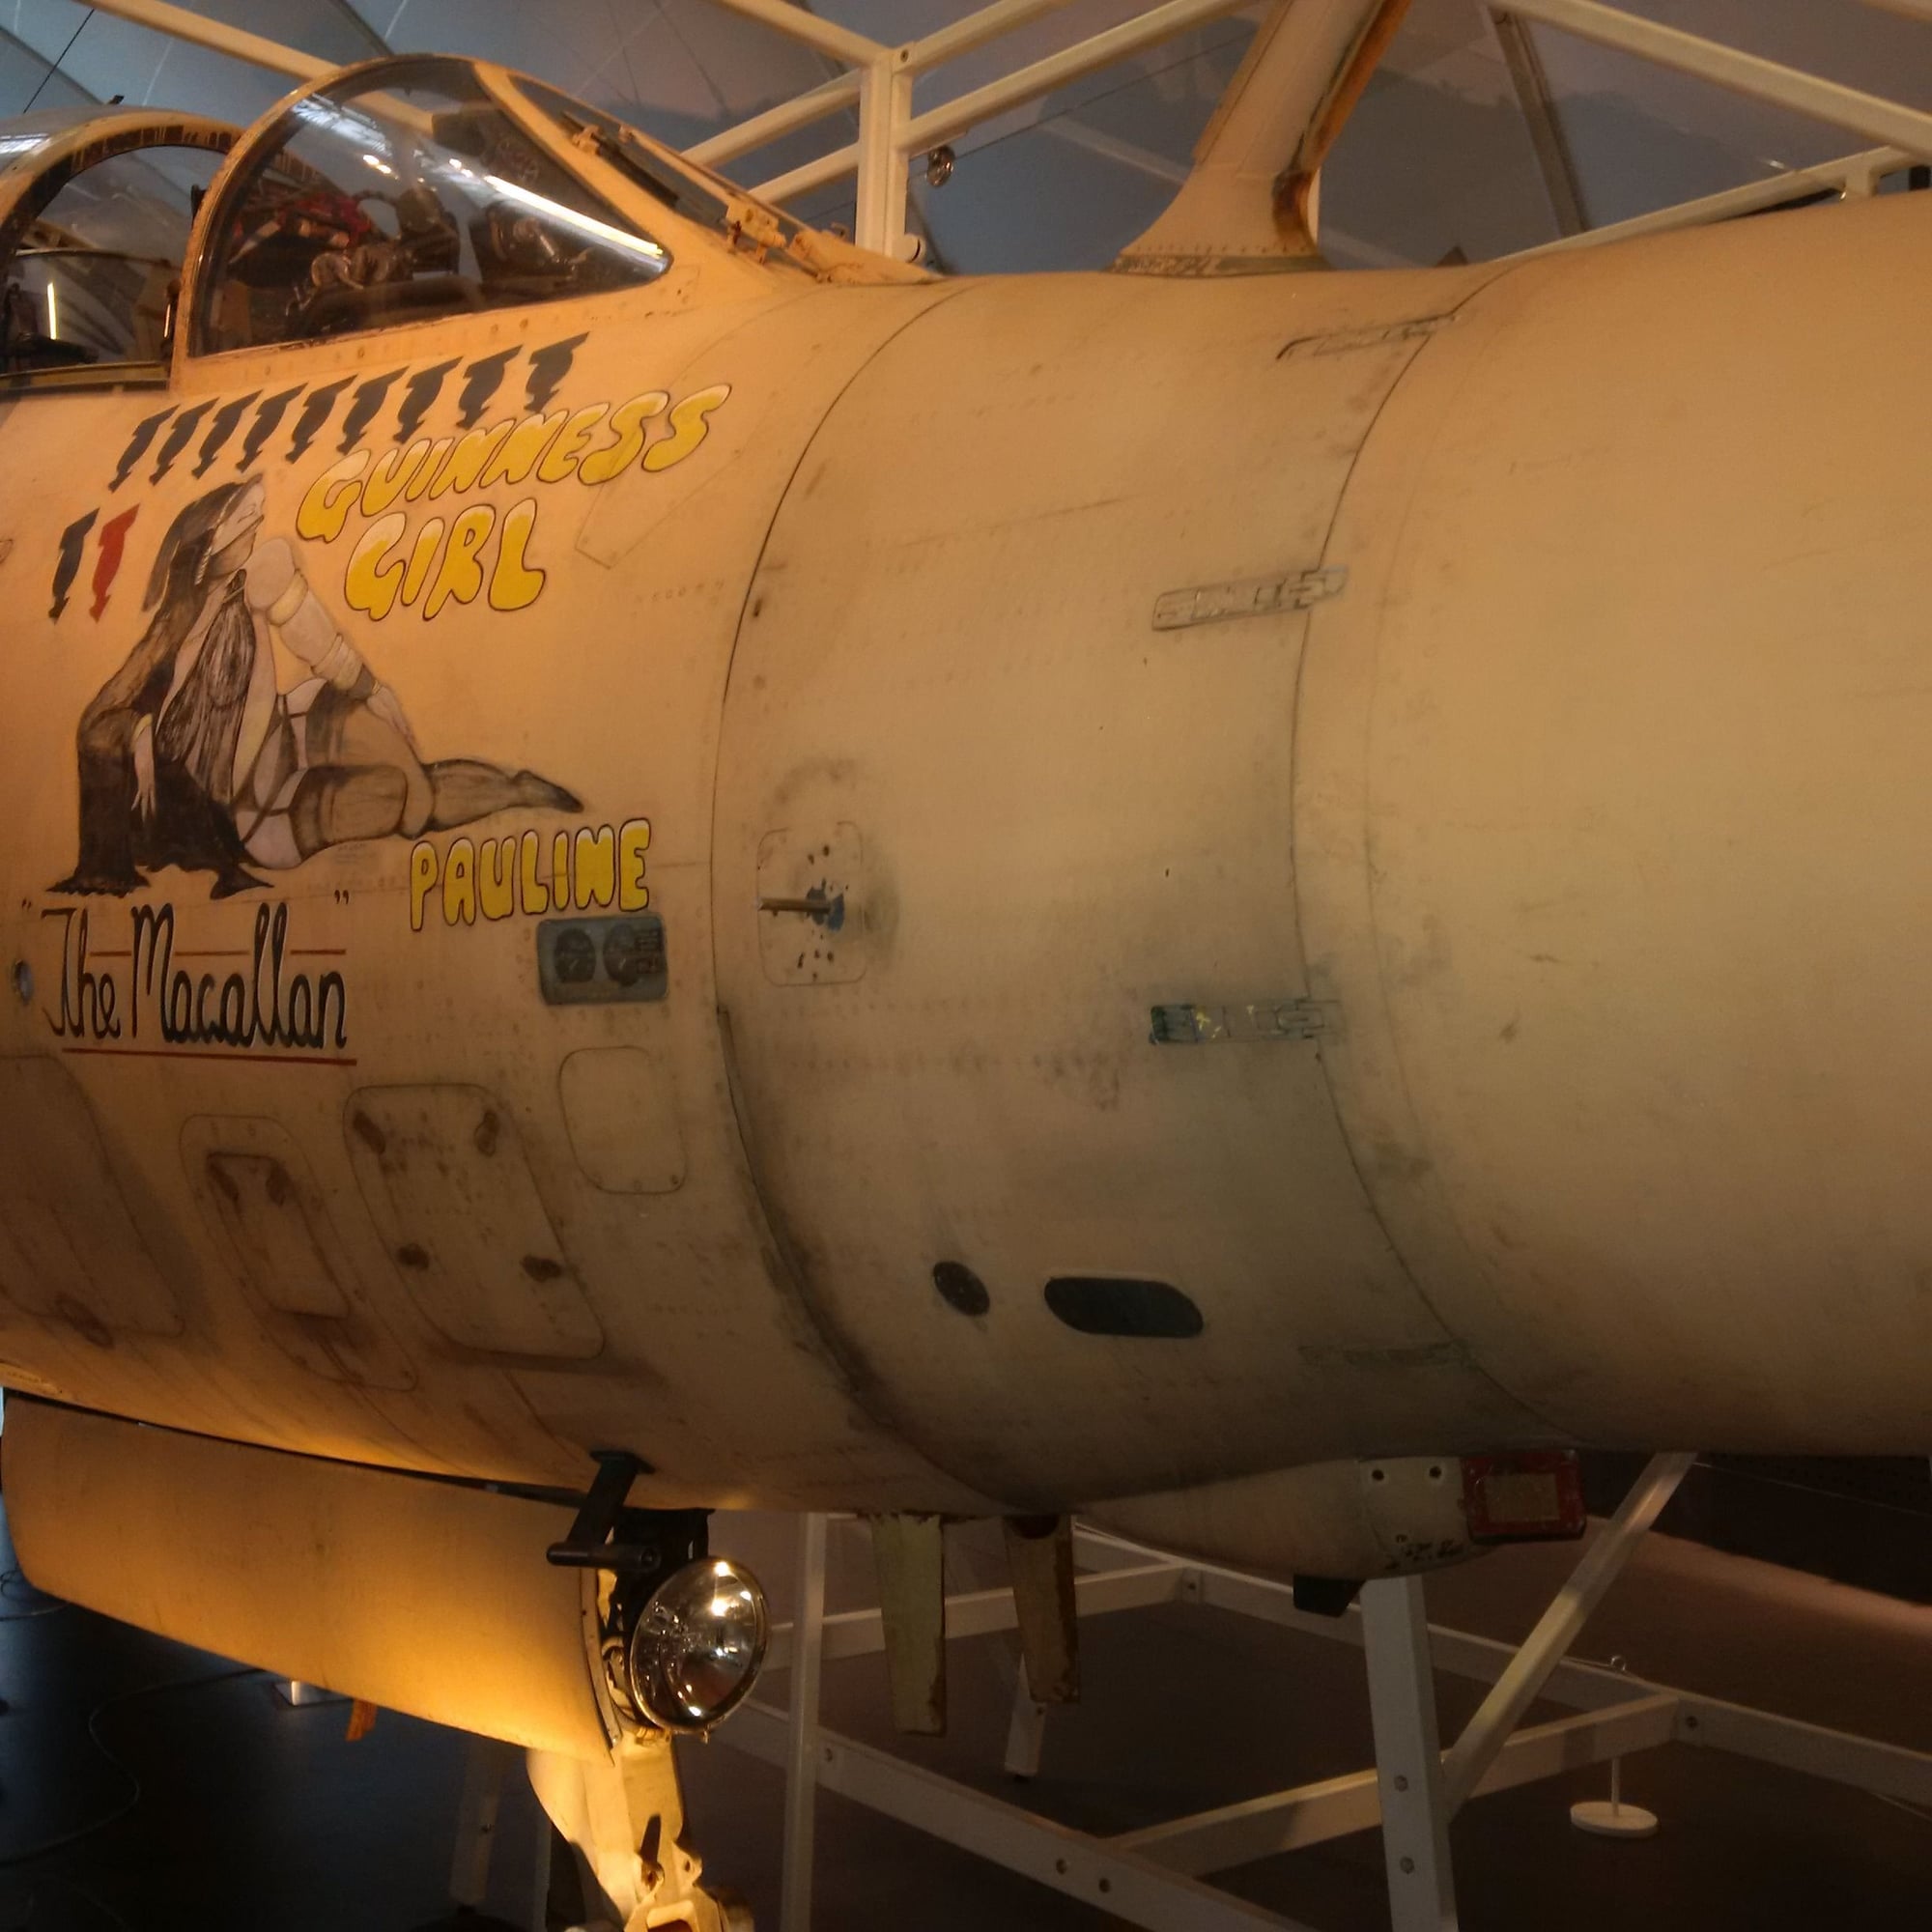
Took my son for a driving lesson to the London aeroplane museum. They have a Buc you can crawl all over. ��w
Took my son for a driving lesson to the London aeroplane museum. They have a Buc you can crawl all over. ��w
Last edited by Dave Wilshere; 12-23-2018 at 11:33 AM.
12-23-2018, 04:13 PM
#149
My Feedback: (20)
Dave,
That's an awesome museum. I used to go there when I had regular trips to London from DC. Spent about 3 days there when the Iceland volcano blew up and we were stuck in London for 6 days. I really enjoyed it.
Gary
That's an awesome museum. I used to go there when I had regular trips to London from DC. Spent about 3 days there when the Iceland volcano blew up and we were stuck in London for 6 days. I really enjoyed it.
Gary
12-23-2018, 07:40 PM
#150
Dave,
Thanks for the photos. They confirm what I recently found from the copy of the maintenance manual I just obtained. I need to re-do the windshield frame again, as the corner cut-out for the windshield wiper is a straight line, not a curve as I assumed from my one poor photo. Hopefully third time's a charm!
Merry Christmas and a Happy 2019.
May all of your take-offs equal your landings!
Paul