BJ Craft Eternity
 03-25-2018, 01:25 PM
#1
Hello Everyone!
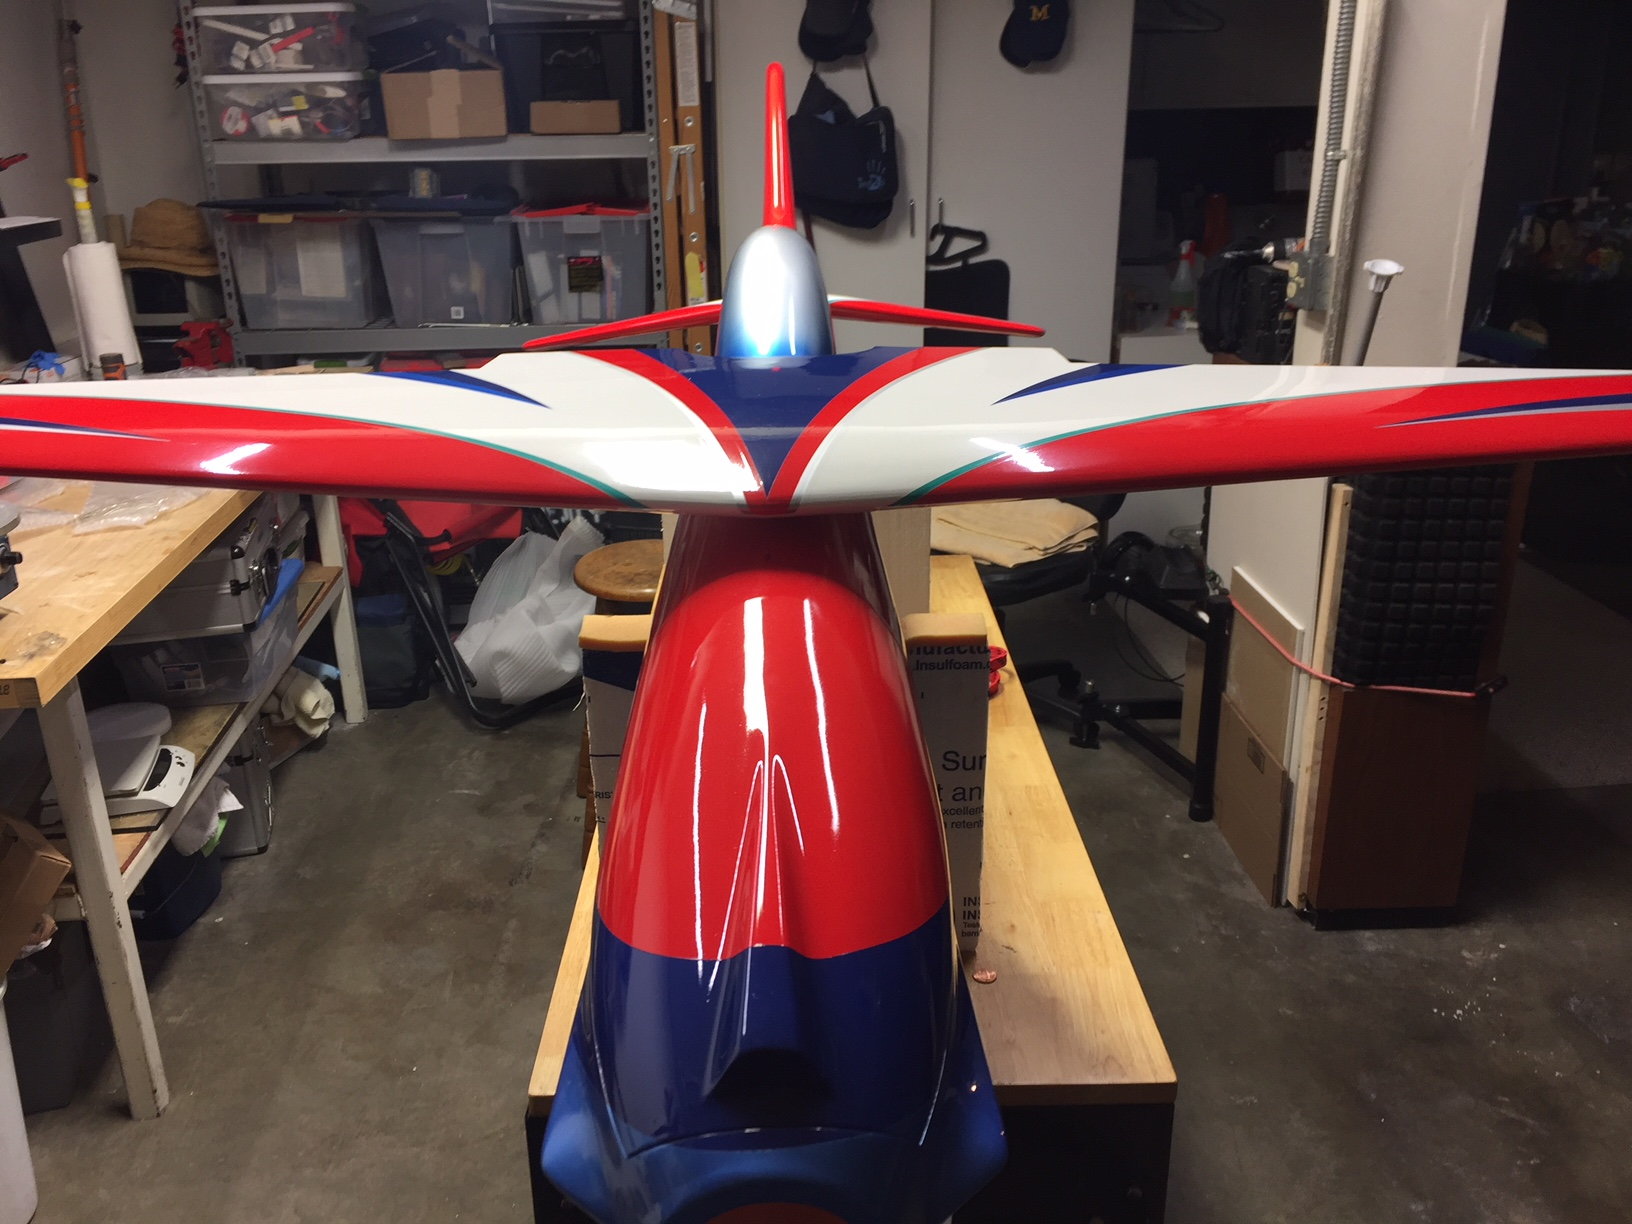
It's been a while since I have done a build. I have been waiting for B.J. to let me know when the time was right to build and fly his next generation airplane. I just received his newest effort, the Eternity. This is what he flew at the F3A World Championships in Argentina.
My friend in France, Jean-Paul Delteil, will be building the Immortal. There are differences between the two, primarily the wings and the fact that the Eternity is set up for the Contra Drive. It will be interesting to see the similarities and differences.
B.J. was very emphatic when he told me that the Eternity should not be thought of as a biplane. Rather, it is the next generation.... I am anxious to try it. I really liked the BiSide bipe. I thought it presented well and flew very nicely. But, it was difficult to set up. I think this may be similar, it will take some time to get it right but I expect that once it is set up, it should shine.
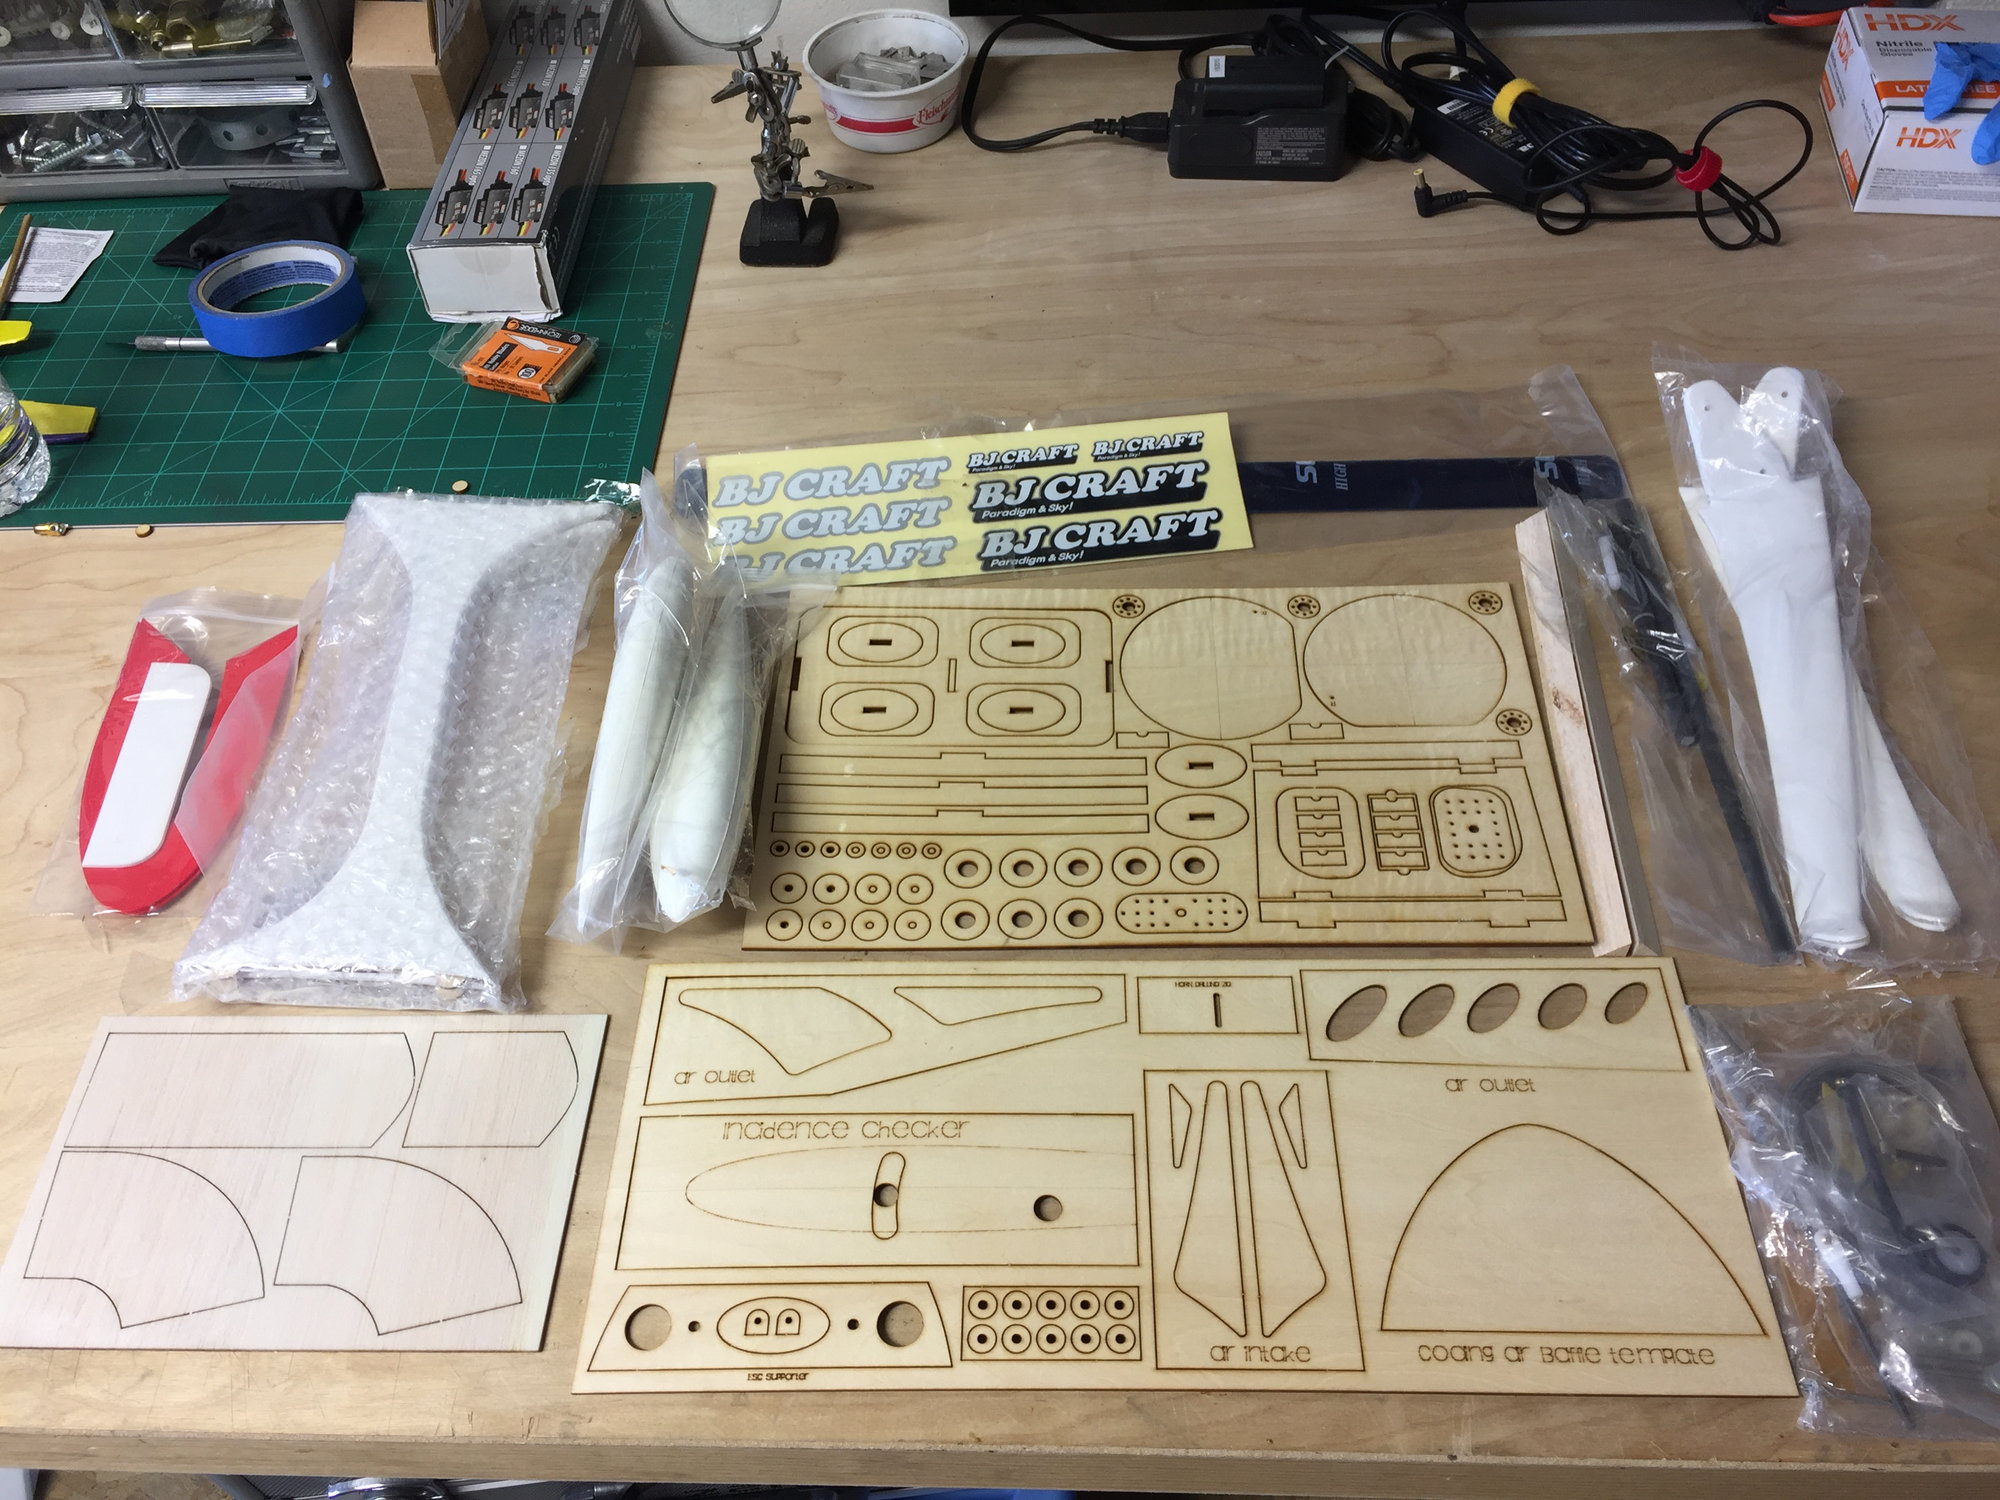
Let's start with the packaging:
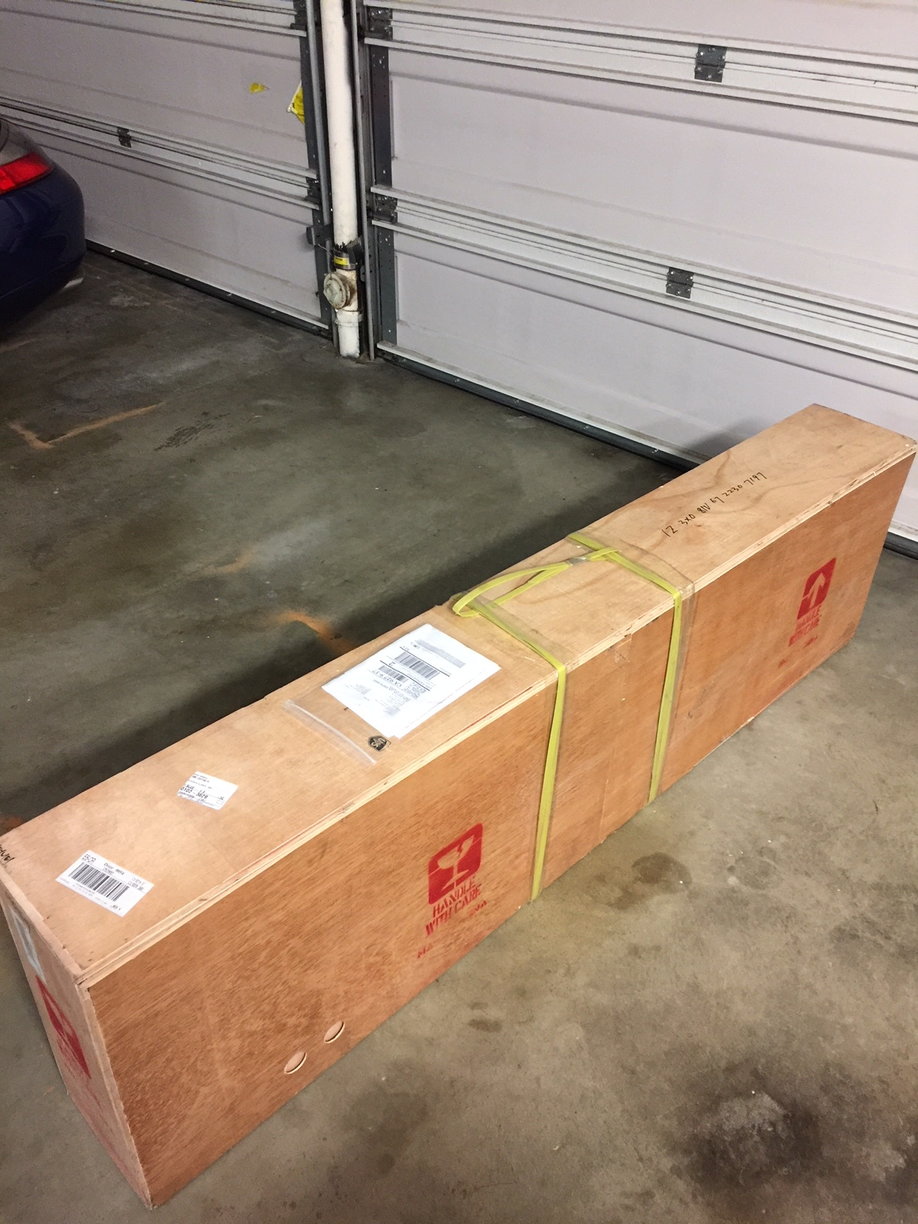
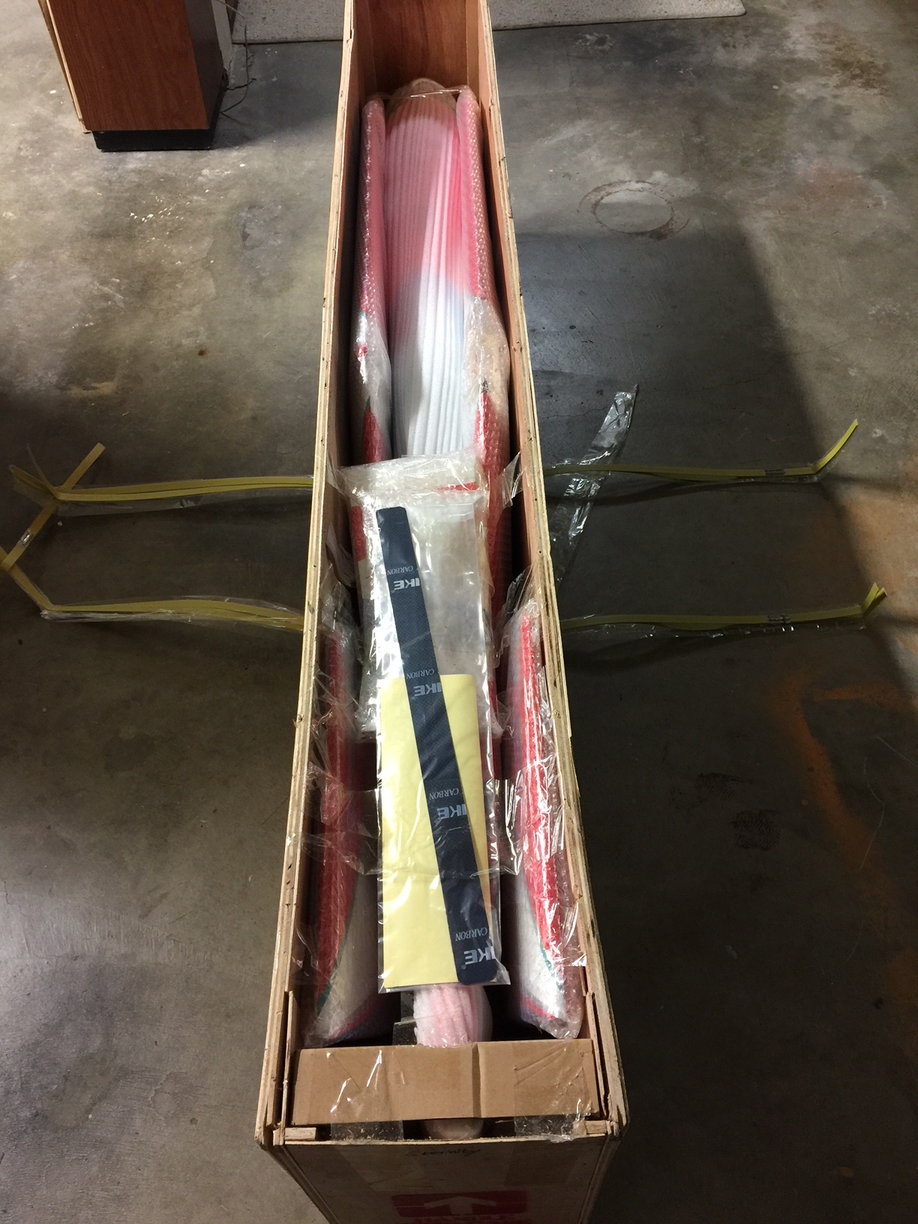
As you can see from the pics, it is the same packaging that BJ Craft has been using for a while. The wooden crate with an anchored support for the fuselage inside. Everything is packed neatly and well protected. You can see that the box suffered some damage at the hands of UPS but the contents survived. There was a small crack on the bottom side near the gear mount but that is superficial and can be easily fixed.
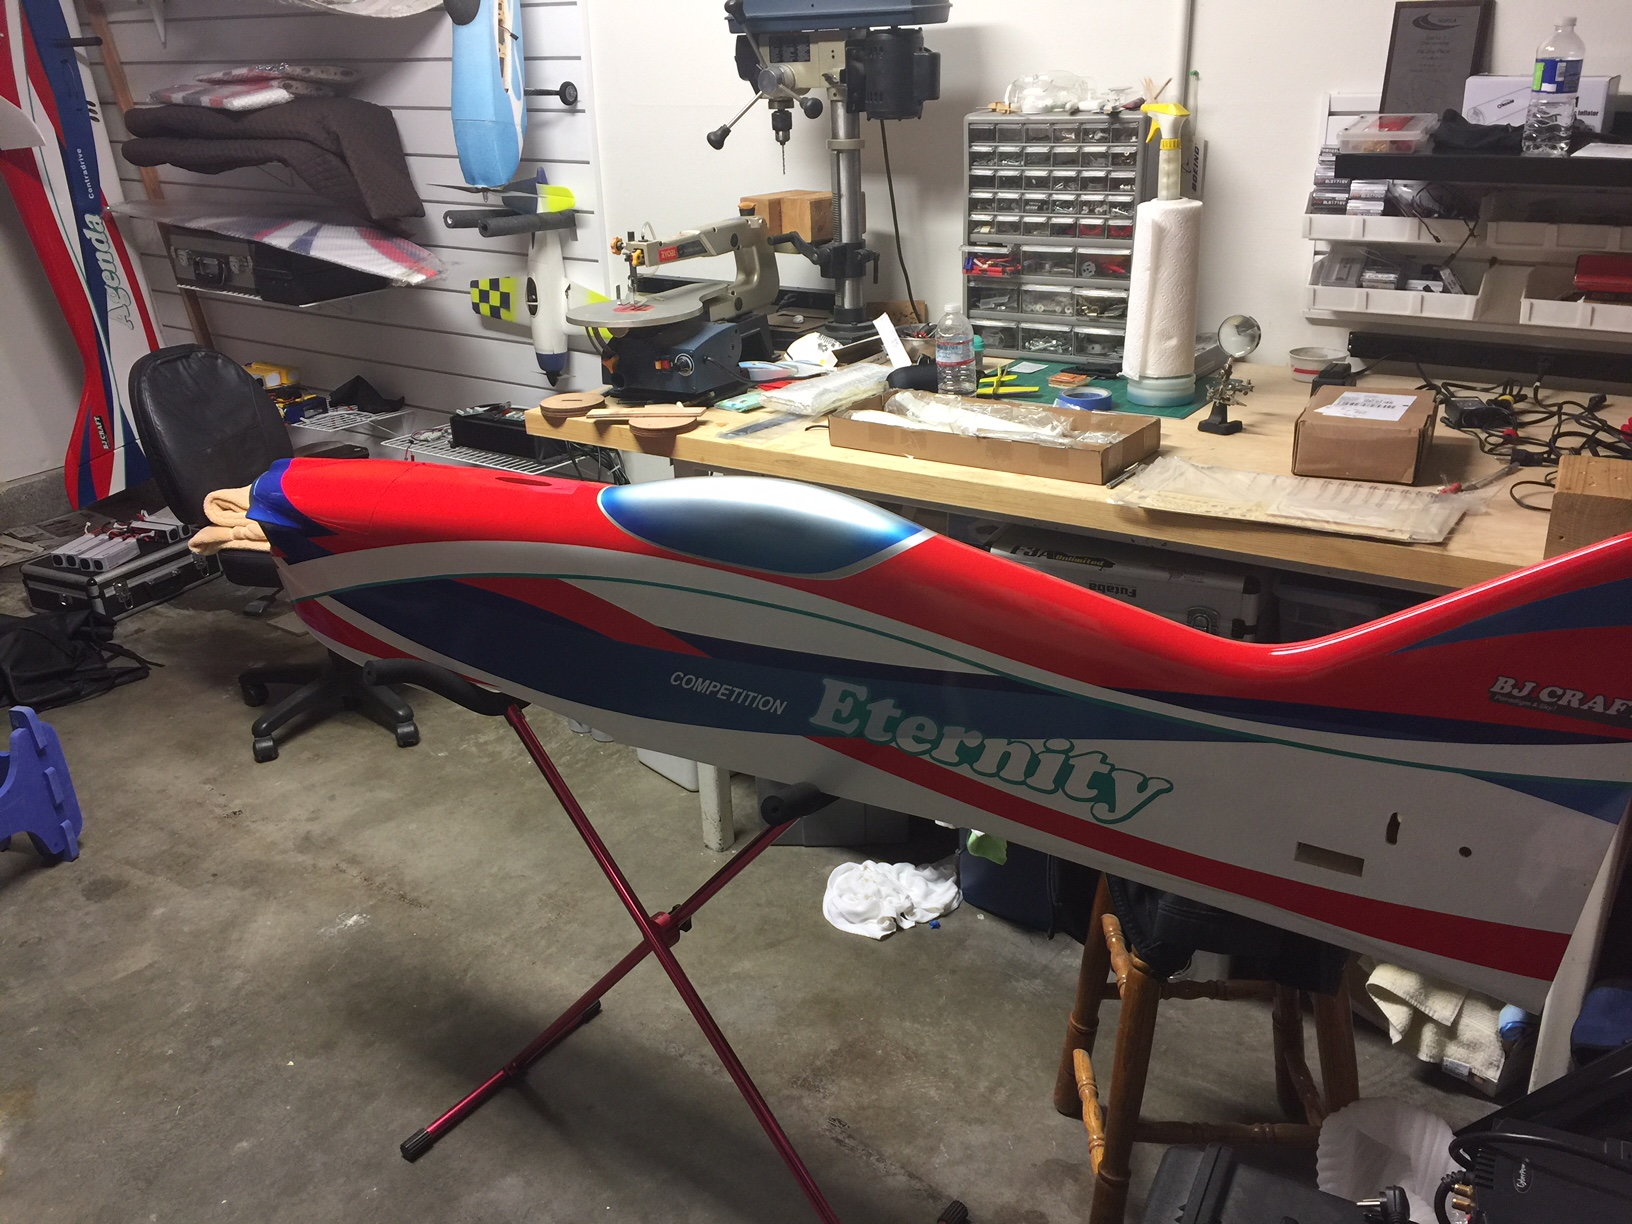
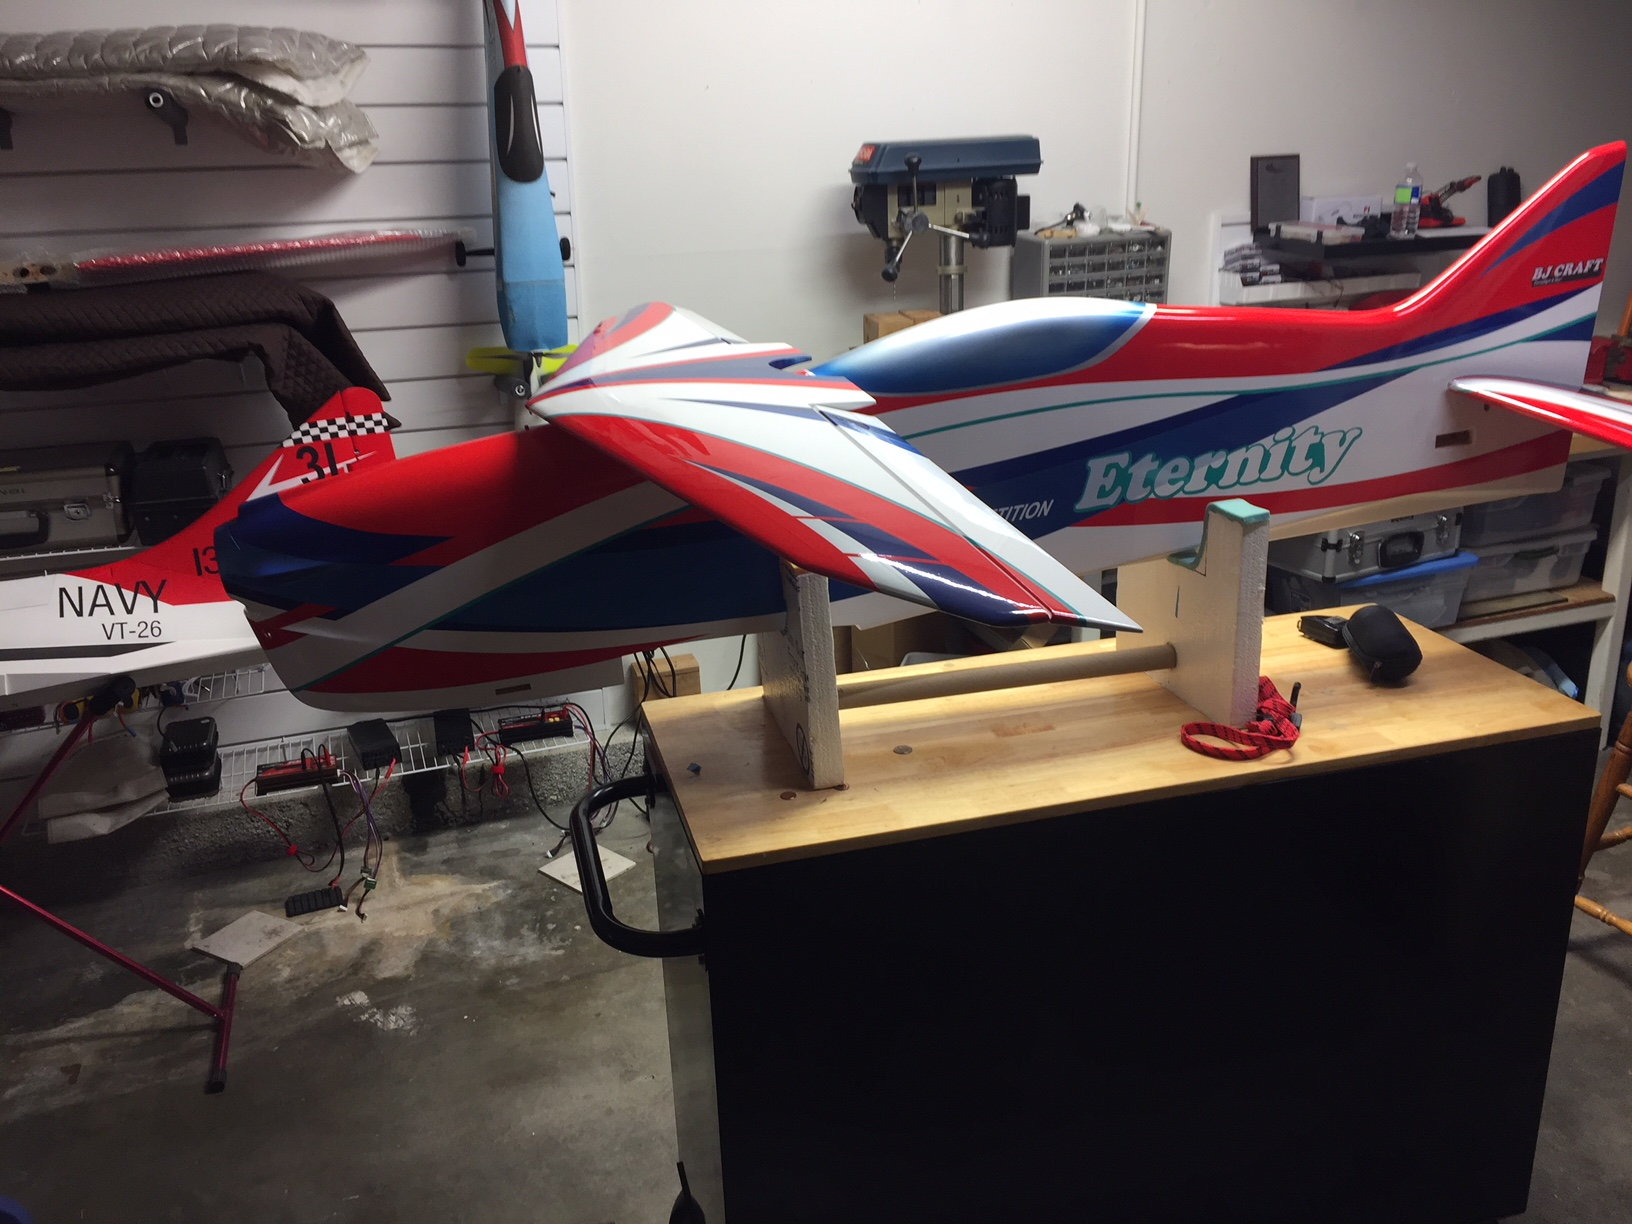
After unpacking, I let the wings, stabs and rudder sit in their packing for a day or so in order to let them acclimate to the humidity here. The fuse looks great and it looks huge but feels very light.
It's been a while since I have done a build. I have been waiting for B.J. to let me know when the time was right to build and fly his next generation airplane. I just received his newest effort, the Eternity. This is what he flew at the F3A World Championships in Argentina.
My friend in France, Jean-Paul Delteil, will be building the Immortal. There are differences between the two, primarily the wings and the fact that the Eternity is set up for the Contra Drive. It will be interesting to see the similarities and differences.
B.J. was very emphatic when he told me that the Eternity should not be thought of as a biplane. Rather, it is the next generation.... I am anxious to try it. I really liked the BiSide bipe. I thought it presented well and flew very nicely. But, it was difficult to set up. I think this may be similar, it will take some time to get it right but I expect that once it is set up, it should shine.
Let's start with the packaging:
As you can see from the pics, it is the same packaging that BJ Craft has been using for a while. The wooden crate with an anchored support for the fuselage inside. Everything is packed neatly and well protected. You can see that the box suffered some damage at the hands of UPS but the contents survived. There was a small crack on the bottom side near the gear mount but that is superficial and can be easily fixed.
After unpacking, I let the wings, stabs and rudder sit in their packing for a day or so in order to let them acclimate to the humidity here. The fuse looks great and it looks huge but feels very light.
 03-25-2018, 01:39 PM
#2
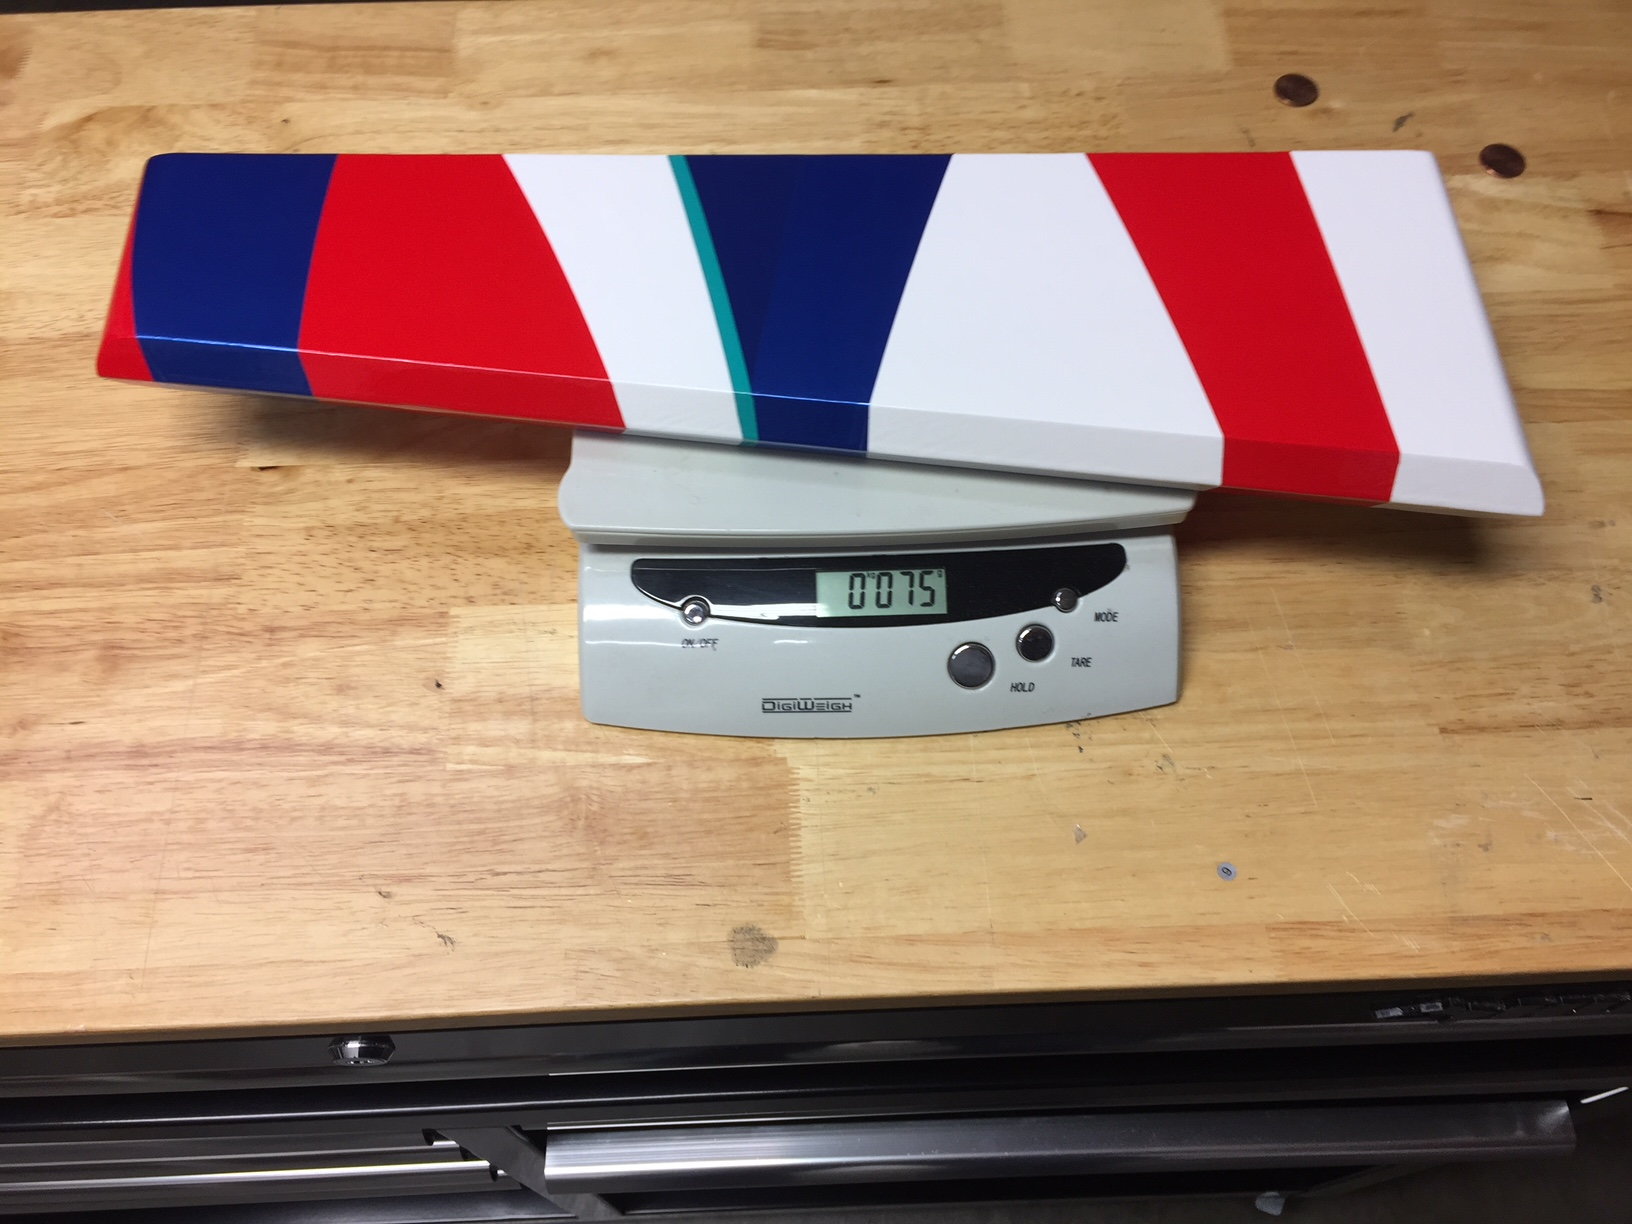
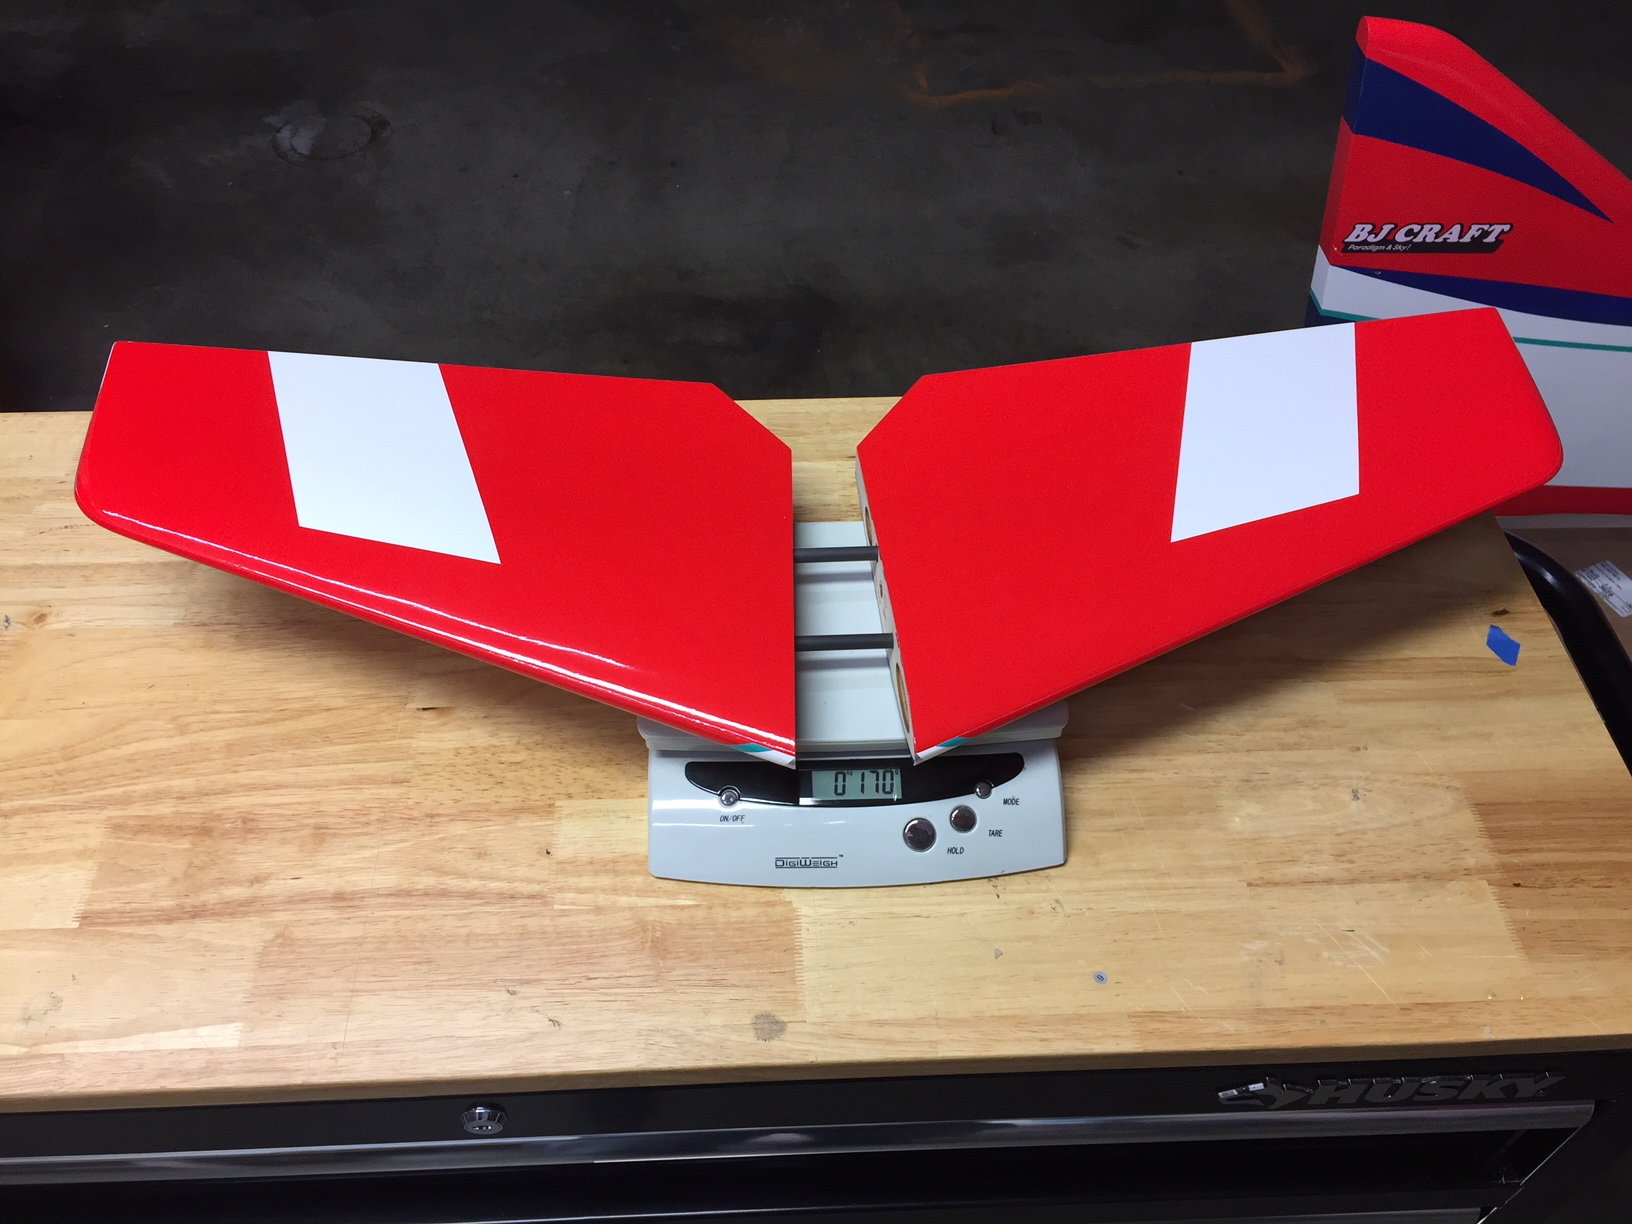
Next up is the Weigh-In. Everyone is always curious about the weights and, with this being a biplane, I am curious to see how it came out. I was pretty impressed by the weight of the fuse so the scale can tell the story:
Fuse 990g
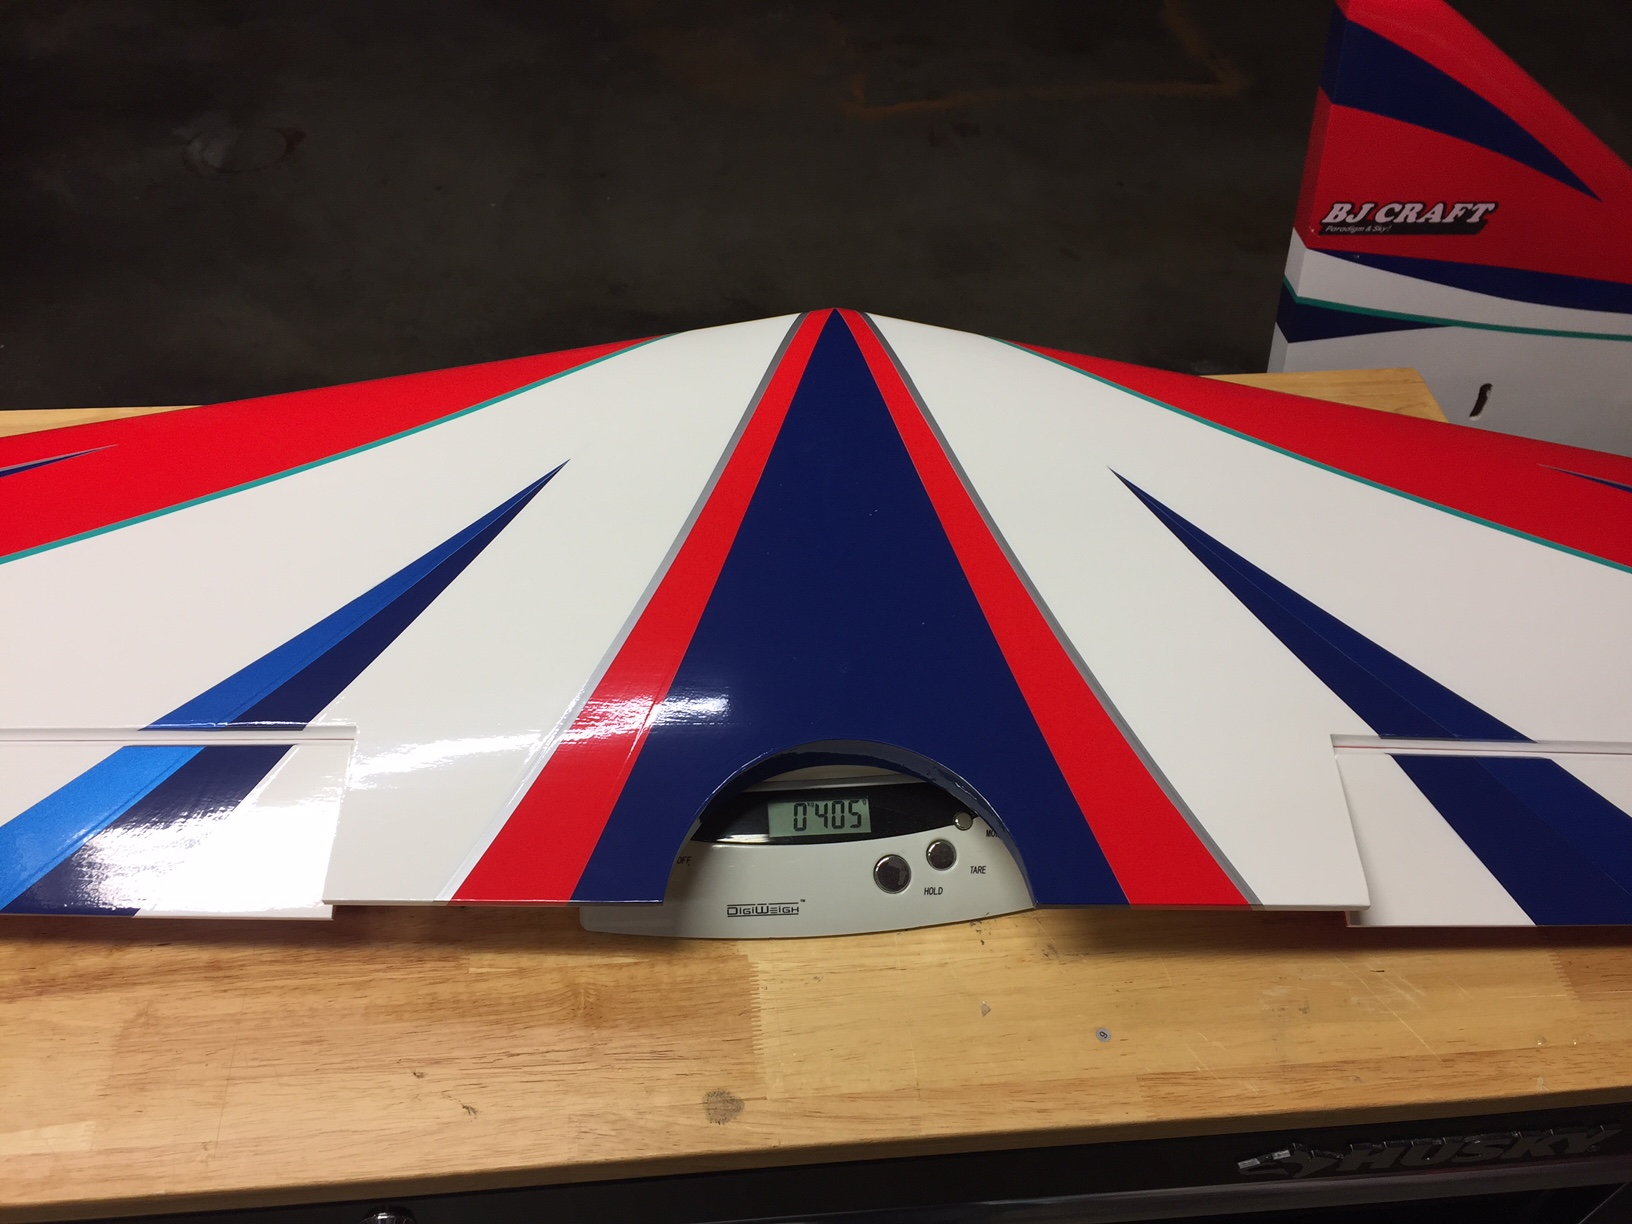
Top Wing 405g
Bottom Wing 400g
Stabs with tubes 170g
Rudder 75g
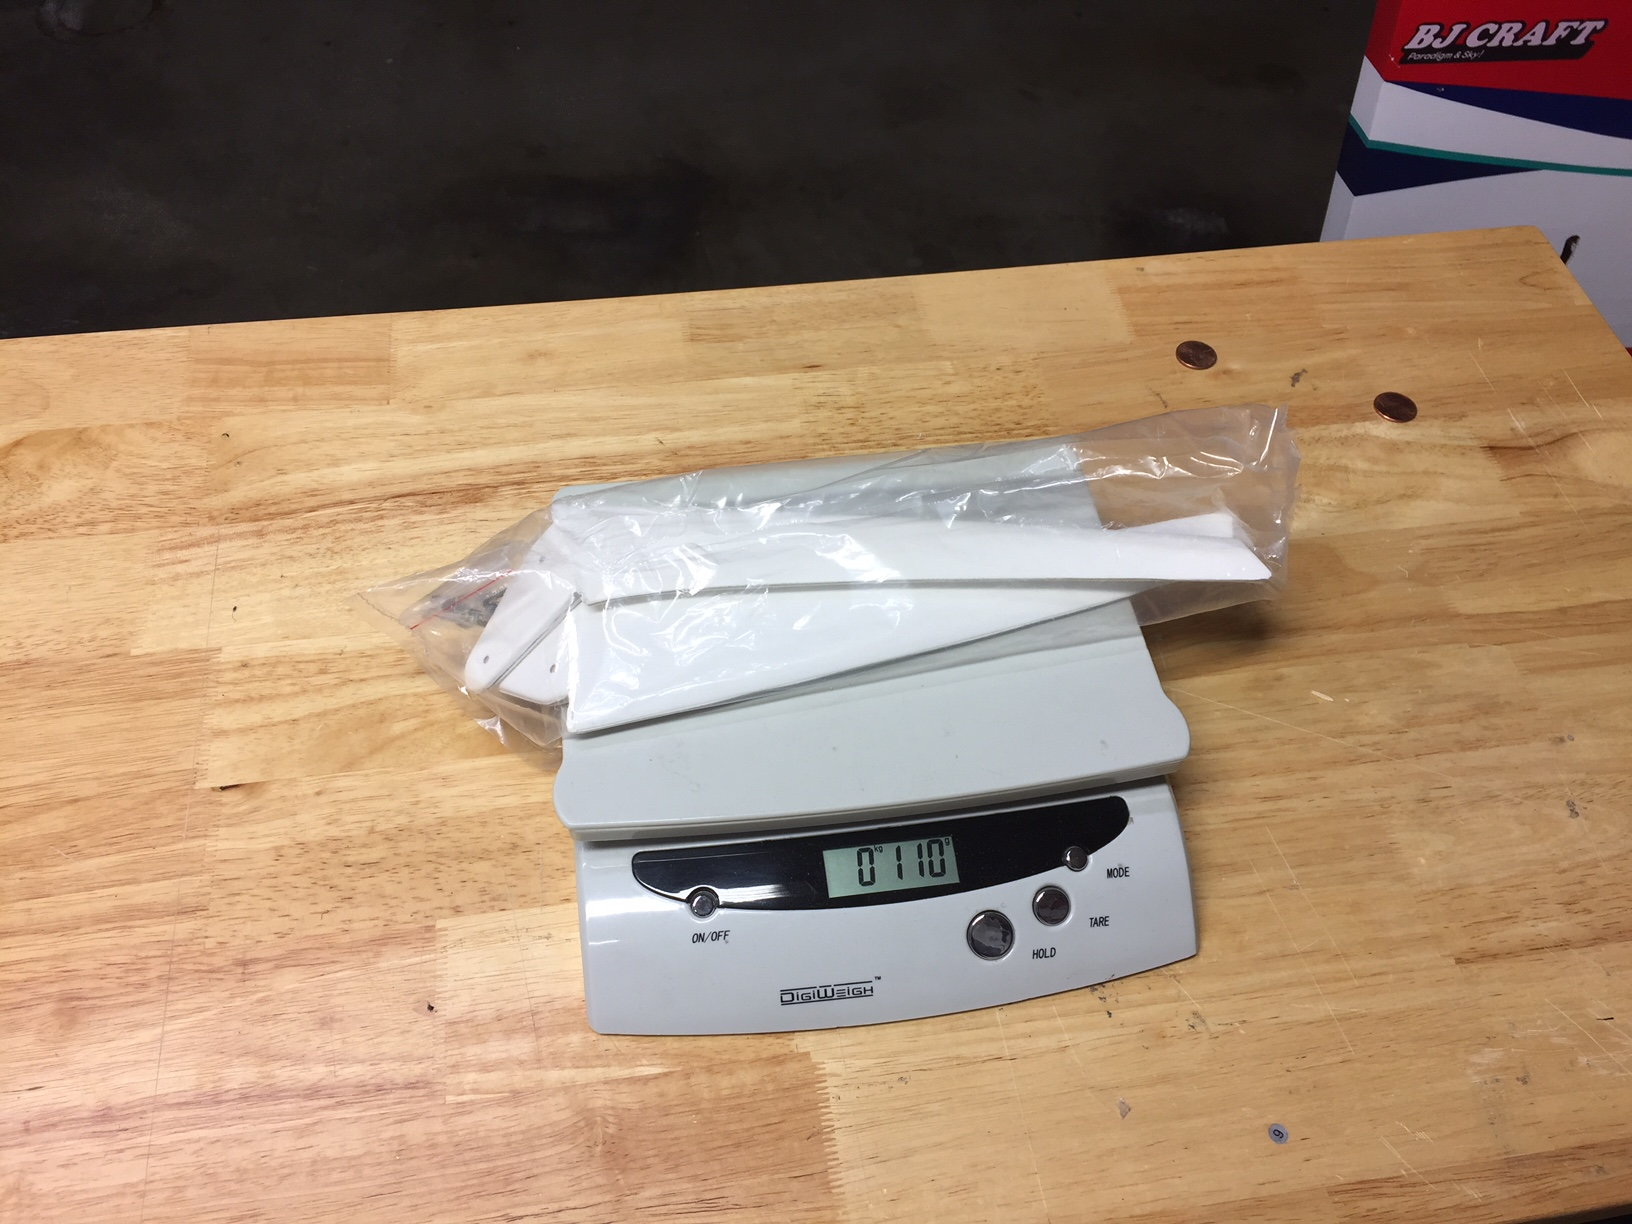
Landing Gear Legs and HW 110g
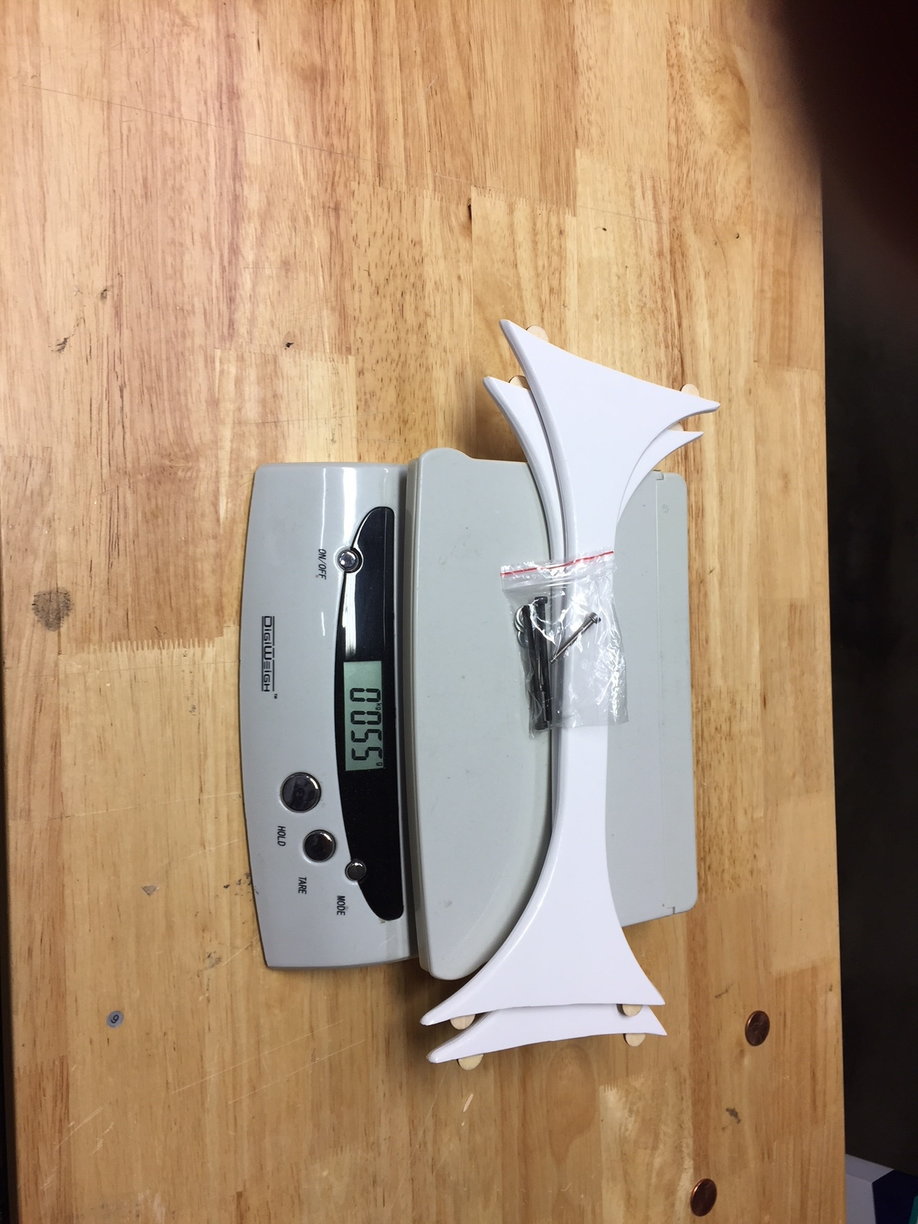
Cabane Struts and HW 55g
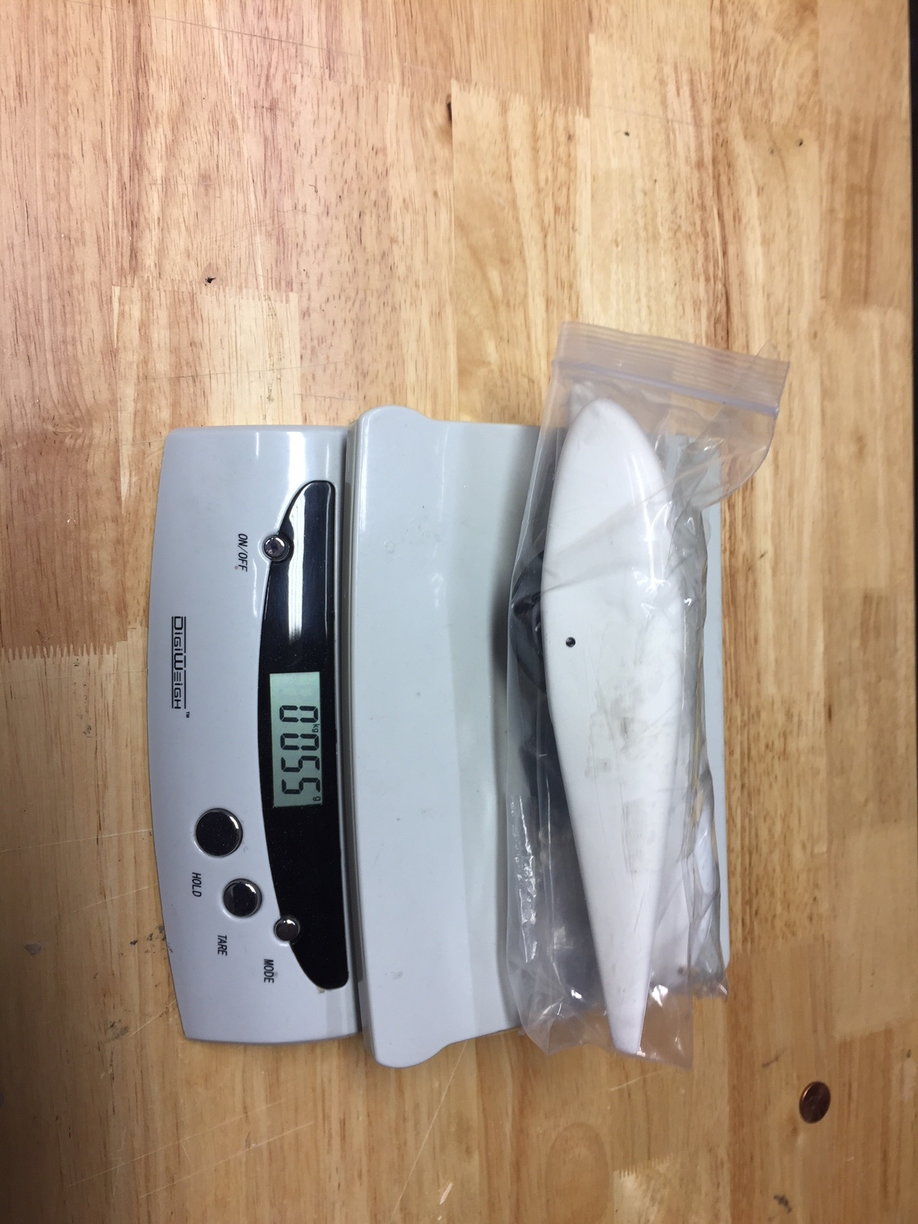
Wheels, pants and axle bolt HW 55g
Total: 2260g
That is really impressive for this large airframe. As a comparison, the same component weights for the Agenda are 2250g.
What I find really astounding is the 990g fuselage weight. The Agenda fuse weighs 1140g. For comparison, the smaller BiSide fuse weighed 995g.....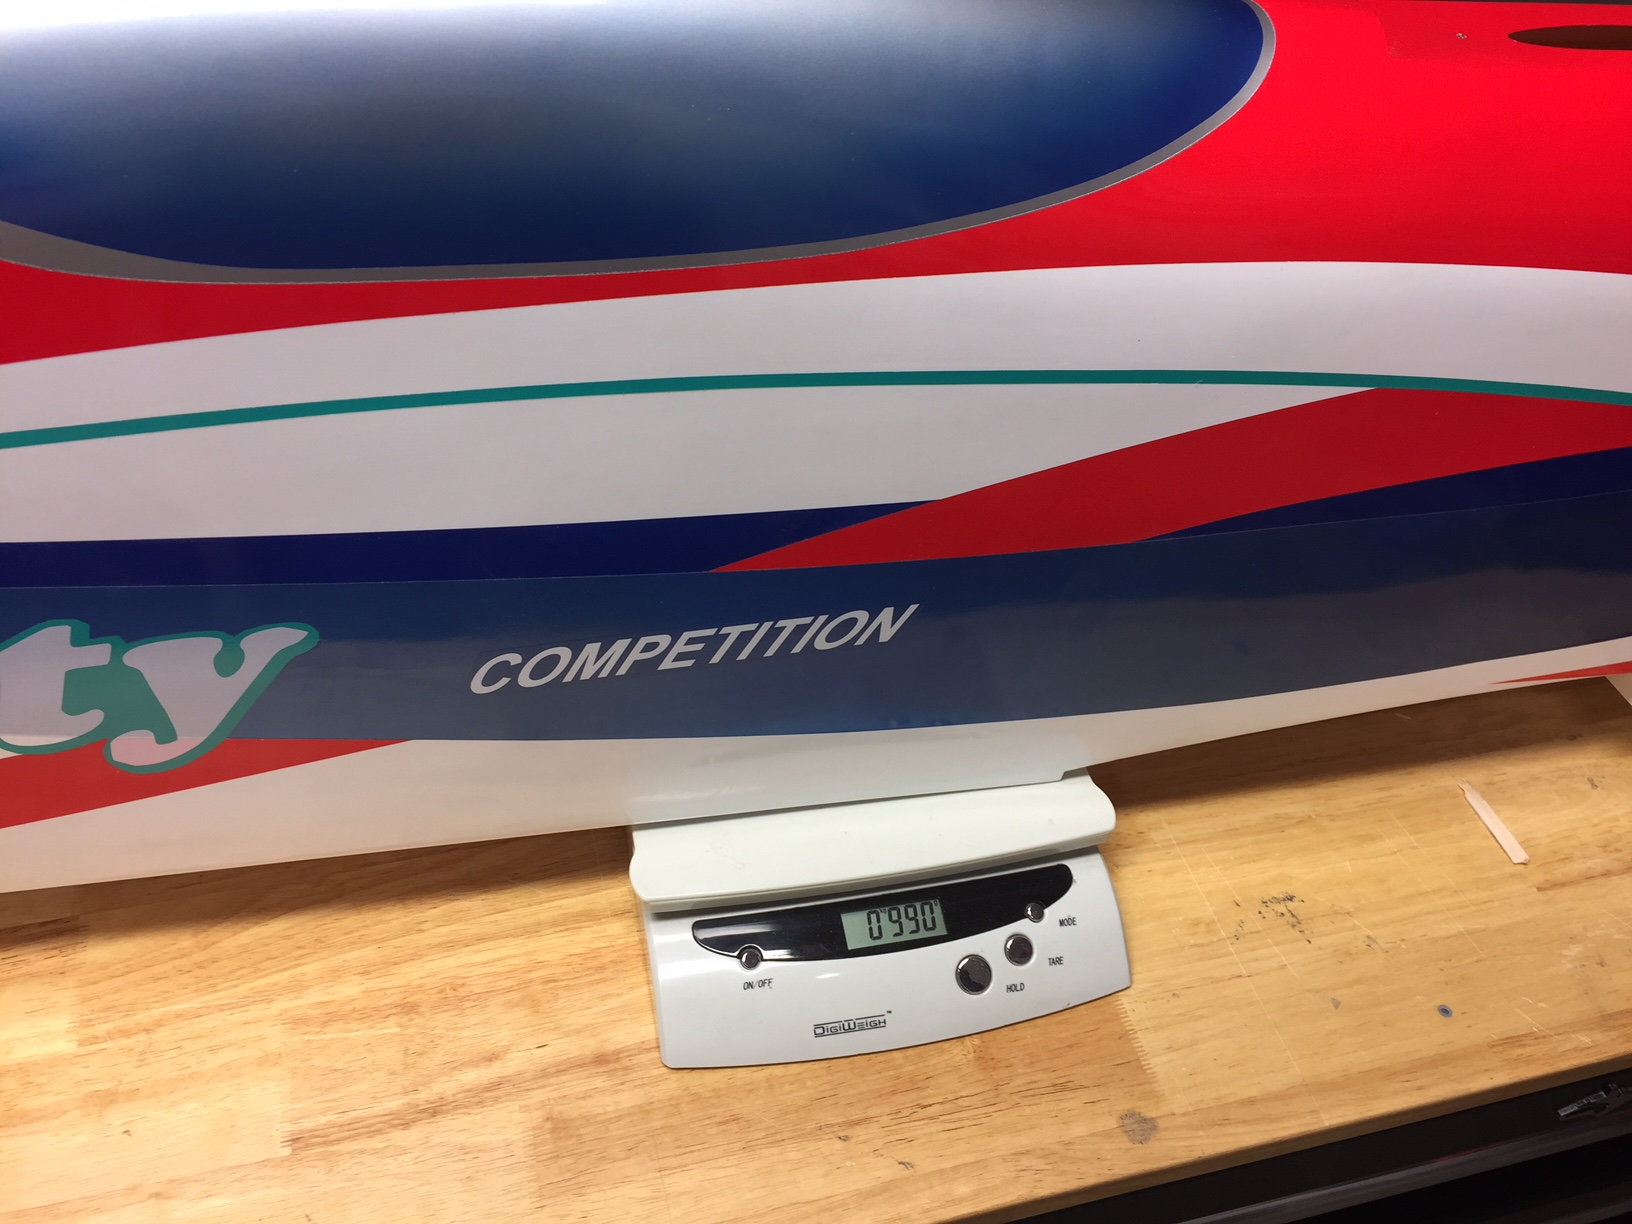

Fuse 990g
Top Wing 405g
Bottom Wing 400g
Stabs with tubes 170g
Rudder 75g
Landing Gear Legs and HW 110g
Cabane Struts and HW 55g
Wheels, pants and axle bolt HW 55g
Total: 2260g
That is really impressive for this large airframe. As a comparison, the same component weights for the Agenda are 2250g.
What I find really astounding is the 990g fuselage weight. The Agenda fuse weighs 1140g. For comparison, the smaller BiSide fuse weighed 995g.....
 03-26-2018, 06:36 PM
#4
I'm going to post some pictures of the plane, but I have to put a disclaimer first. RCU has changed the way they allow you to post pics in a thread. Previously, you could write text and post a thumbnail pic relating to that text and make a very readable post. Now, for some reason, they no longer support thumbnail inline pics and every picture is posted inline at full size and resolution. This kind of ruins the whole build blog experience in my opinion. If enough people complain maybe they will change it back to the way it was. For now, you have to bear with me while I try and figure out a way to post pictures and text that make sense and can be followed. Sorry for the rant...
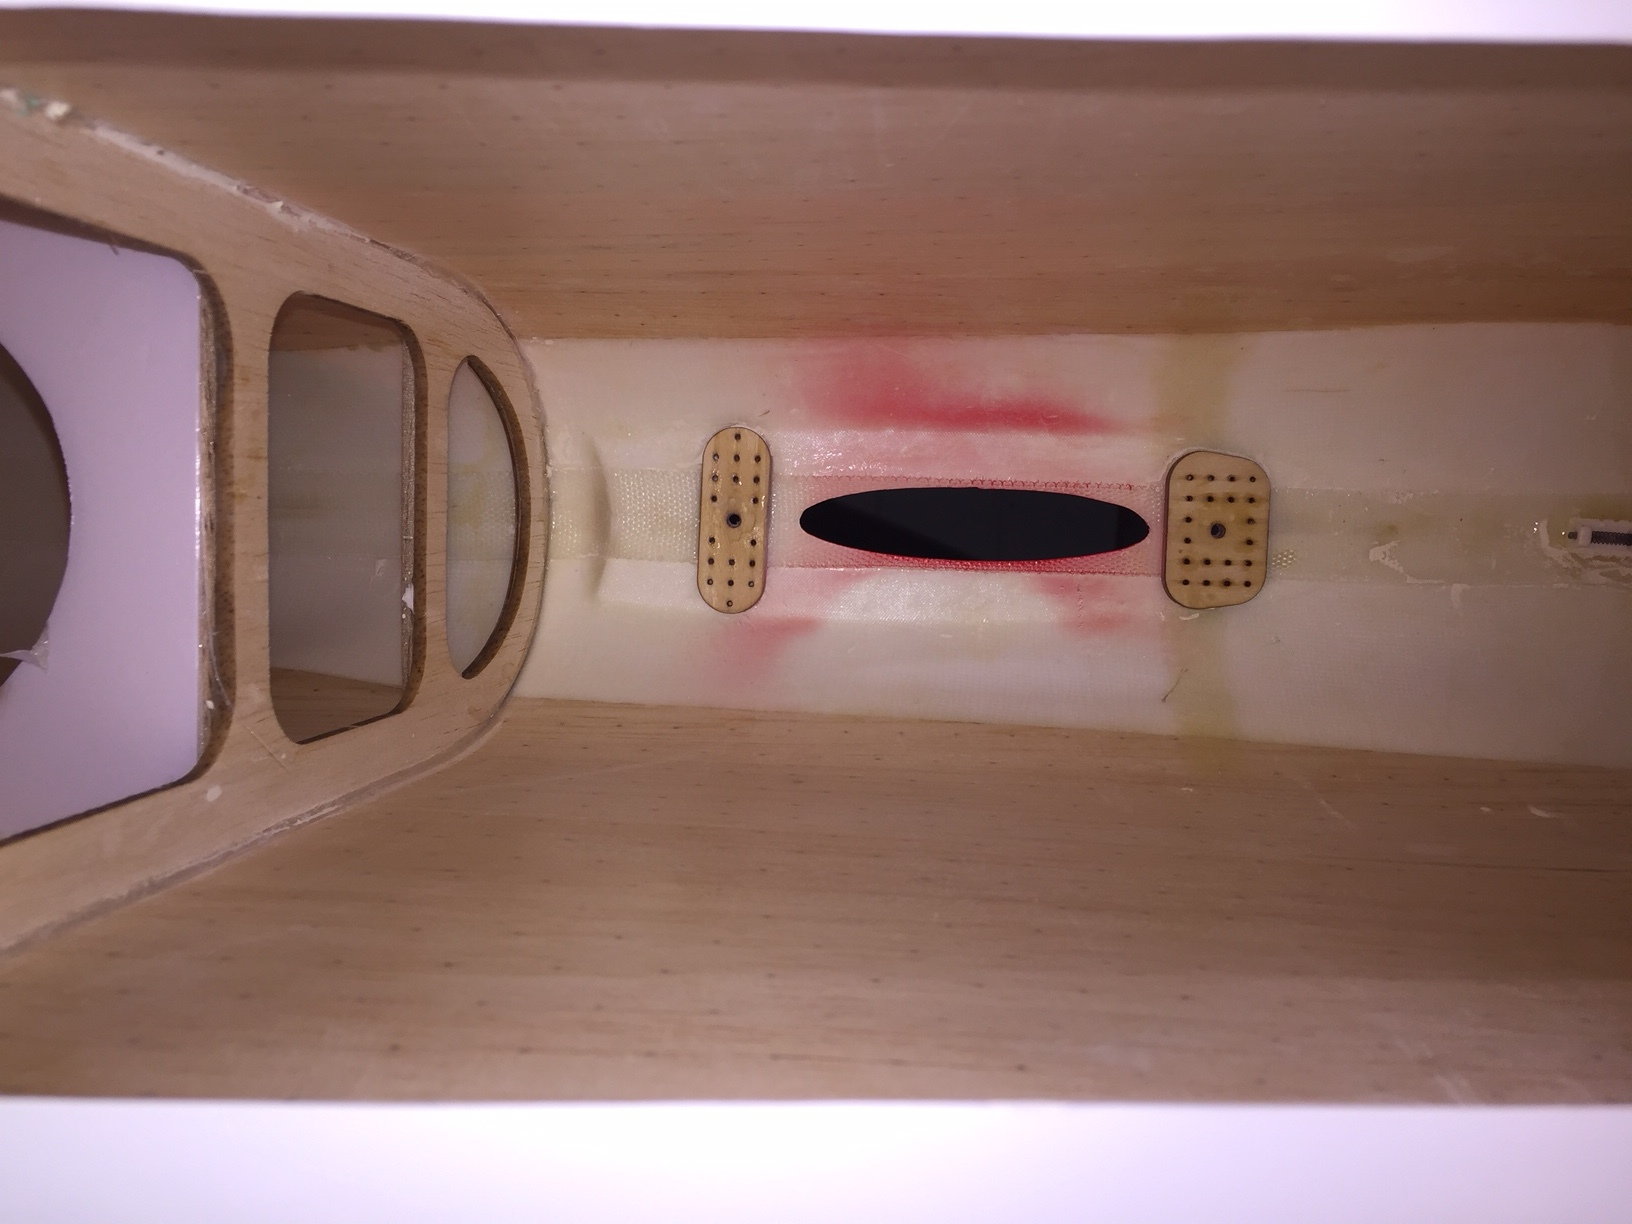
Anyway, here are some pictures of the structure. Overall, the construction is super light weight and very clean. I have not tried to screw the wings down into their mounts yet but it fits together very well. The bottom wing looks like a great fit to the wing saddle and the top wing has no real gaps around the wing and the saddle. You can see the foam board support crutch, similar to the Agenda, running the length of the fuselage.

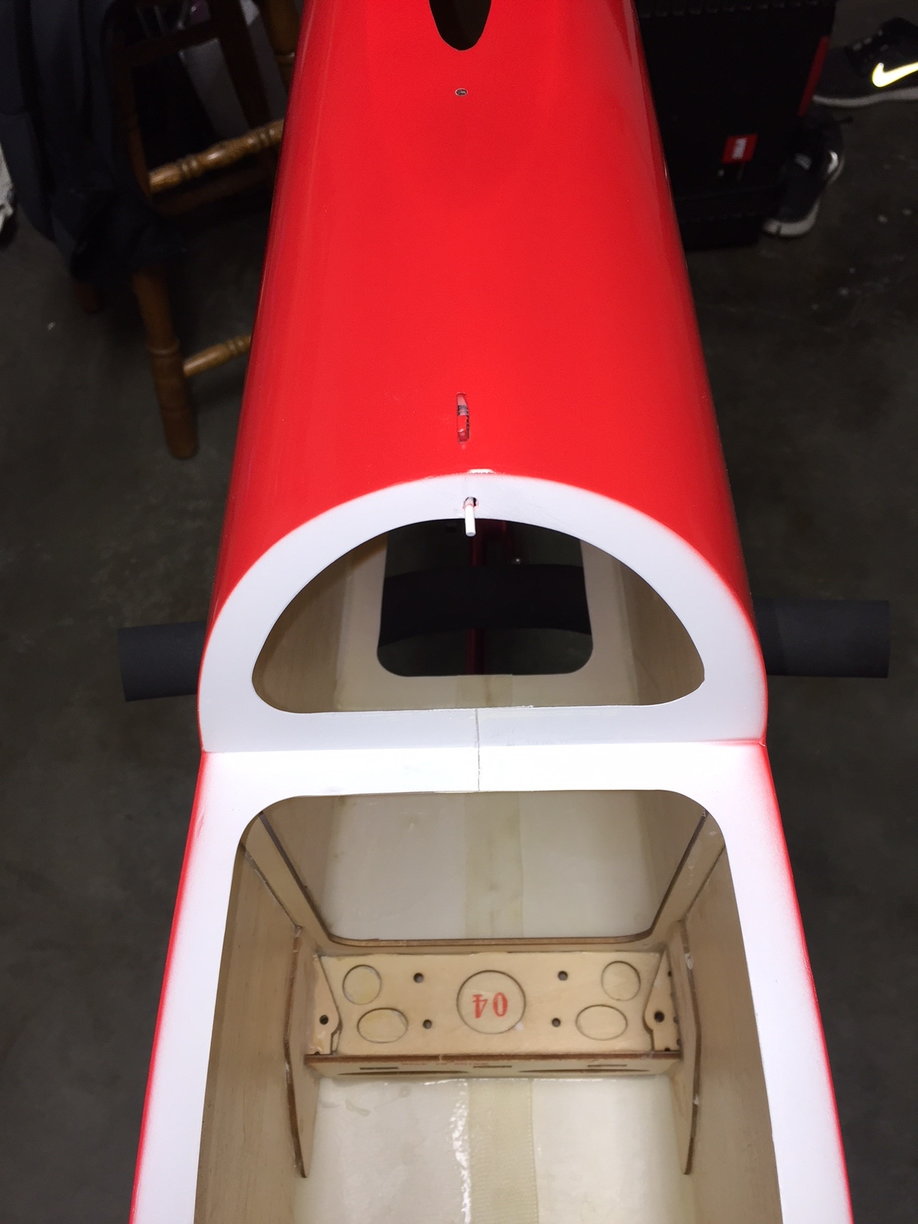
Looking down the fuse from the nose. Standard BJ Craft support structure. LG mount is the typical style
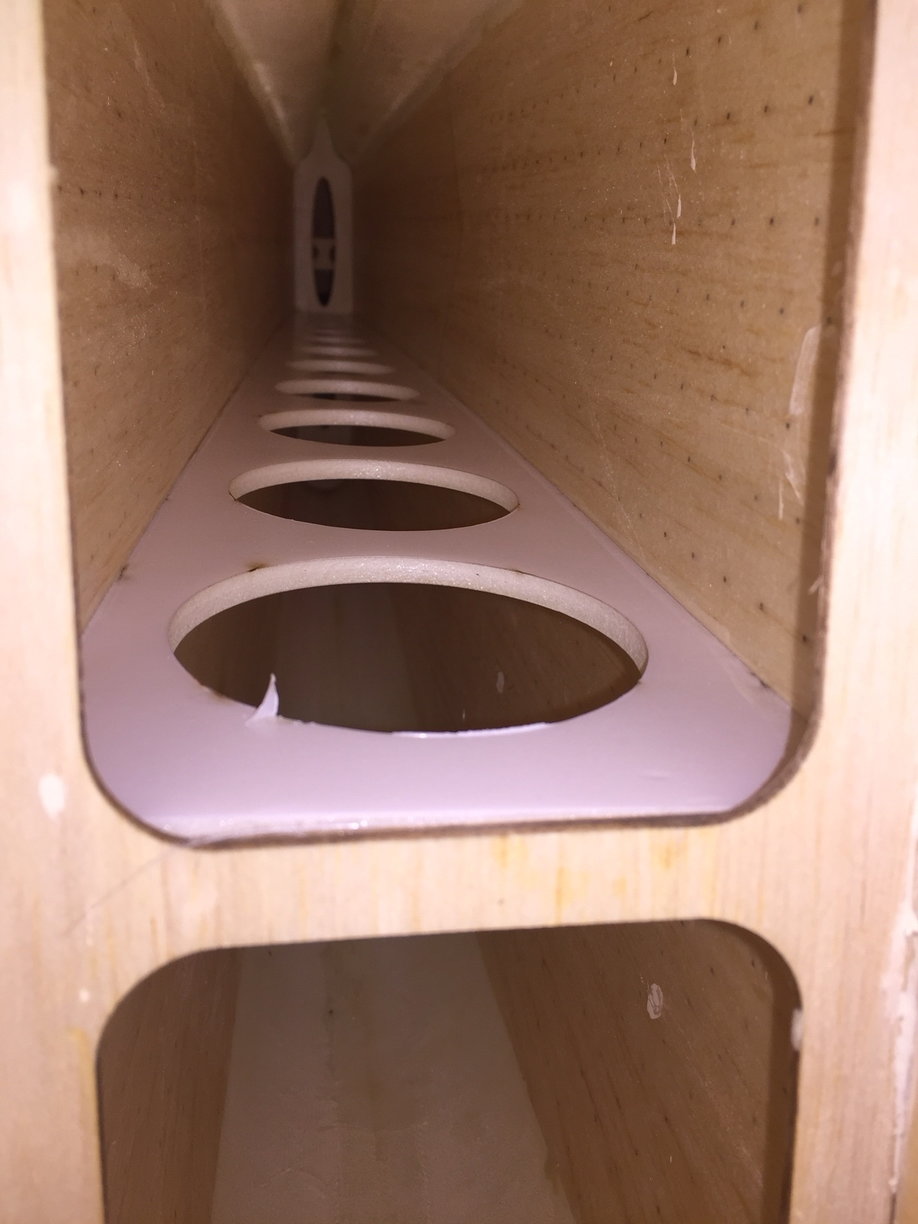
Very light lay up on the fuse. The foam board support adds a lot of stiffness.
The LG structure is just like the other BJ Craft planes. I will run a bead of Hysol 9462 around the glue joints. If you fly off of a rough field you might want to reinforce it.


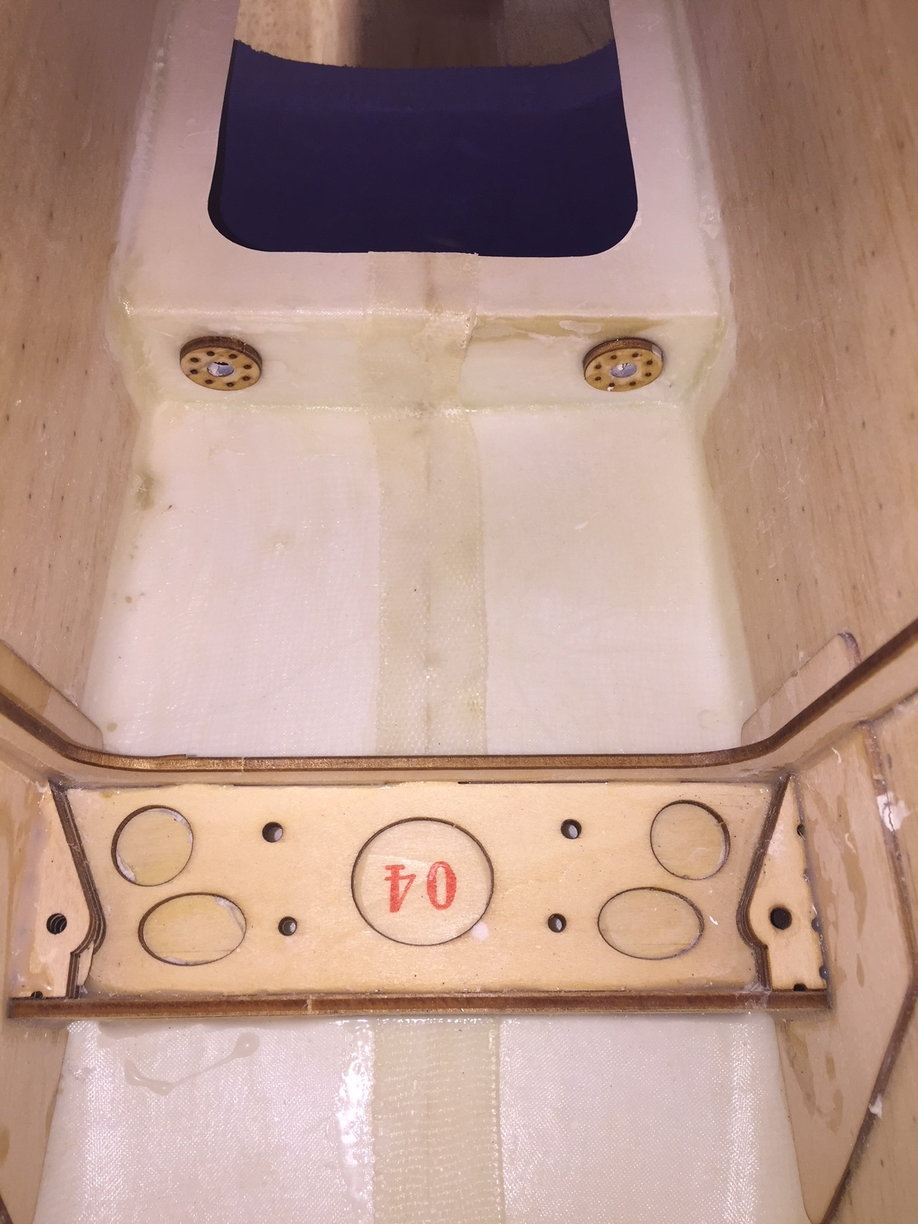
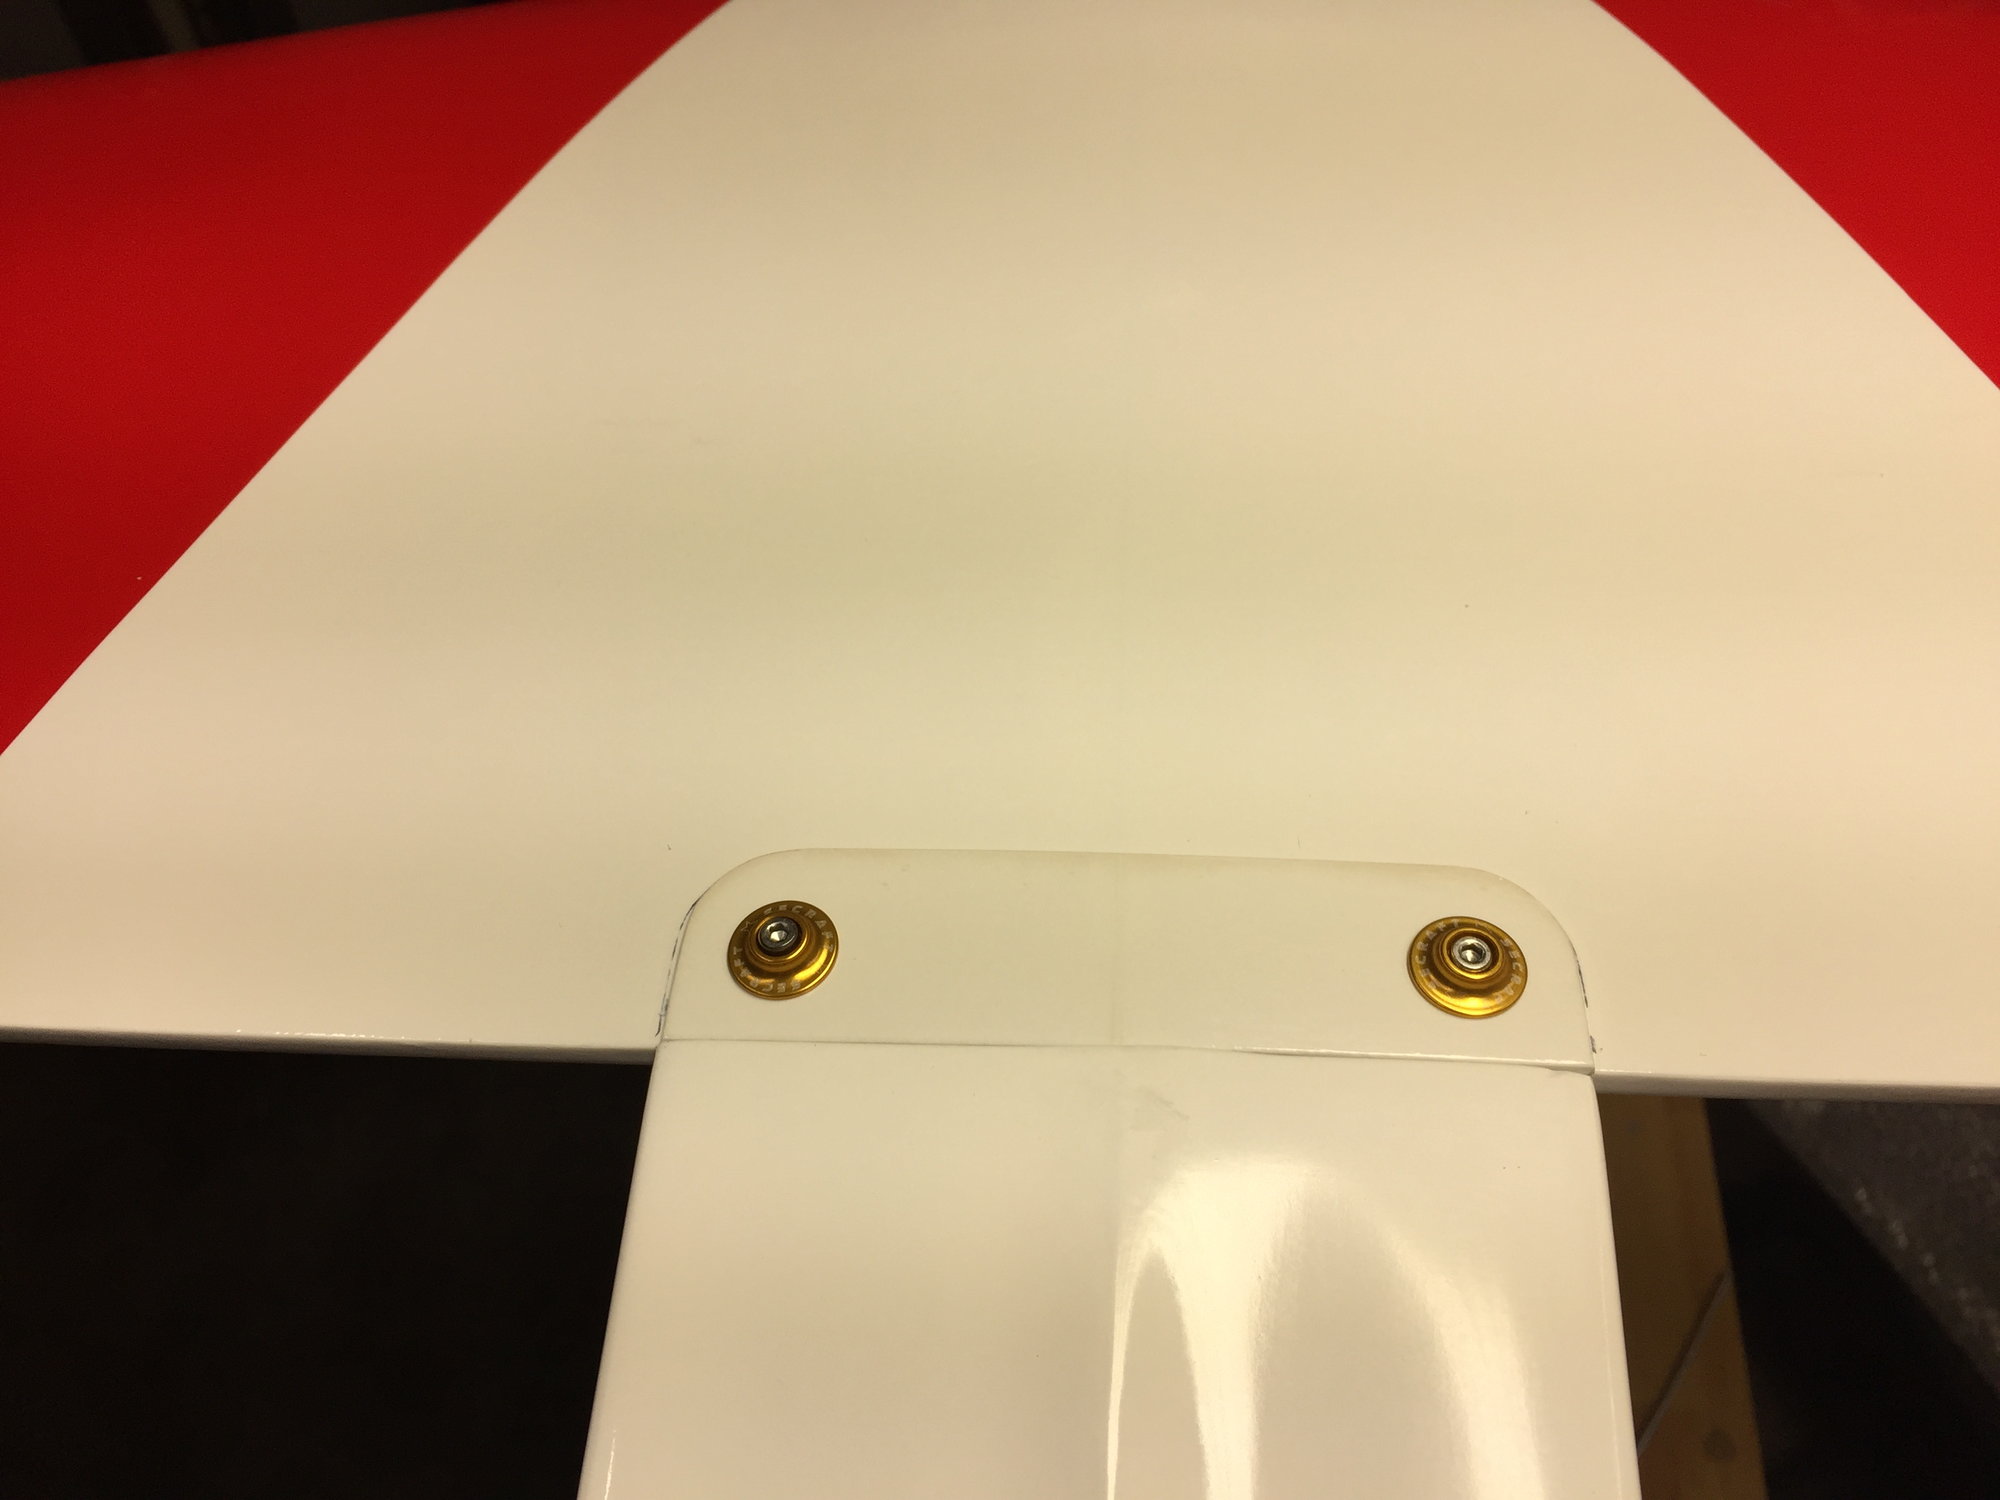
Top wing saddle. The wing attaches with two screws to the saddle, similar to the BiSide
Bottom wing saddle. It is similar to the BiSide with two bolts in the rear and two front pins. The front pins look to be made out of Delrin.

Nice fit of the bottom wing into the saddle
Bottom wing snug fit
Top wing looks like it has a good fit and alignment, but I haven't tried to bolt it in yet

Location for the top wing screws. I will probably beef this up a bit by applying Hysol 9462 as I have done in previous planes.
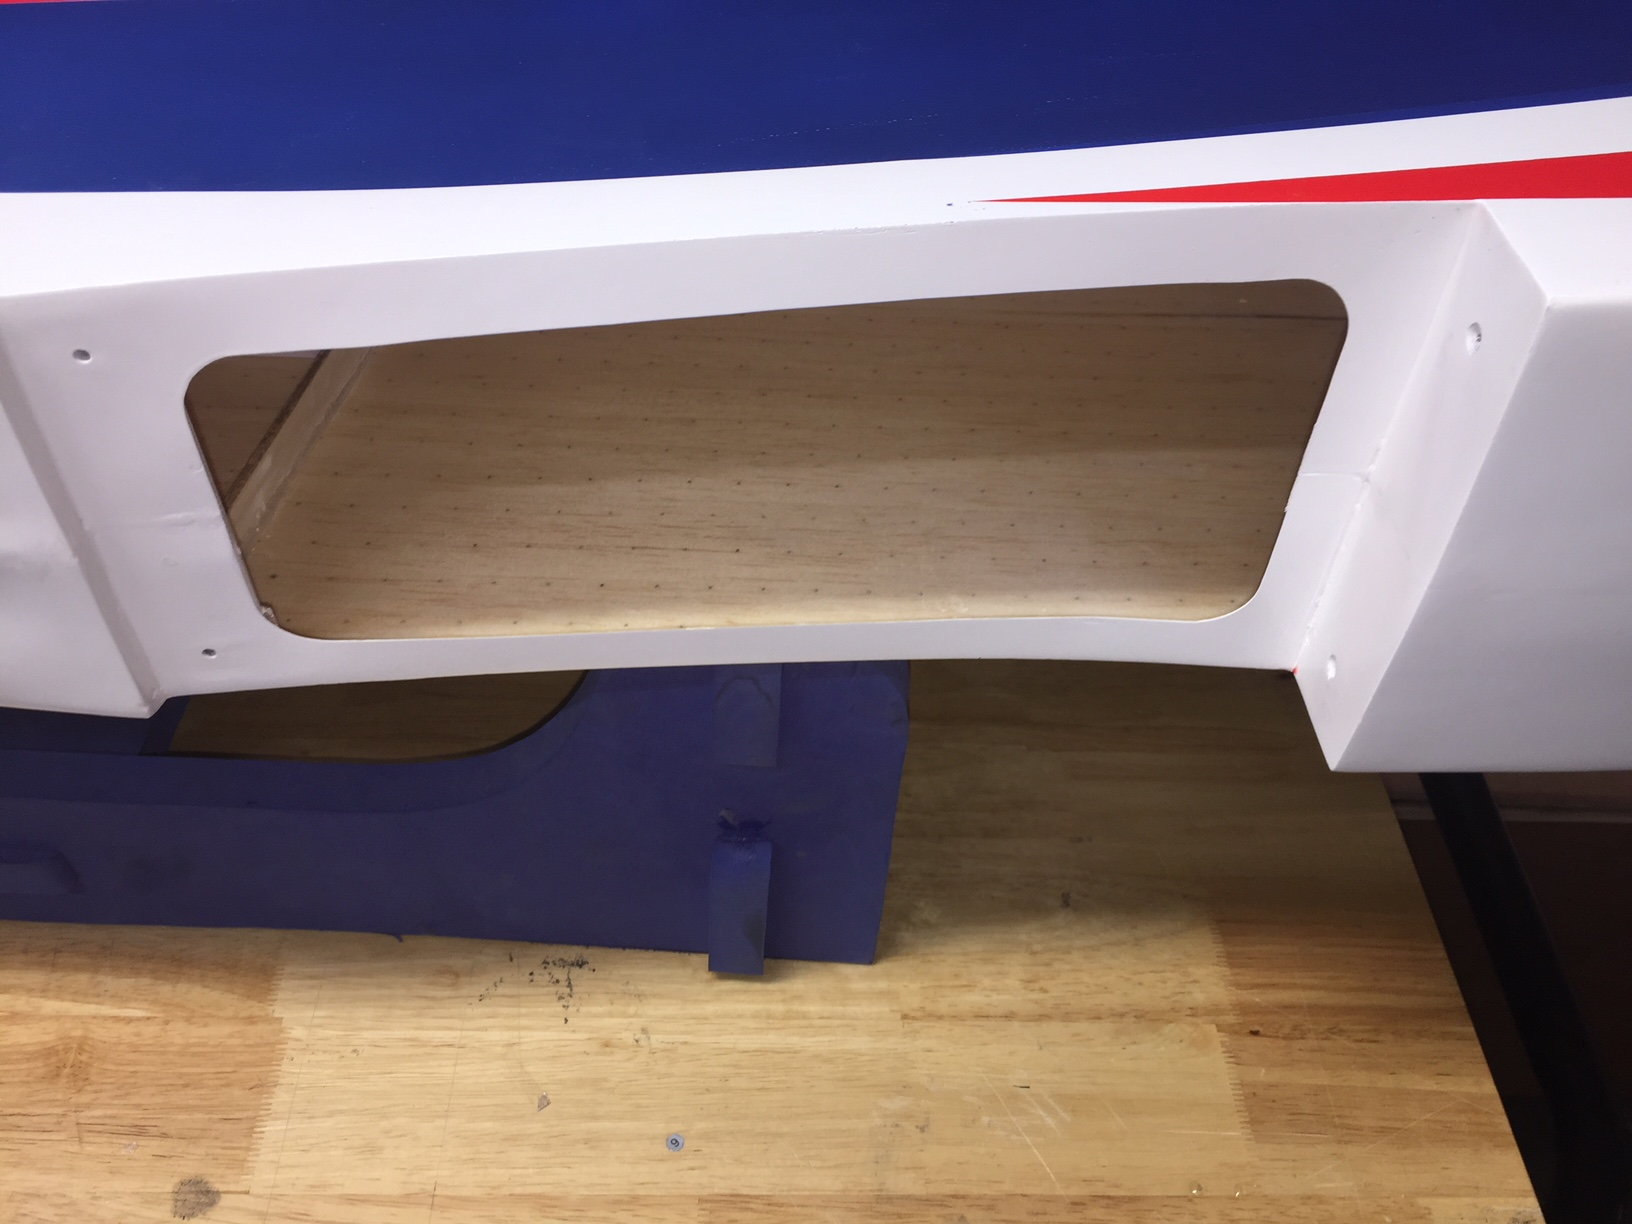
LG mount location on the belly of the fuse
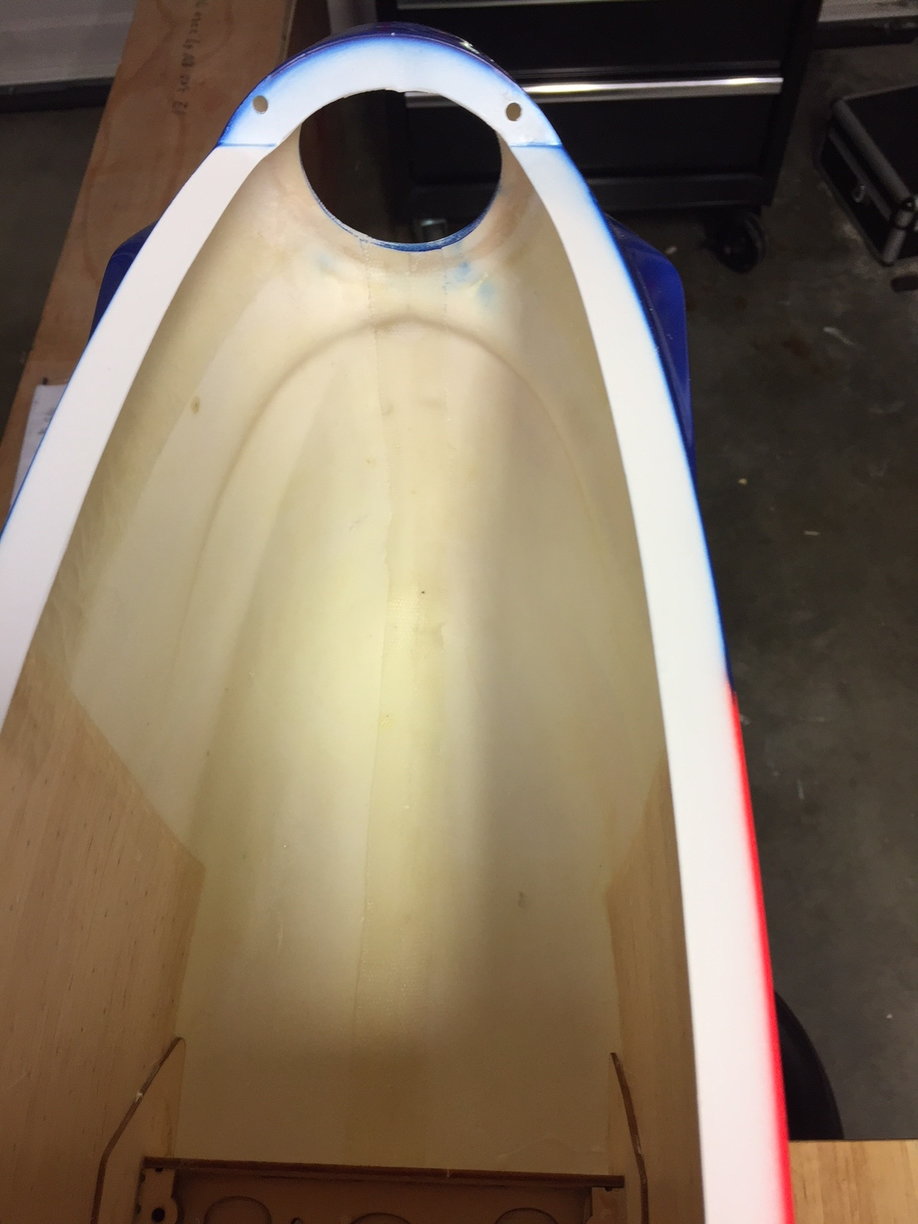
Clean nose layup. Very stiff.
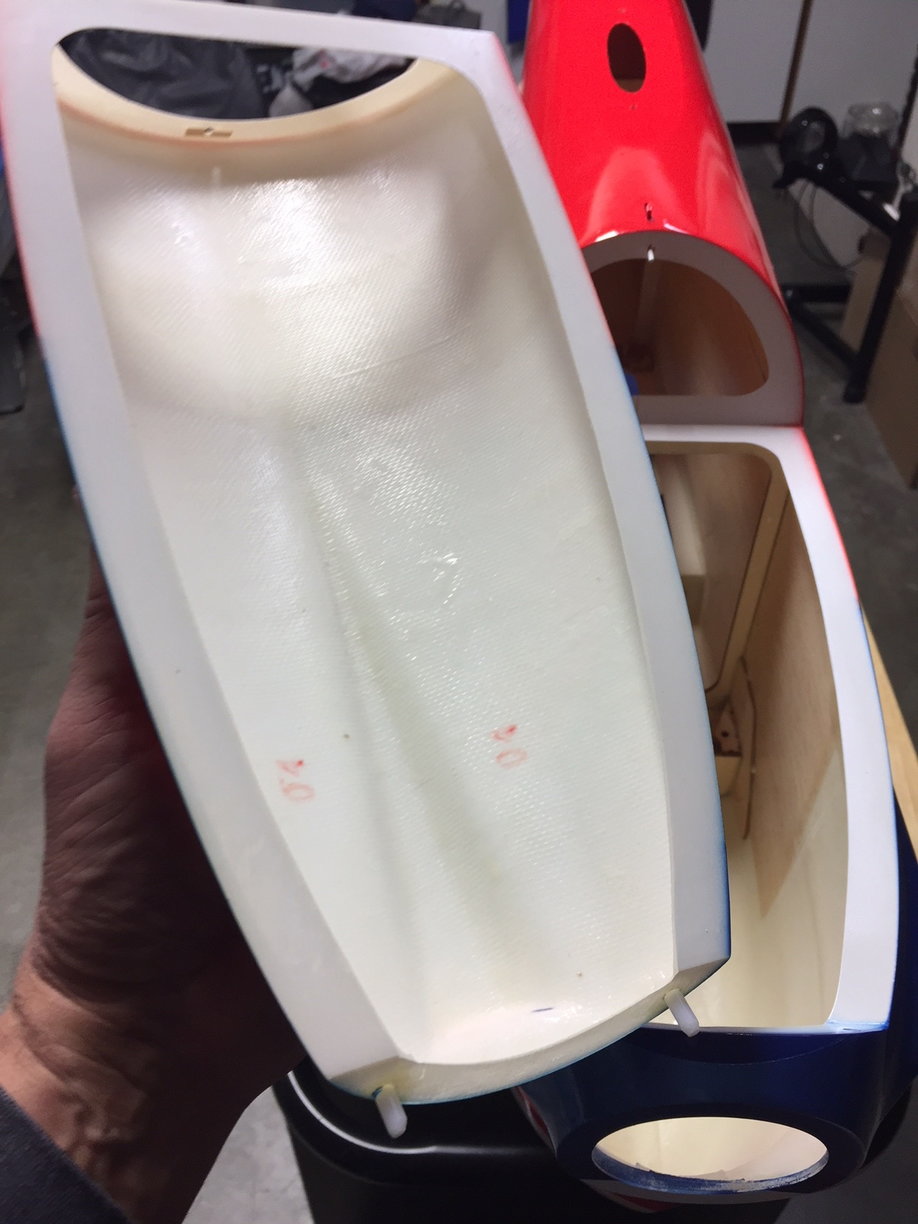
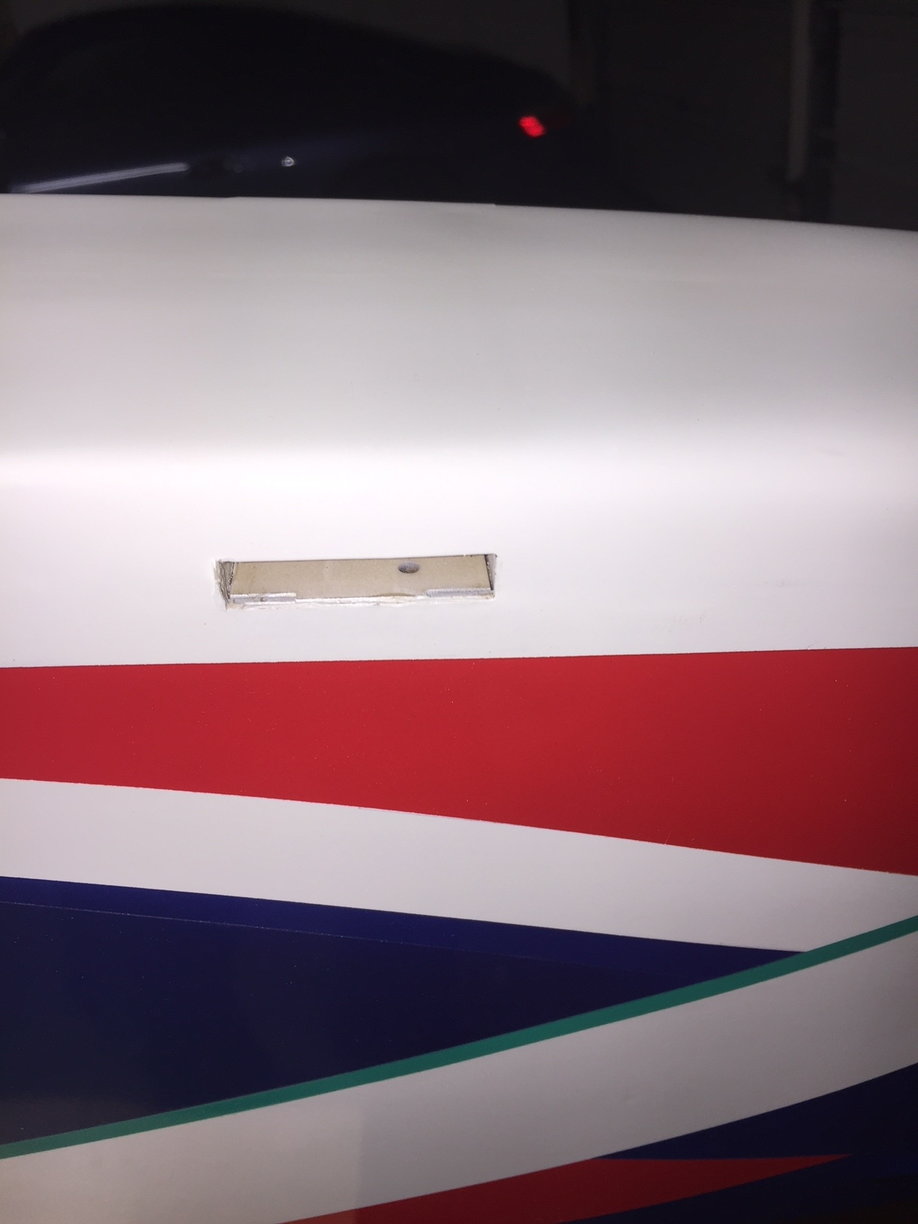
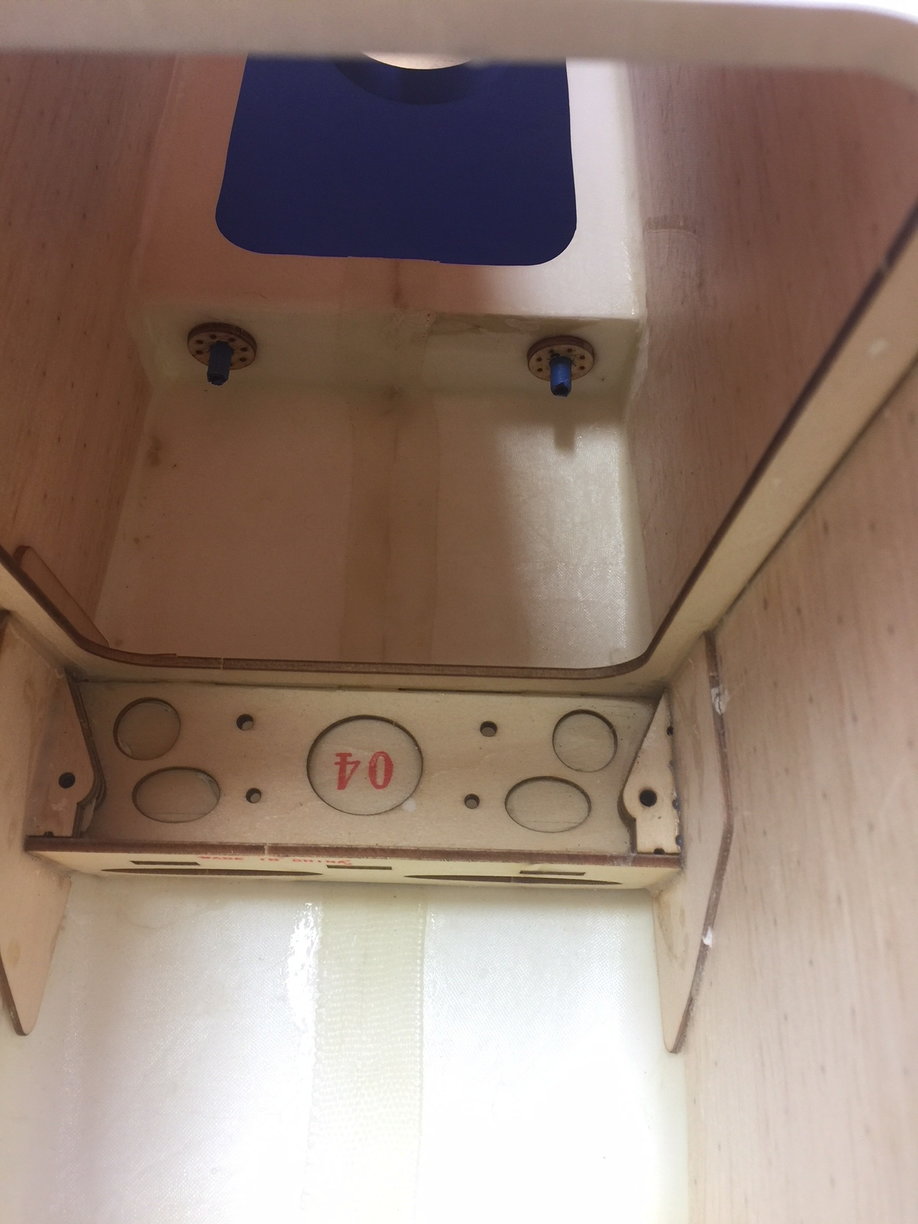
Super light hatch. It uses the spring loaded sliding pin latch.
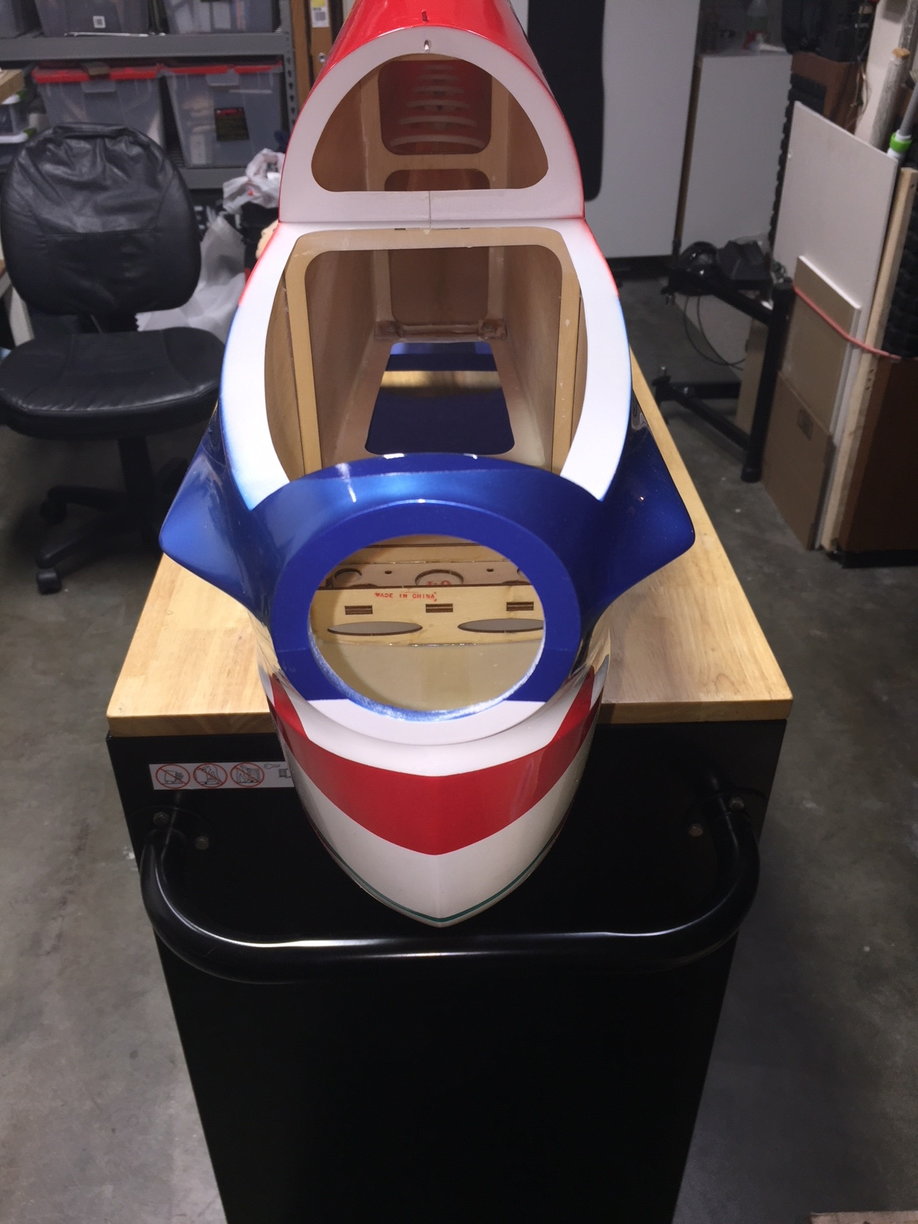
Anyway, here are some pictures of the structure. Overall, the construction is super light weight and very clean. I have not tried to screw the wings down into their mounts yet but it fits together very well. The bottom wing looks like a great fit to the wing saddle and the top wing has no real gaps around the wing and the saddle. You can see the foam board support crutch, similar to the Agenda, running the length of the fuselage.
Looking down the fuse from the nose. Standard BJ Craft support structure. LG mount is the typical style
Very light lay up on the fuse. The foam board support adds a lot of stiffness.
The LG structure is just like the other BJ Craft planes. I will run a bead of Hysol 9462 around the glue joints. If you fly off of a rough field you might want to reinforce it.
Top wing saddle. The wing attaches with two screws to the saddle, similar to the BiSide
Bottom wing saddle. It is similar to the BiSide with two bolts in the rear and two front pins. The front pins look to be made out of Delrin.
Nice fit of the bottom wing into the saddle
Bottom wing snug fit
Top wing looks like it has a good fit and alignment, but I haven't tried to bolt it in yet
Location for the top wing screws. I will probably beef this up a bit by applying Hysol 9462 as I have done in previous planes.
LG mount location on the belly of the fuse
Clean nose layup. Very stiff.
Super light hatch. It uses the spring loaded sliding pin latch.
Last edited by shannah; 03-27-2018 at 09:17 AM.
 03-27-2018, 02:01 PM
#6

Join Date: Mar 2006
Location: Houston,
TX
Posts: 325
Likes: 0
Received 0 Likes
on
0 Posts
Nice to see a build thread. I got one from Mike Mueller last year after the Nats (He made me buy it  ) and I've been flying it since November. Overall I think it flies better than the Biside the pitch coupling is gone though there still some roll coupling on KE. The plane seems to like a slightly faster pace than the Biside but it presents well in the air and is not as bouncy in high wind conditions.
) and I've been flying it since November. Overall I think it flies better than the Biside the pitch coupling is gone though there still some roll coupling on KE. The plane seems to like a slightly faster pace than the Biside but it presents well in the air and is not as bouncy in high wind conditions.
03-28-2018, 04:13 PM
#7

My Feedback: (1)

Join Date: Jun 2002
Location: Casablanca, CHILE
Posts: 94
Likes: 0
Received 0 Likes
on
0 Posts
Hi Steve
I also received one last December from Mike, I’m very happy with the quality and finish, first BJcraft for me.
Now it is waiting on the workbench but hope this threat help to pull my hands on it,
no decided yet on the engine, seems Contra and Adverrum are “the” alternative but I would like to know what are you thinking or what you already choose.
please keep us updated on your progress.
Regards
Fernando
03-29-2018, 07:27 PM
#8
Hi Fernando
My plan is to use the new BJ Craft X-Drive. B.J. Park told me that it is almost ready so if all goes well I will use that new drive. I am really anxious to see how it has turned out. If it is ready then I will use it and post more info on another thread.
My plan is to use the new BJ Craft X-Drive. B.J. Park told me that it is almost ready so if all goes well I will use that new drive. I am really anxious to see how it has turned out. If it is ready then I will use it and post more info on another thread.
03-30-2018, 12:18 PM
#10
You can get it from these guys, PowerSearch, SearchFit PowerSearch
You might be able to find it elsewhere. It's pretty slick. It folds flat and is lightweight. I am sure I'll use it at the field when putting this thing together. I got it for my EDF and have been using it for a while. Very nice. The only drawback for the Eternity is that the cradle is kind of wide and the fuse can roll around when it is inverted. I may make a foam adapter so it can hold the fuse better when I'm putting the lower wing on.
I hope to get more building done this weekend, but I do have to get ready for my contest next weekend at OCMA.
03-31-2018, 06:44 PM
#12
My Feedback: (1)
Join Date: Jun 2002
Location: Casablanca, CHILE
Posts: 94
Likes: 0
Received 0 Likes
on
0 Posts
I saw some pictures of BJ unit but seems it�s taking longer than expected to realease it, I would like to see some reports but I very confident on the quality and I planning to use one if they are ready soon.


 04-01-2018, 05:17 PM
#14
My Feedback: (3)
���[�܂�R���g���x���g�h���C�u
????????????????JPN33F130086?So-net???
(just use Chrome or Google translate)
There is a YT video of it running ... sounds very nice
04-09-2018, 12:00 PM
#16
Join Date: Mar 2006
Location: Houston,
TX
Posts: 325
Likes: 0
Received 0 Likes
on
0 Posts
04-09-2018, 08:54 PM
#17
I have been using SBus on all of my planes (even my sport scale plane) and it makes the installation and setup so much easier.
04-11-2018, 05:00 AM
#18
Hey Steve,
The Eternity is a Contra specific air frame correct and the Immortal will take a traditional setup? Can I get the Eternity wings for a Immortal?
Thanks,
Bill H.
Dist2
The Eternity is a Contra specific air frame correct and the Immortal will take a traditional setup? Can I get the Eternity wings for a Immortal?
Thanks,
Bill H.
Dist2
04-13-2018, 12:52 PM
#19
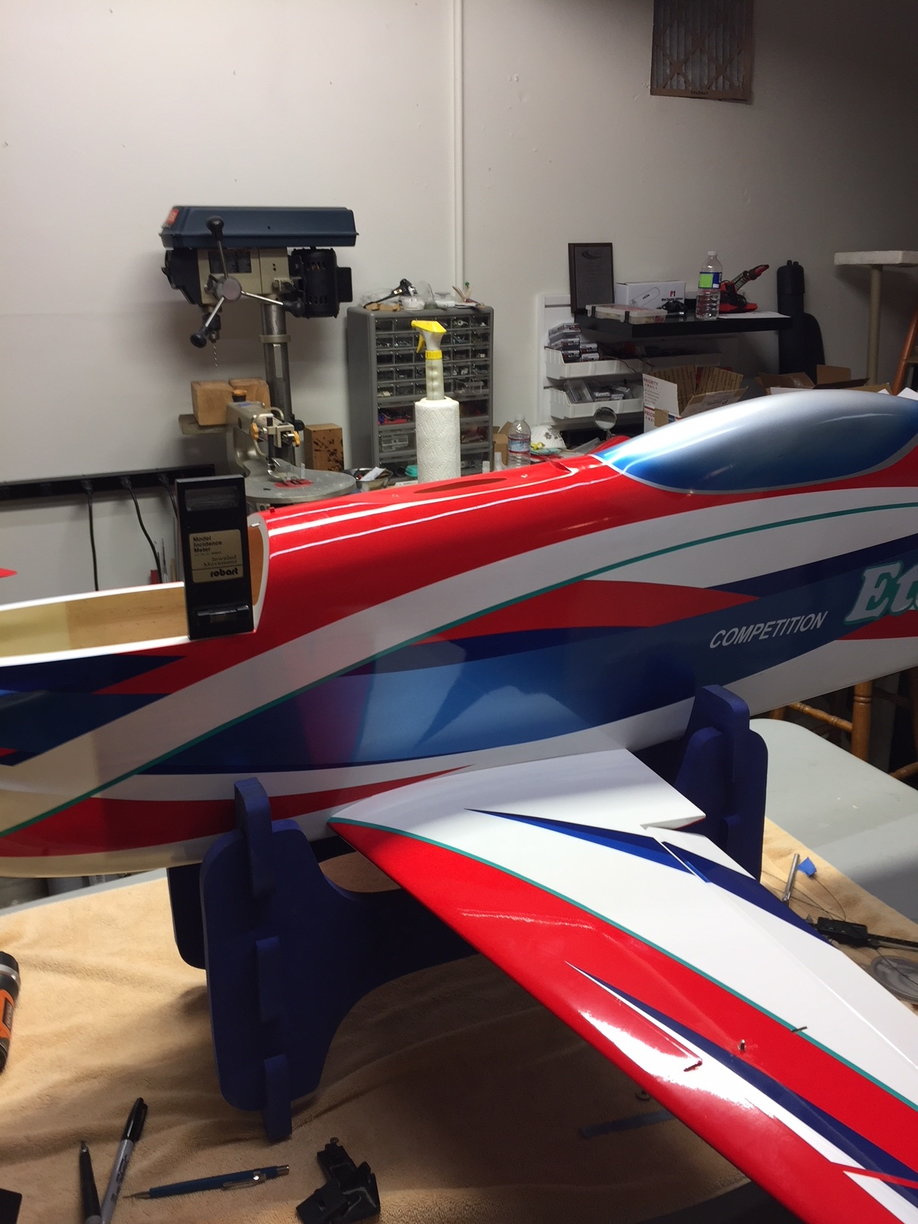
I had a window of building time so I was able to install the wings. Per B.J.'s note to me, here are the incidence settings:
Bottom wing +0.5dgr.
Top wing 0dgr(+0.5dgr) adjust by knife edge tendency
Flying tail -0.5~0dgr.
The good thing about this fuselage is that you can use the left side of the fuselage hatch frame as your zero reference point. Therefore, I set the fuselage in place and adjusted it so that the incidence reading on the hatch mount was zero.
Next, I installed the bottom wing mounting dowels. I was going to use the supplied dowels, which look nice and appear to be made from a material like Delrin, but I decided to go to a tighter fitting dowel with just a bit more diameter. I made sure the lower wing was at the referenced +0.5dgr and glued in the mounting dowels.
Next, I installed the cabanes on the lower wing, did some slight trimming around the location where the wing bolt enters the strut due to a small high point there, and mounted the top wing.
When mounting the top wing I secured the center portion of the wing to the fuse saddle and did not screw in the wing cabanes just yet. I checked incidence and added a small shim to the rear of the cabane strut to start off at +0dgr.
04-13-2018, 01:08 PM
#20
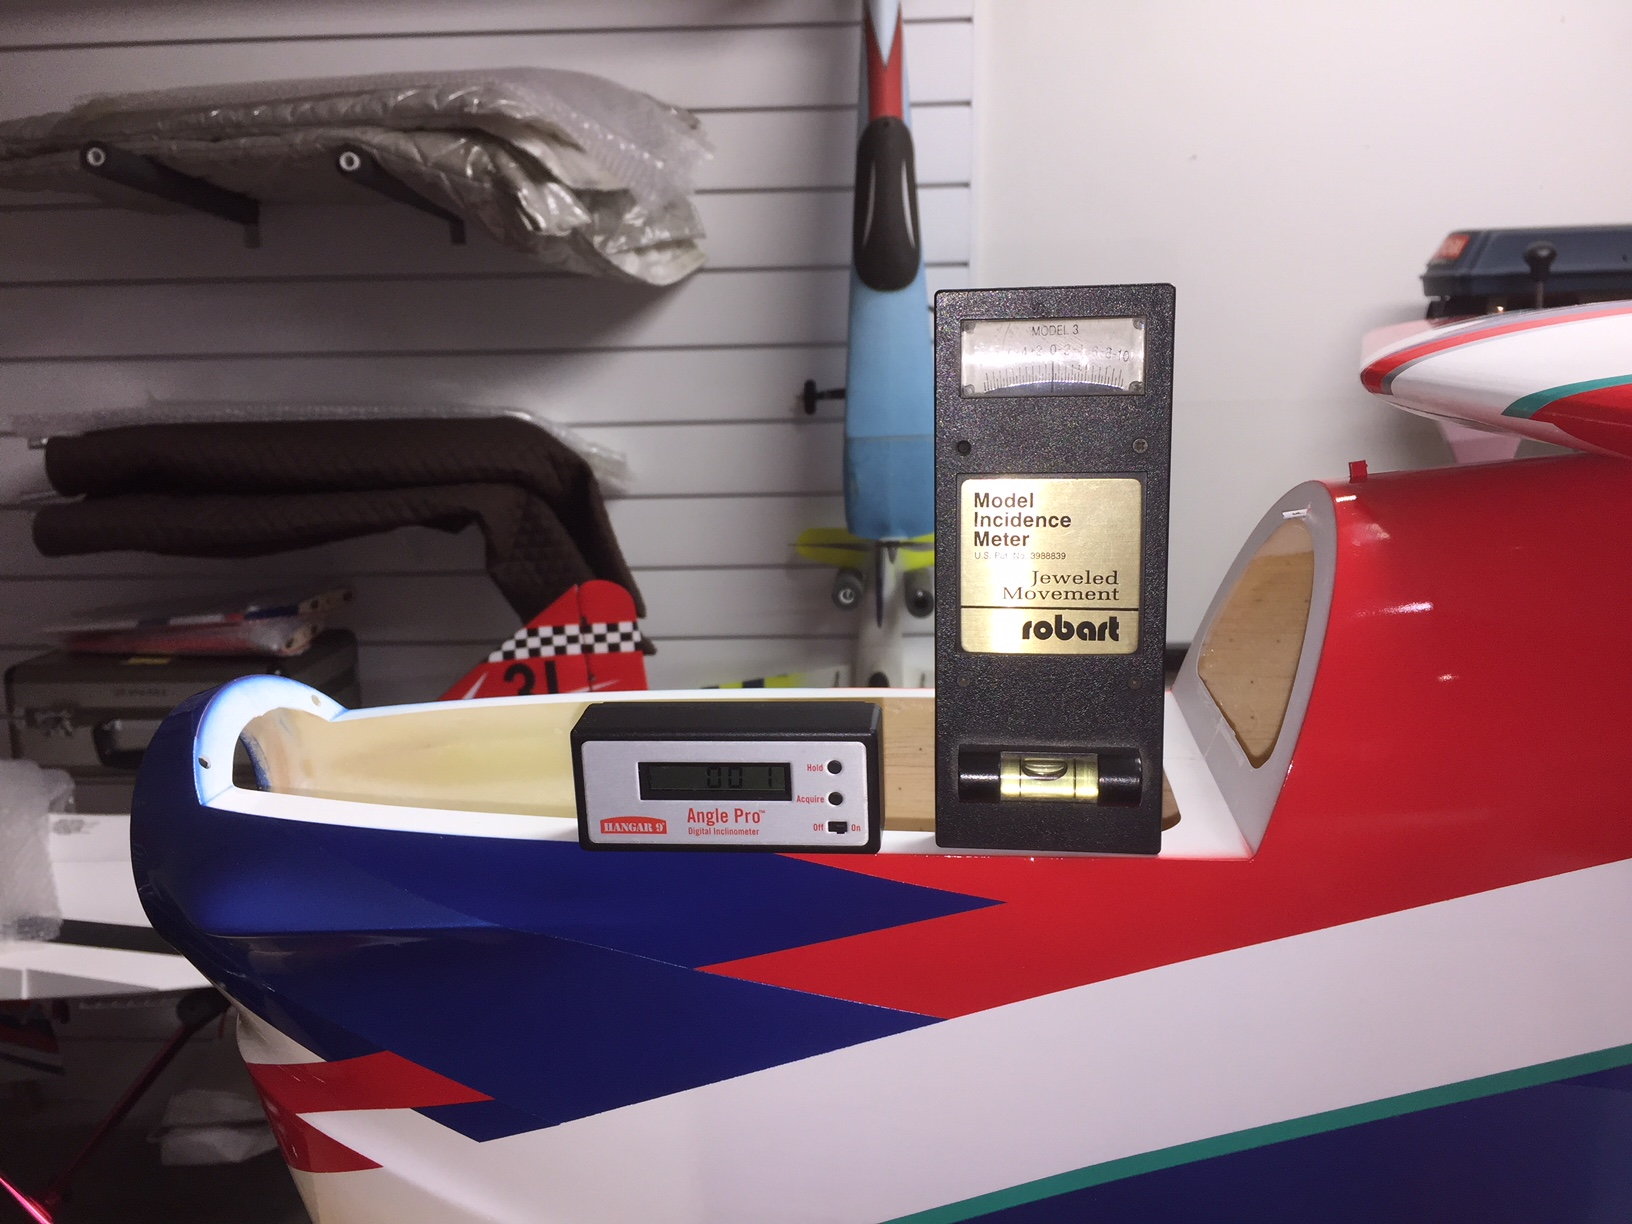
I used the robart incidence meter and my digital meter to adjust the fuselage position to zero. I kept the digital one on the hatch frame so I could make sure nothing moved as I checked wing incidence.
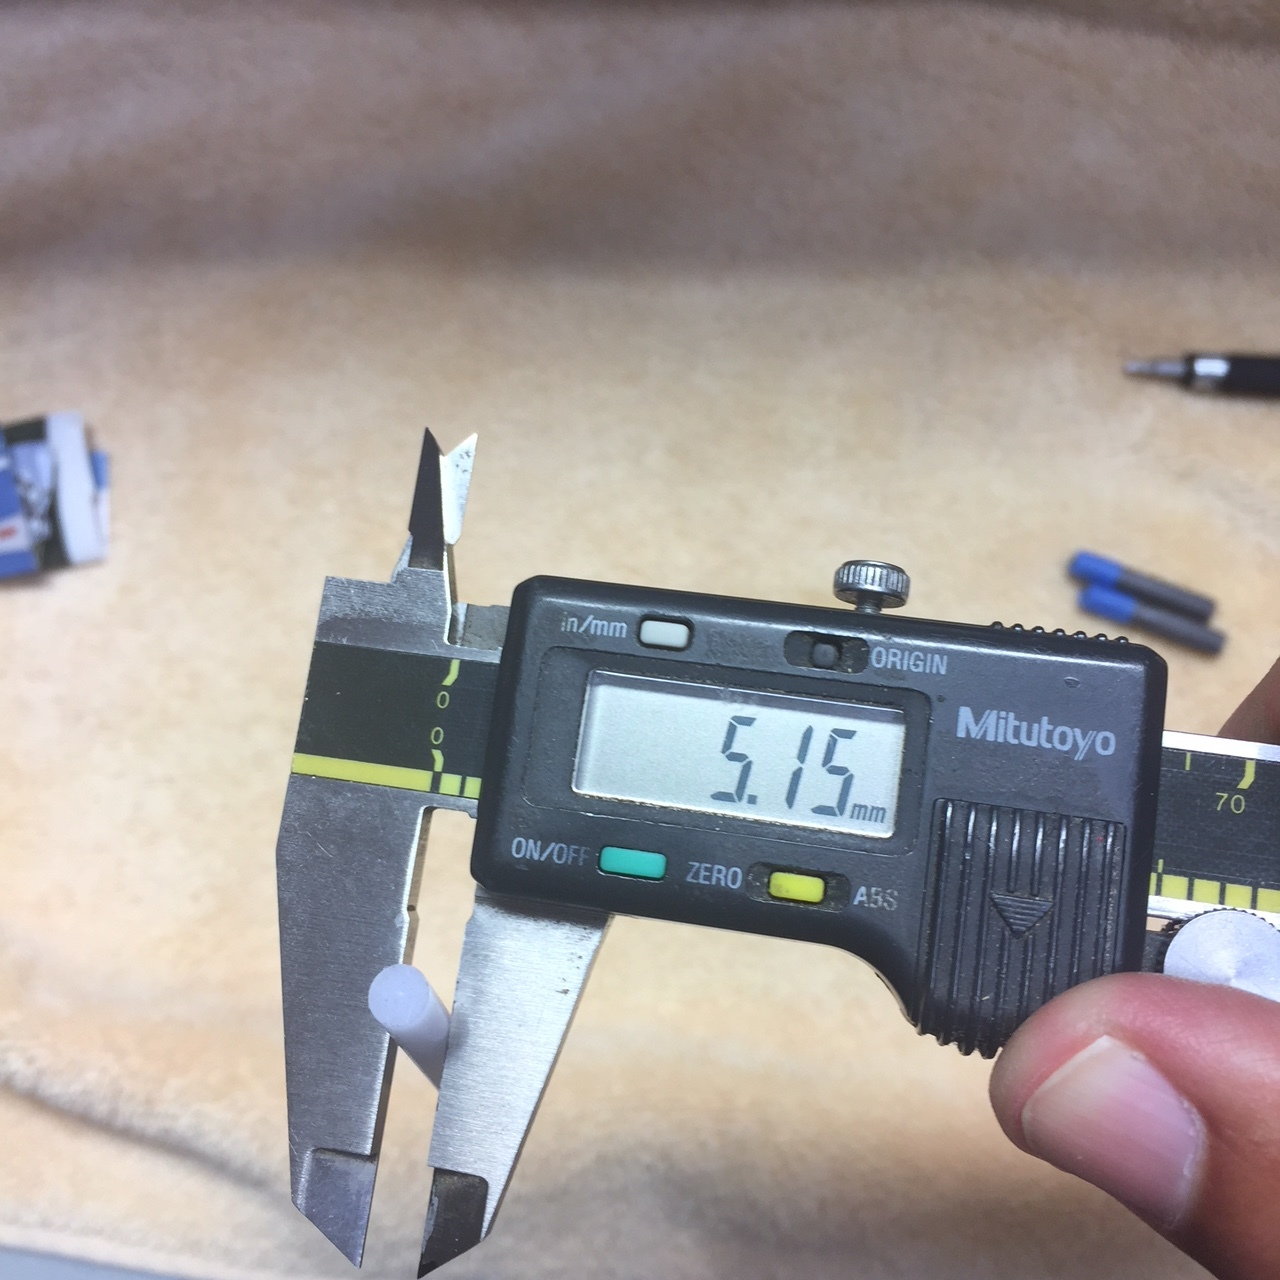
I test fit the wing using the supplied Delrin dowels and I felt like I would prefer a tighter fitting dowel. The supplied dowels would probably be fine but I opted for a tighter fit.

These pins were something I had on hand, a bit larger OD
I test fit the dowels and wrapped tape around the end to serve as a mark for the depth.
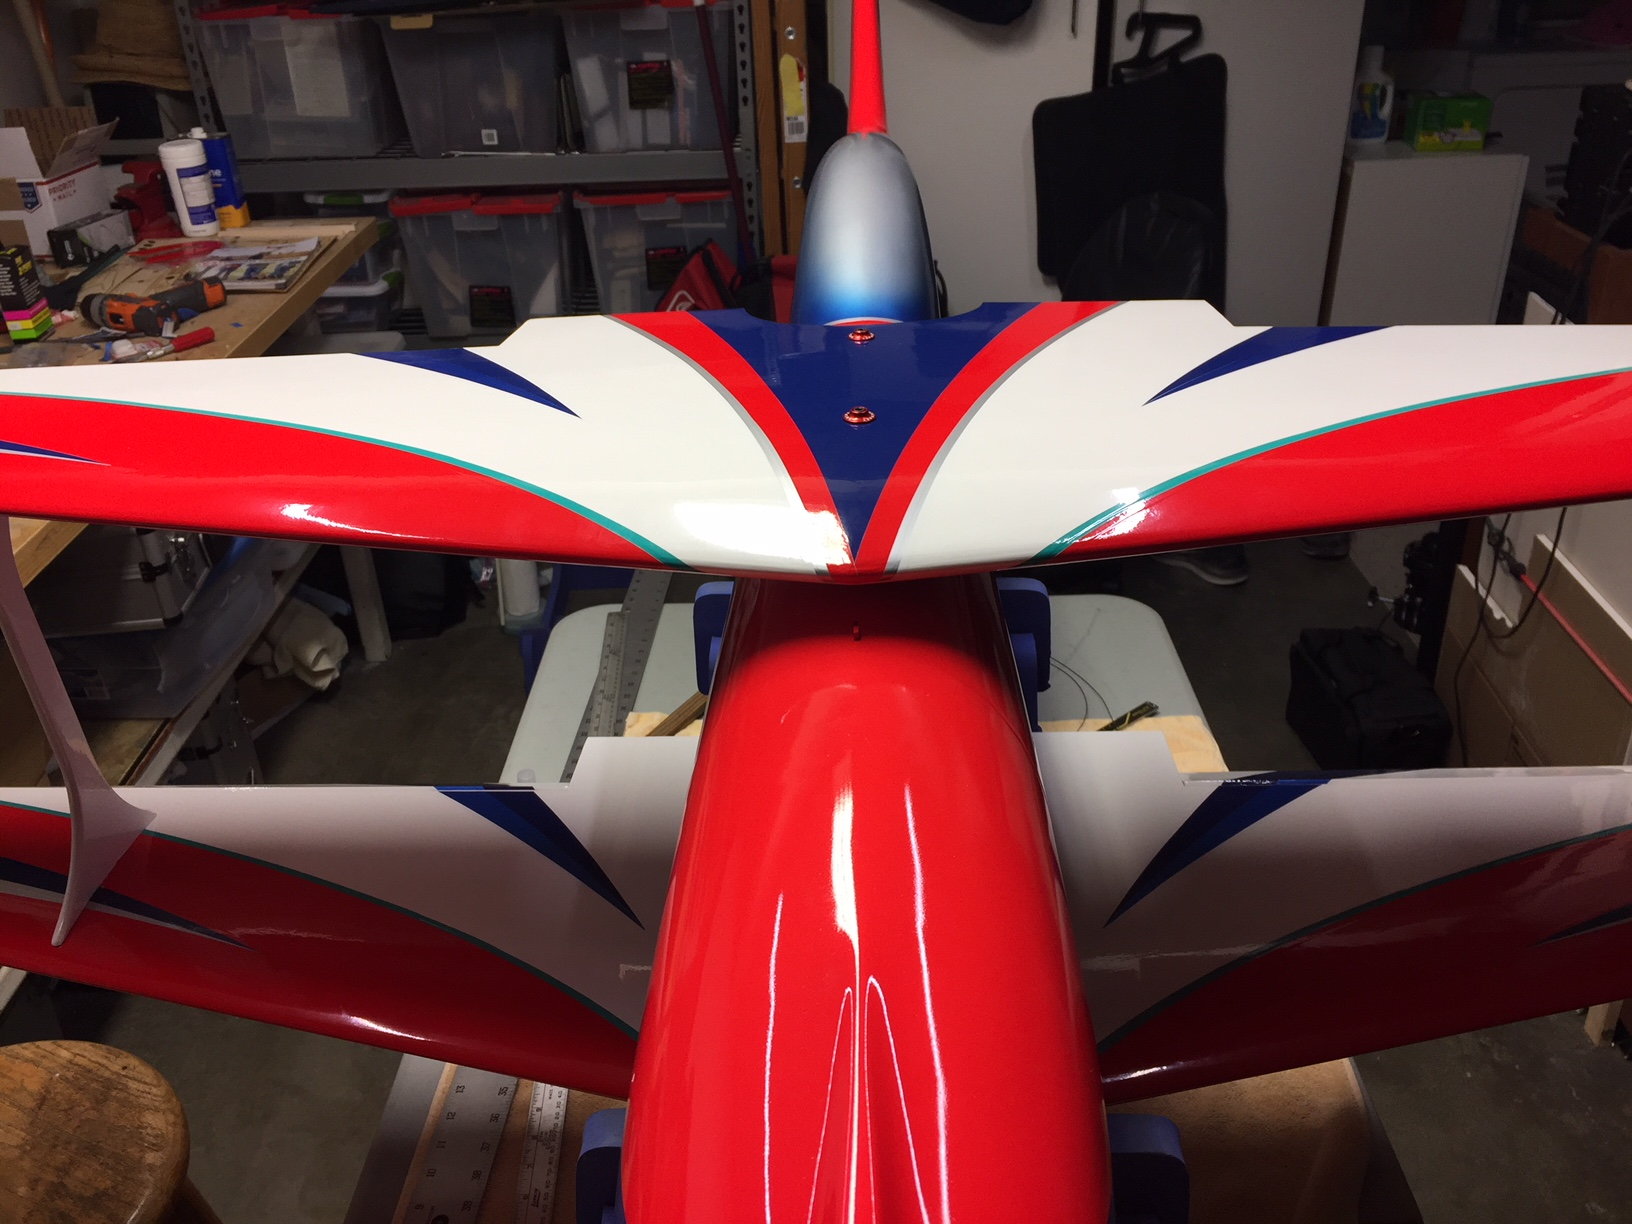
Next I mounted the wing and then checked incidence. All was well so I moved on to gluing in the pins. I measured tips to center of the vertical fine for alignment. All was well.

I slathered some Hysol 9462 into the wing dowel holes and shielded the wing with cling wrap.

Everything came out great so now I am ready to install and make sure it is all lined up.
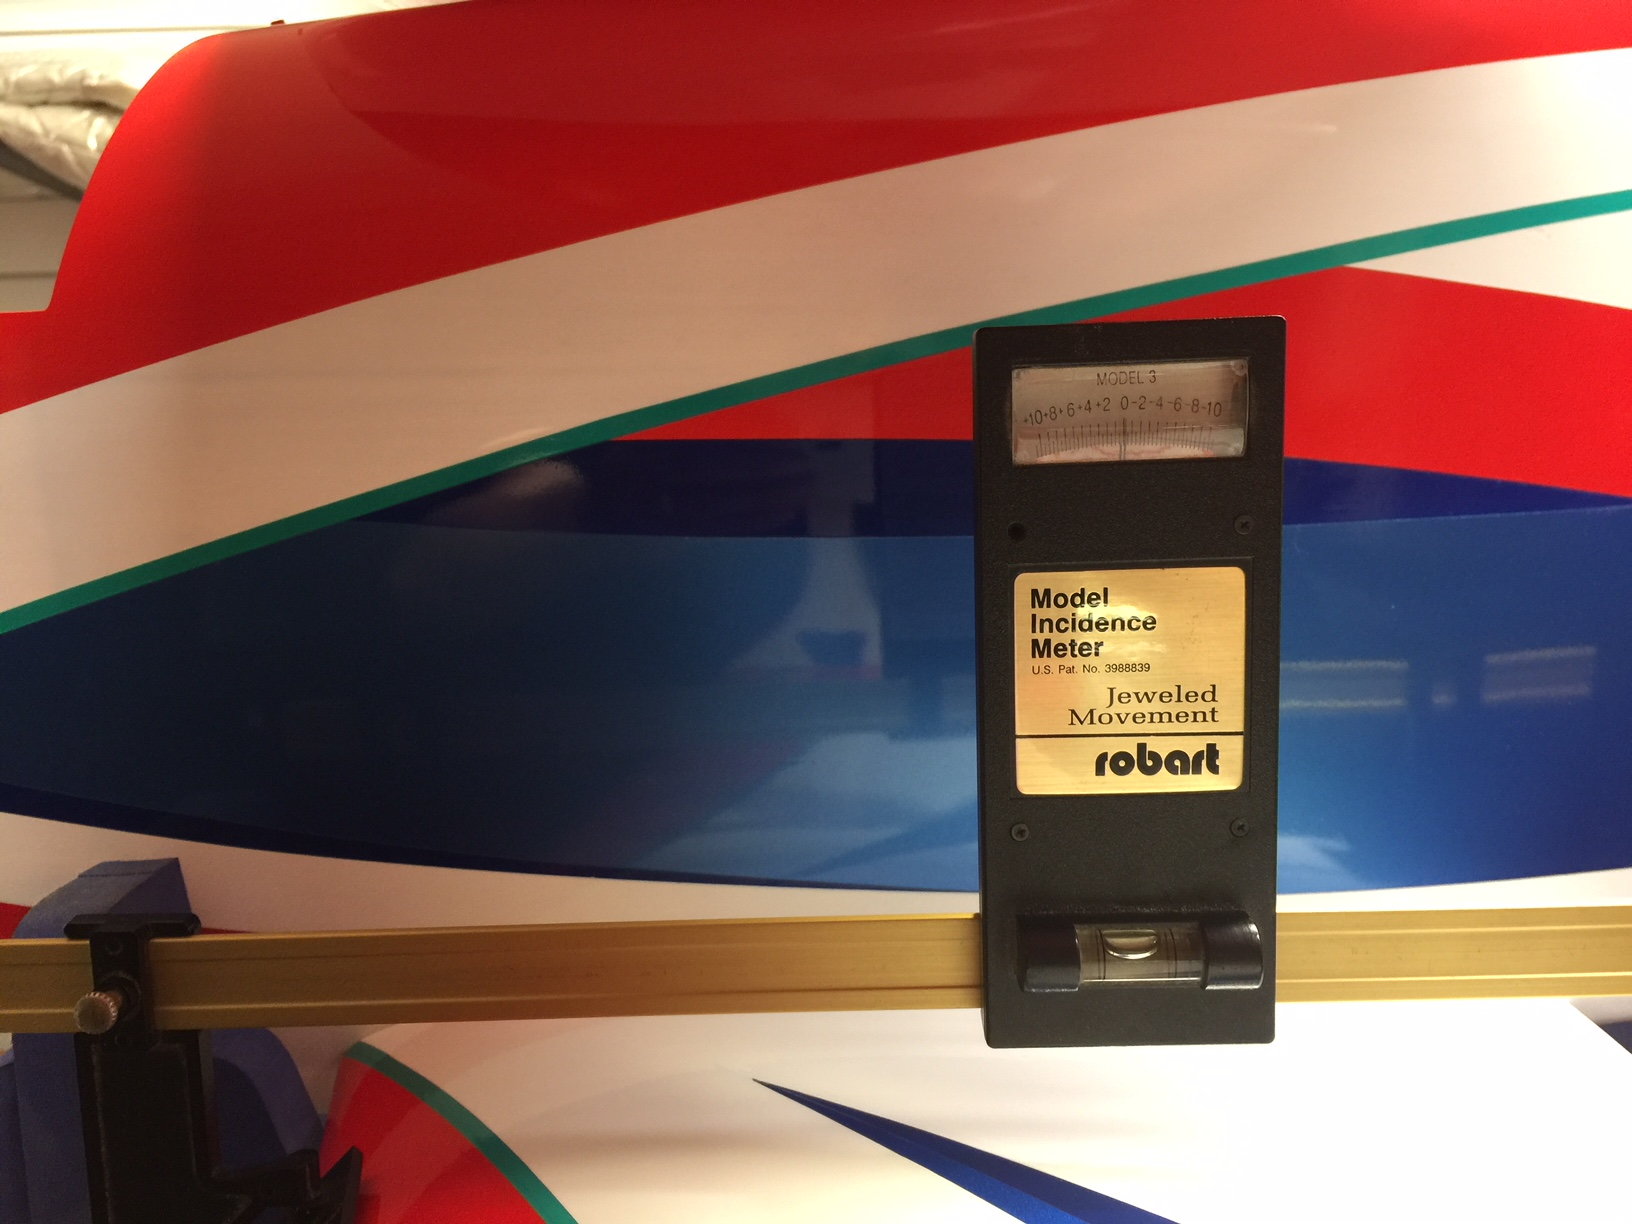
Incidence is good

 Upper Wing incidence looks good


Alignment check on top and bottom looks good as well. Next will be the stab.
Last edited by shannah; 04-14-2018 at 12:35 PM.
04-15-2018, 06:56 PM
#22
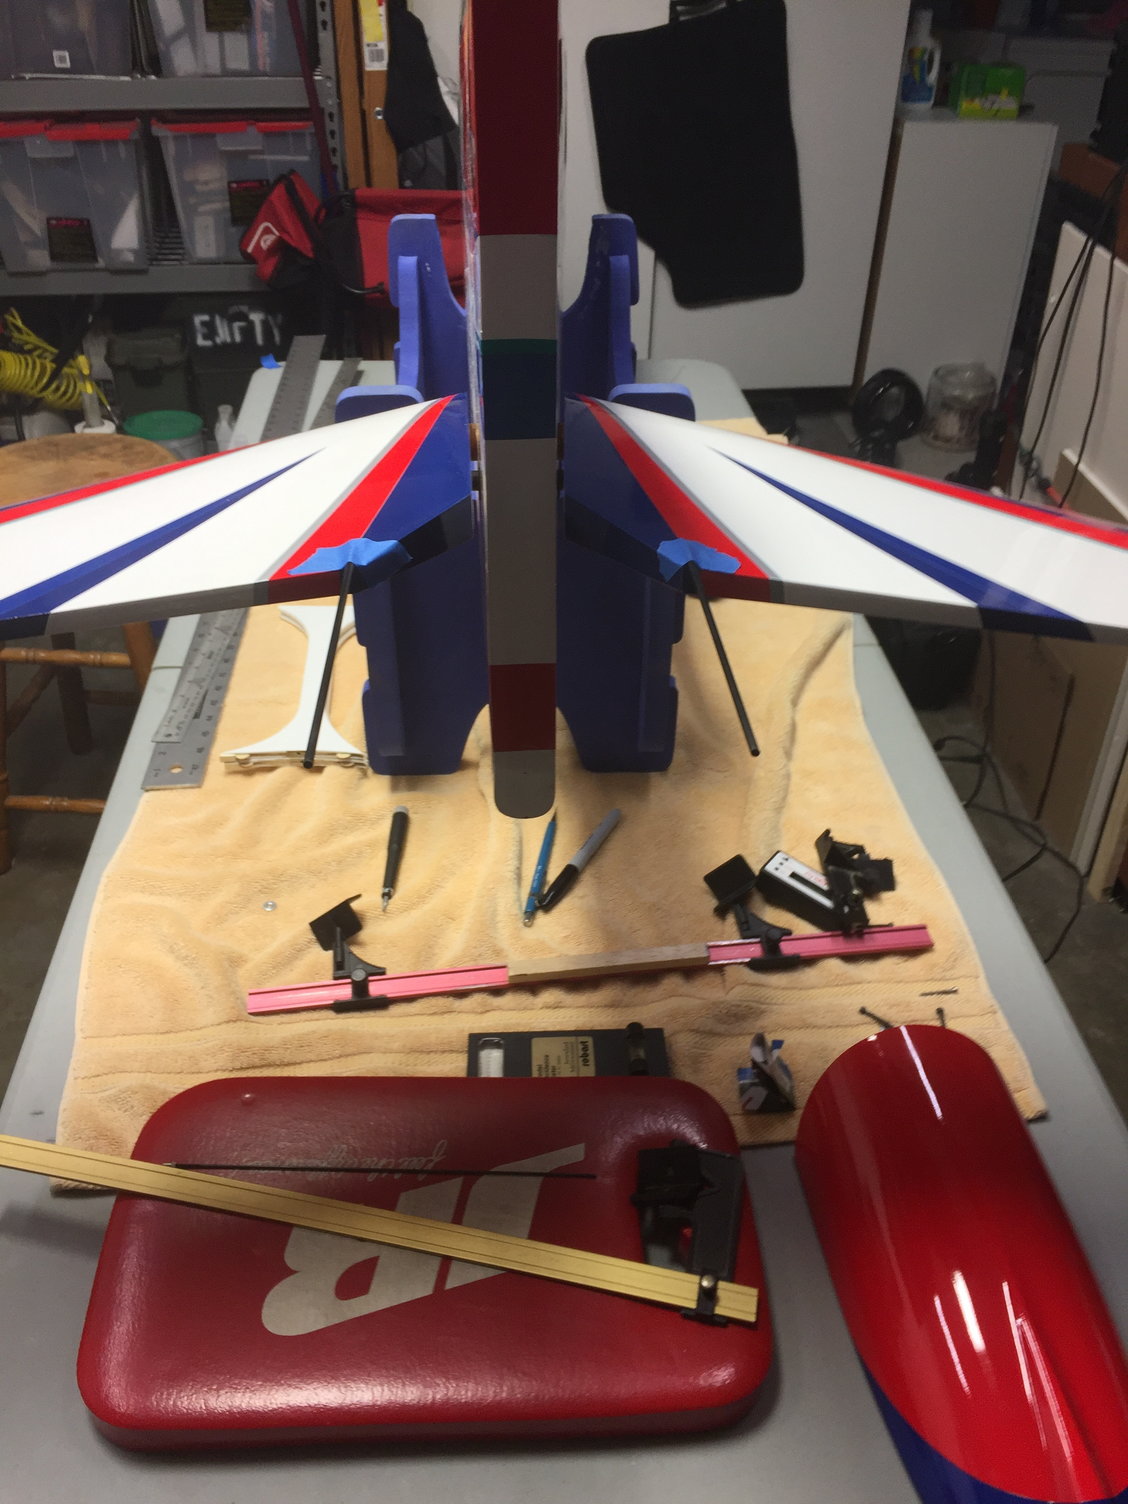
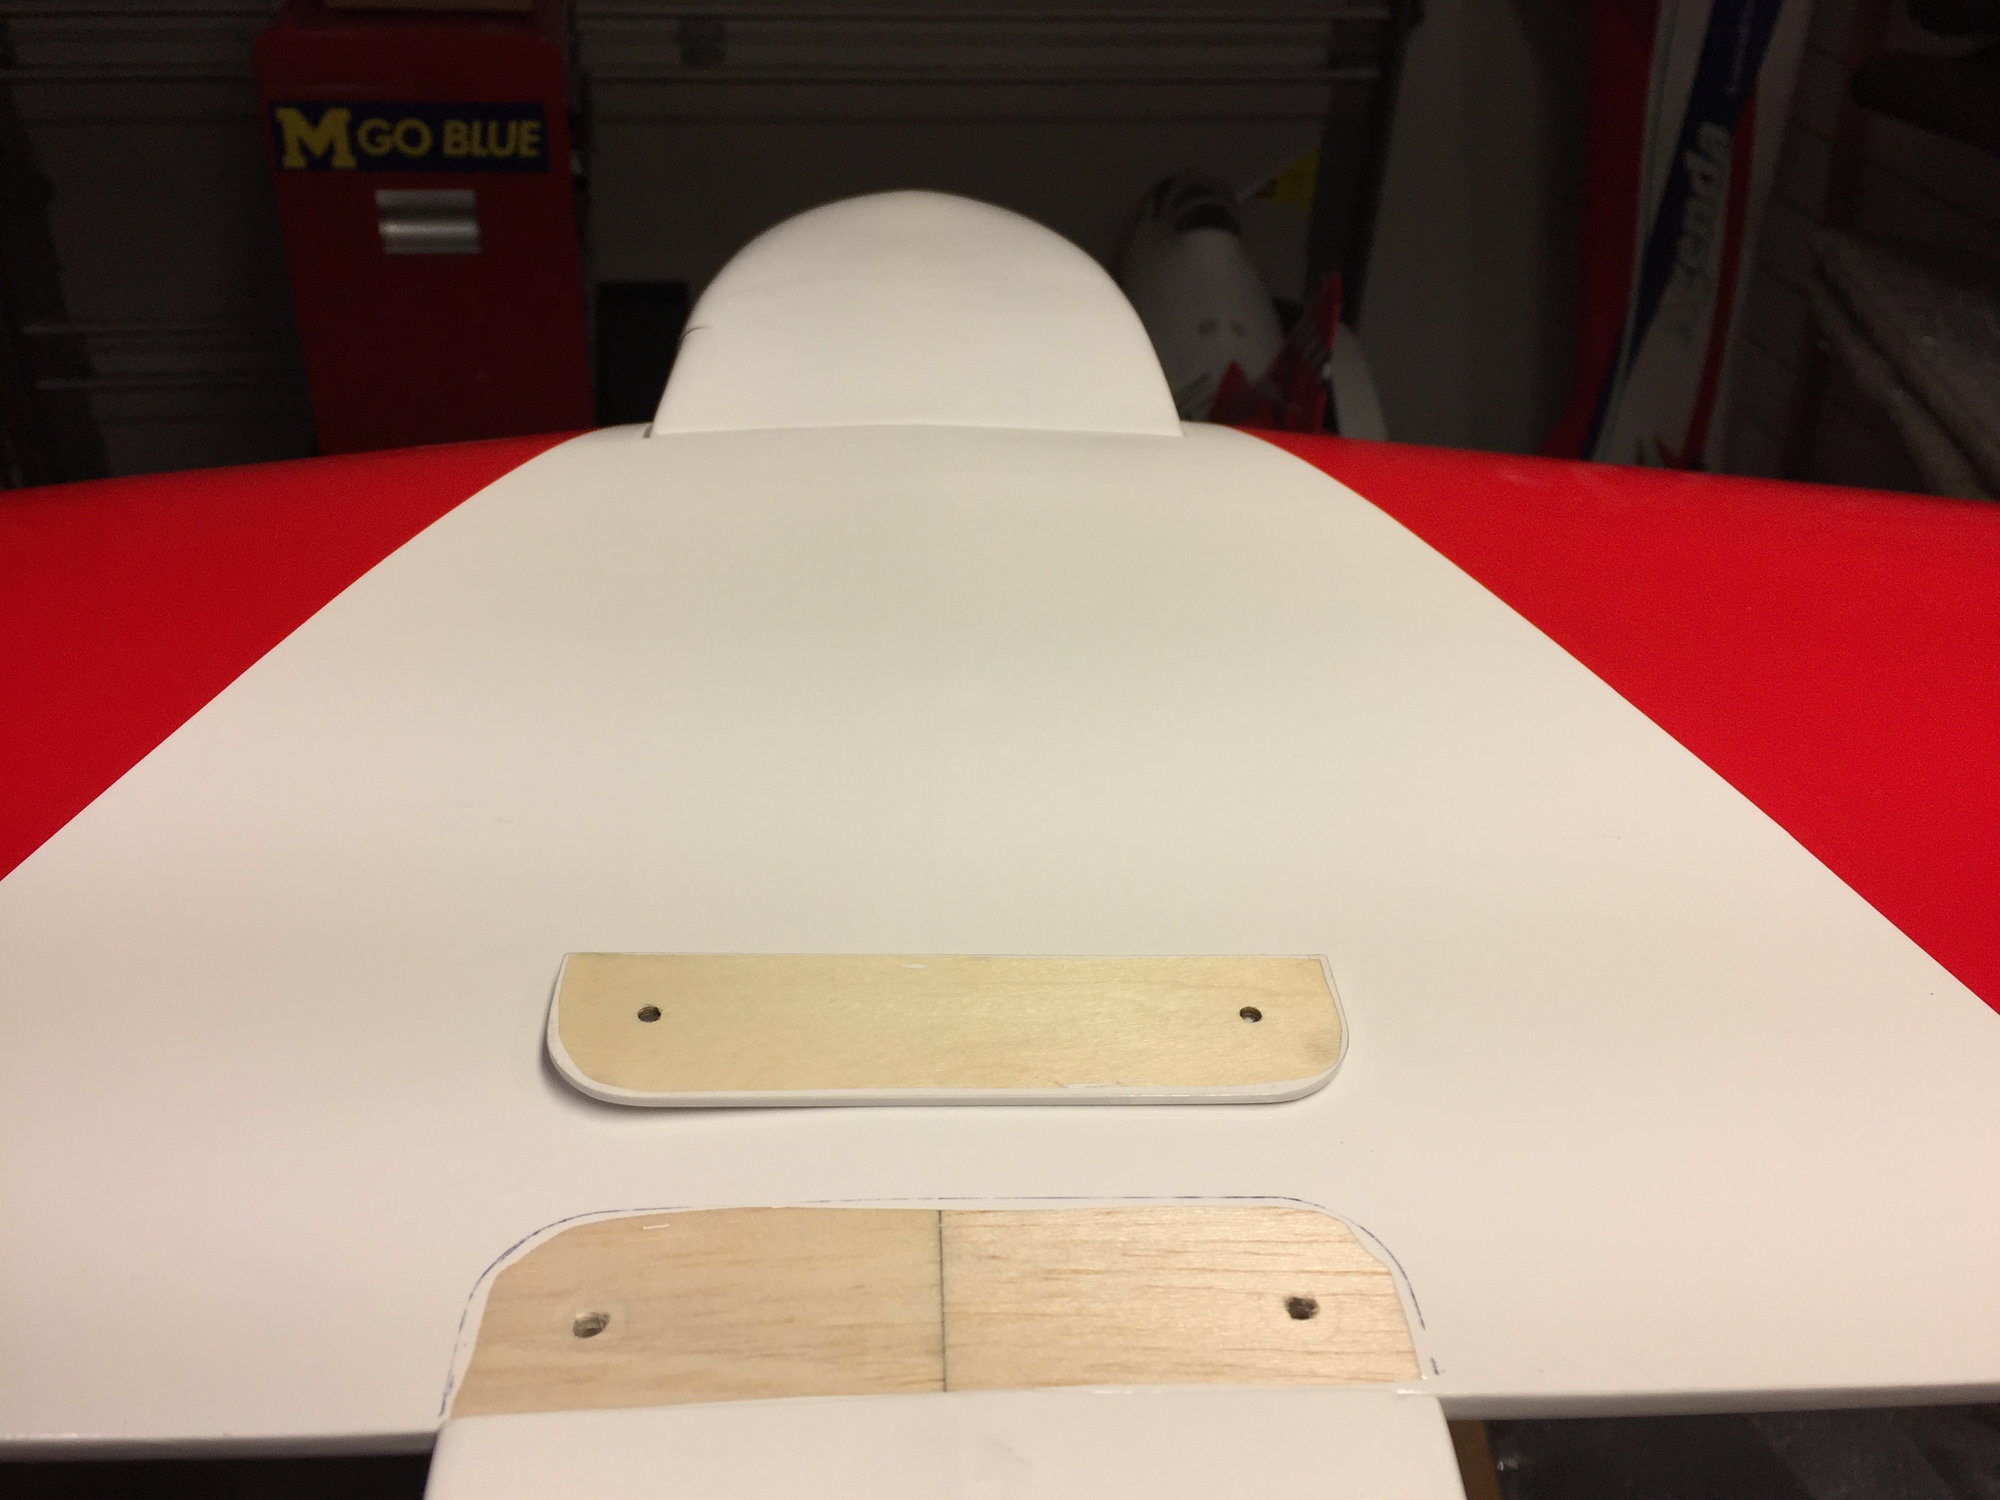
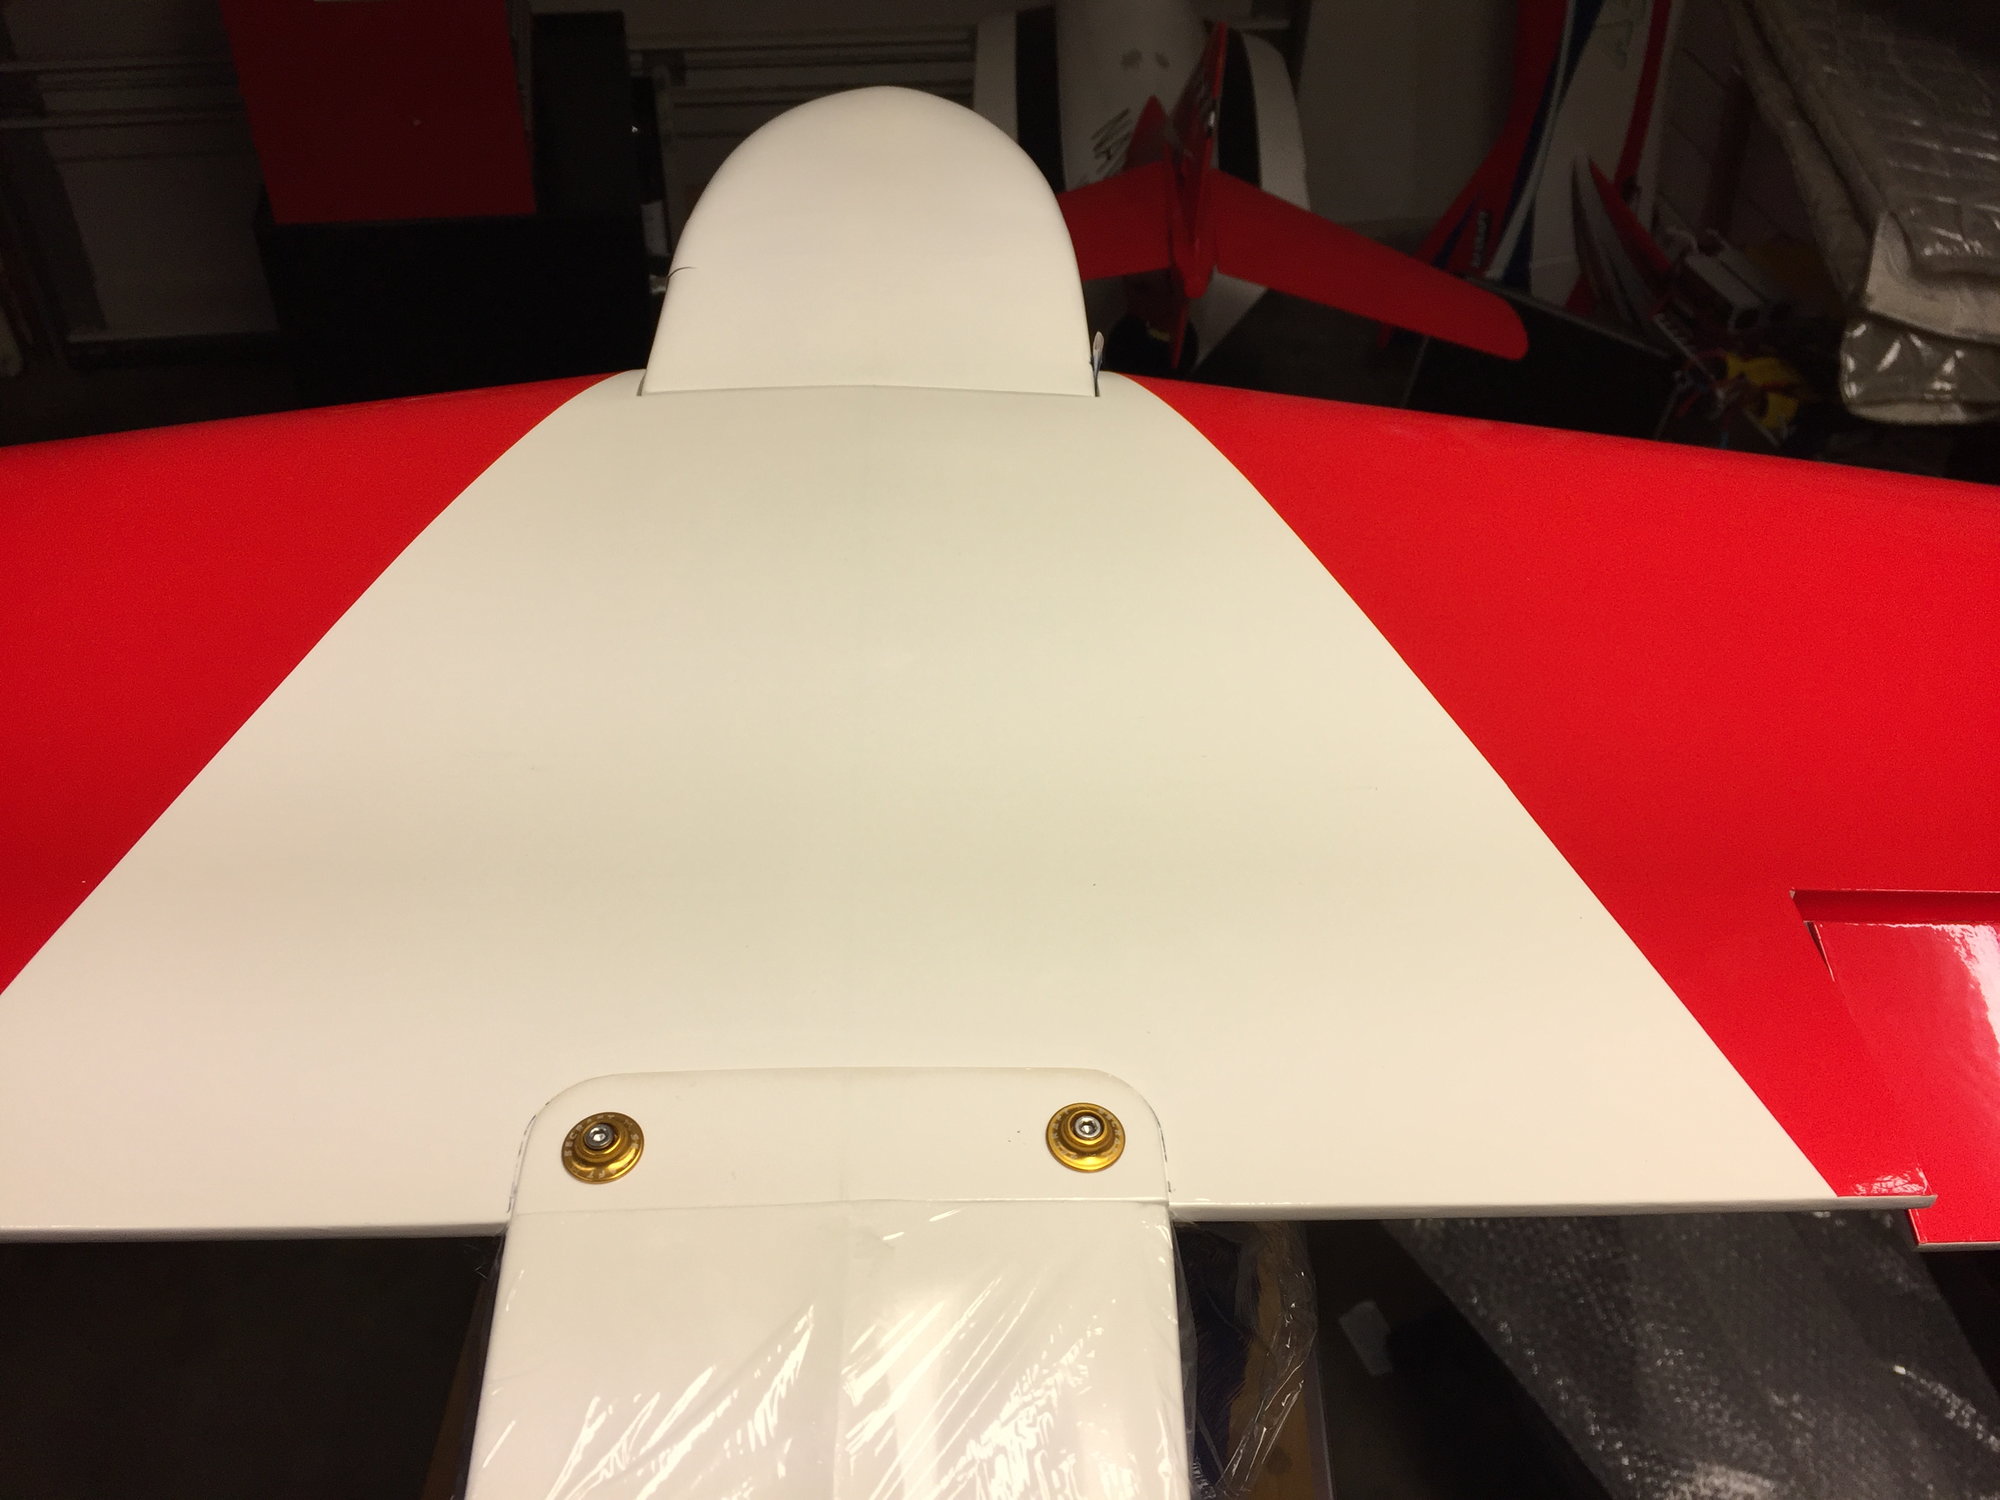
Next up is the flying stab installation.
First, install the stab tube socket into the fuse. Then check it for level and proper side to side alignment.
Glue the socket in place with CA.
Double check the stab alignment to make sure the halves are properly aligned in incidence and side to side. Mine was fine. In the past I had to make a minor adjustment here and there, but this one was right on the money.
Next, I always line the root of the flying stabs with felt. I got mine from Hobby Lobby. It helps the stab glide easily on the fuse and allows you to keep an even gap.
Make sure you notice the side of the stabs that have the hard points for the screws. One side has screws, the other side does not. The side without screws is the one that you glue the CF rods in for permanent installation. The right side has the screws, the left side is glued in.
I finished up by making the servo mount for my Futaba 9170SV servo. B.J. recommends this for the stab. I am going all SBUS on this one, as I did on my Agenda. For that matter, all airplanes I build are SBUS now. I love it. The servo programming app is cool and lets you fine tune everything. Quick and easy.